This procedure outlines how to assign a planned event to an asset. When the right conditions are met (a certain amount of time has elapsed, or a meter reading is greater than it should be), the system will trigger the planned event based on the planned event template.
Prerequisites before using this procedure:
- Create the asset record in Assetminder
- Create the time or meter-based planned event template
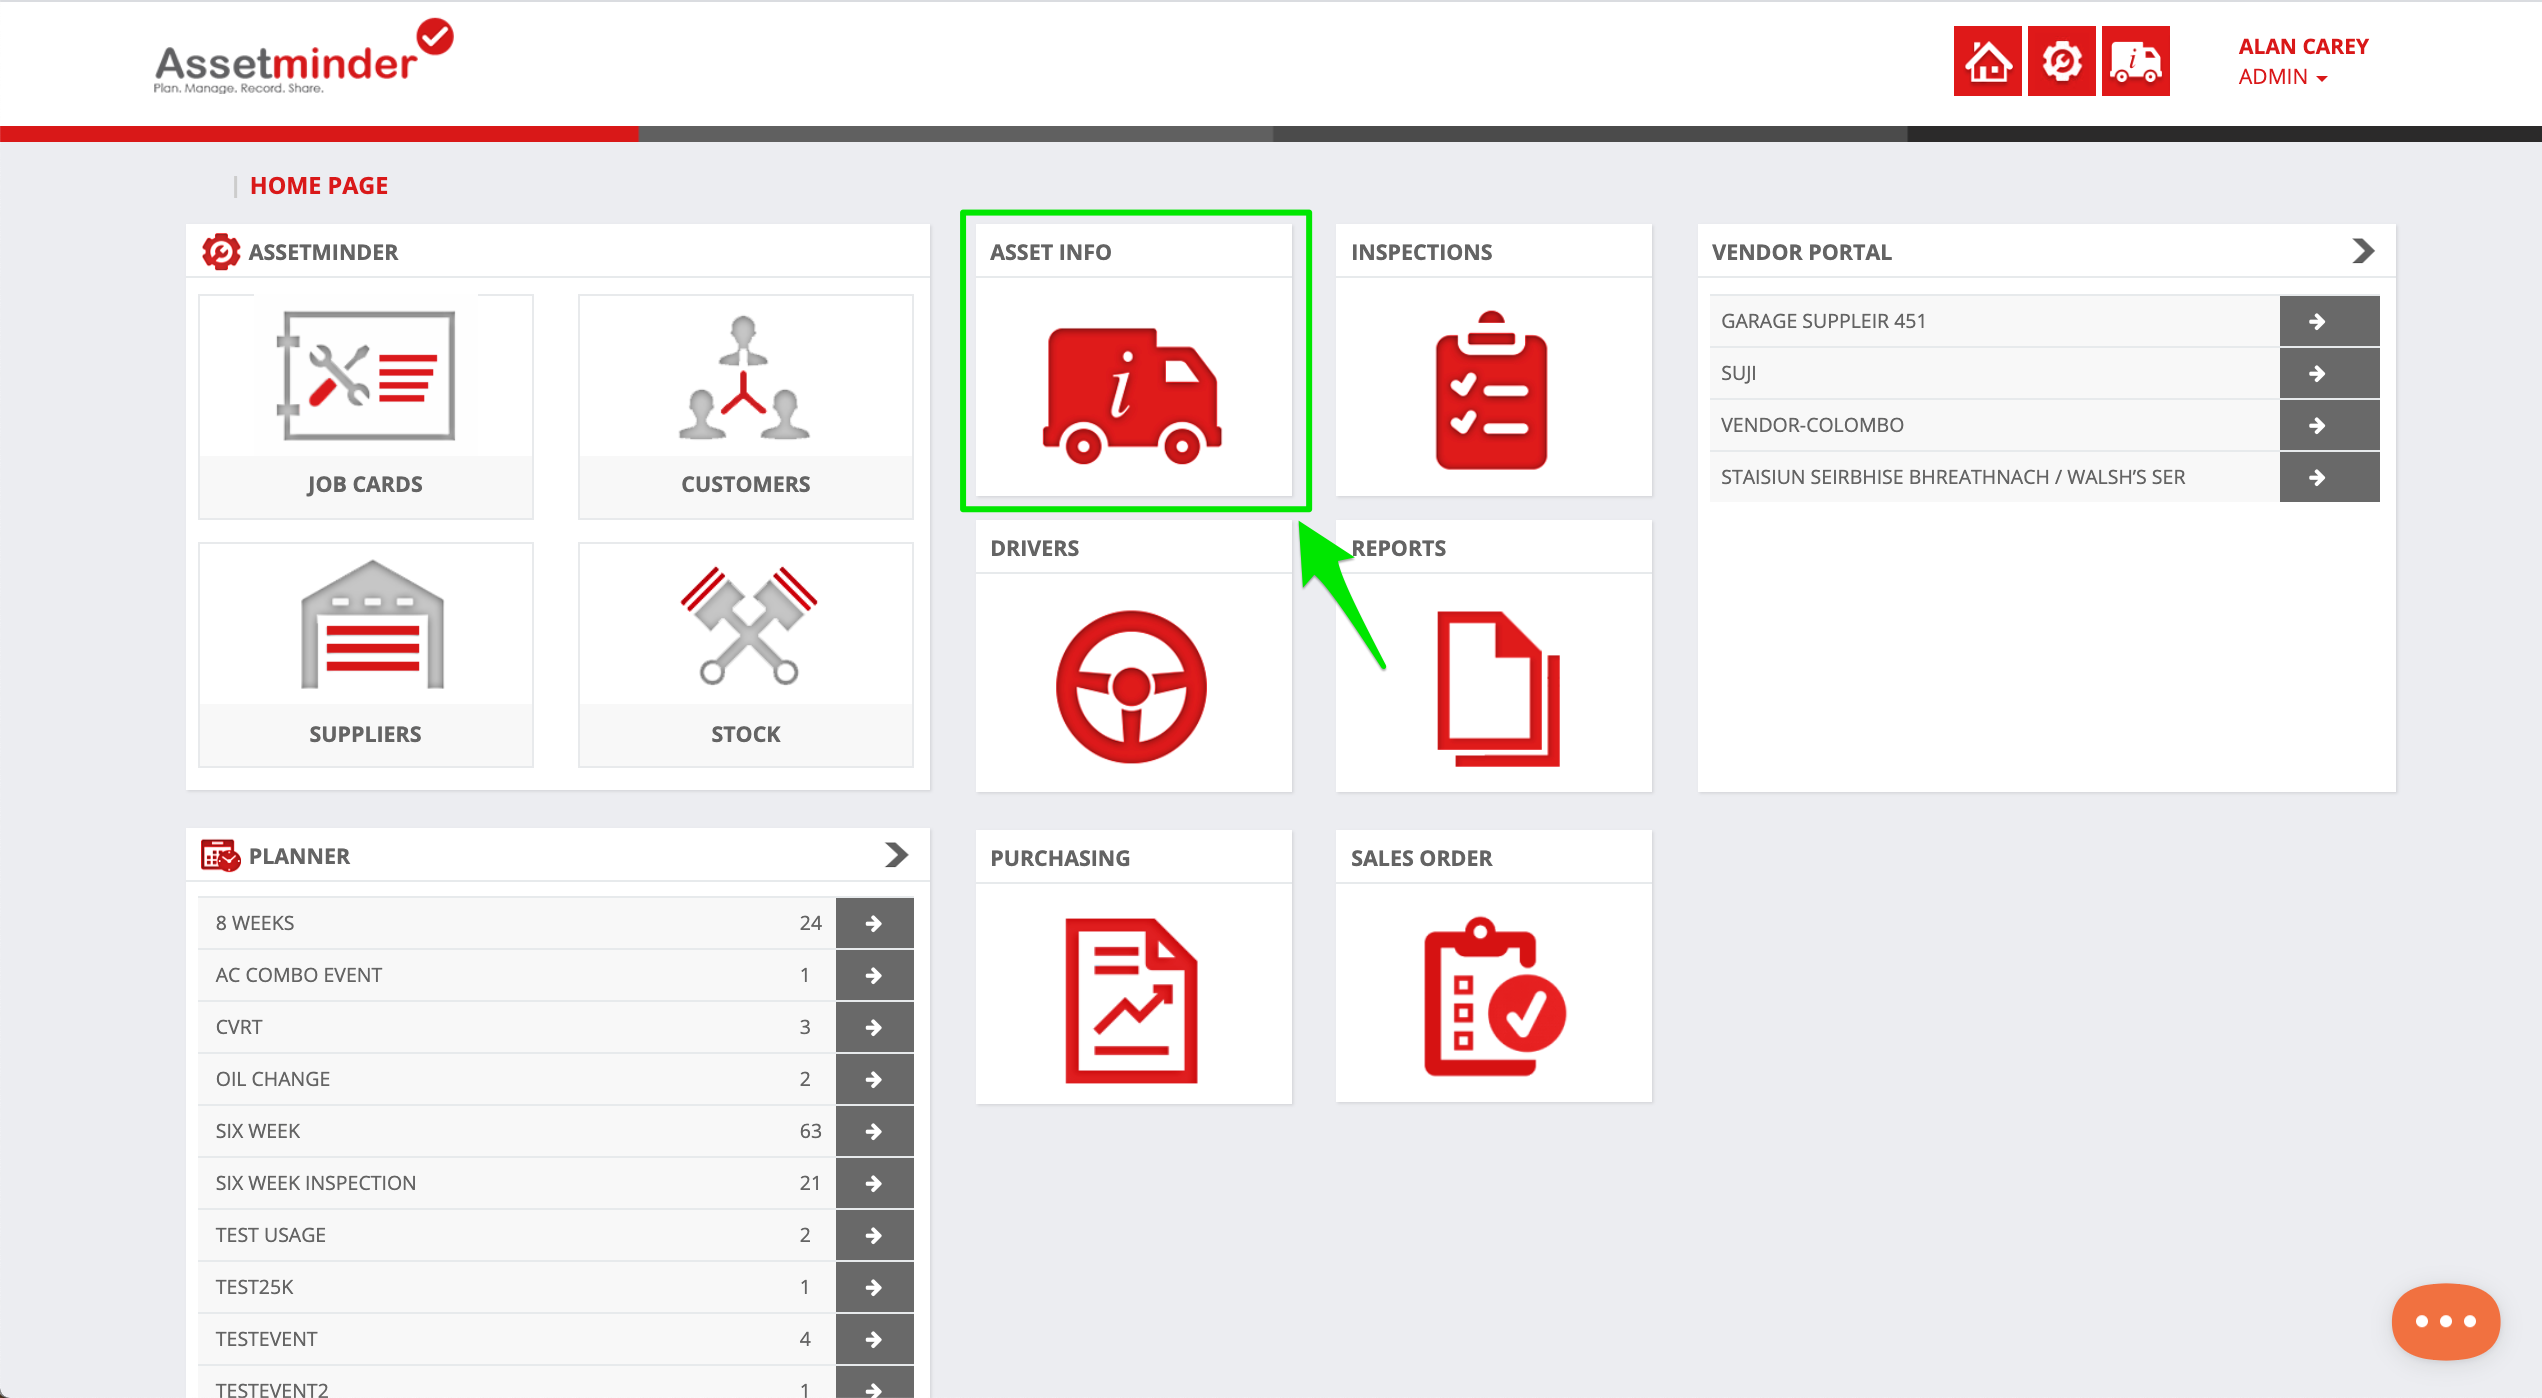
1. Step 1 is to open the relevant asset record. Click Asset Info on the home screen
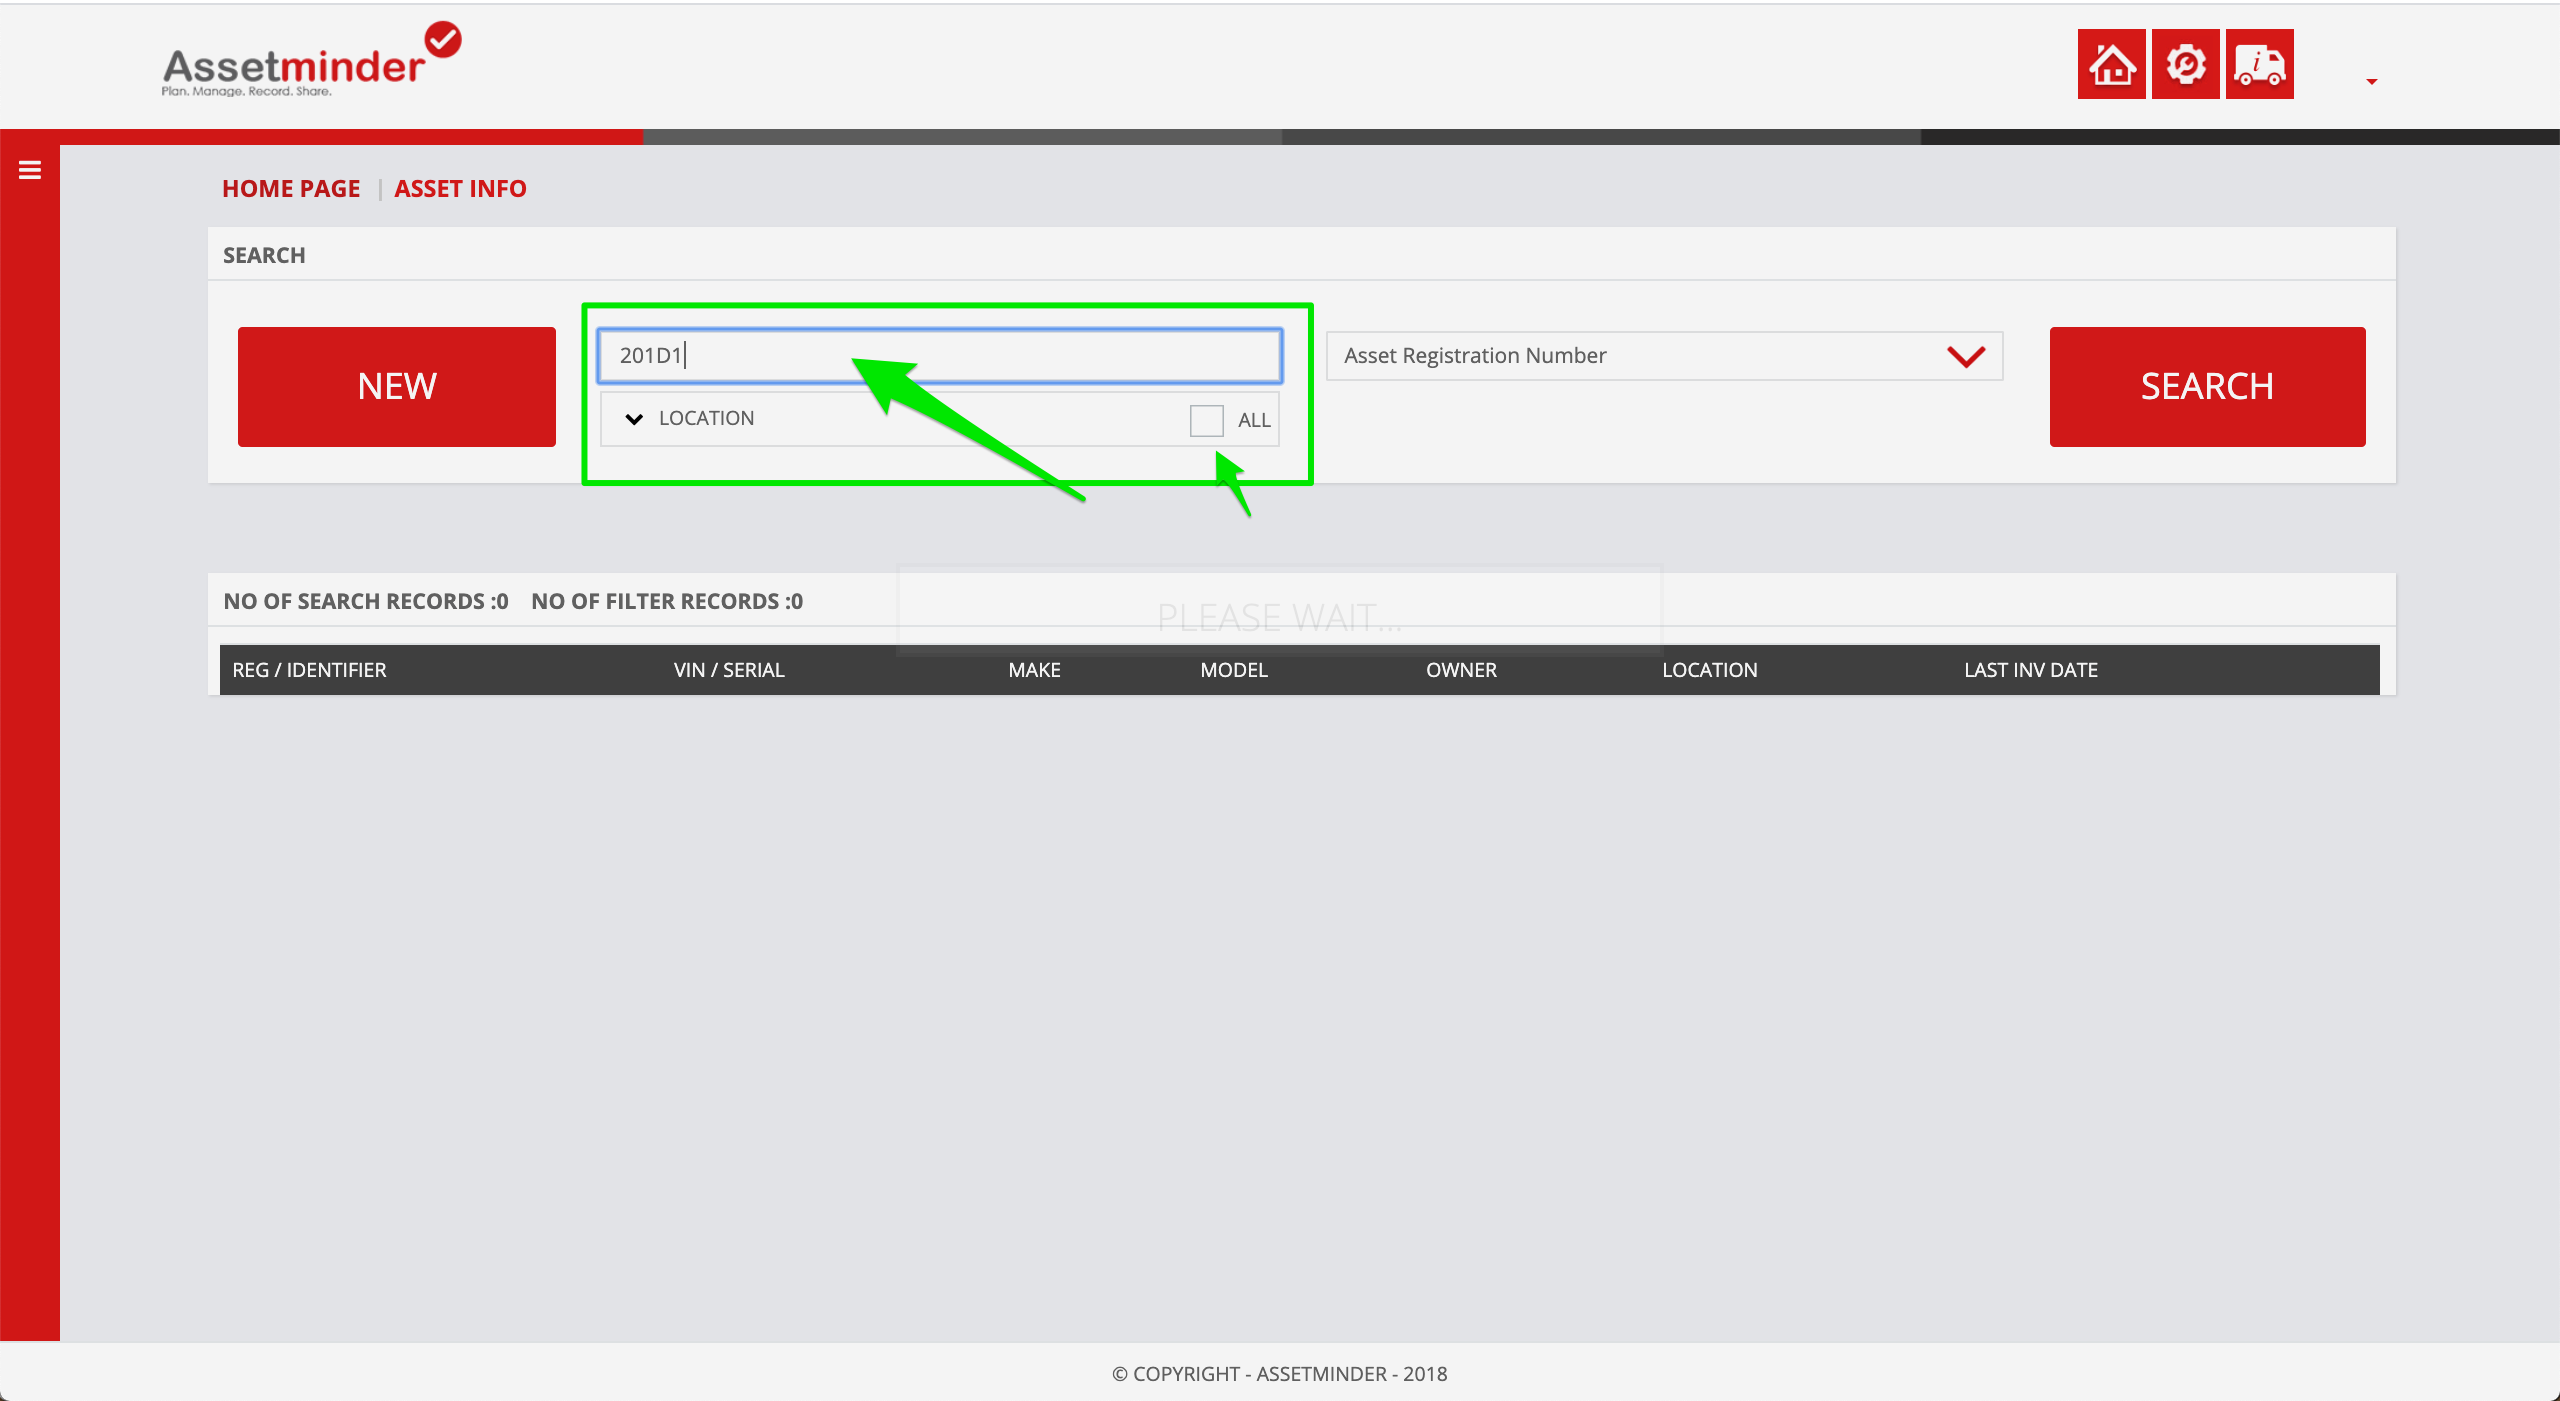
2. Locate the asset on the asset list by using Search. Make sure to search for the asset at the correct location.
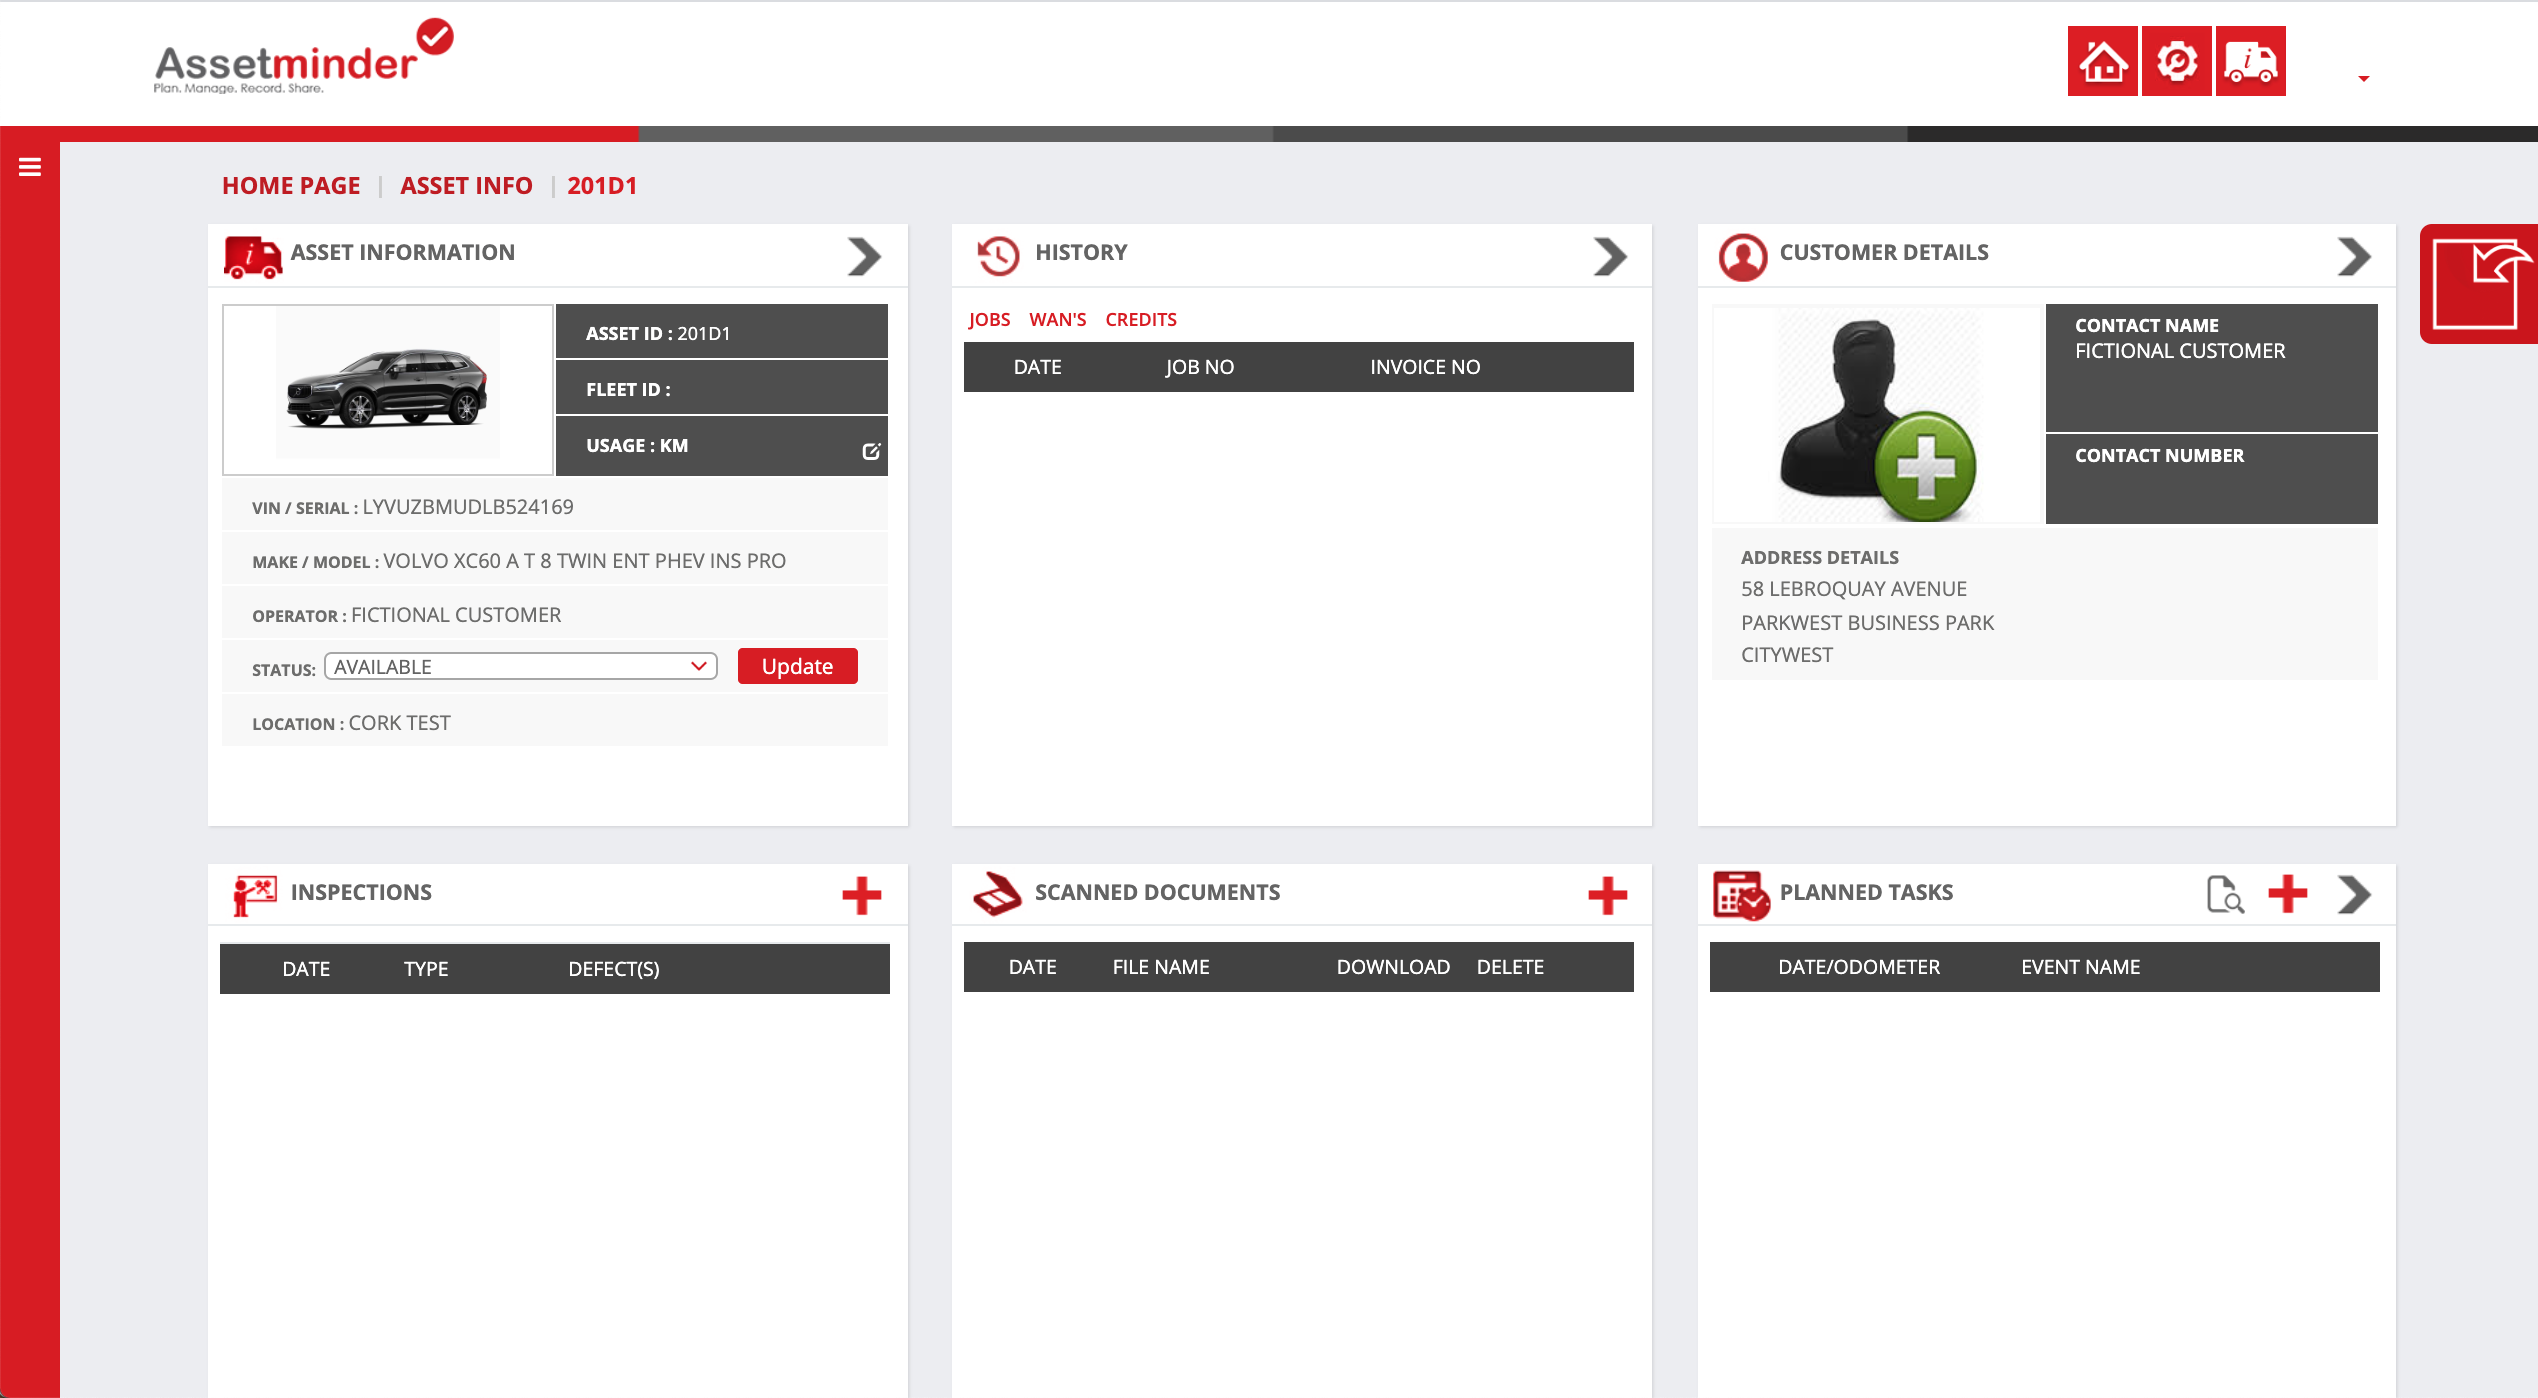
3. Click through to the asset 6 tile view
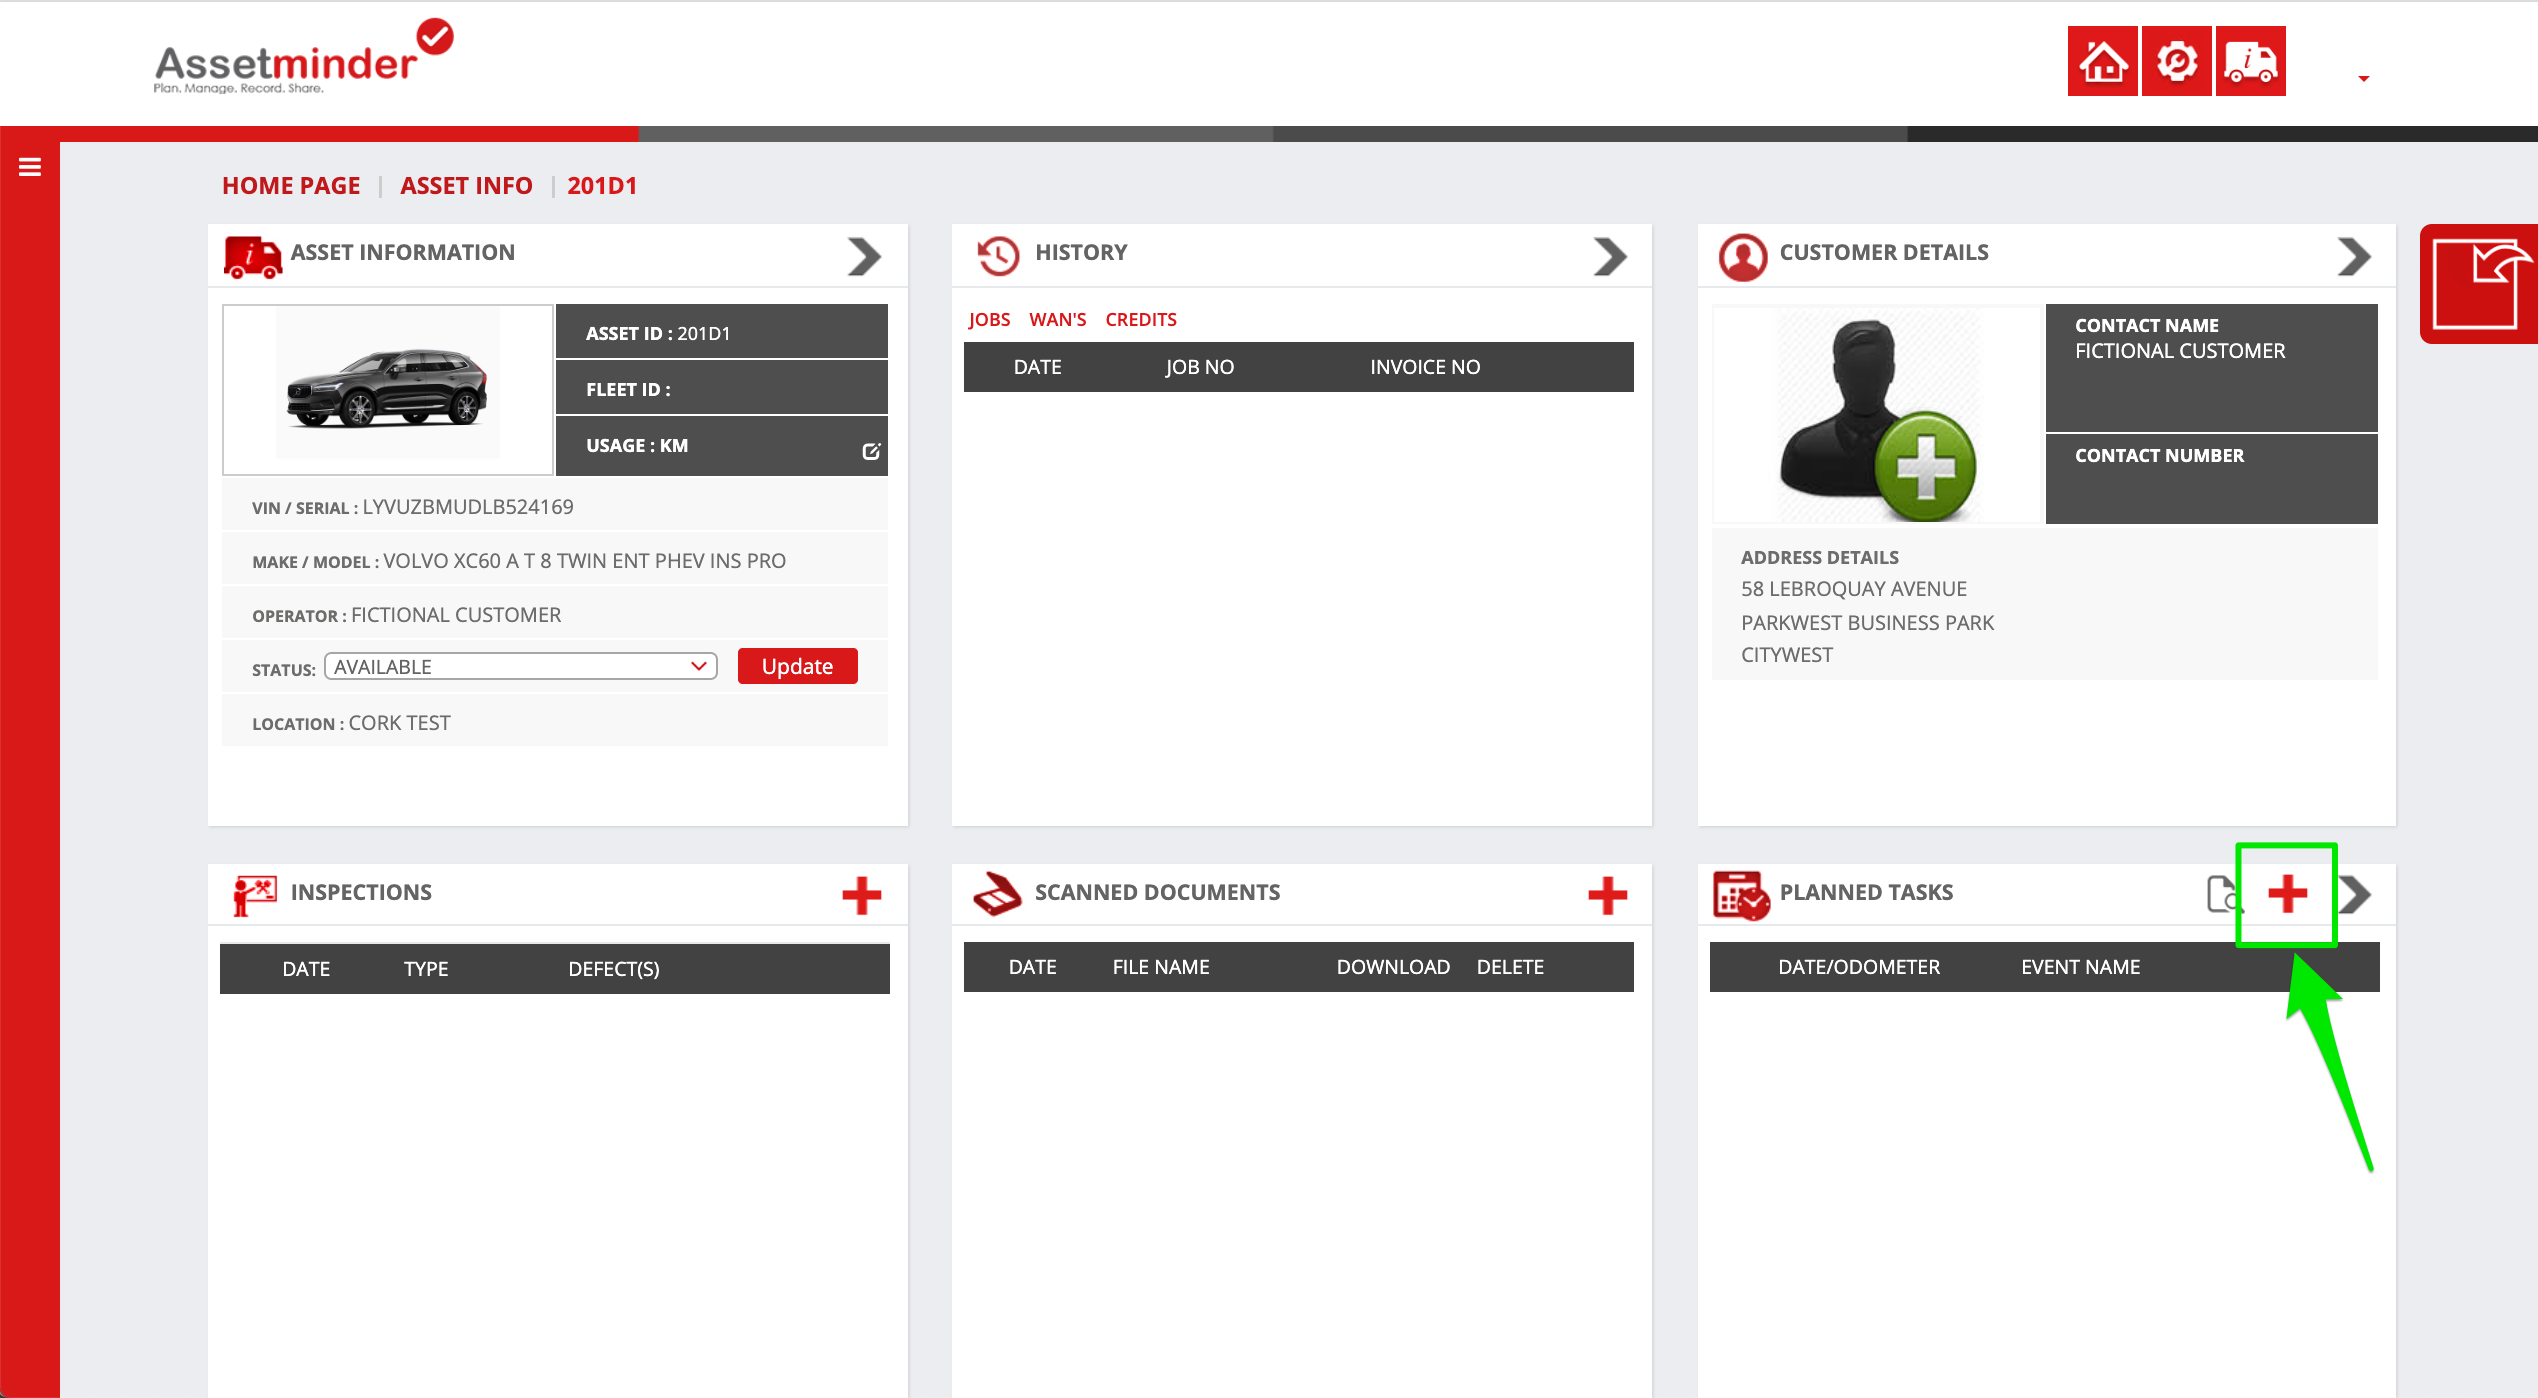
4. In the Planned Task tile, click Add New
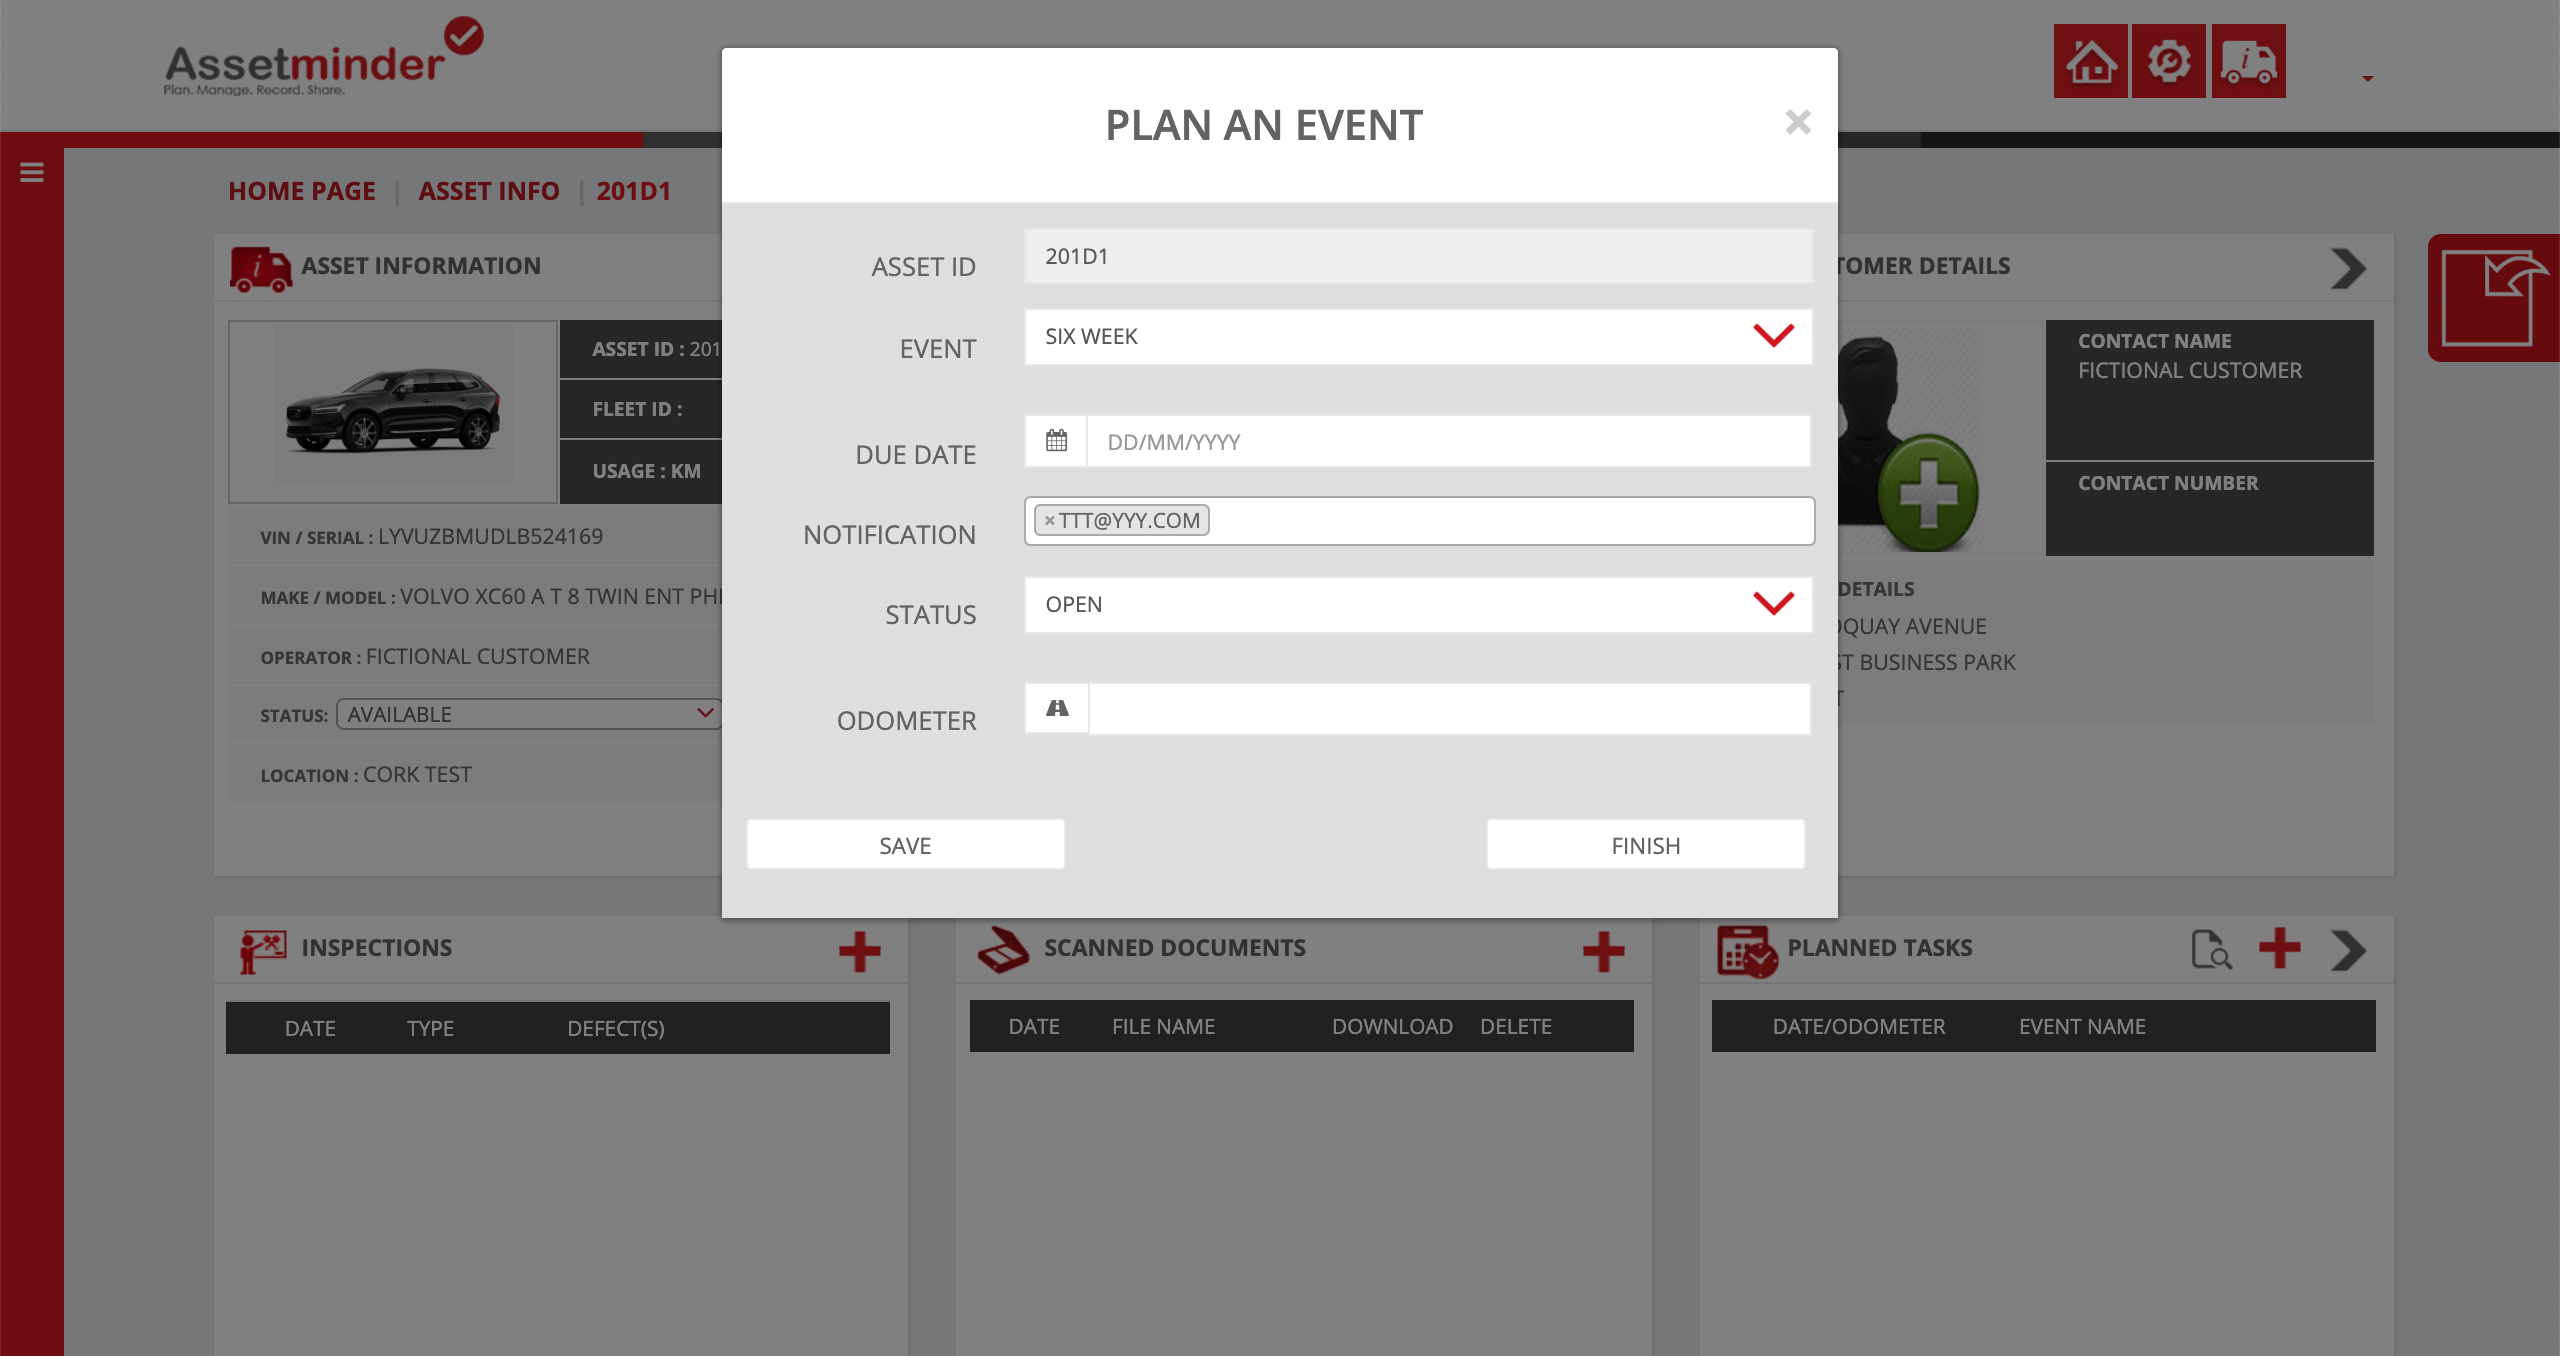
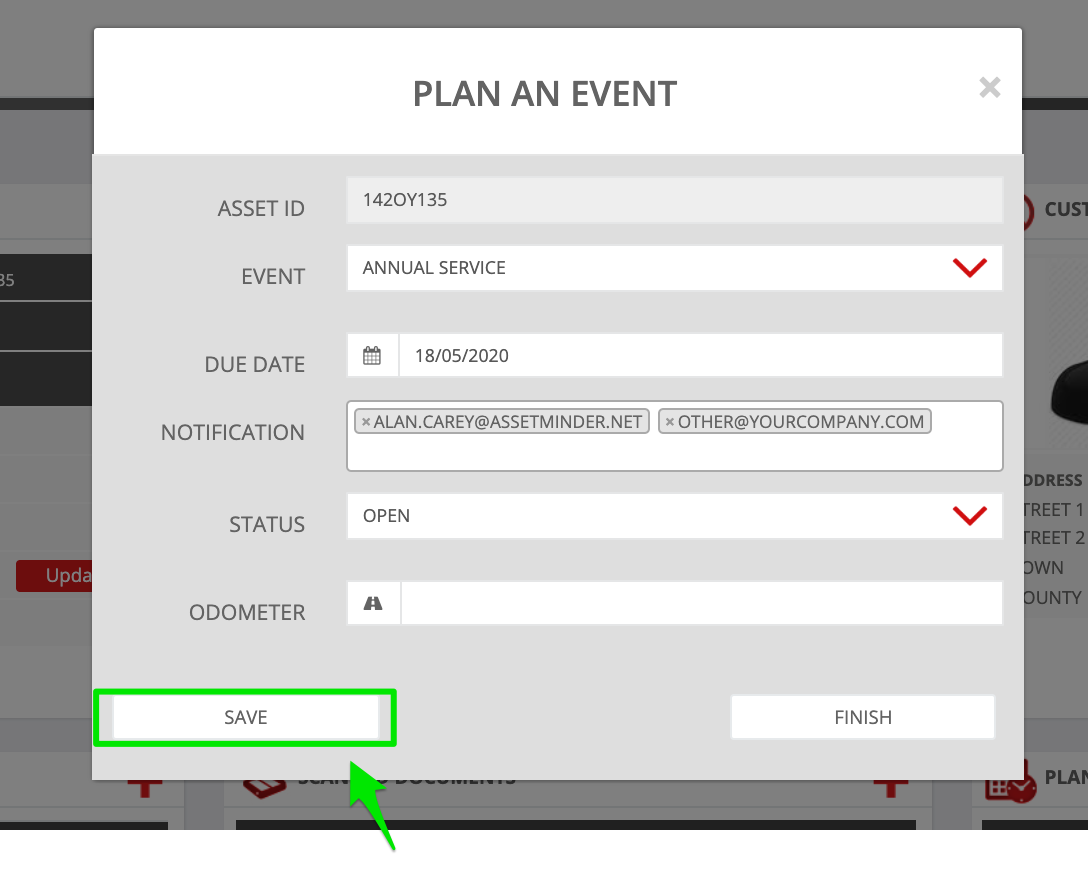
5. Fill in the required information in the Plan An Event screen
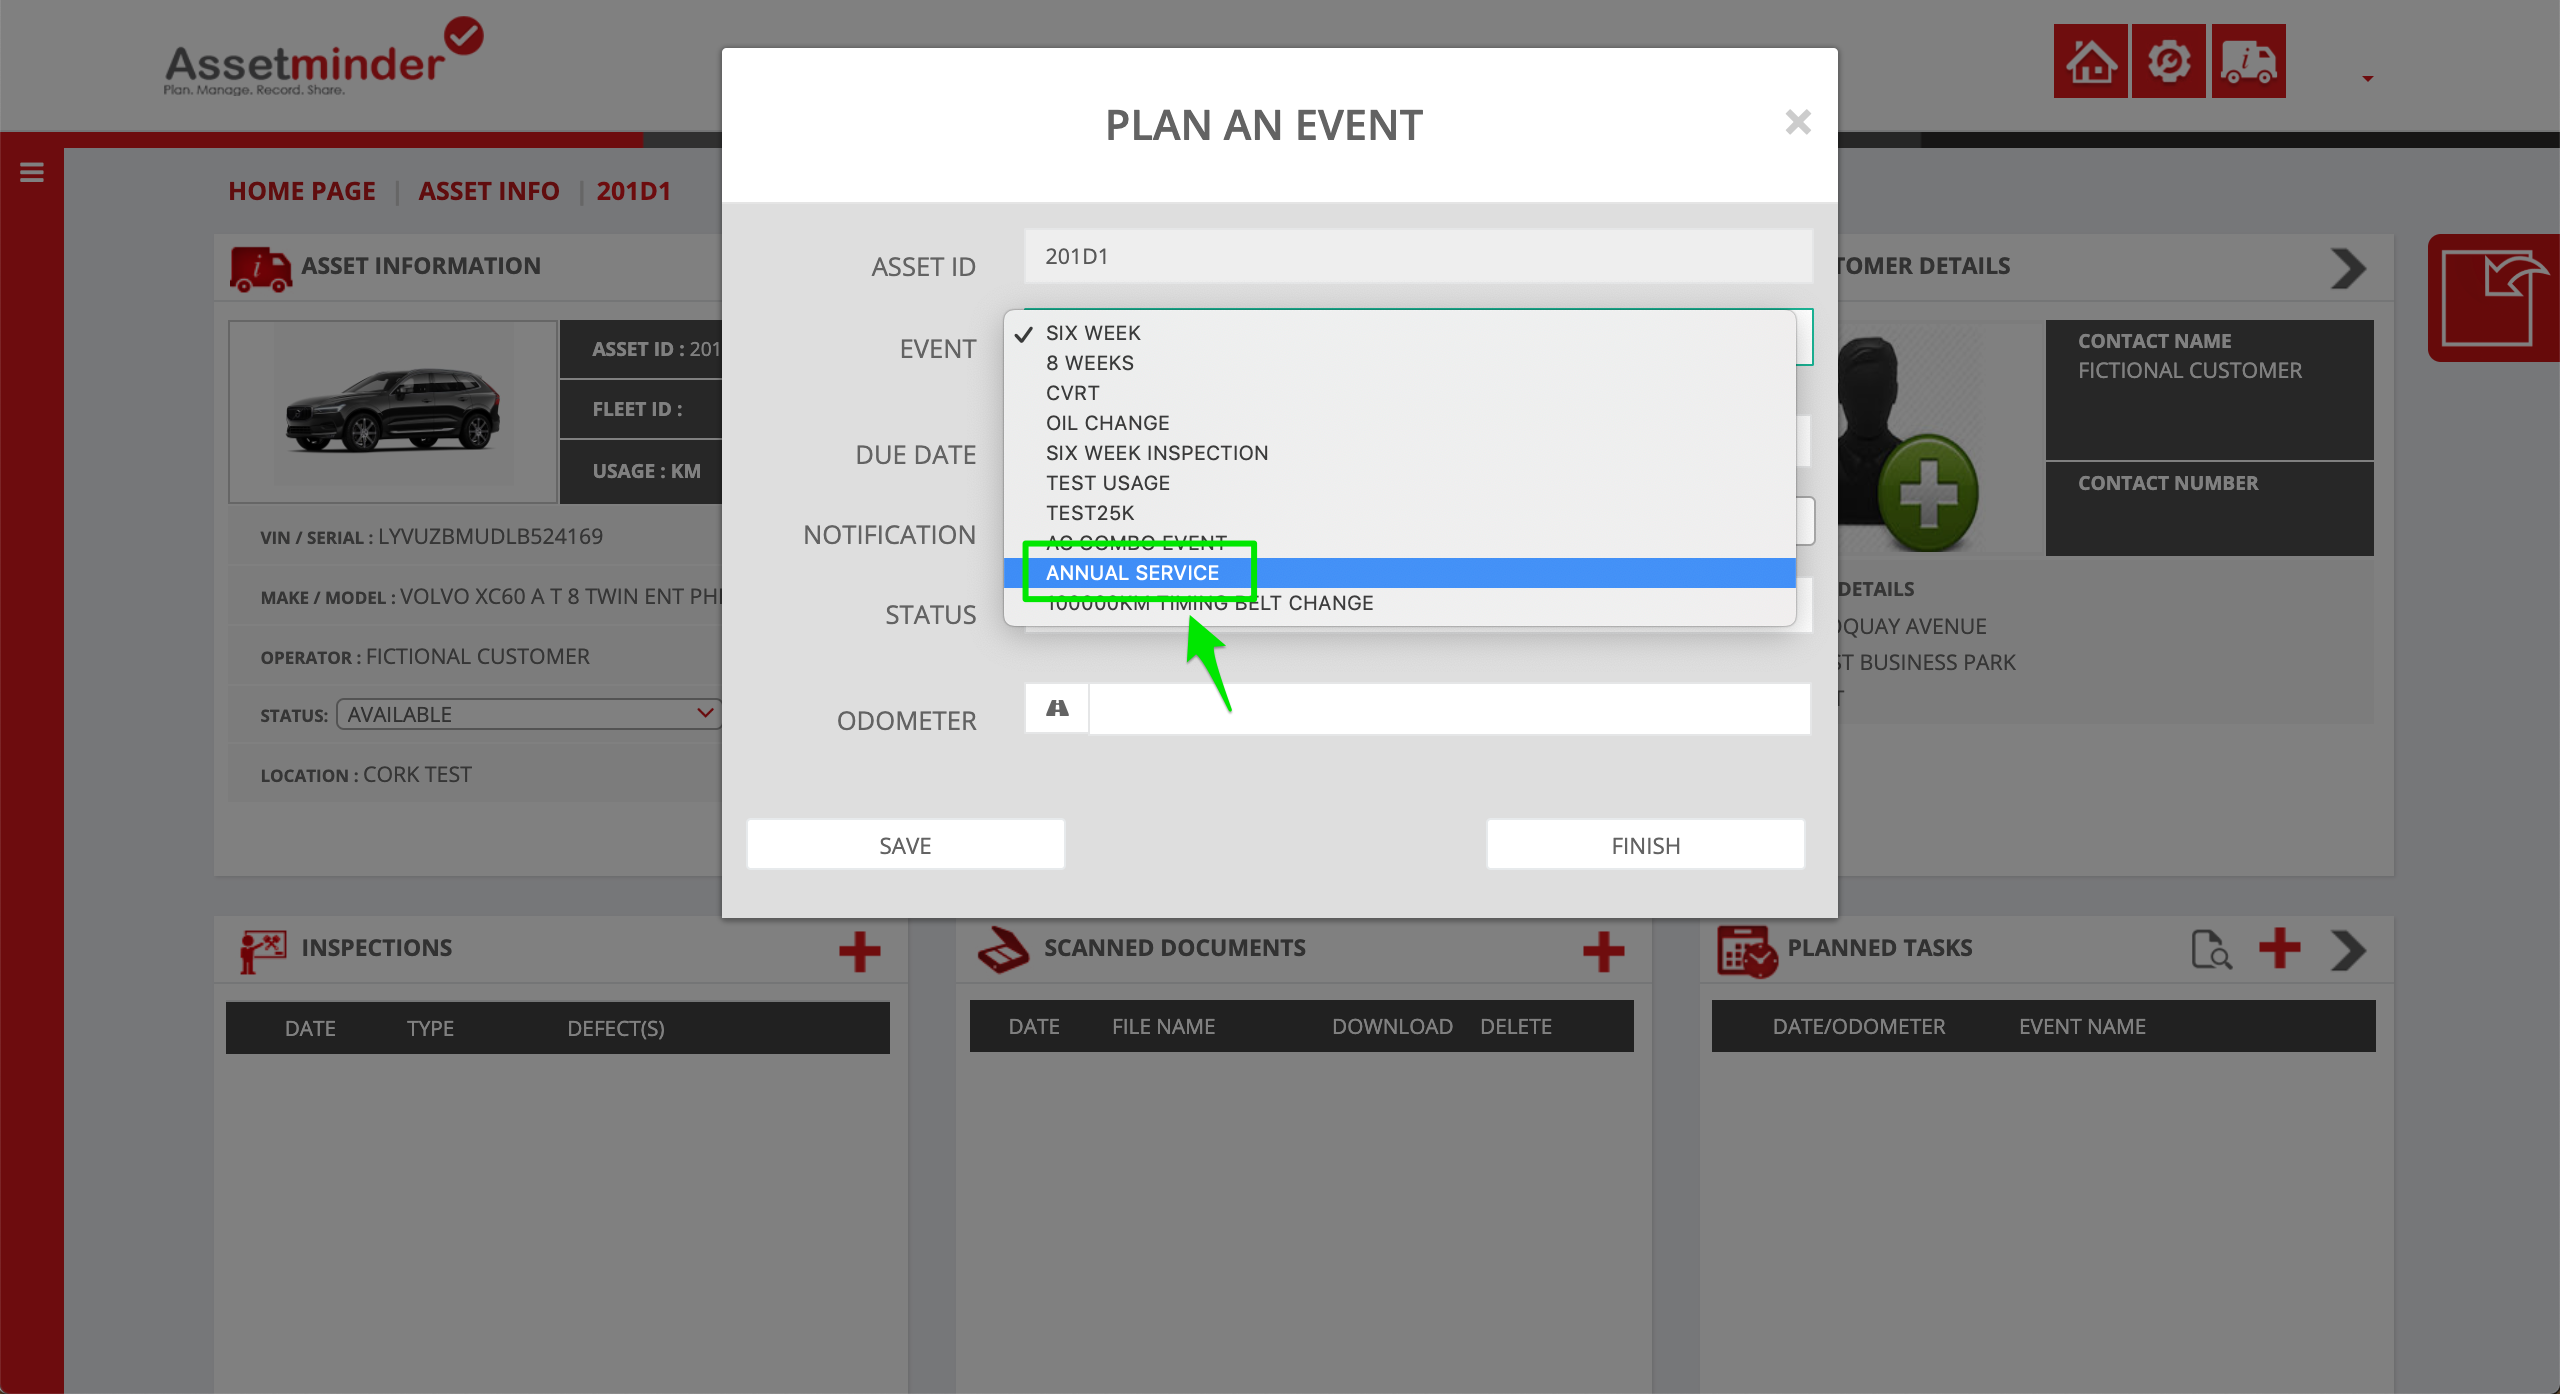
6. Select the Planned Event Template from the dropdown
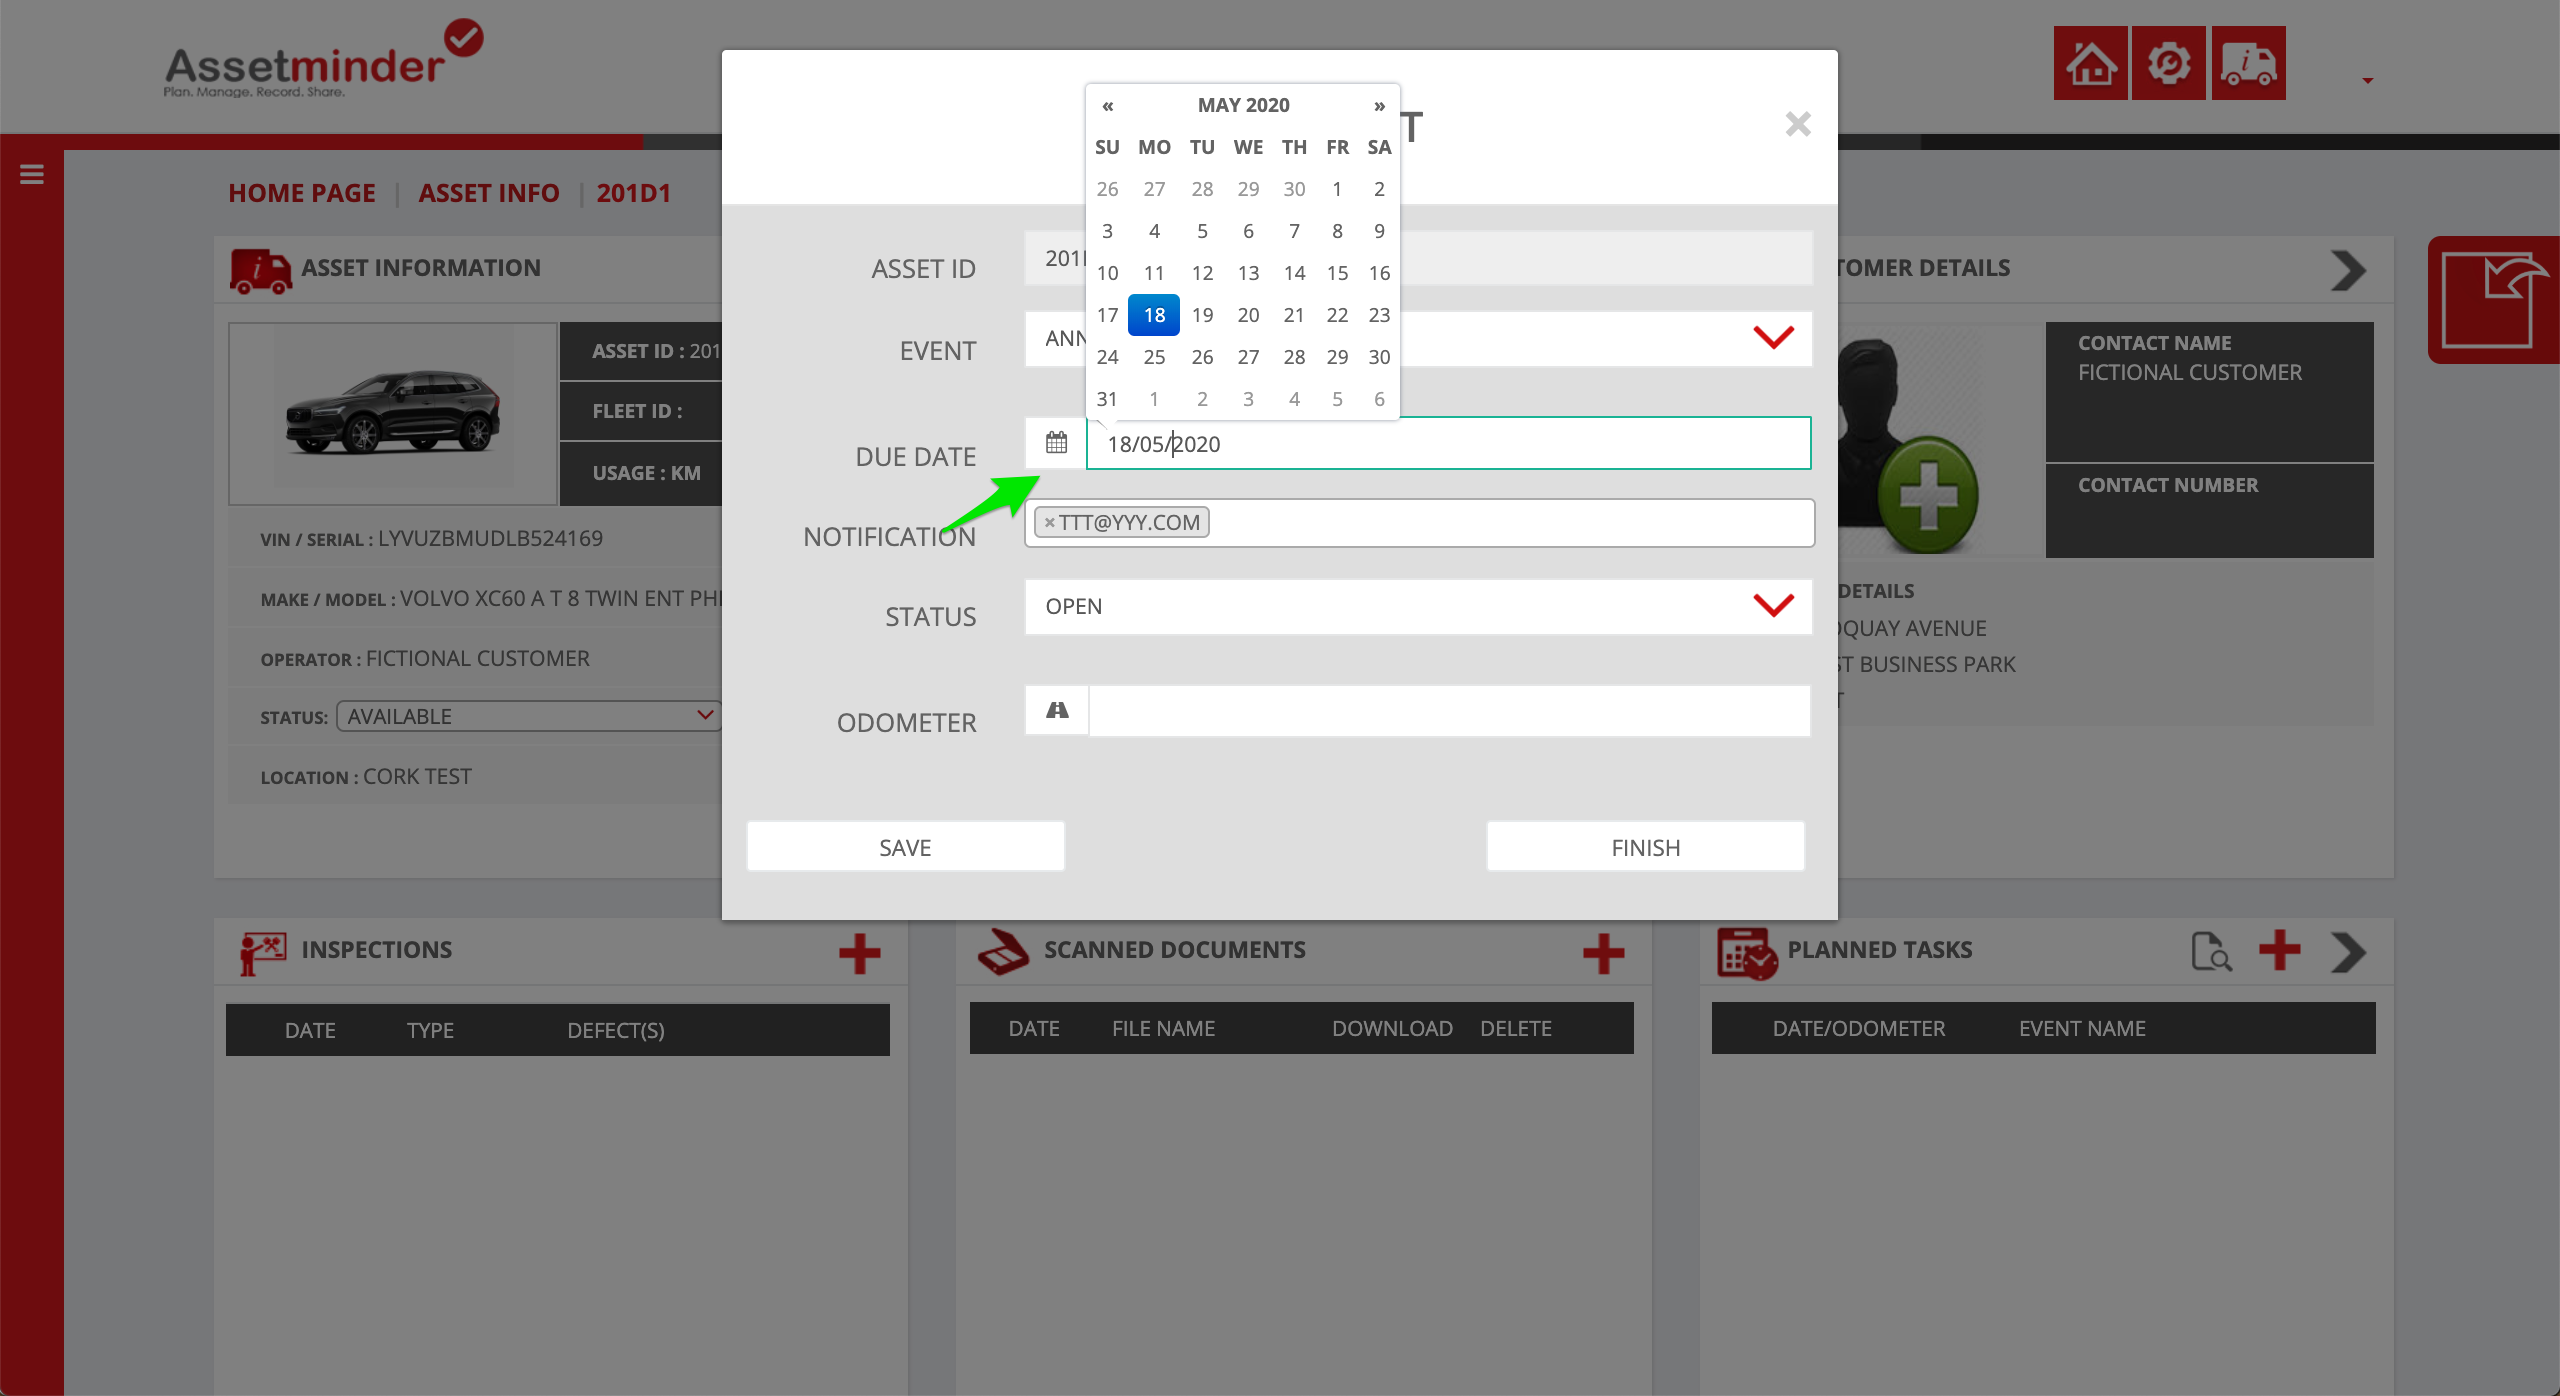
7. Select the due date for the first planned event, in this case, the first annual service
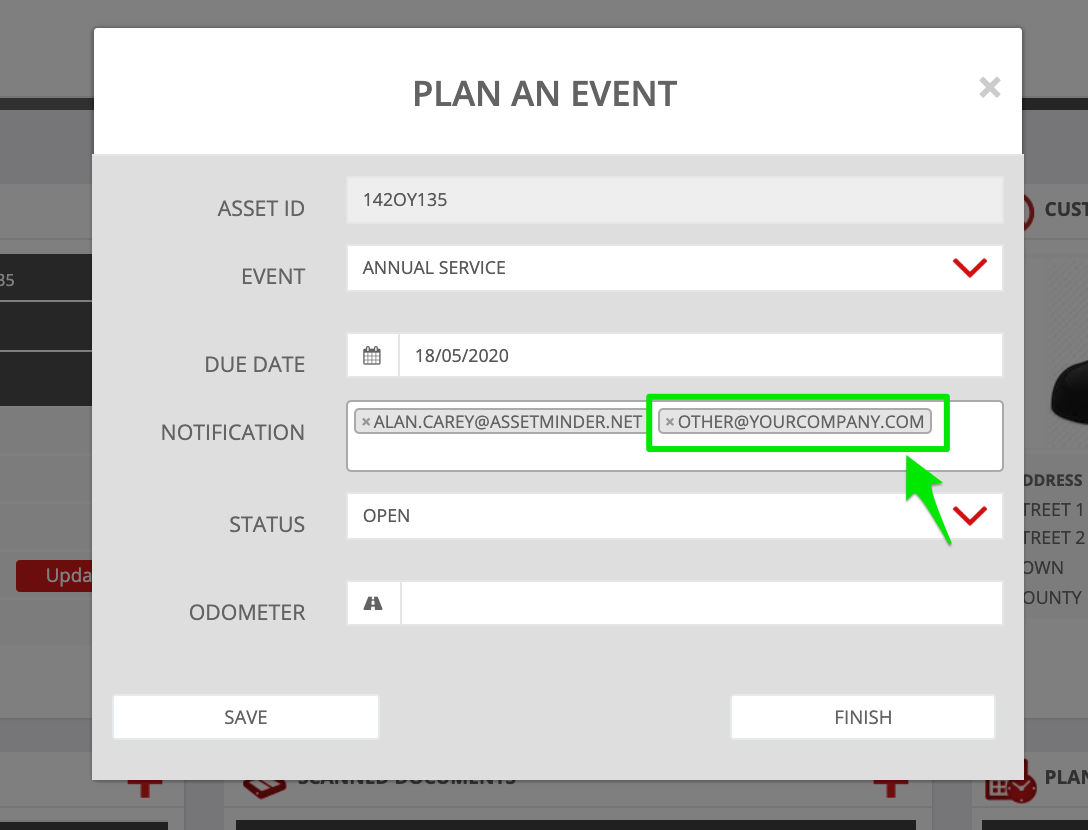
8. By default the email address on the customer record is pulled into the notification field. Add additional users or email addresses as needed
9. Click Save to lock in the changes
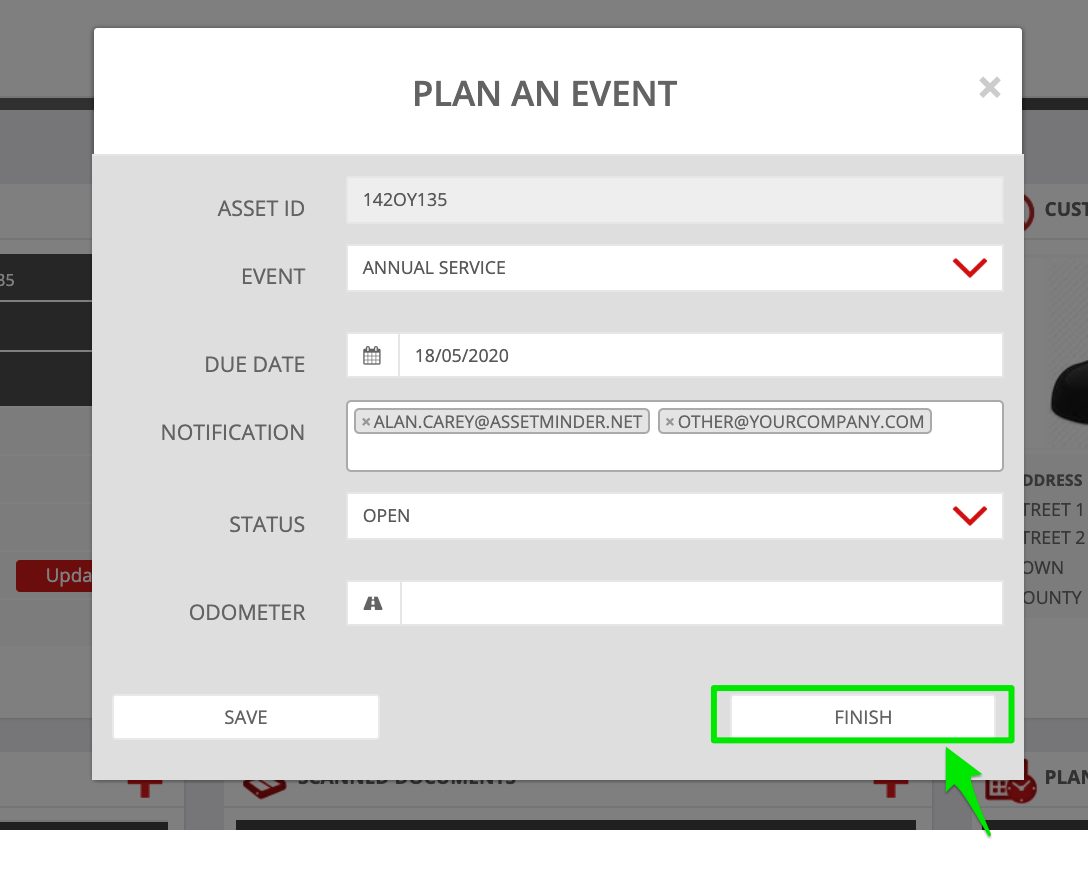
10. Click Finish to close
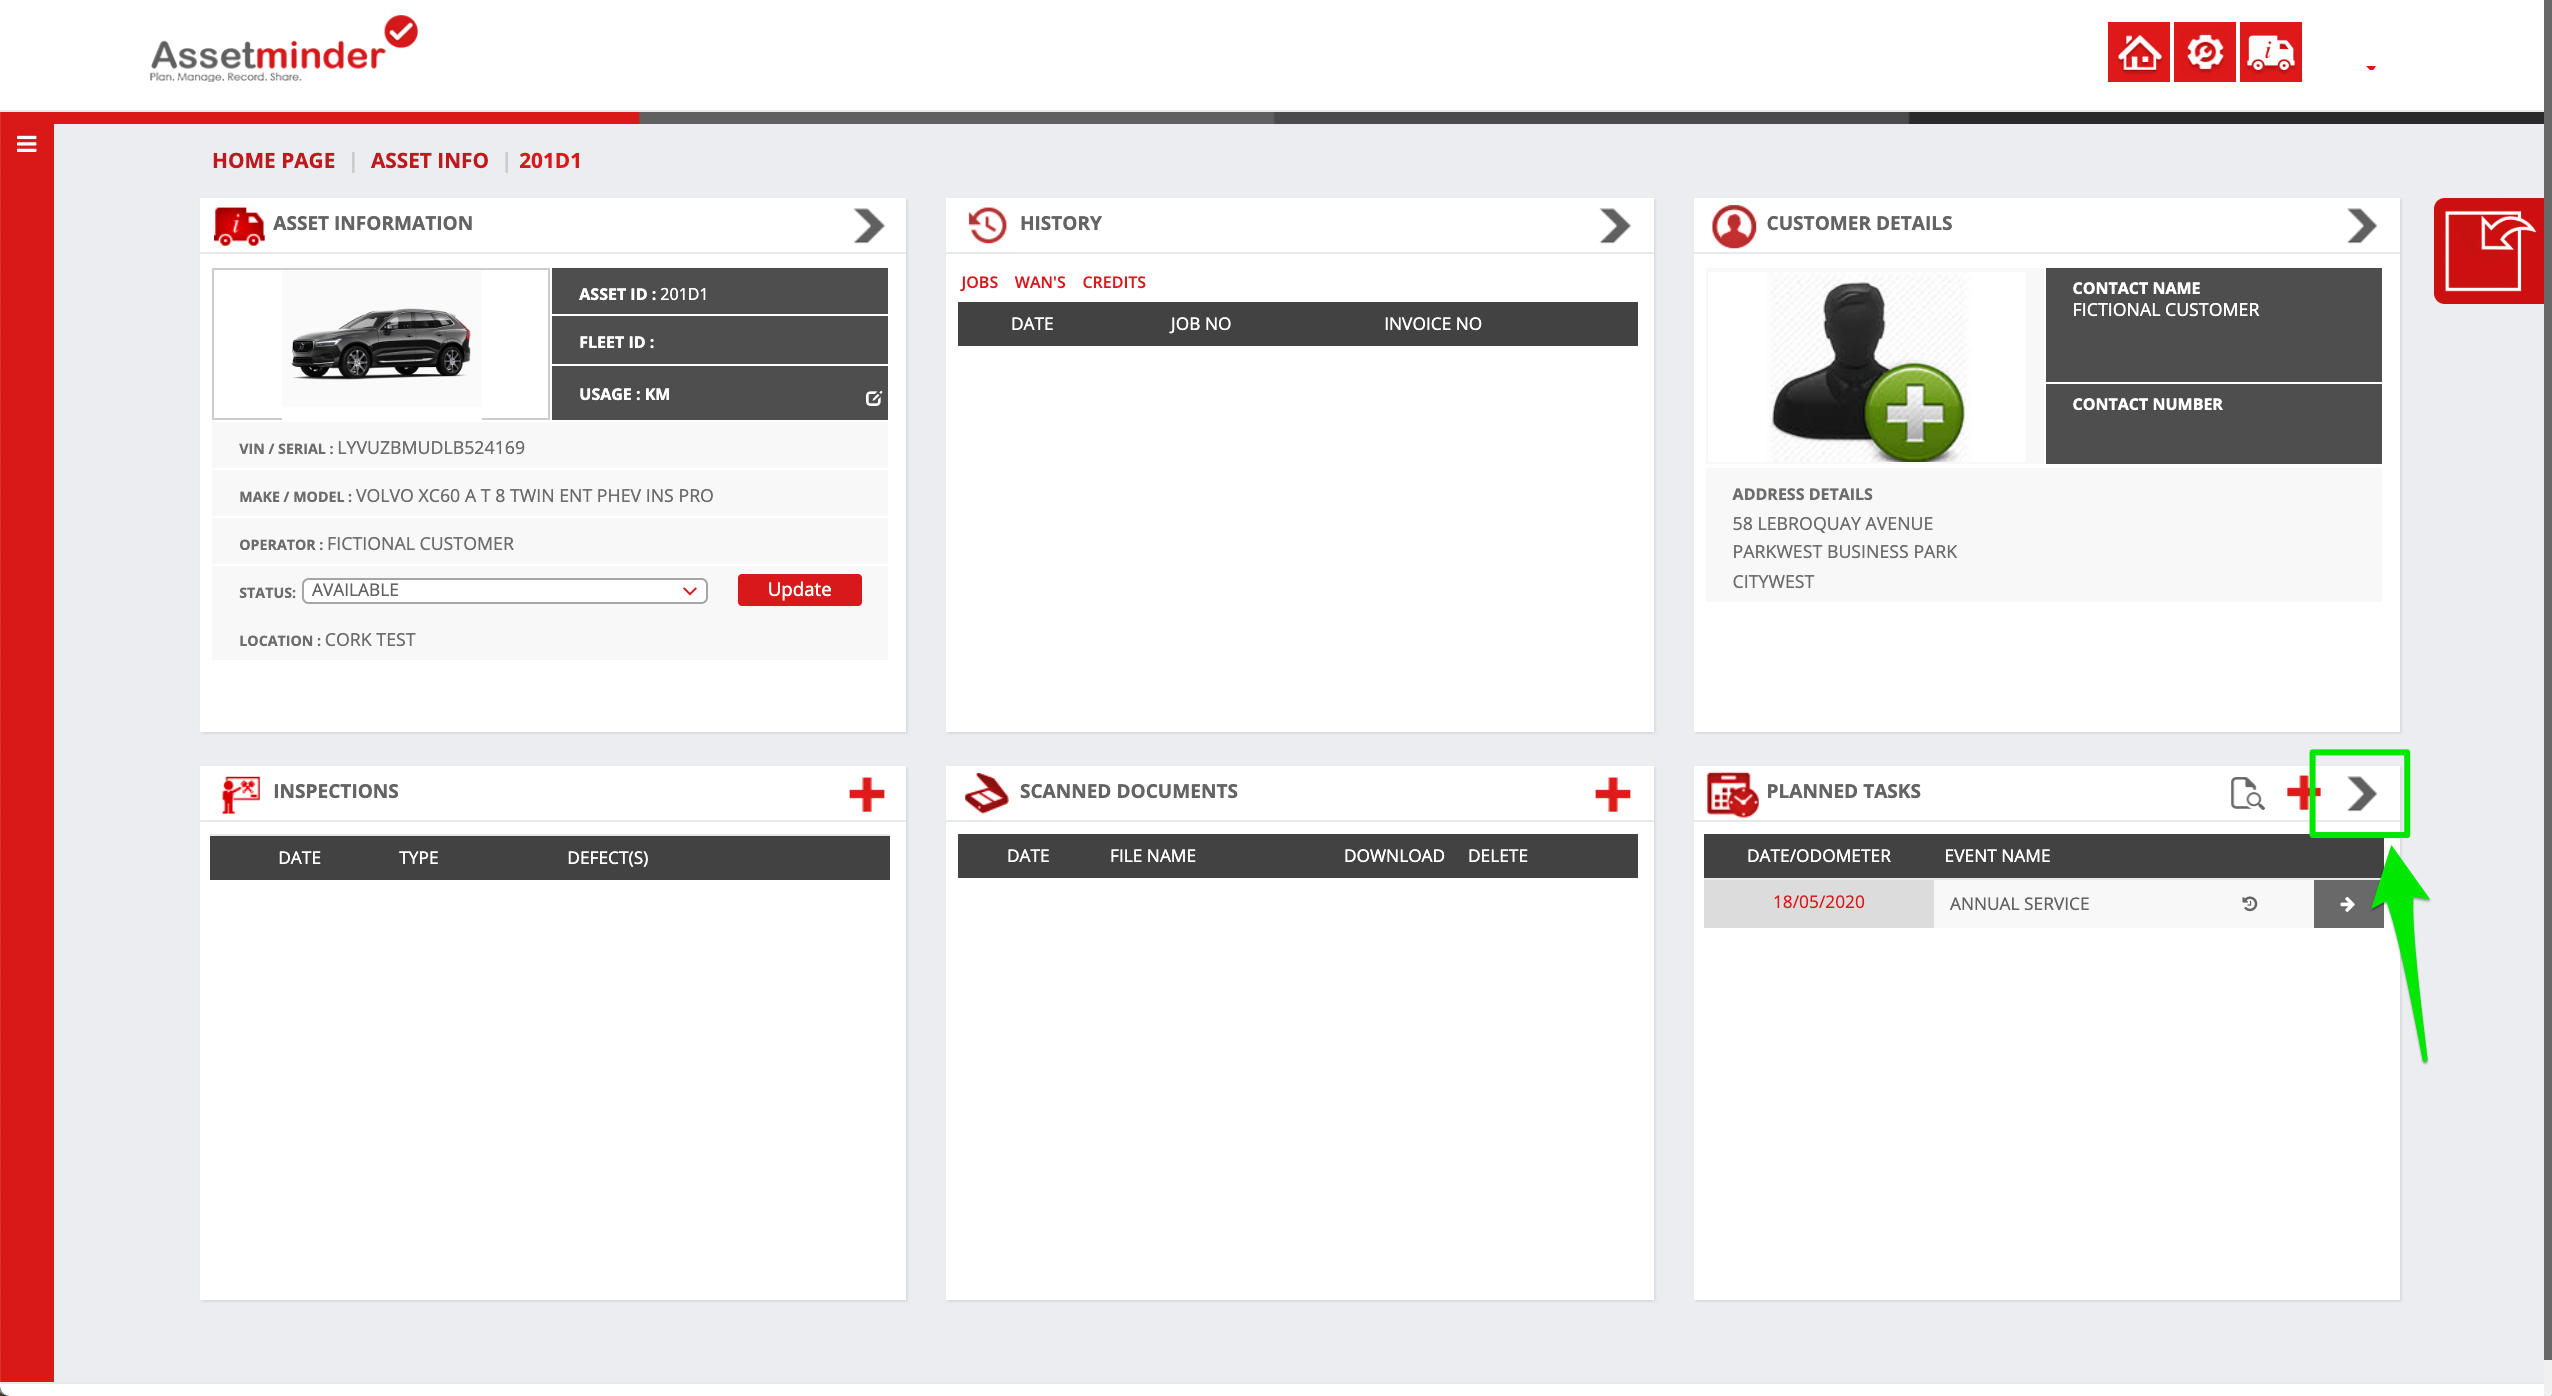
11. Verify your work by opening the planner view for the asset. Click the arrow in the Planned Tasks tile
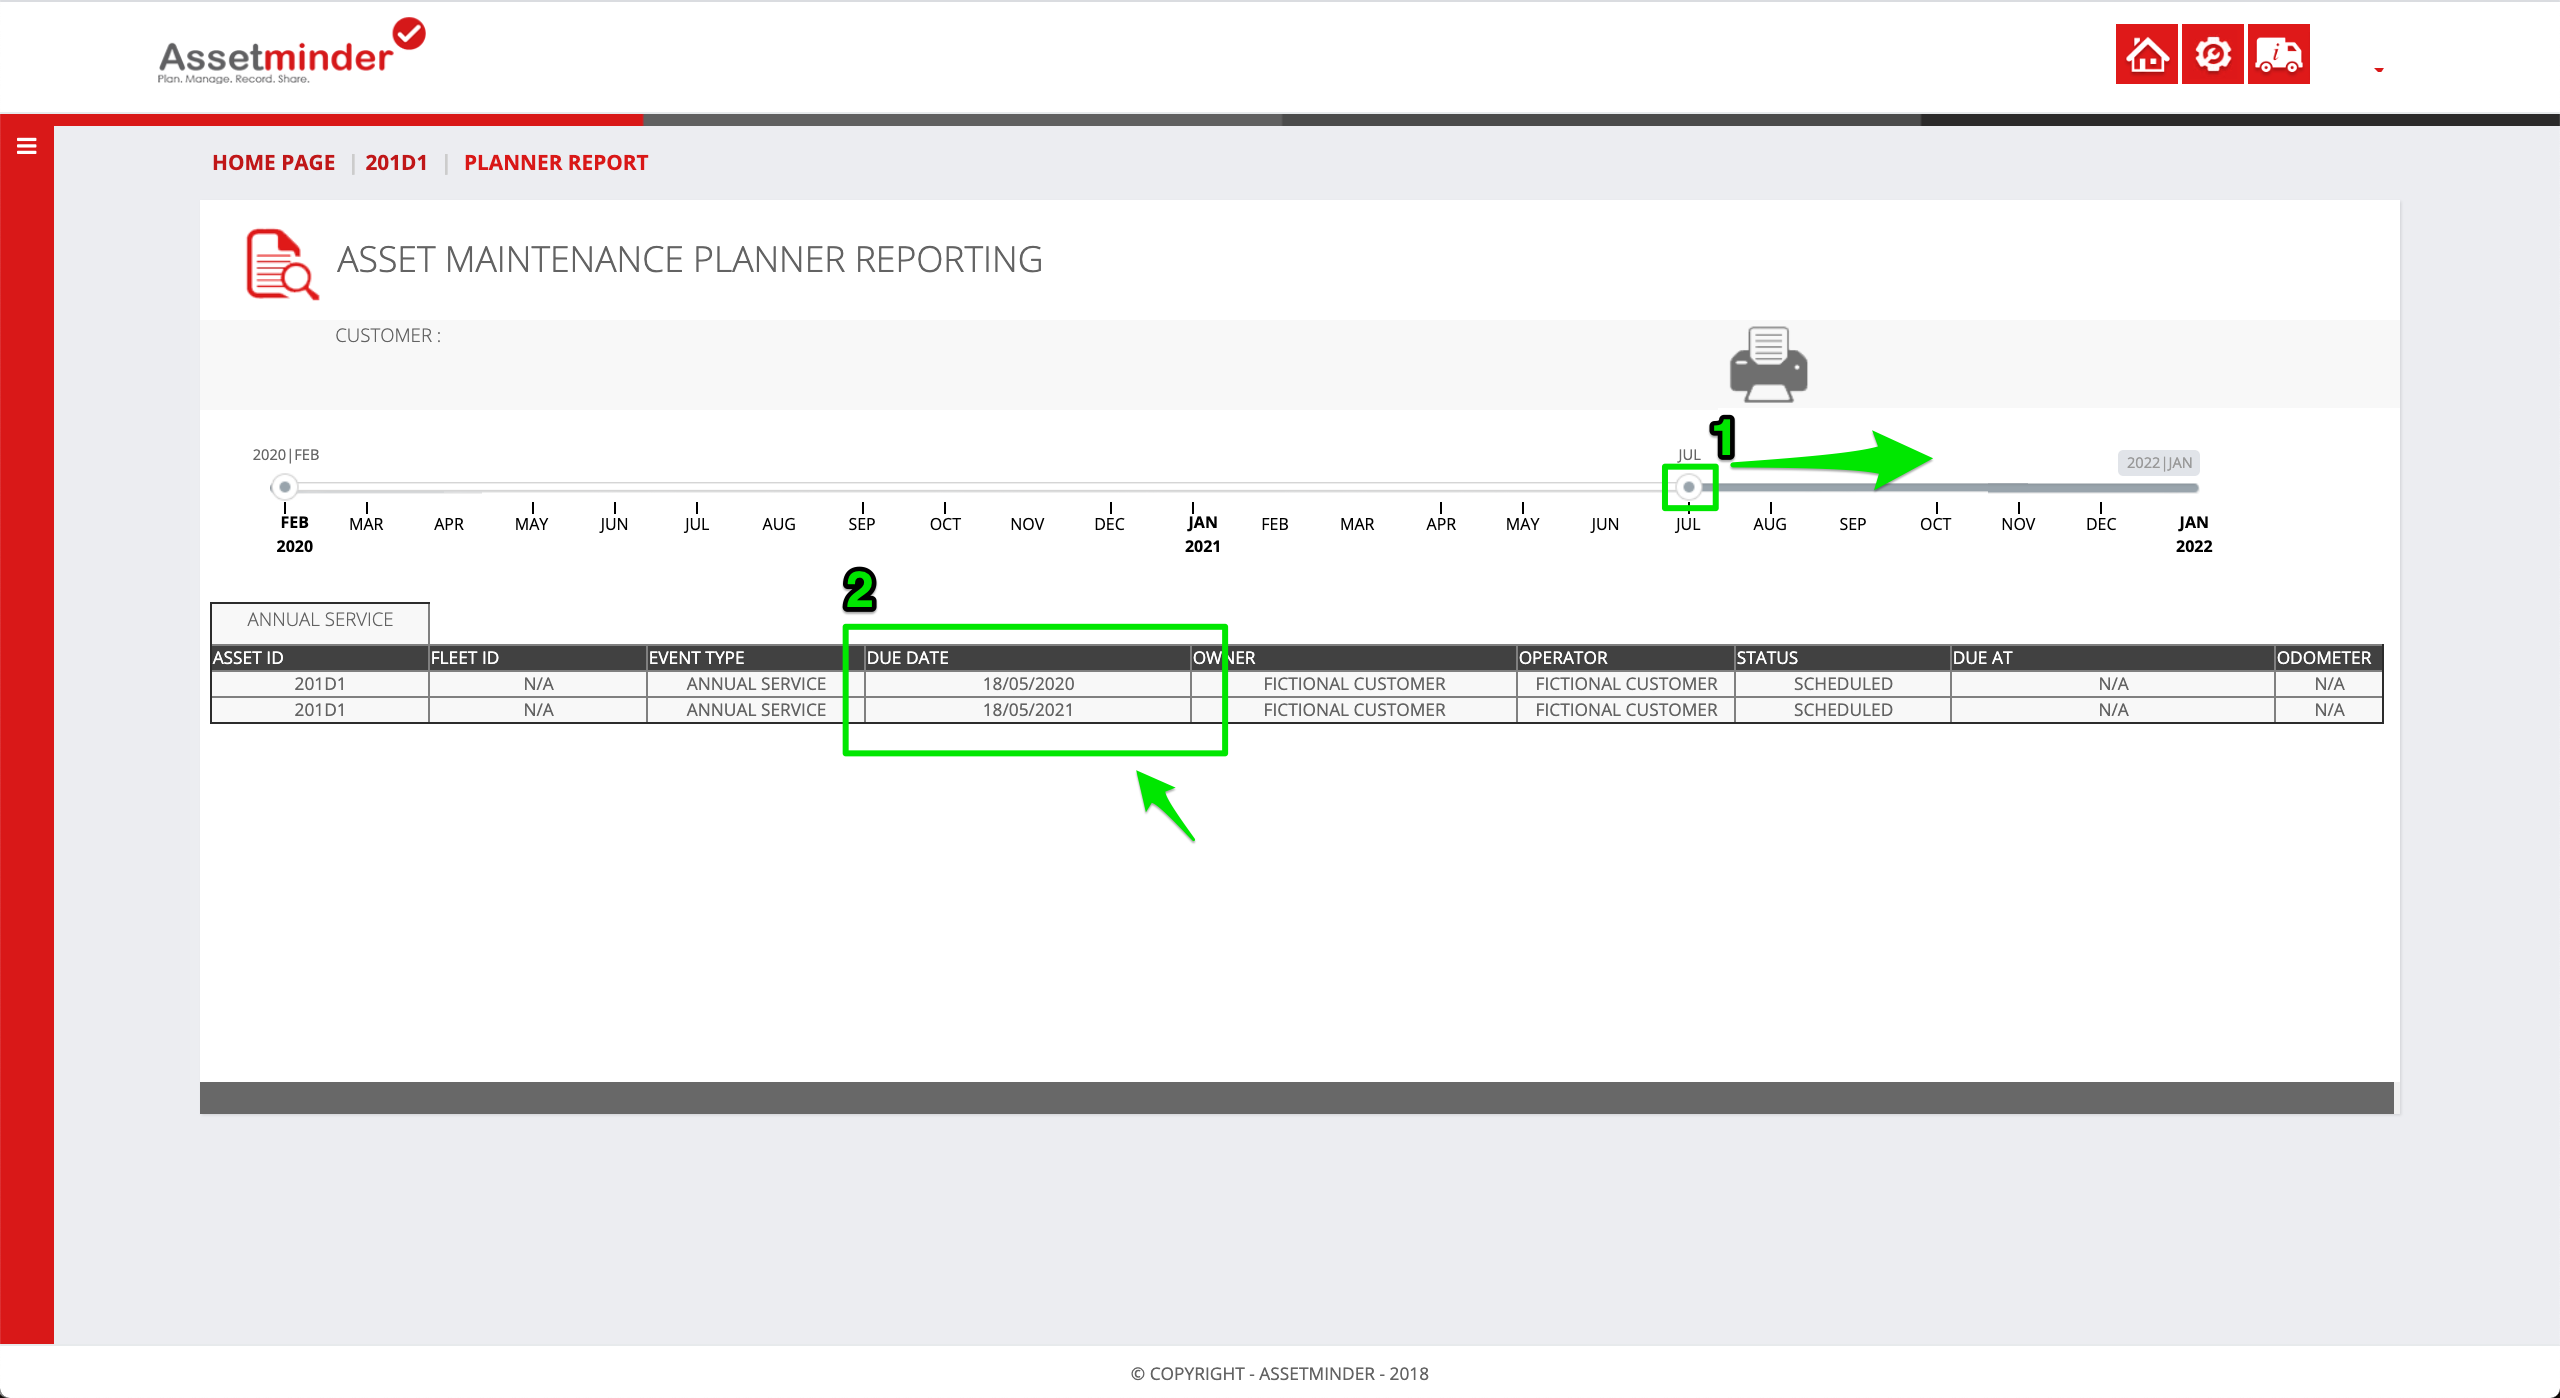
12. Move the date slider right to maximise the time window. As this example is an annual PM, and the time window shows planned events for the next 2 years, the system shows the two upcoming planned events.
13. Repeat the process for all other planned events on the asset
Conor Gibson
Comments