About a Stocktake in Assetminder
Stage 1: Create a Stocktake Event
A stocktake begins by setting up a stocktake event.
This event defines what will be counted and where the count will take place.
-
Select the depot where the stocktake will occur.
-
Choose the locations within that depot that should be included.
-
Confirm the event details so the system can generate the list of items to be counted.
In large warehouses or depots with many parts often cannot be fully counted in a single session. Assetminder allows the user to break the stocktake into manageable segments by selecting specific locations. Over time, by completing multiple events, the organisation can achieve a full and accurate stock count.
Stage 2: Perform the Physical Count
Once the stocktake event is created, the user proceeds to the physical counting stage.
Steps
-
Go to the selected depot and locations defined in the event.
-
Count the physical stock items present.
-
Record the quantities in Assetminder according to the event’s parameters.
PROCEDURE
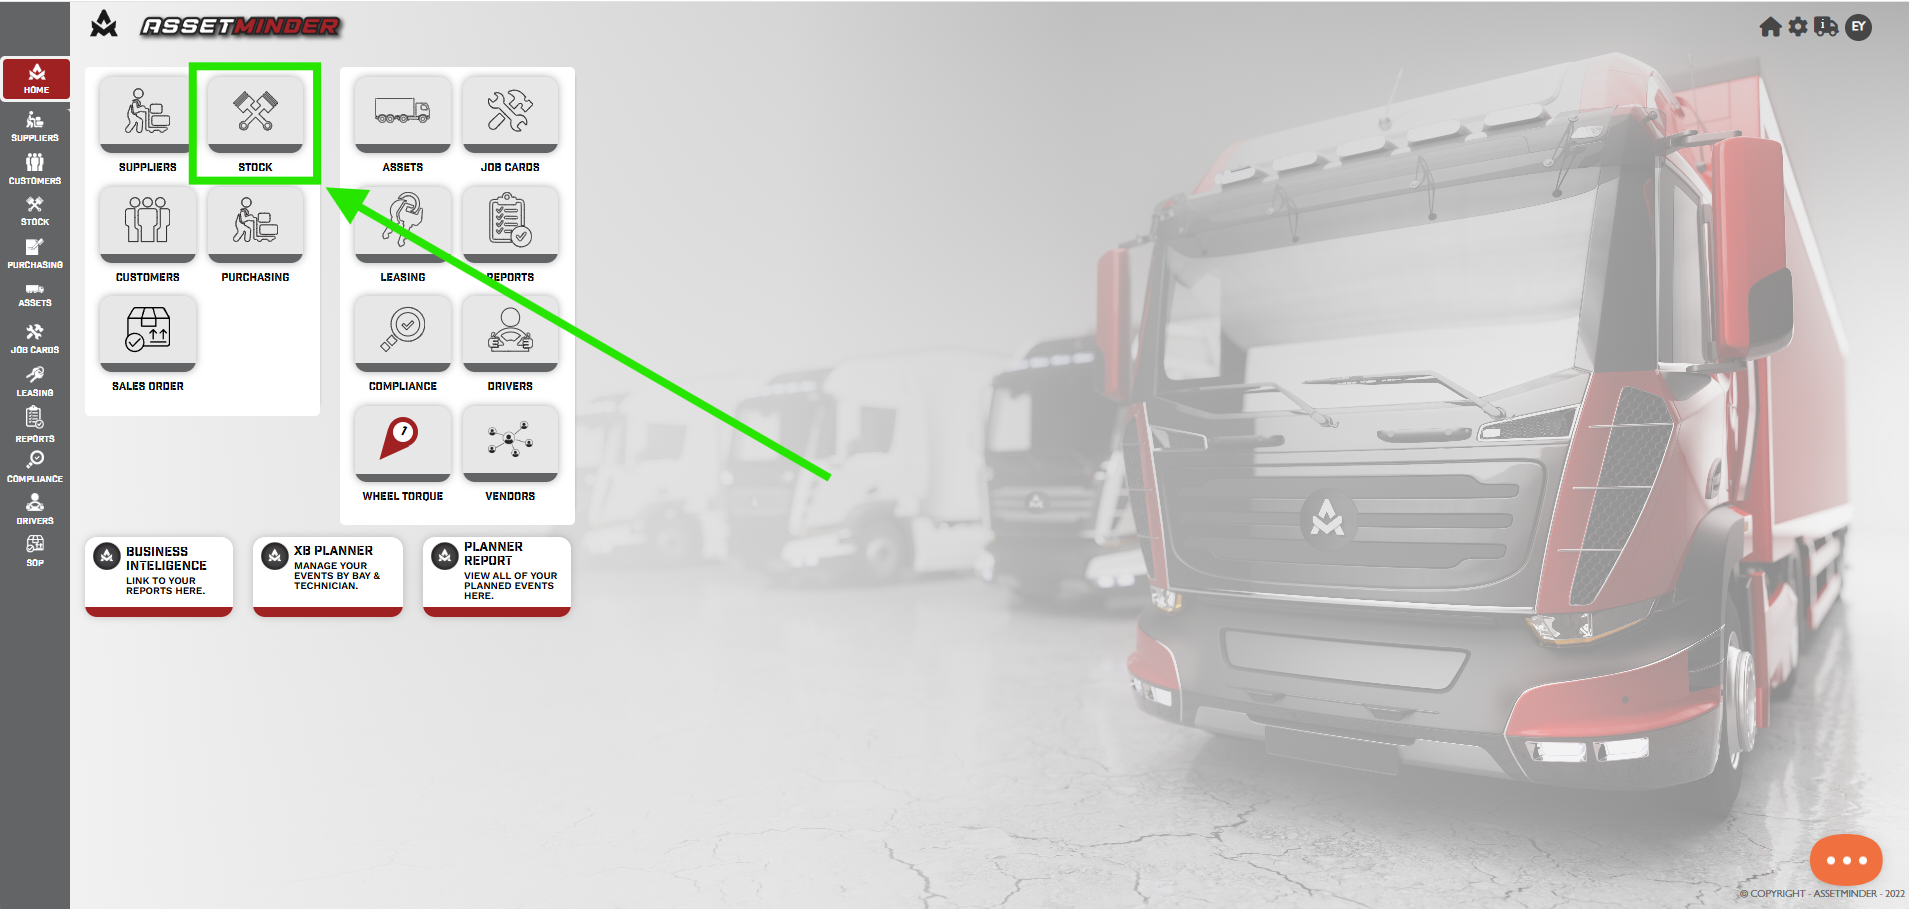
1. Go to Stock from the Home screen.
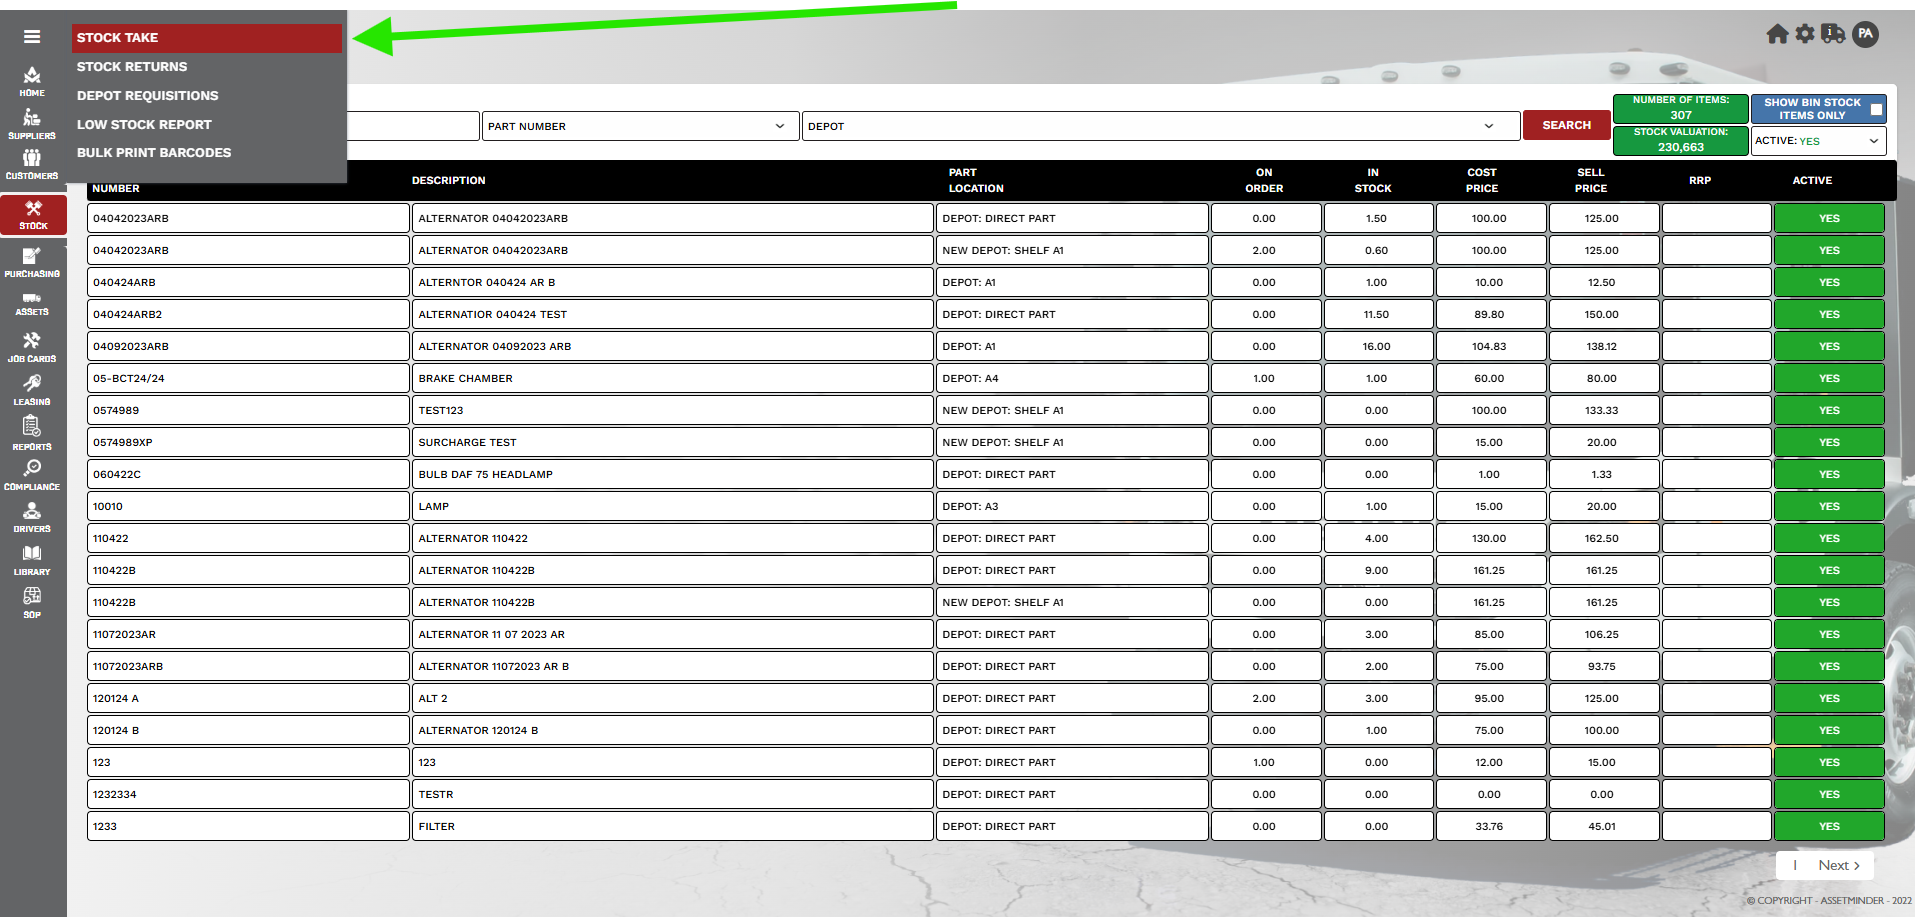
2. Open the Burger menu and select Stocktake.
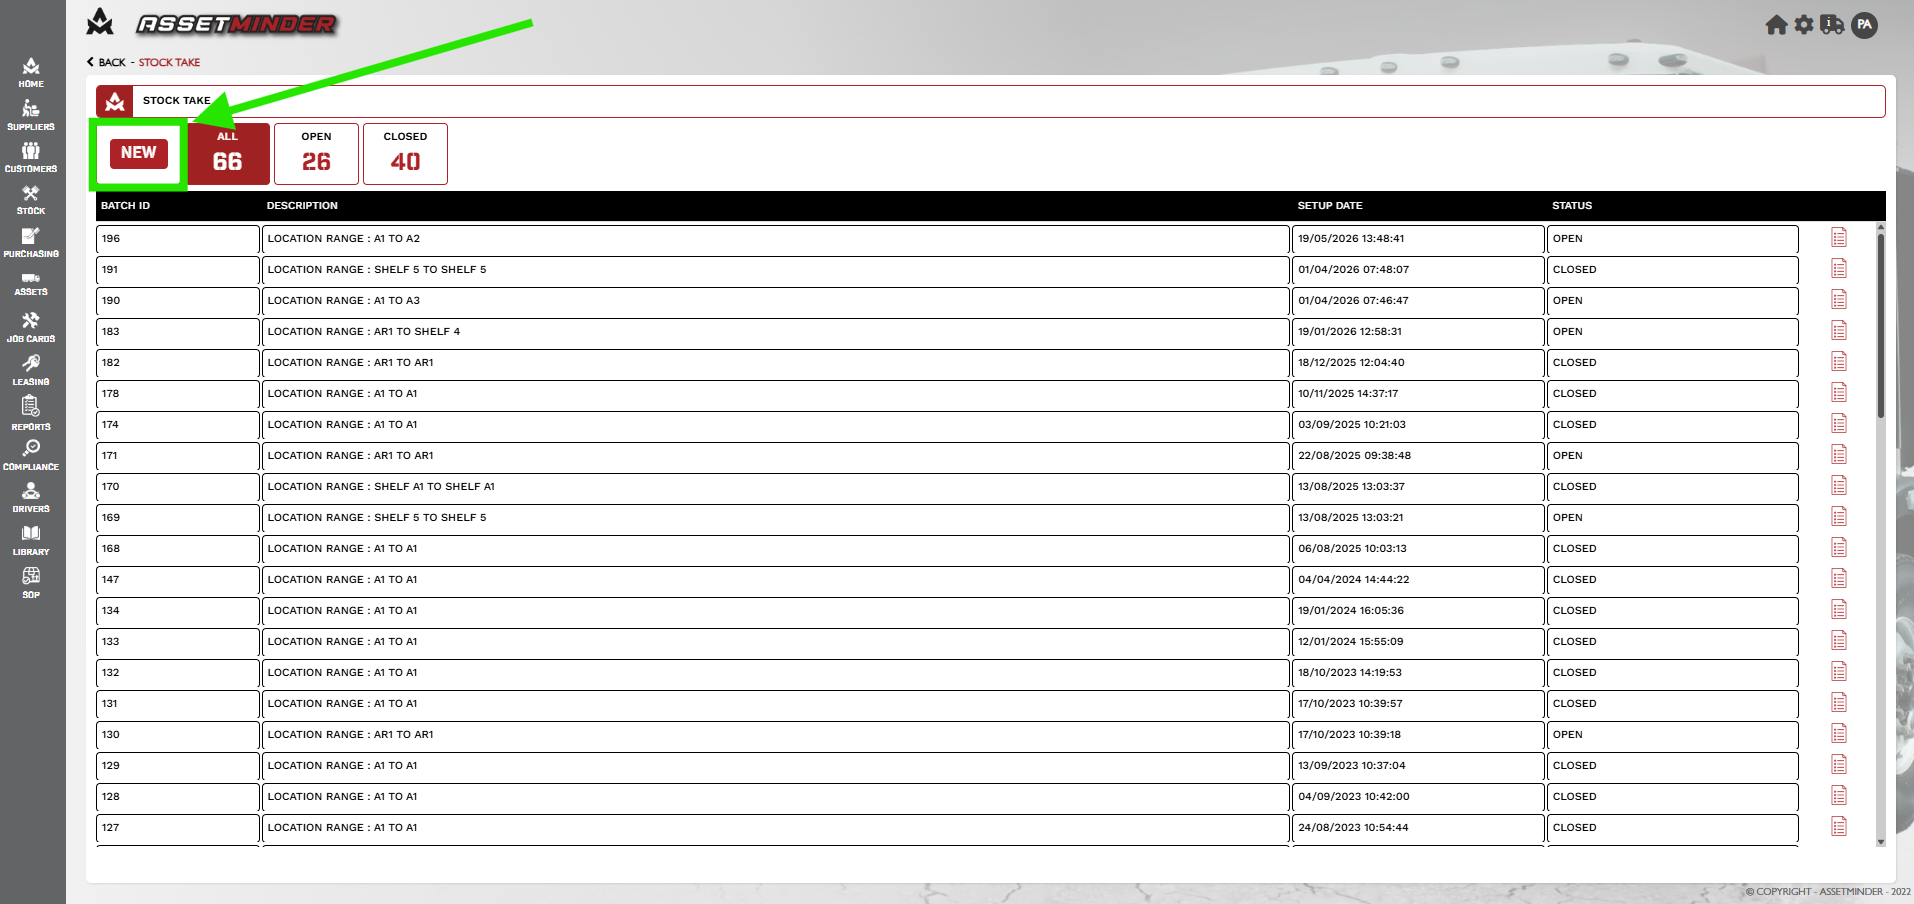
3. Click on NEW
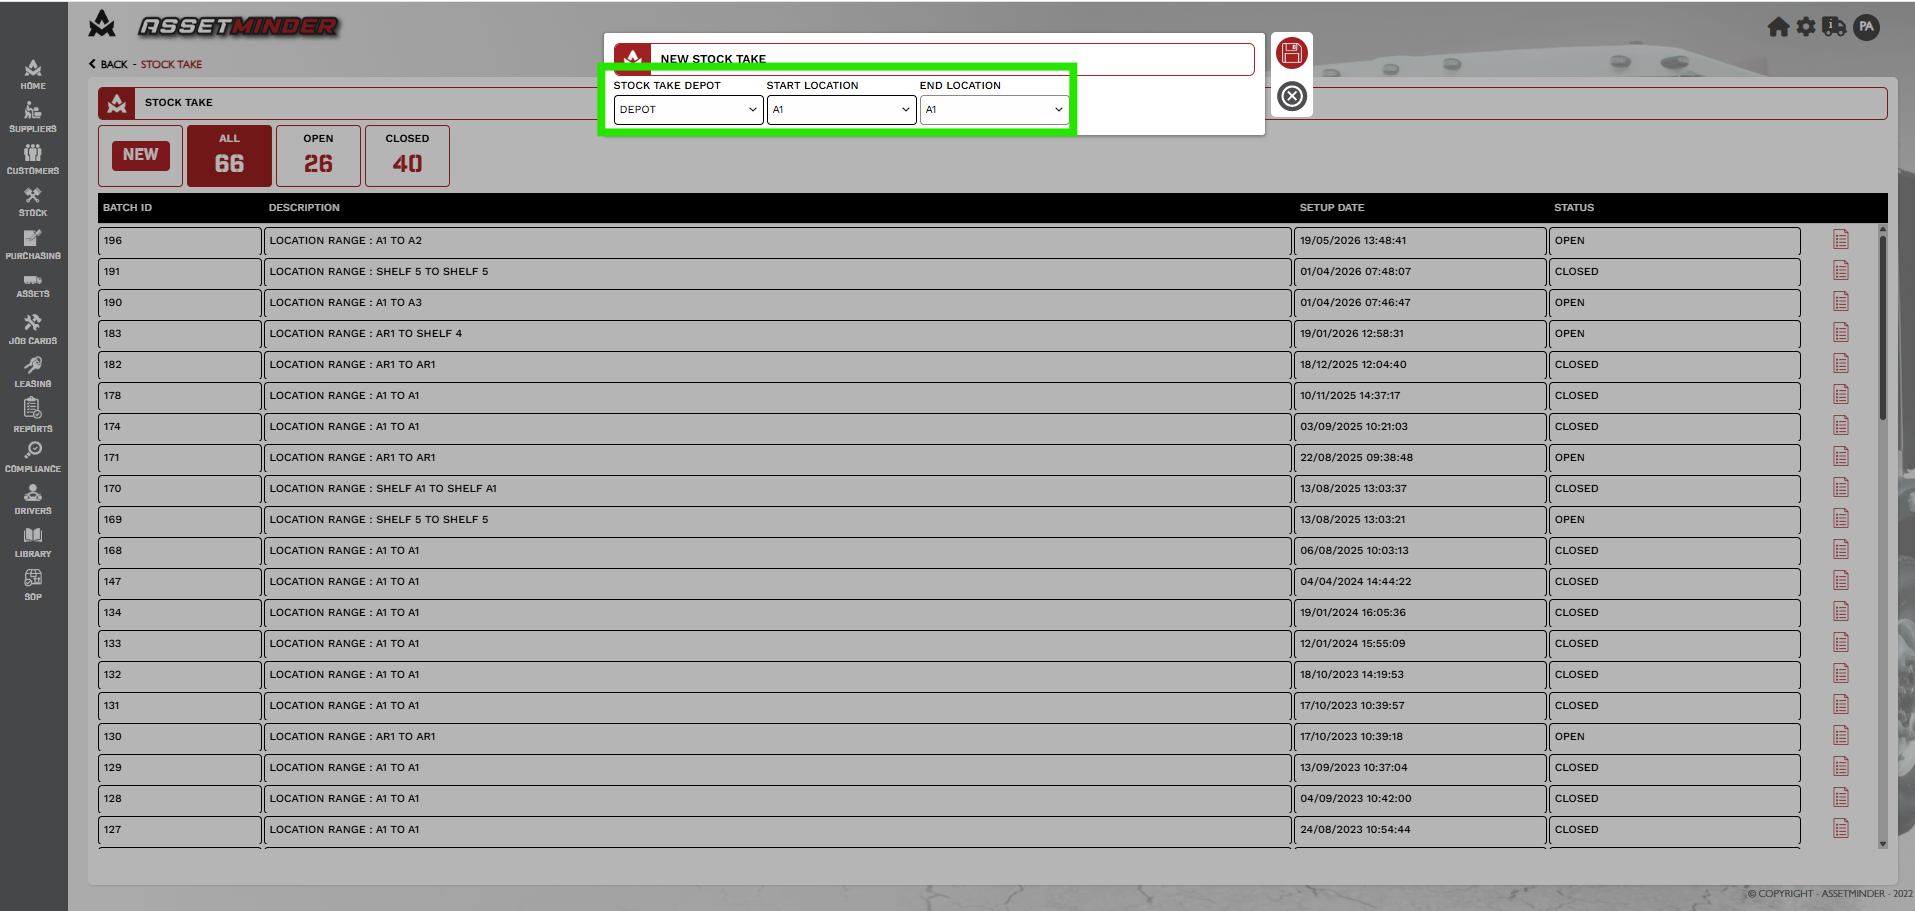
4. Select the depot, start location and end location.
5. Open the stock report. This can be printed.
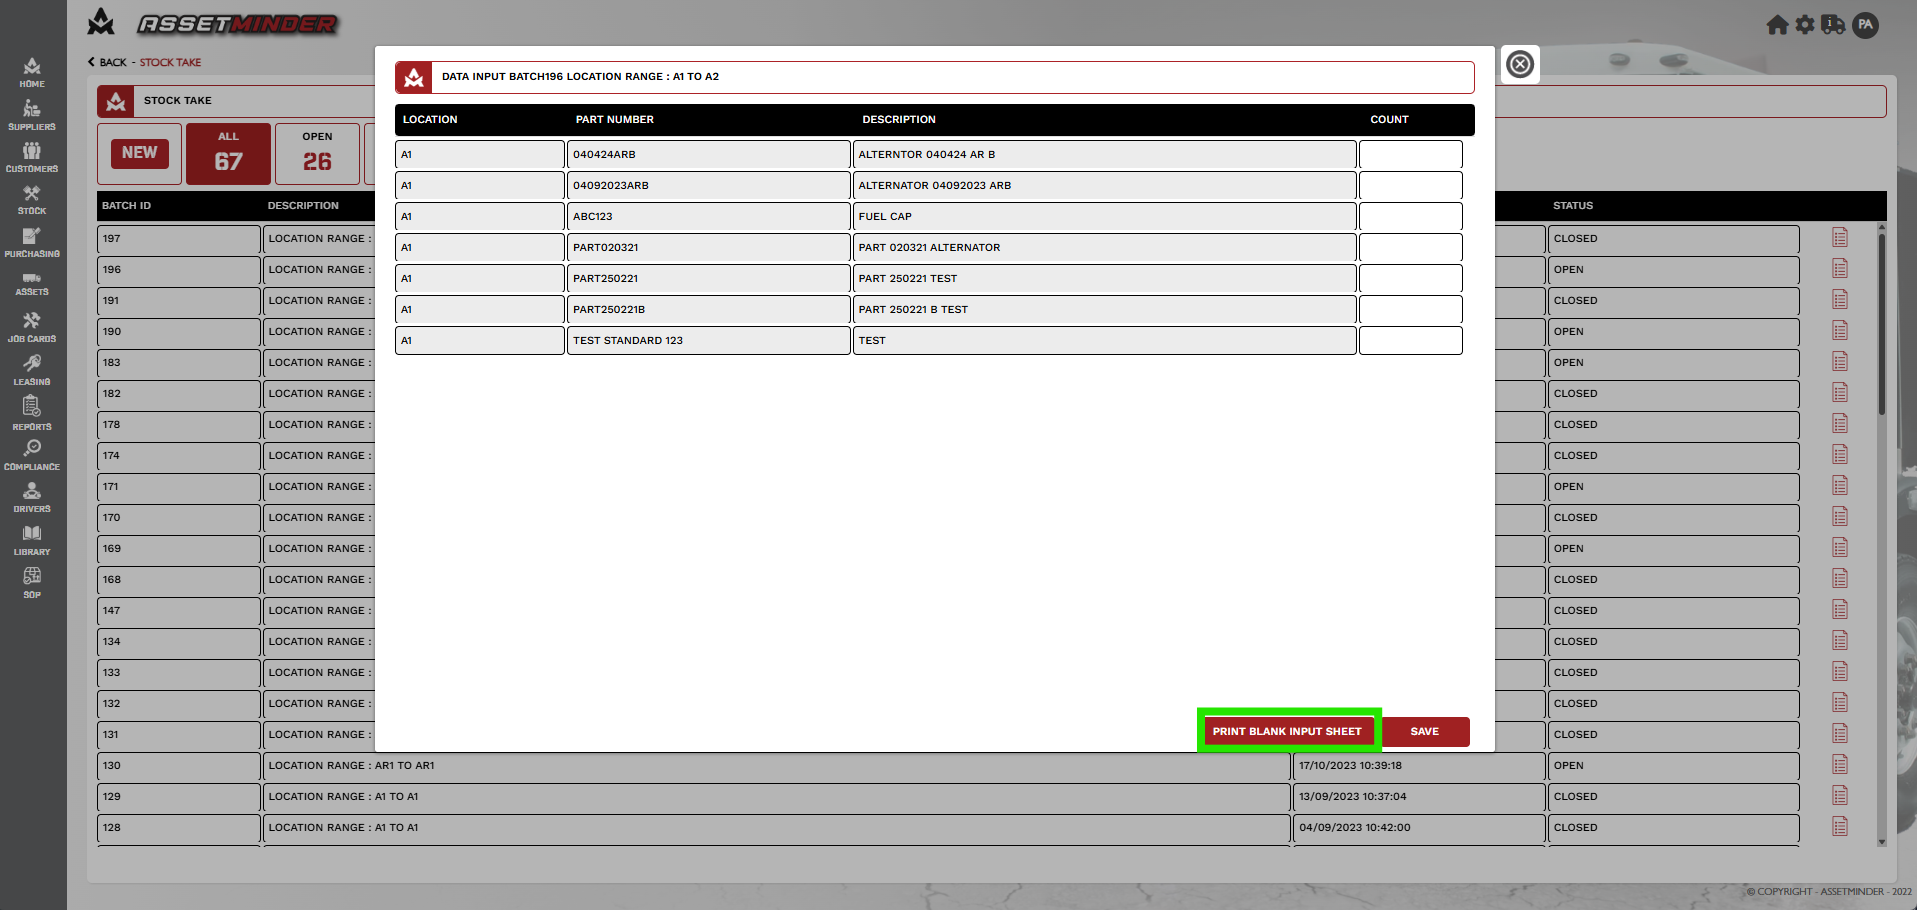
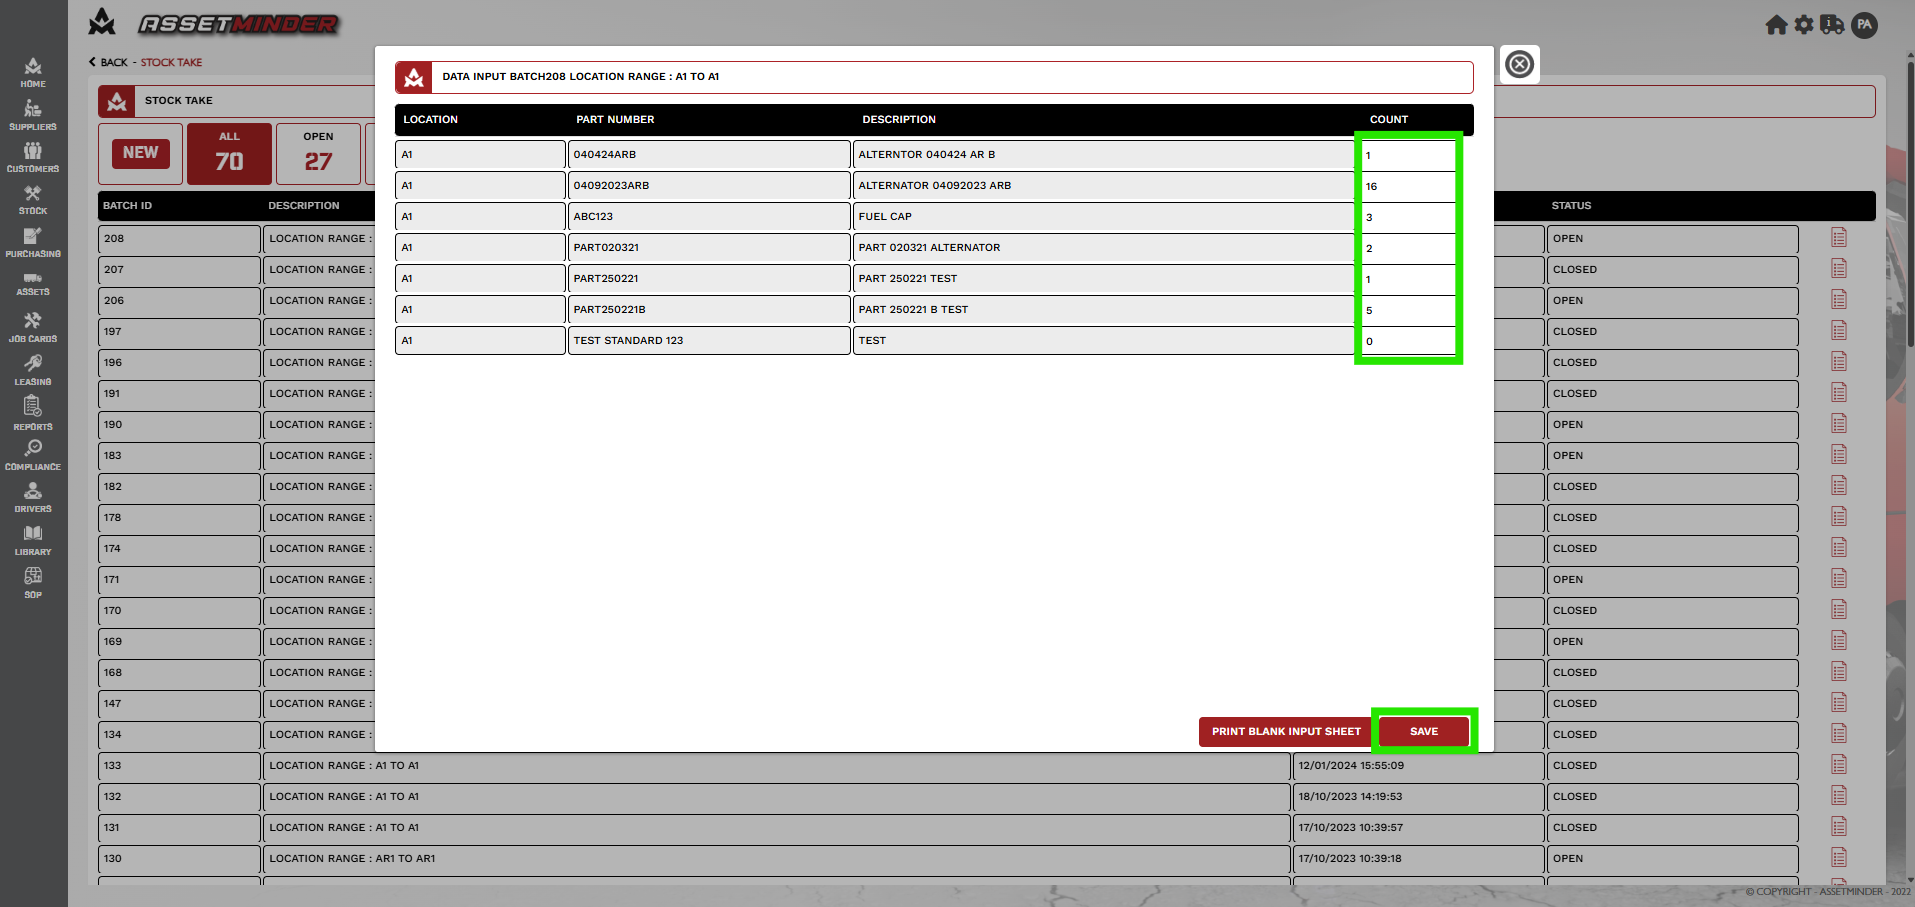
6. Fill in the Stock report and SAVE.
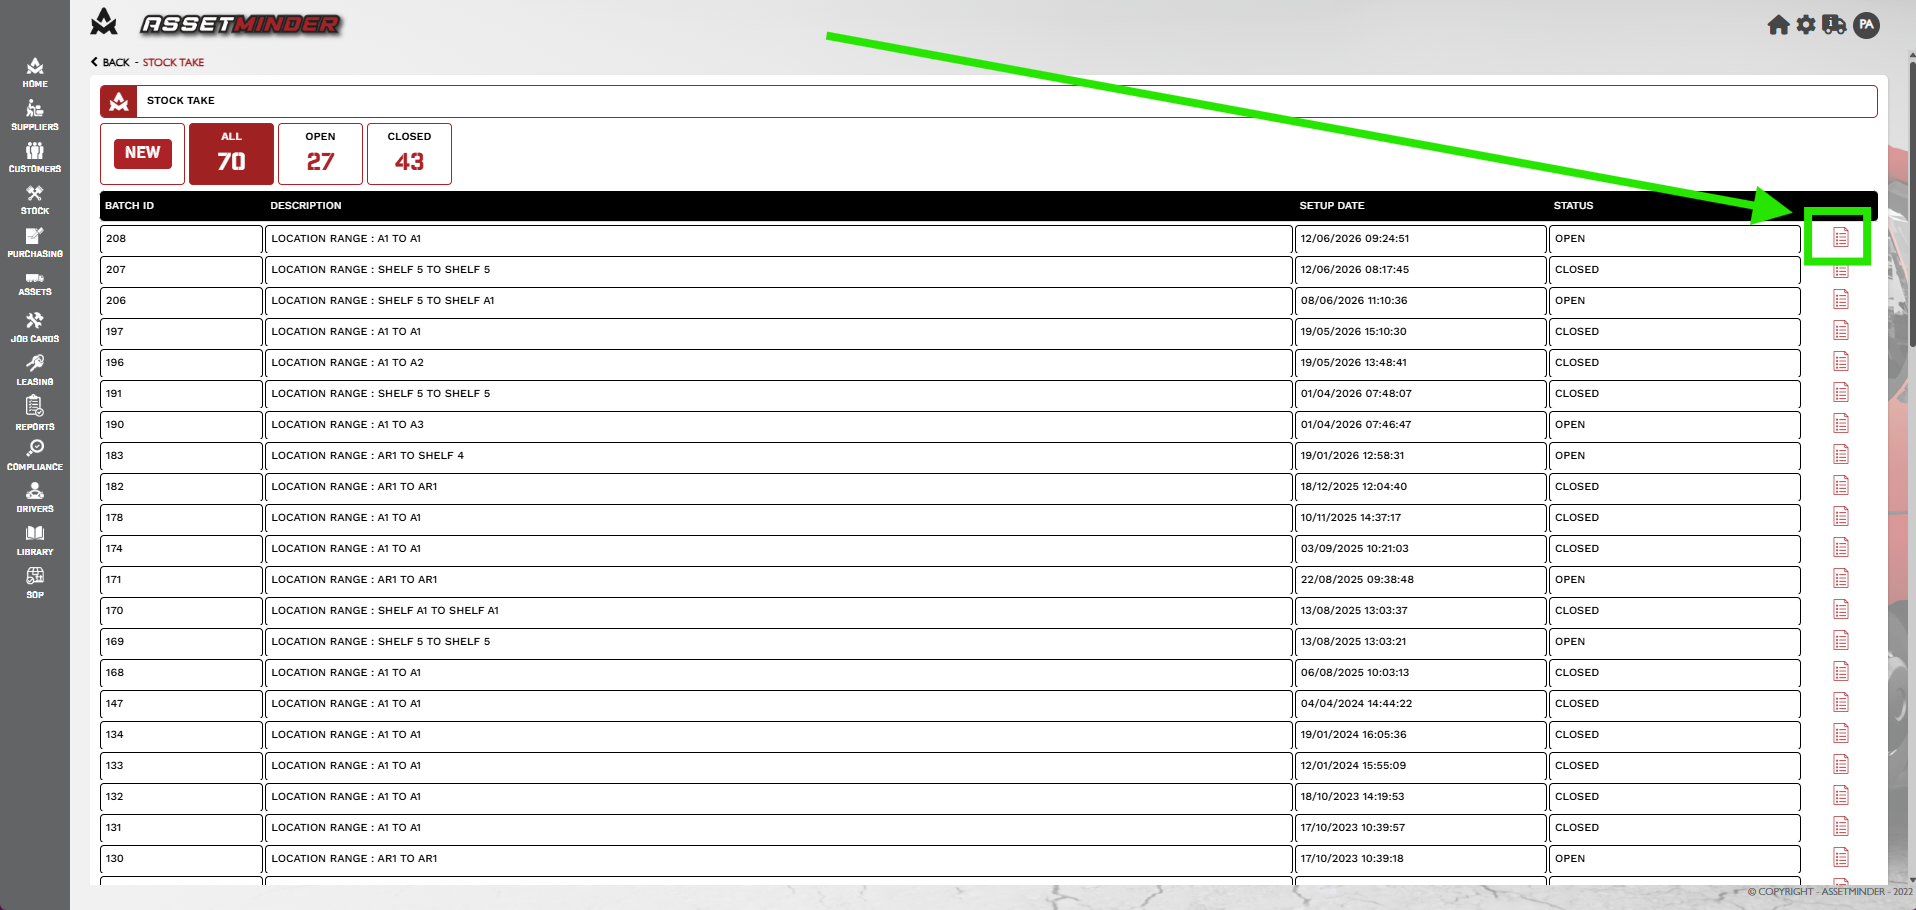
7. Click on the icon to open the stocktake report.
8. Click INTEGRATE BATCH.
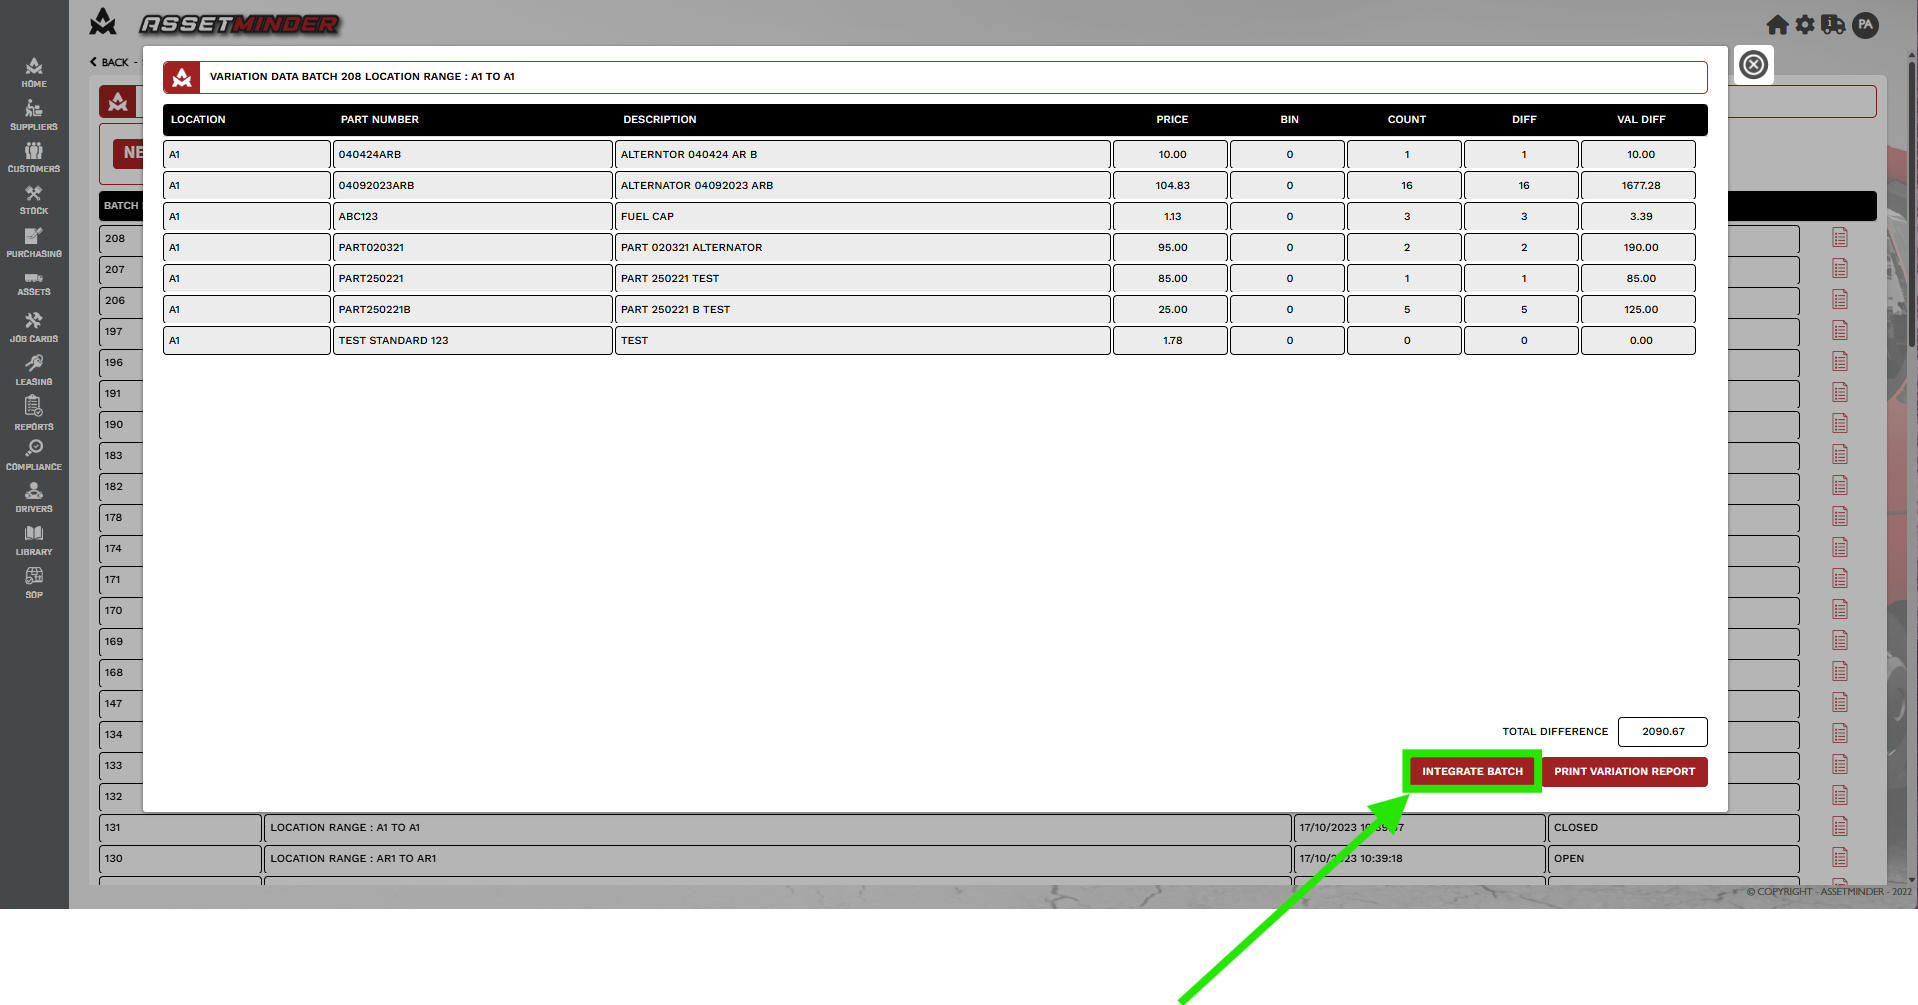
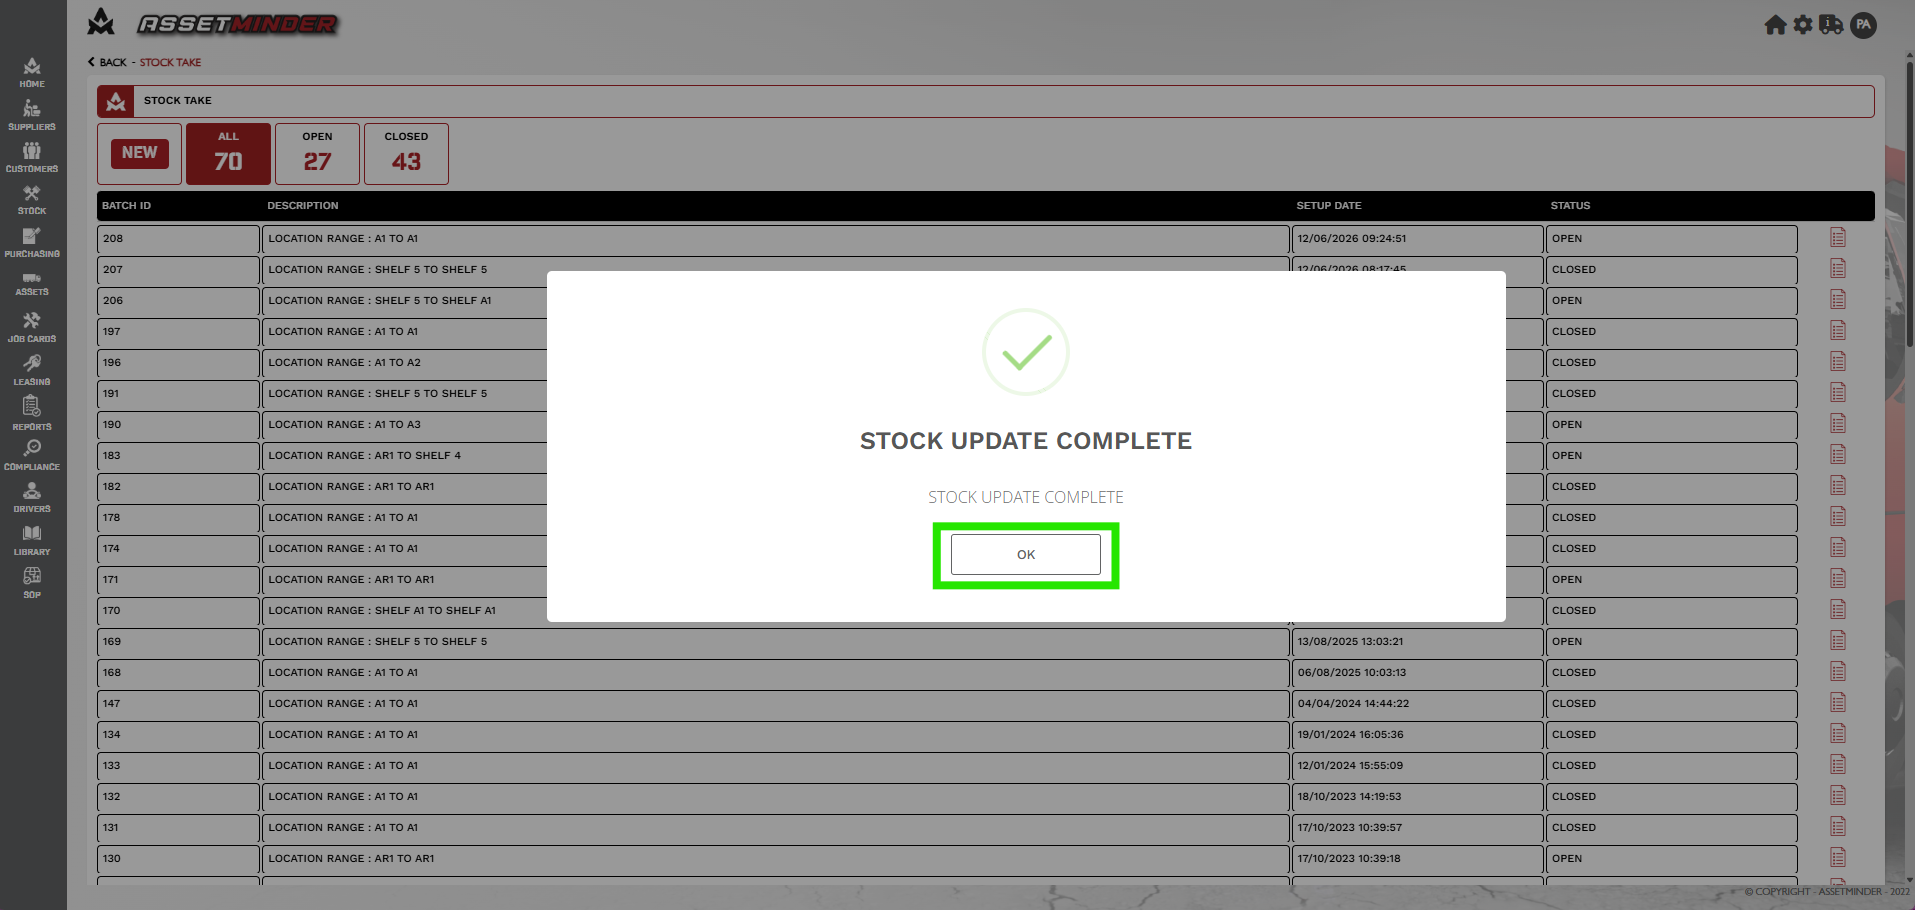
10. A message will appear ‘STOCK UPDATE COMPLETE’. Click OK.
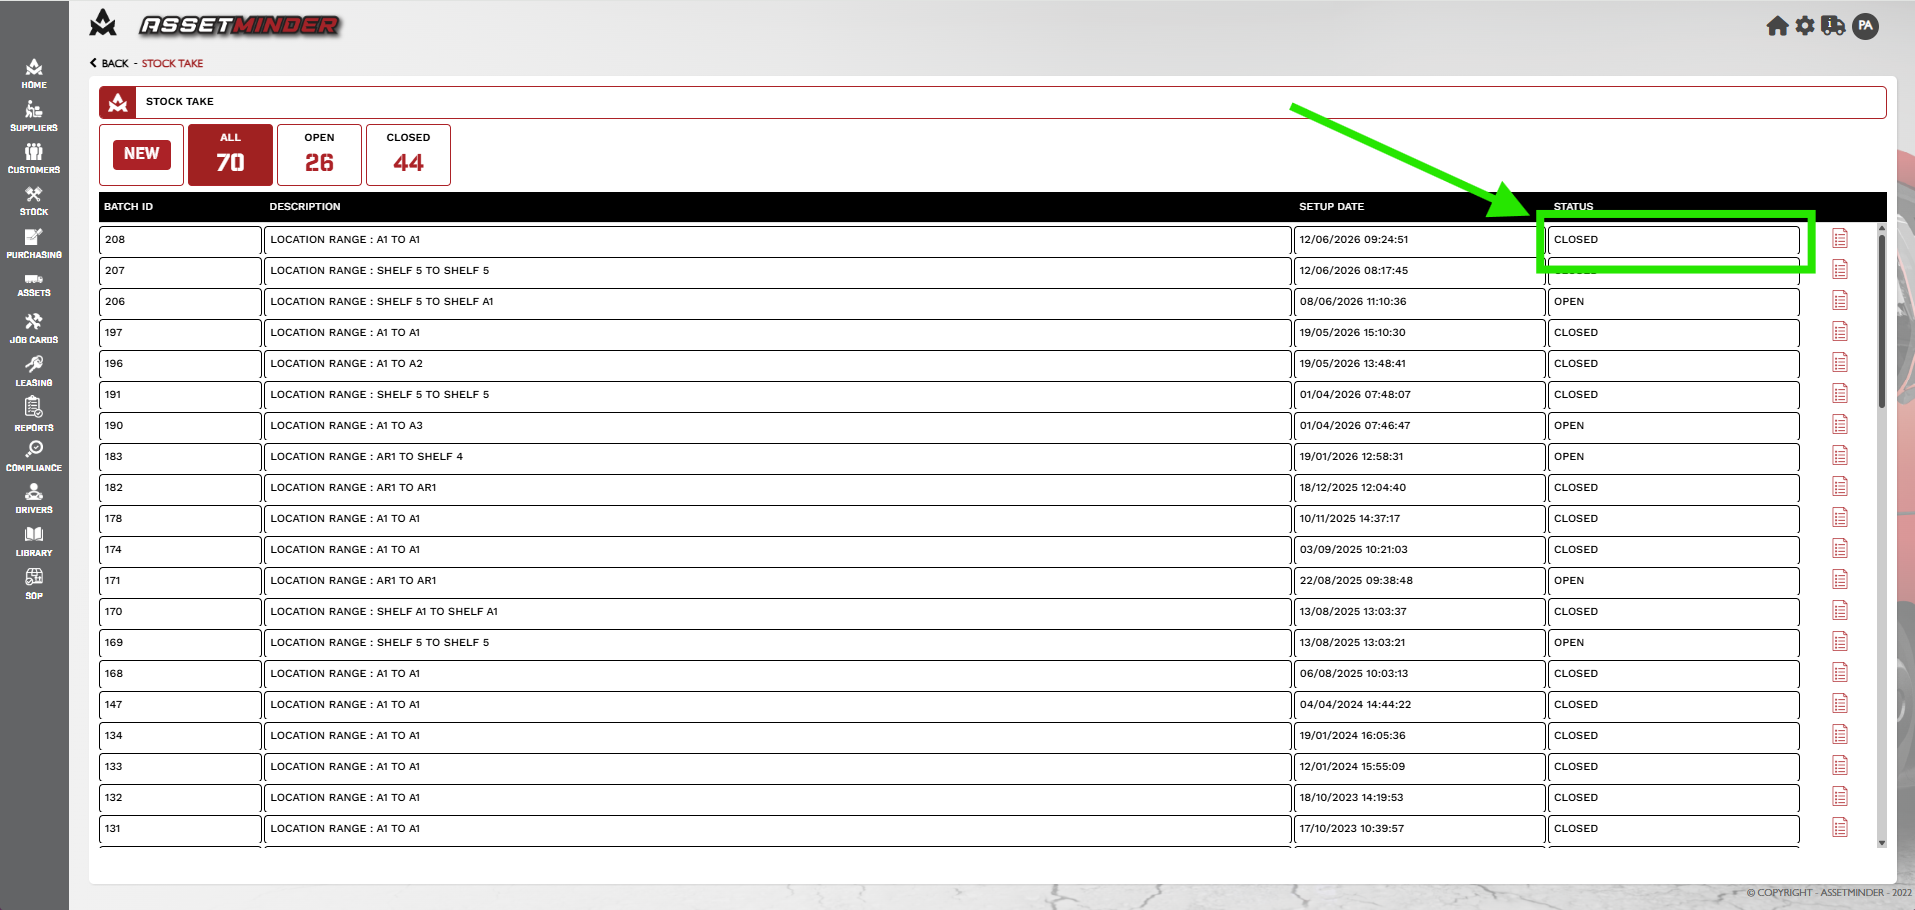
11. The stocktake will now appear in the Closed section.
Paul Murray
Comments