Overview
Inspections are a list of tasks that you complete in order. They could be driver checklists, standardised list of repair activities, procedures, or safety checks. The idea is to build it once and use it many times. Inspections are linked to the asset type and subtype.
Prerequisites before completing this procedure:
- Create asset types
- Create asset subtypes
Procedure
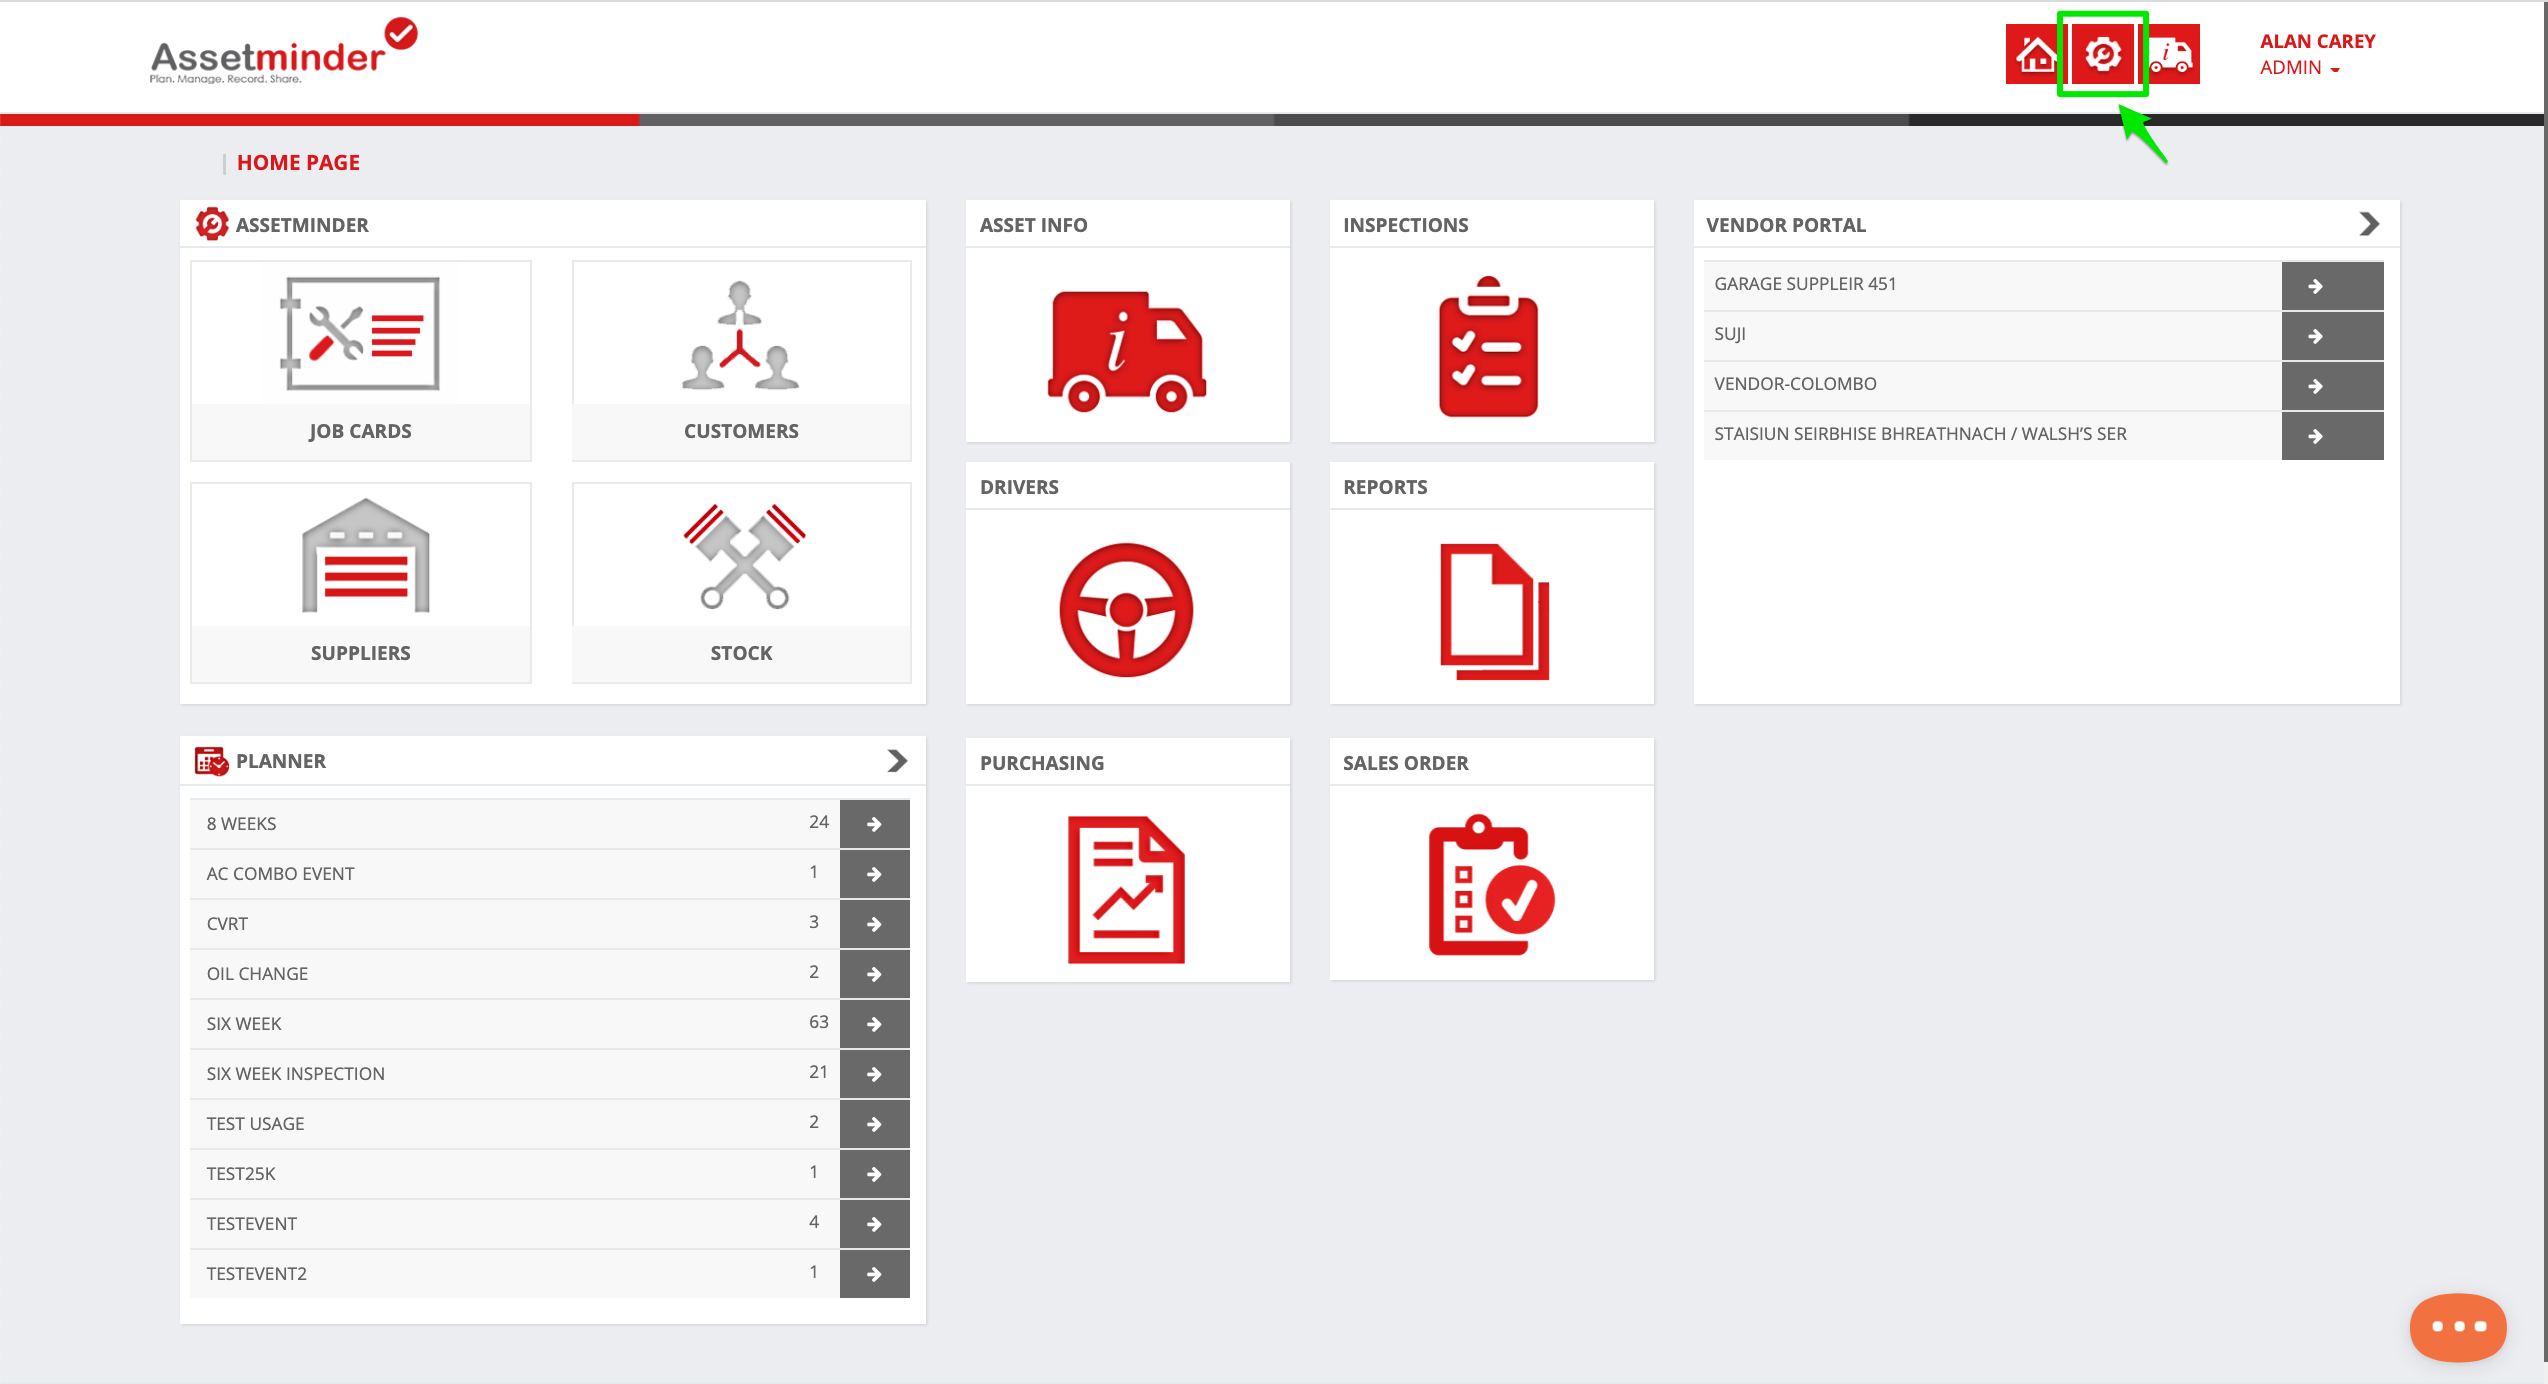
1. To create a new inspection, click the Administrator Settings icon on the home screen
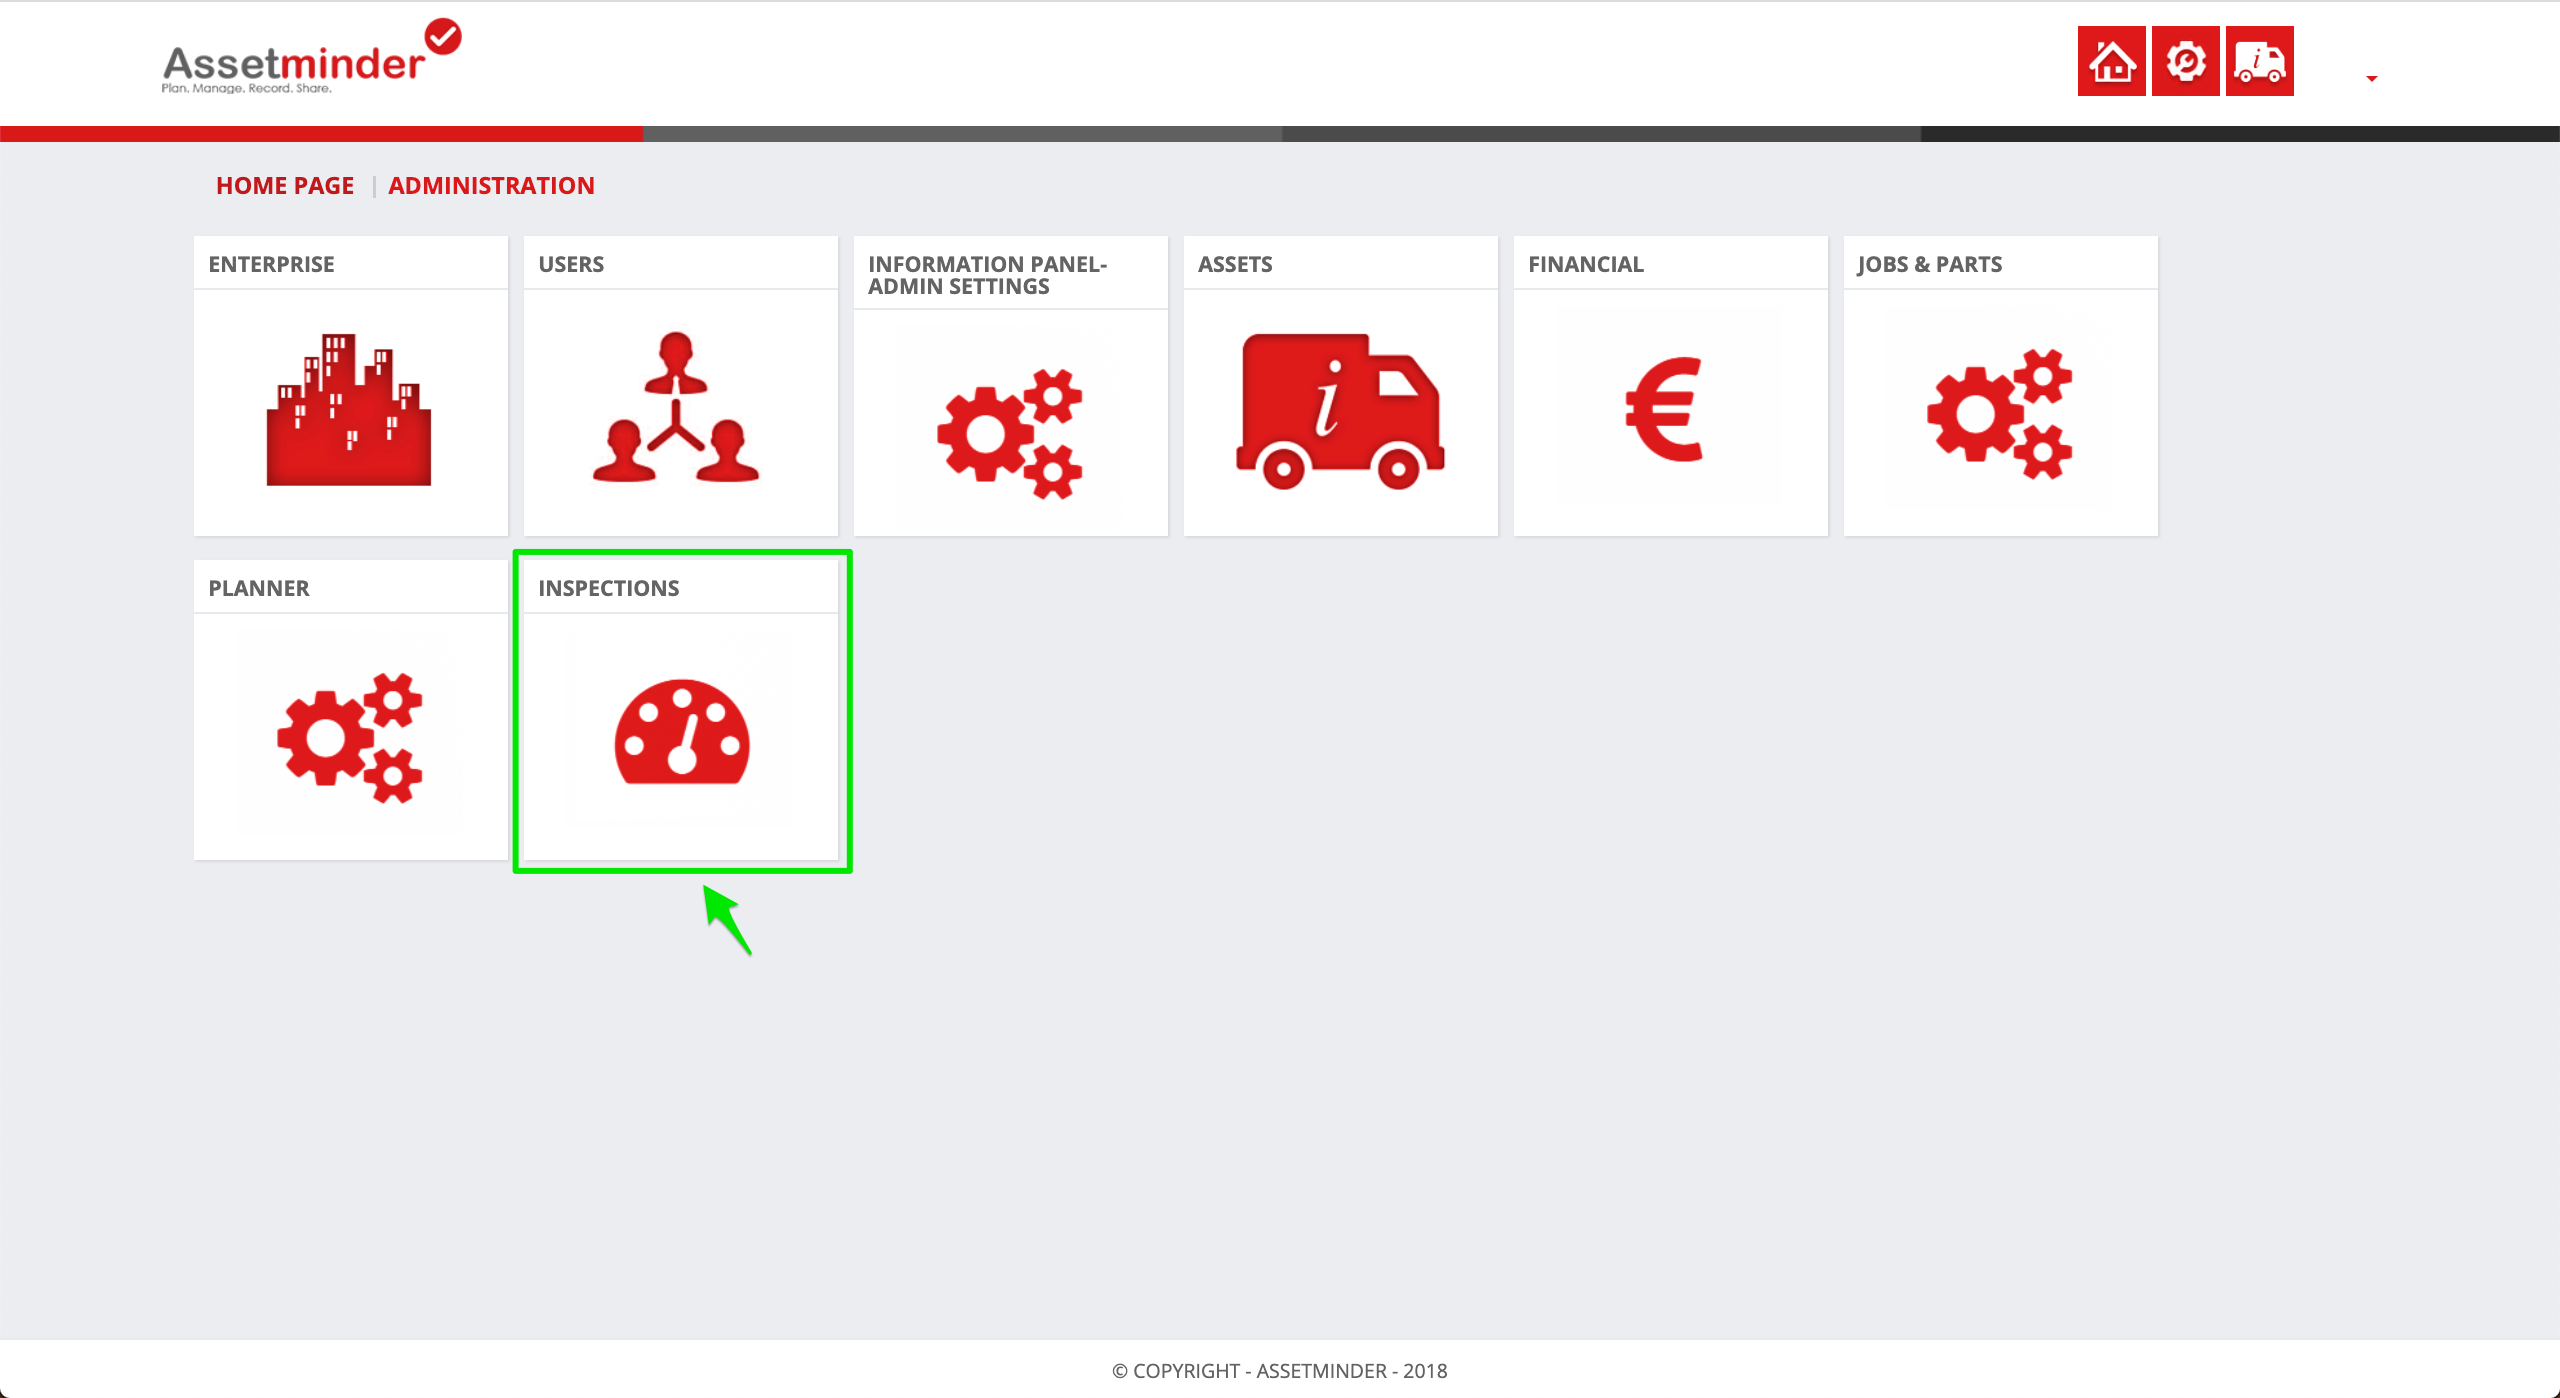
2. Click Inspections
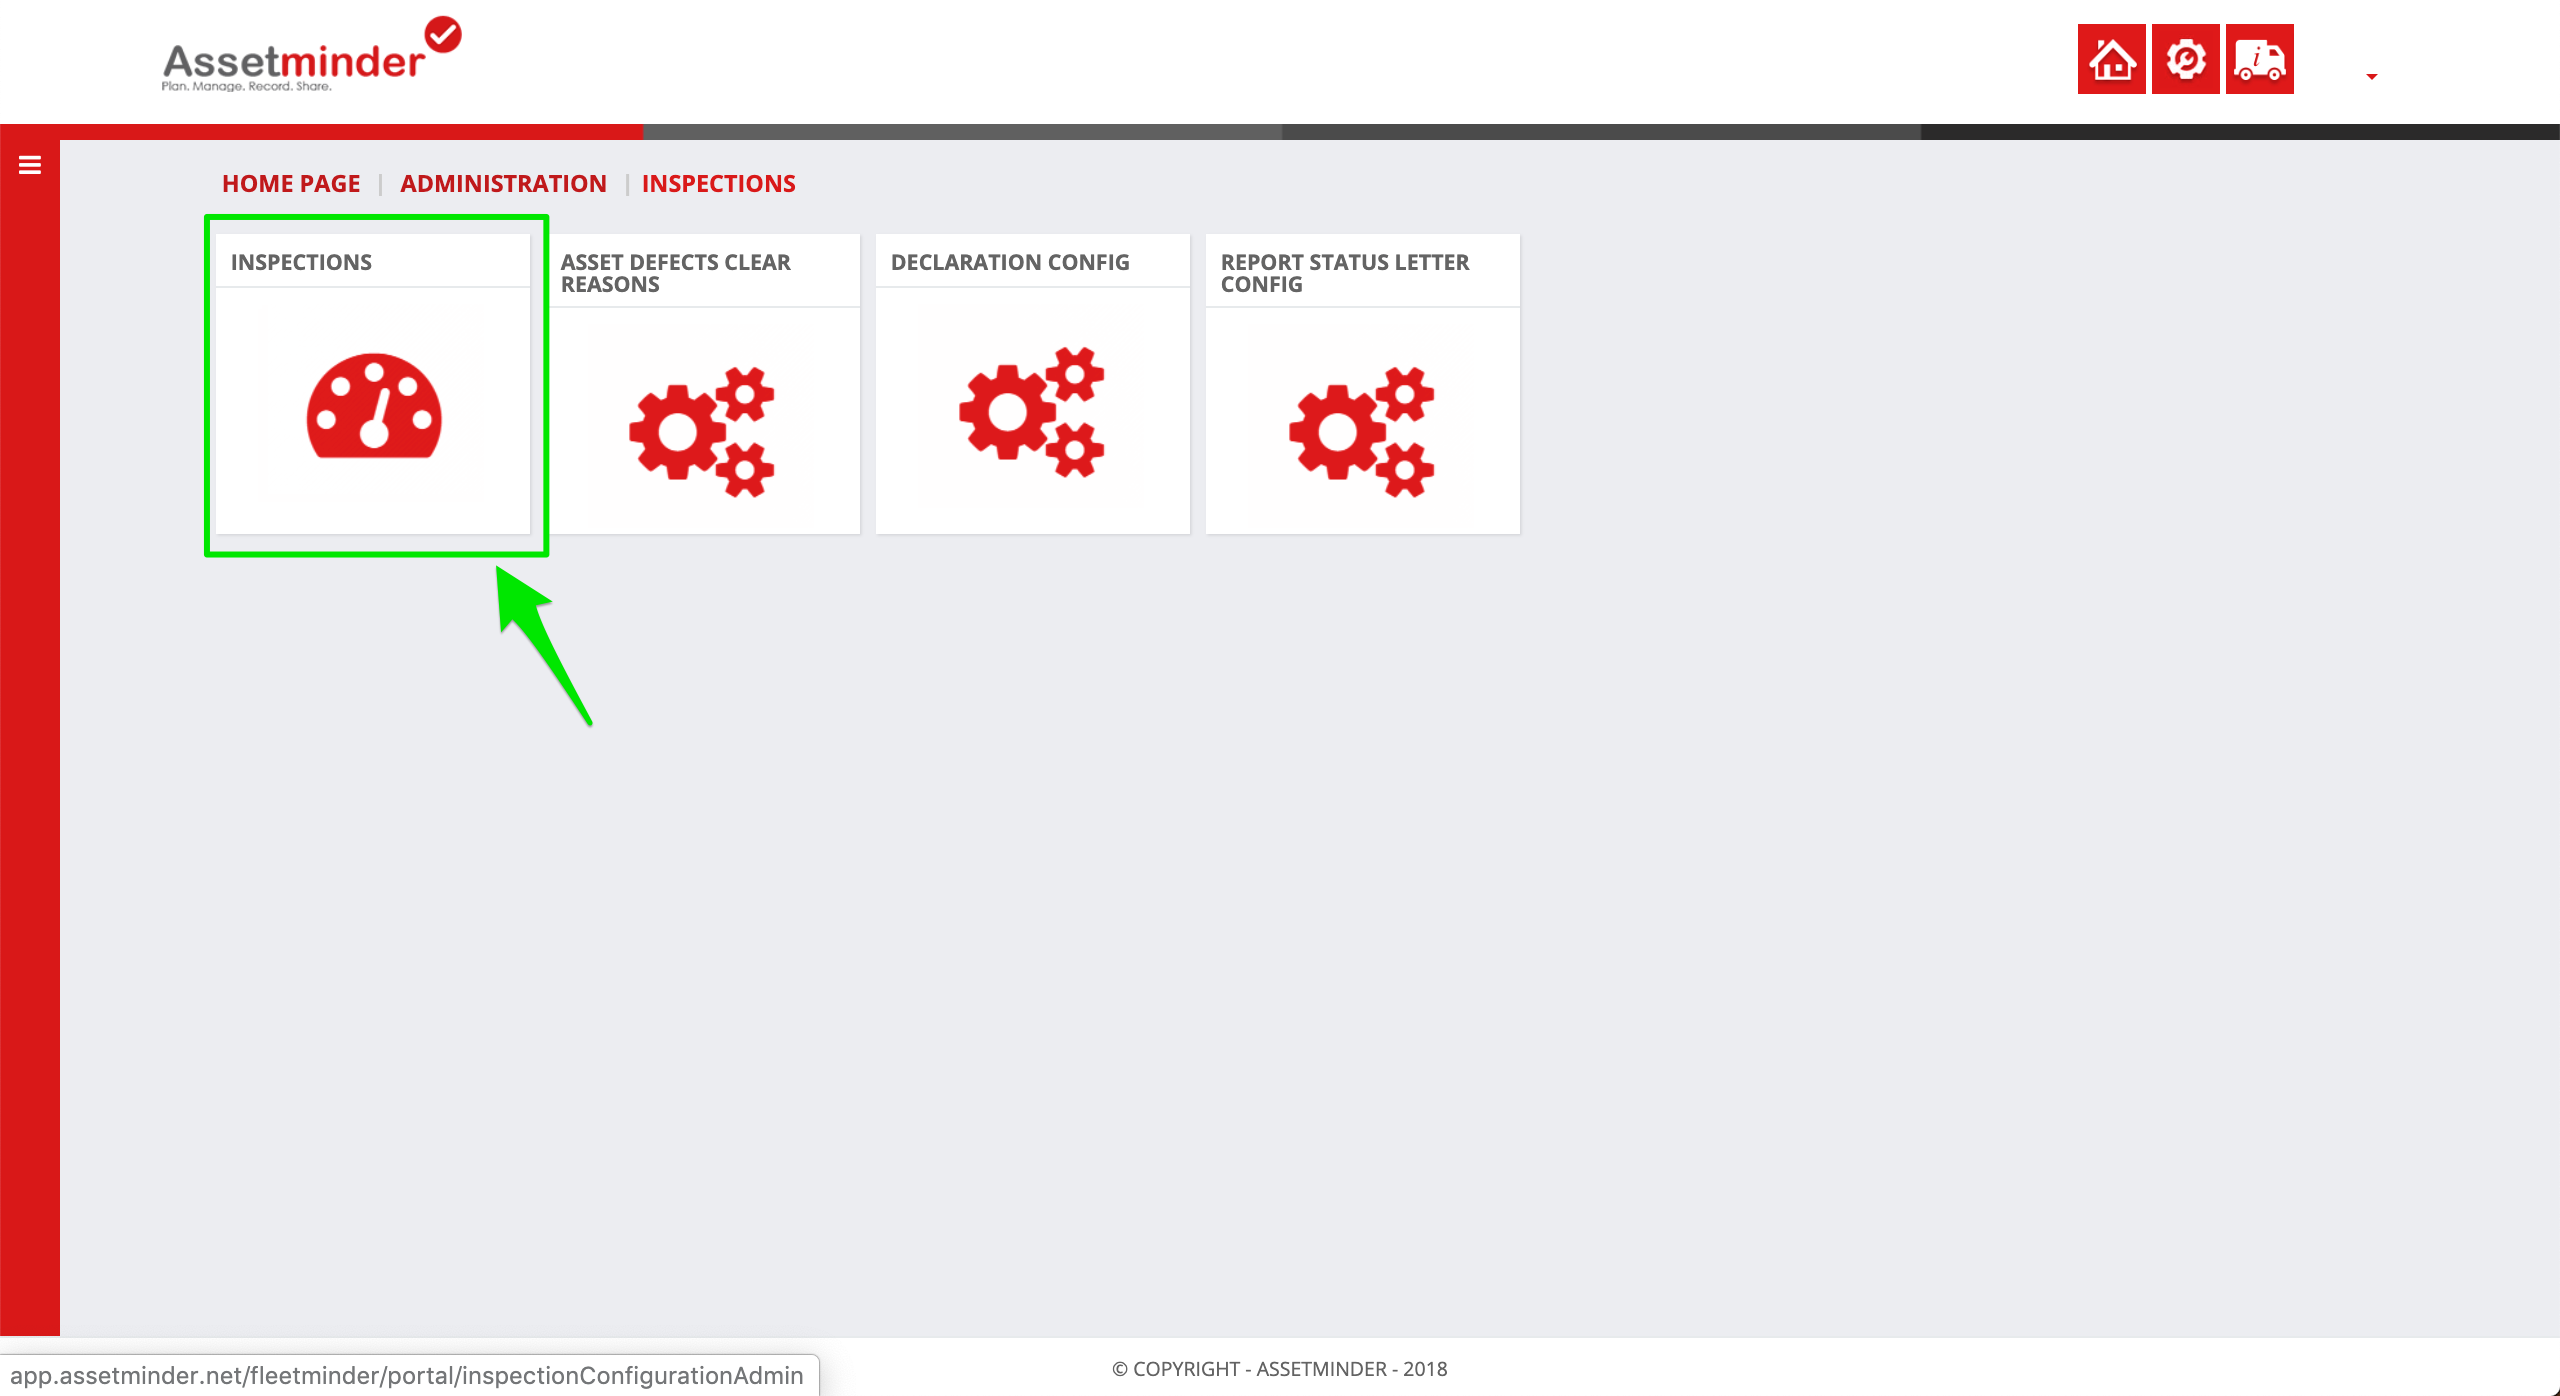
3. Click Inspections again
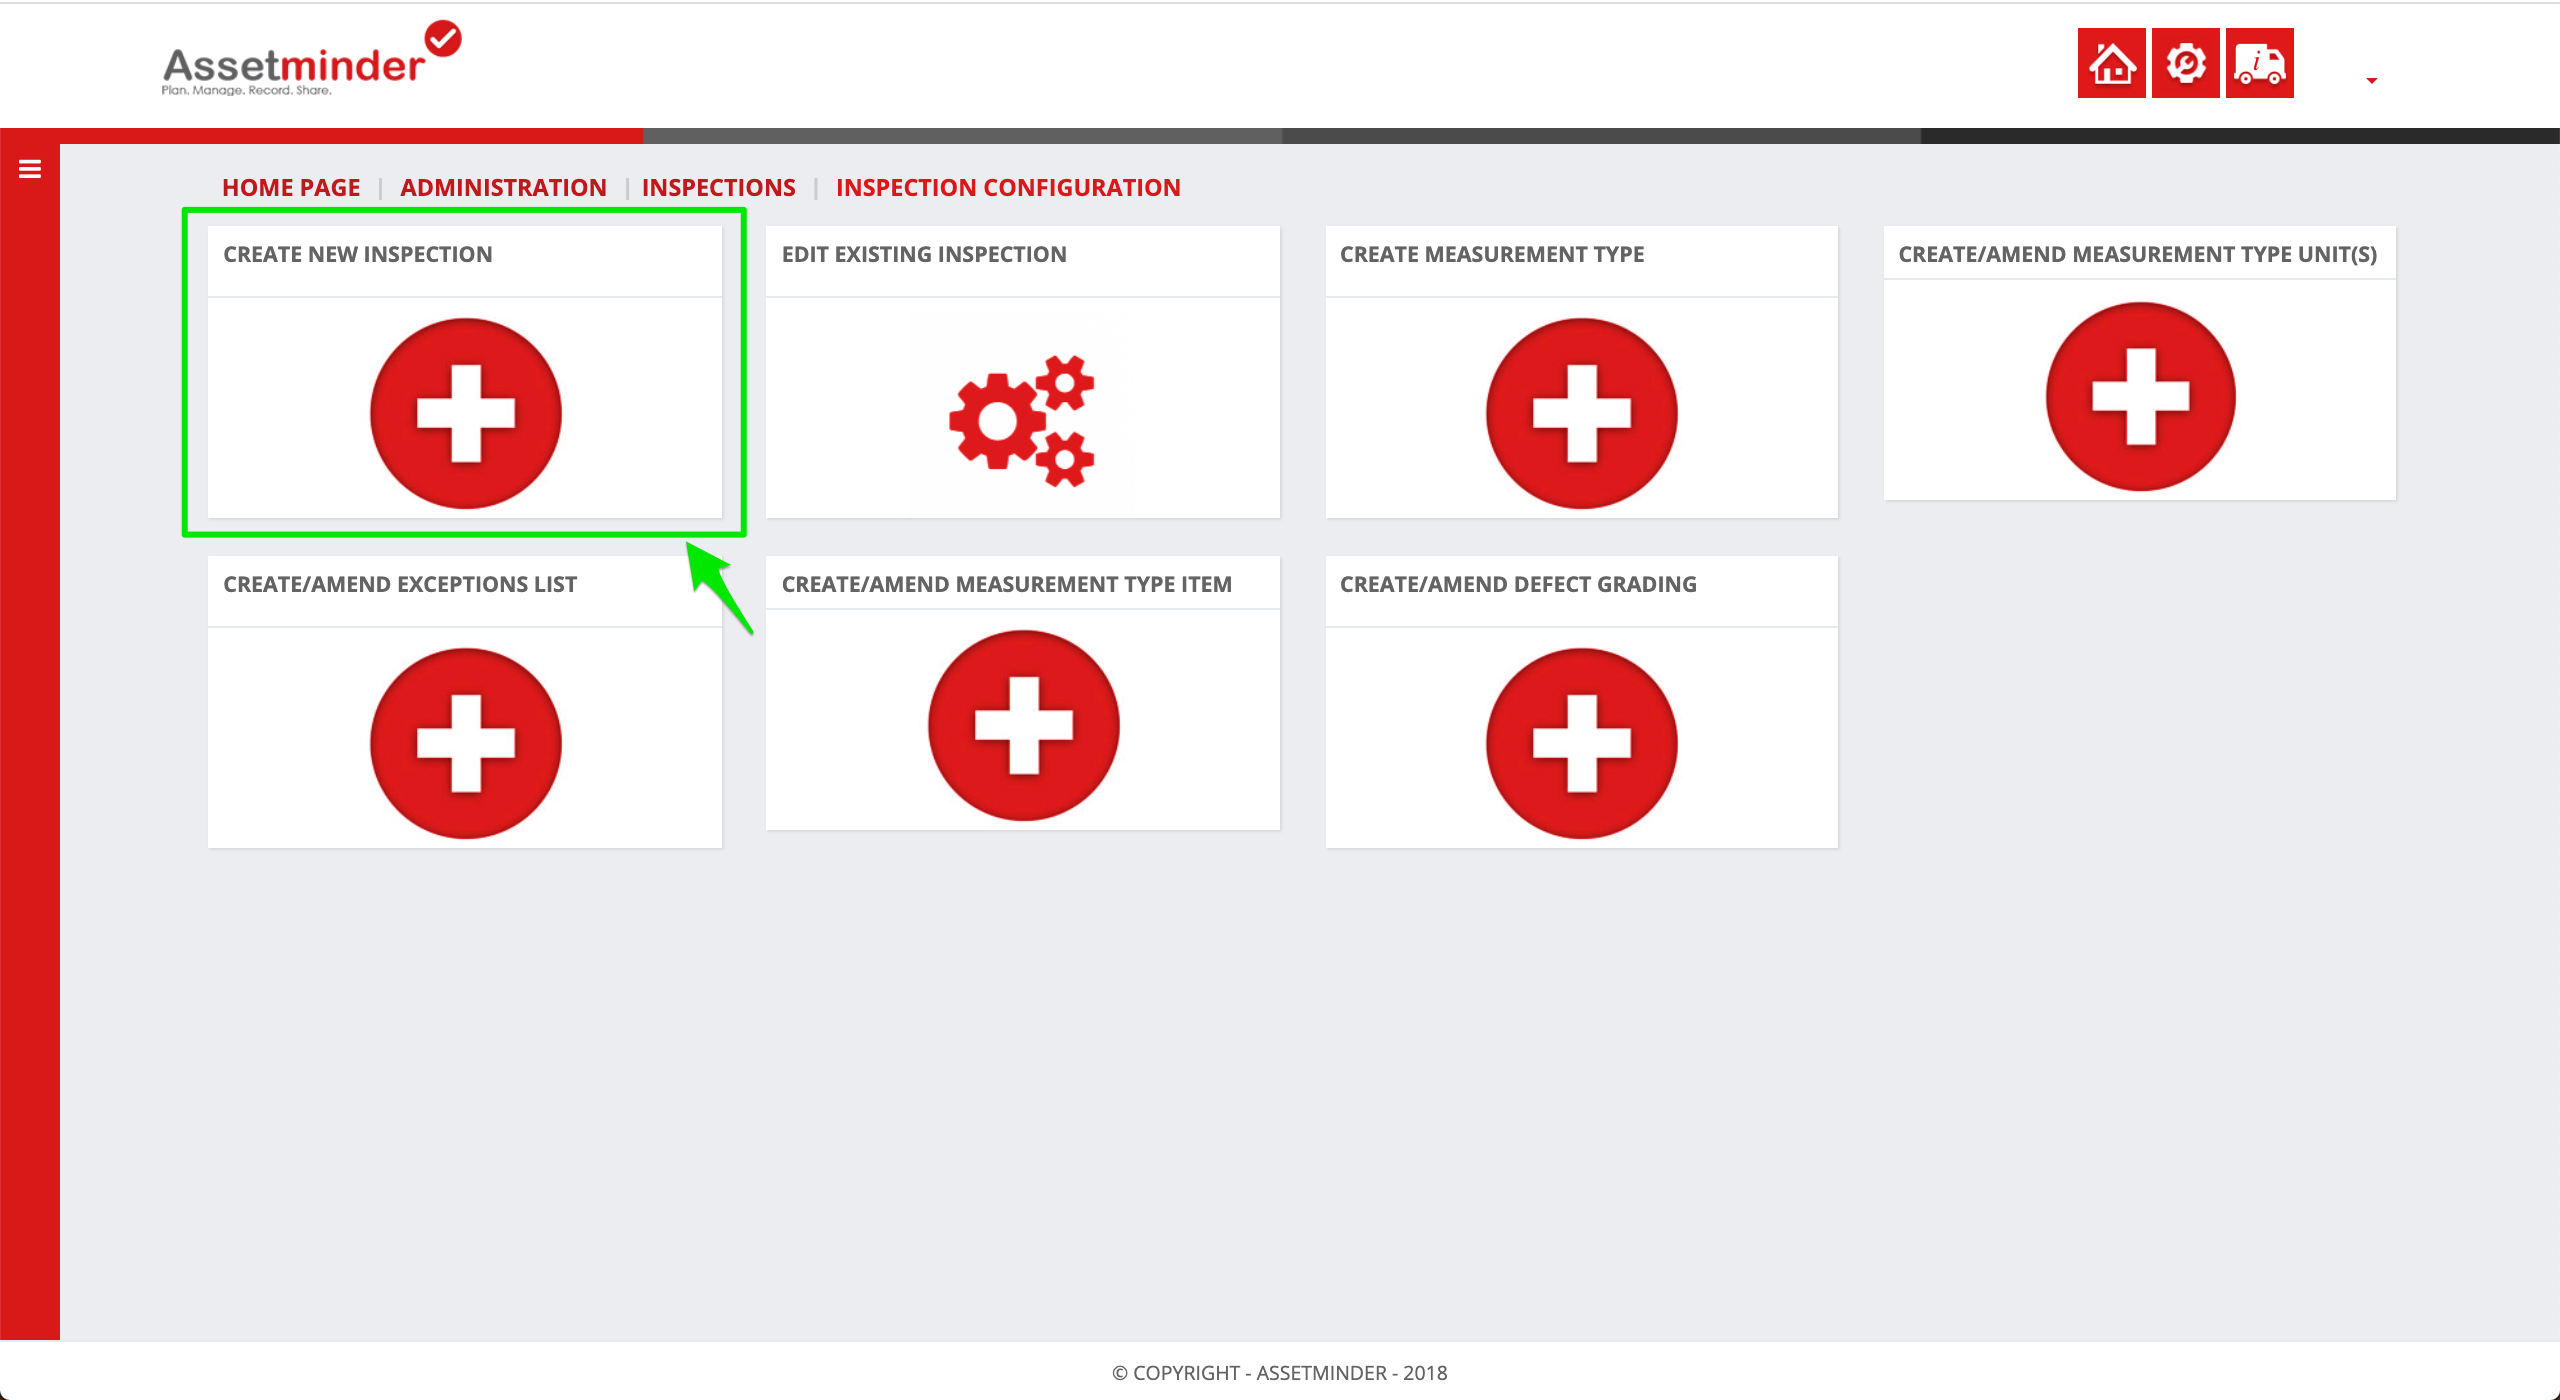
4. Select Create a New Inspection
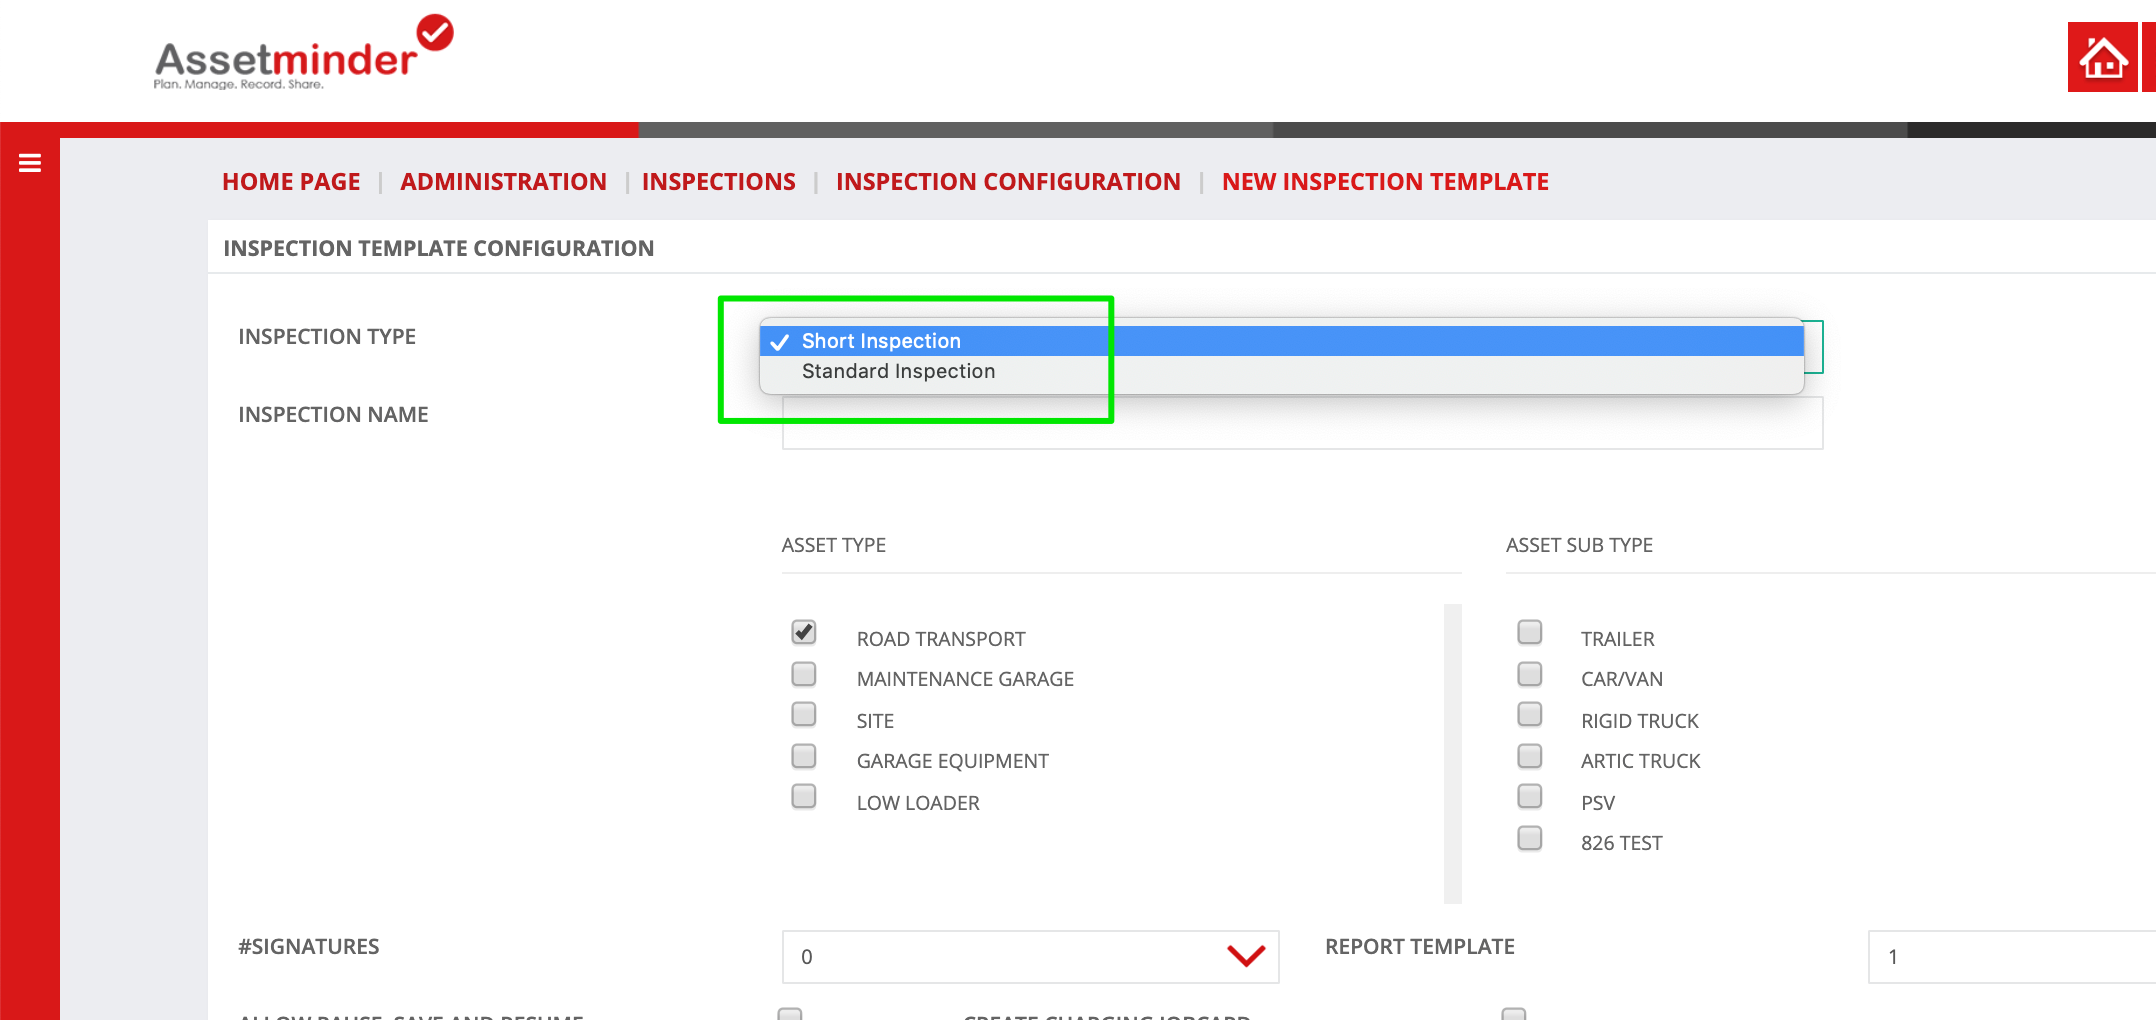
5. First step is to decide whether this is a short or standard inspection:
- Short - High level inspection typically 10-15 items mainly completed by driver
- Standard - Detailed inspections for mechanics typically used for annual checks, overhauls etc
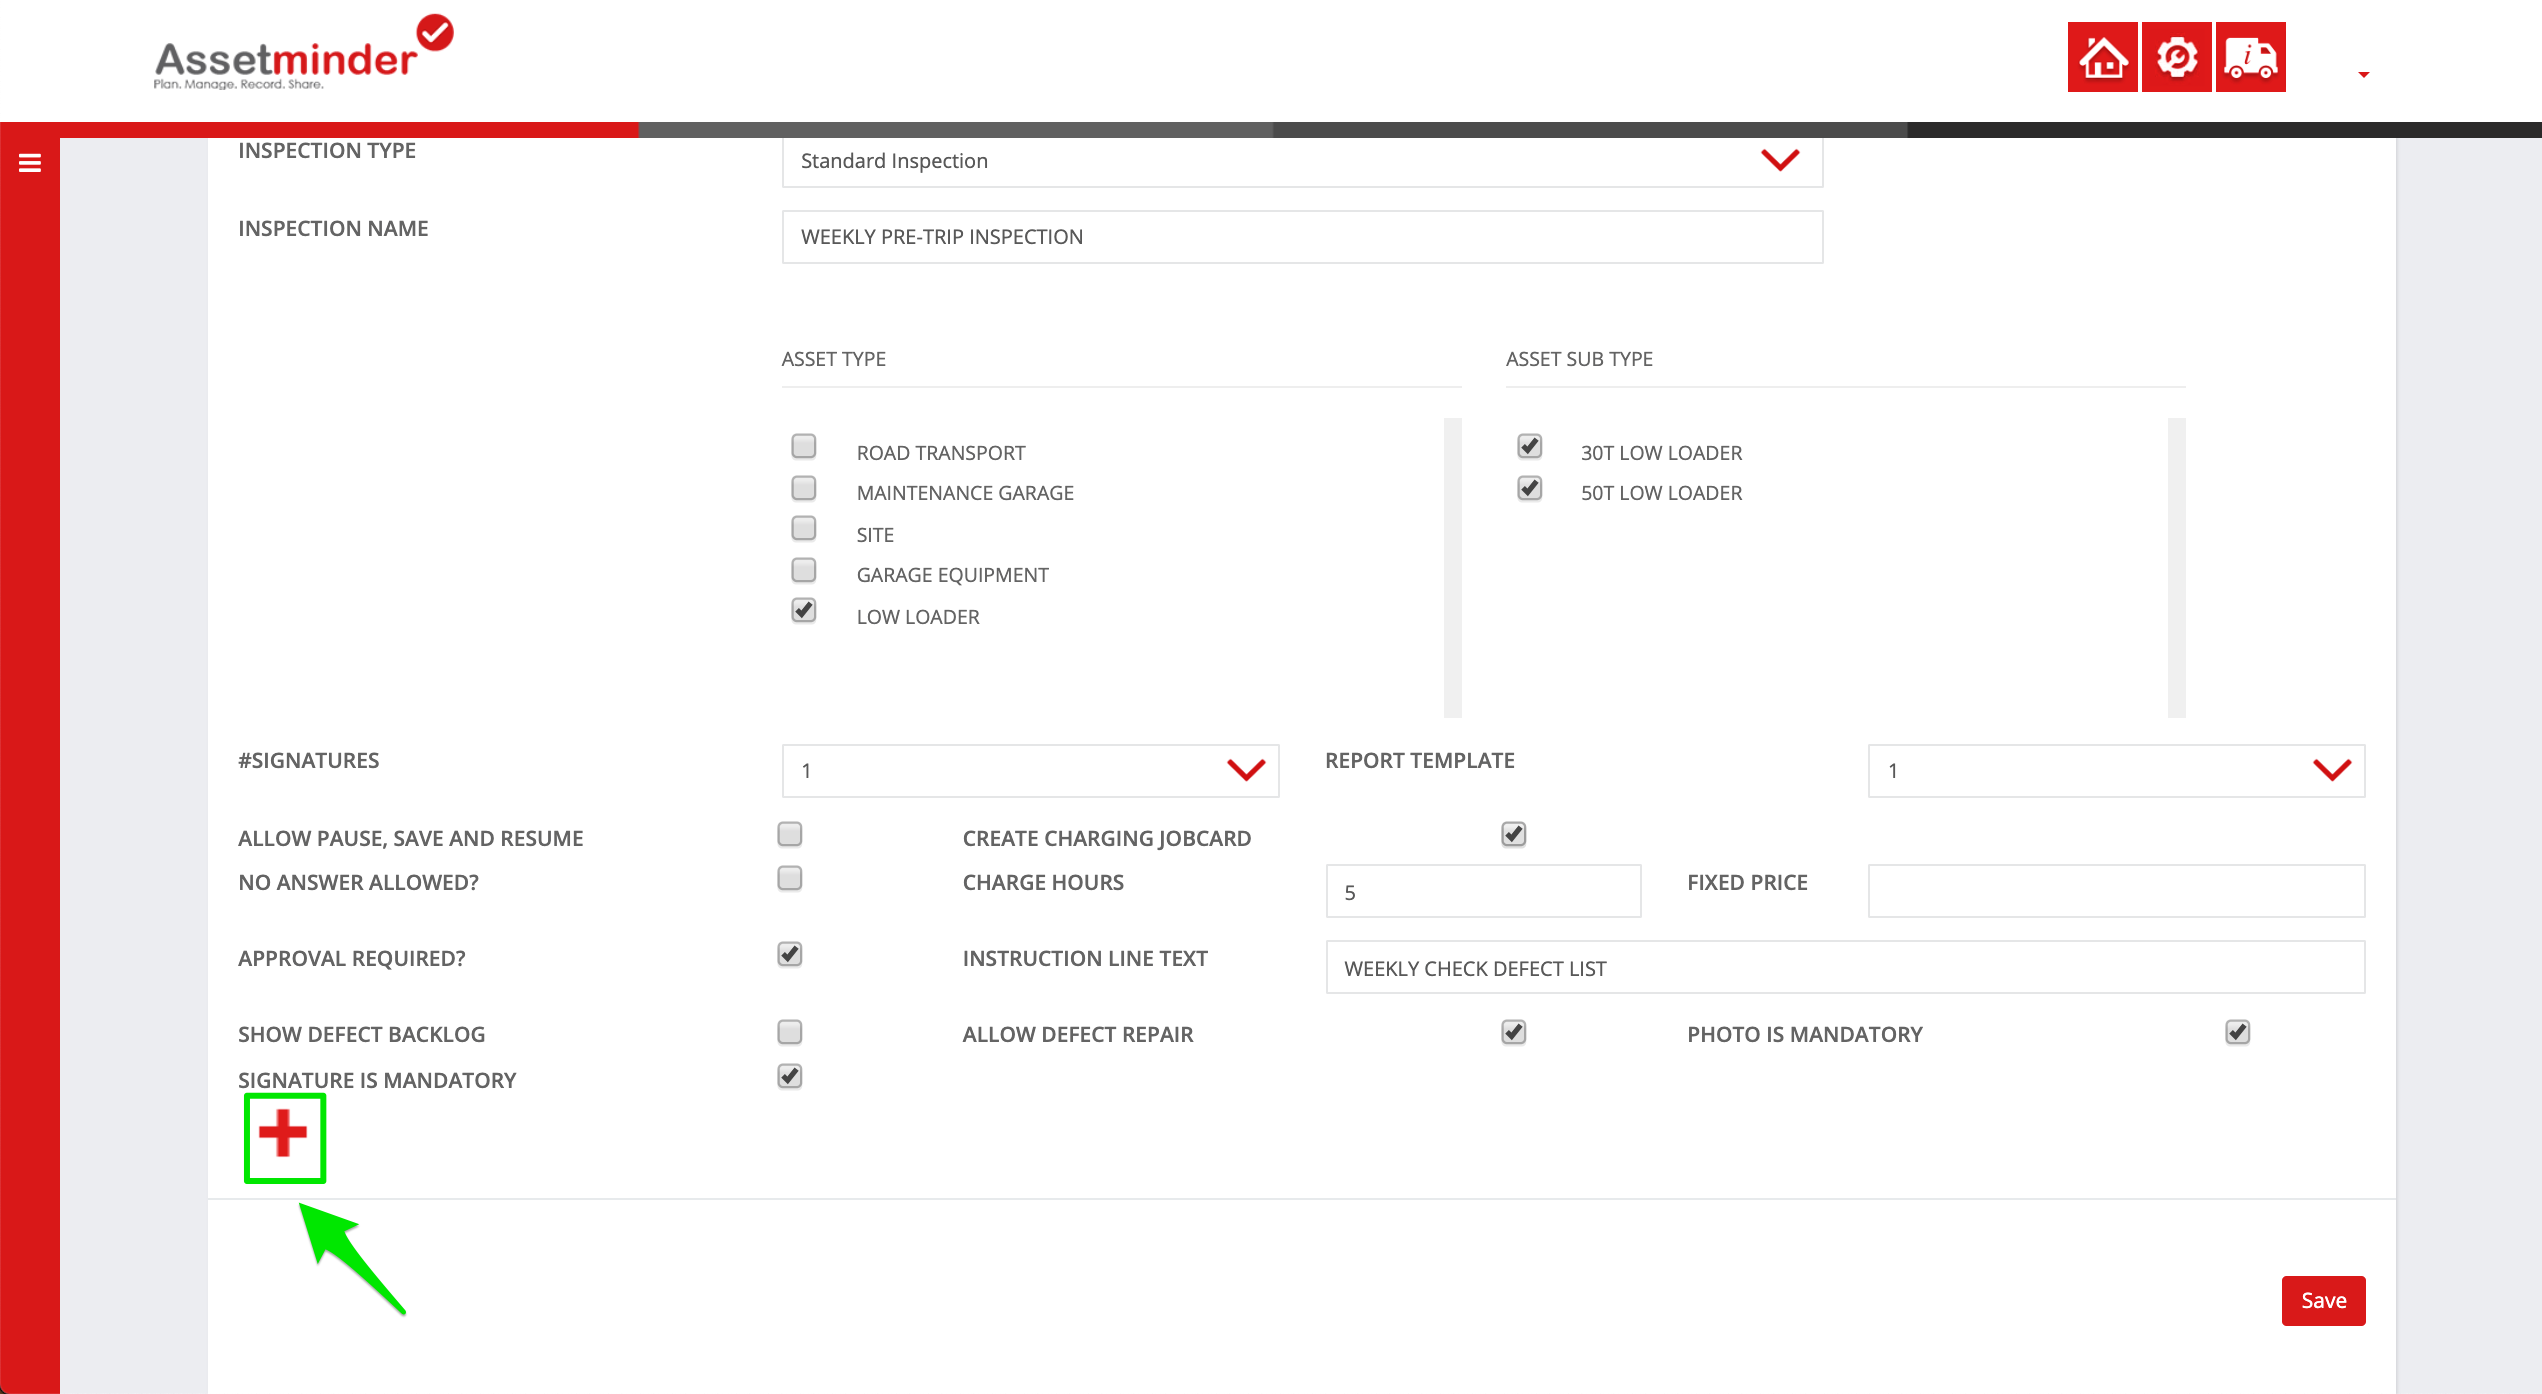
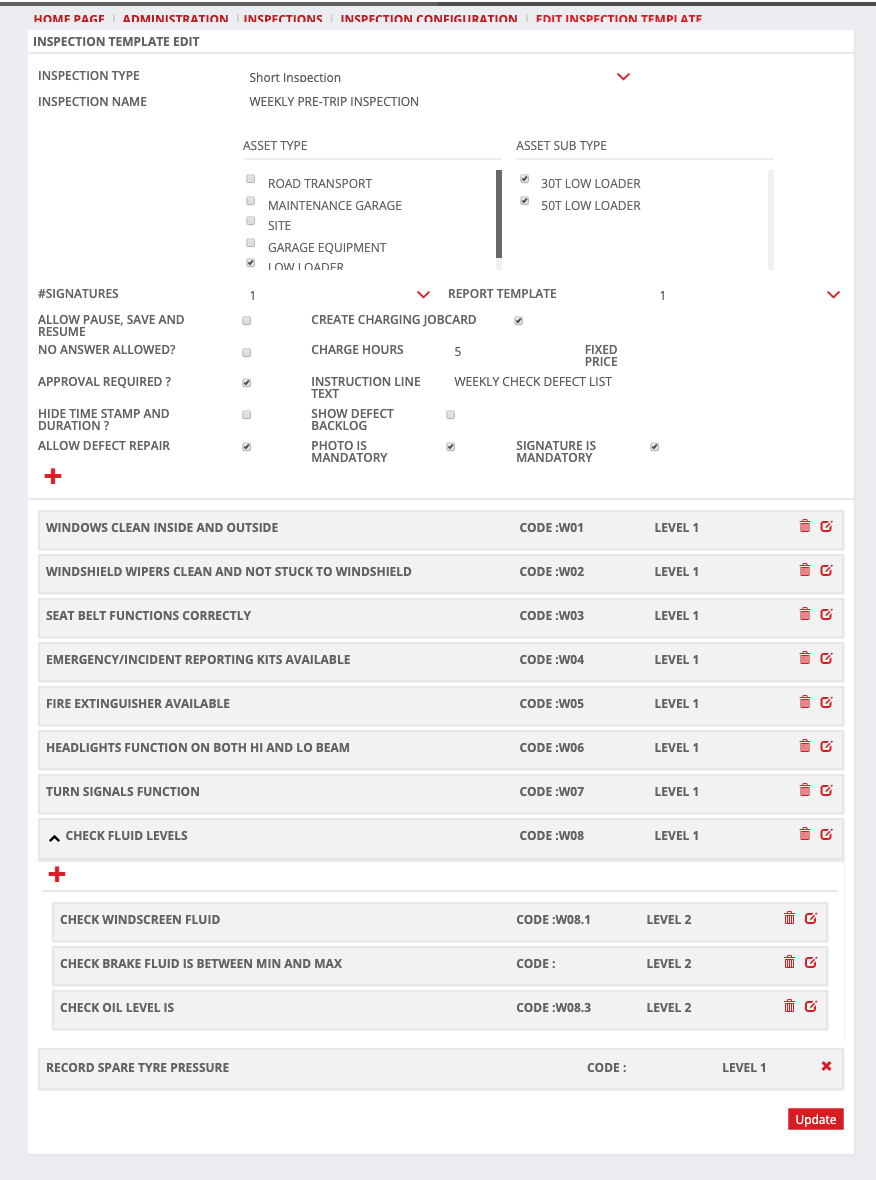
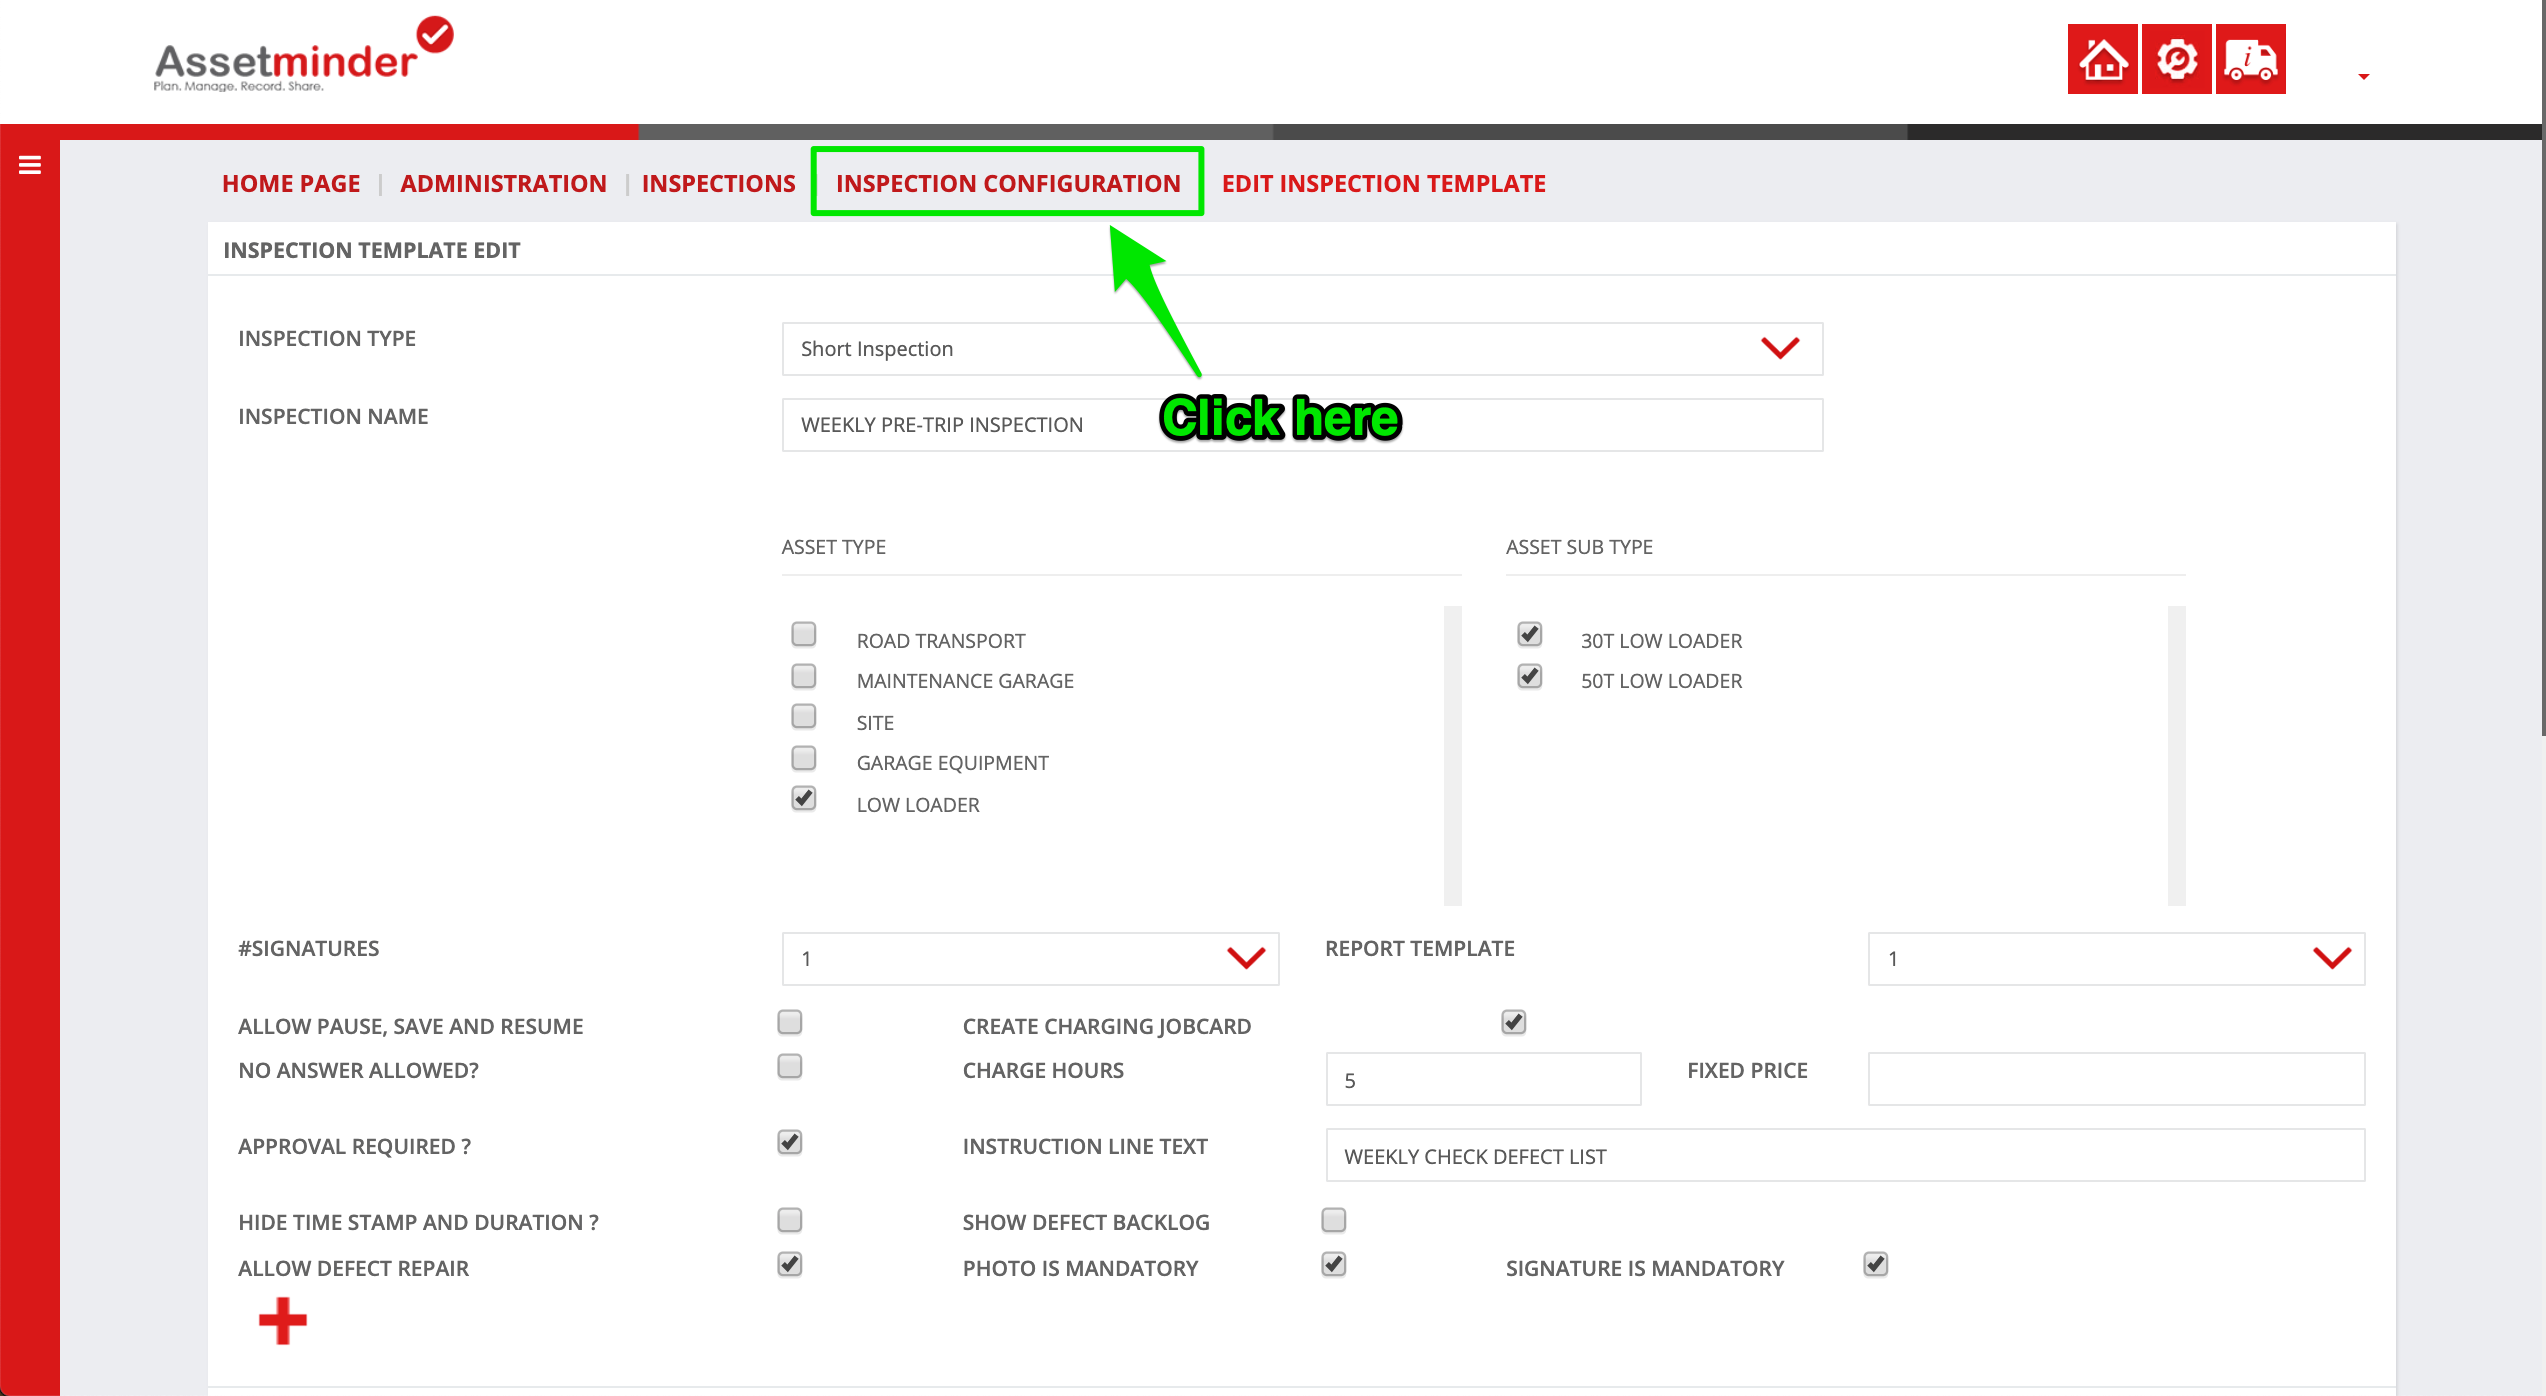
6. Next, assign the inspection a name in the Inspection Name field
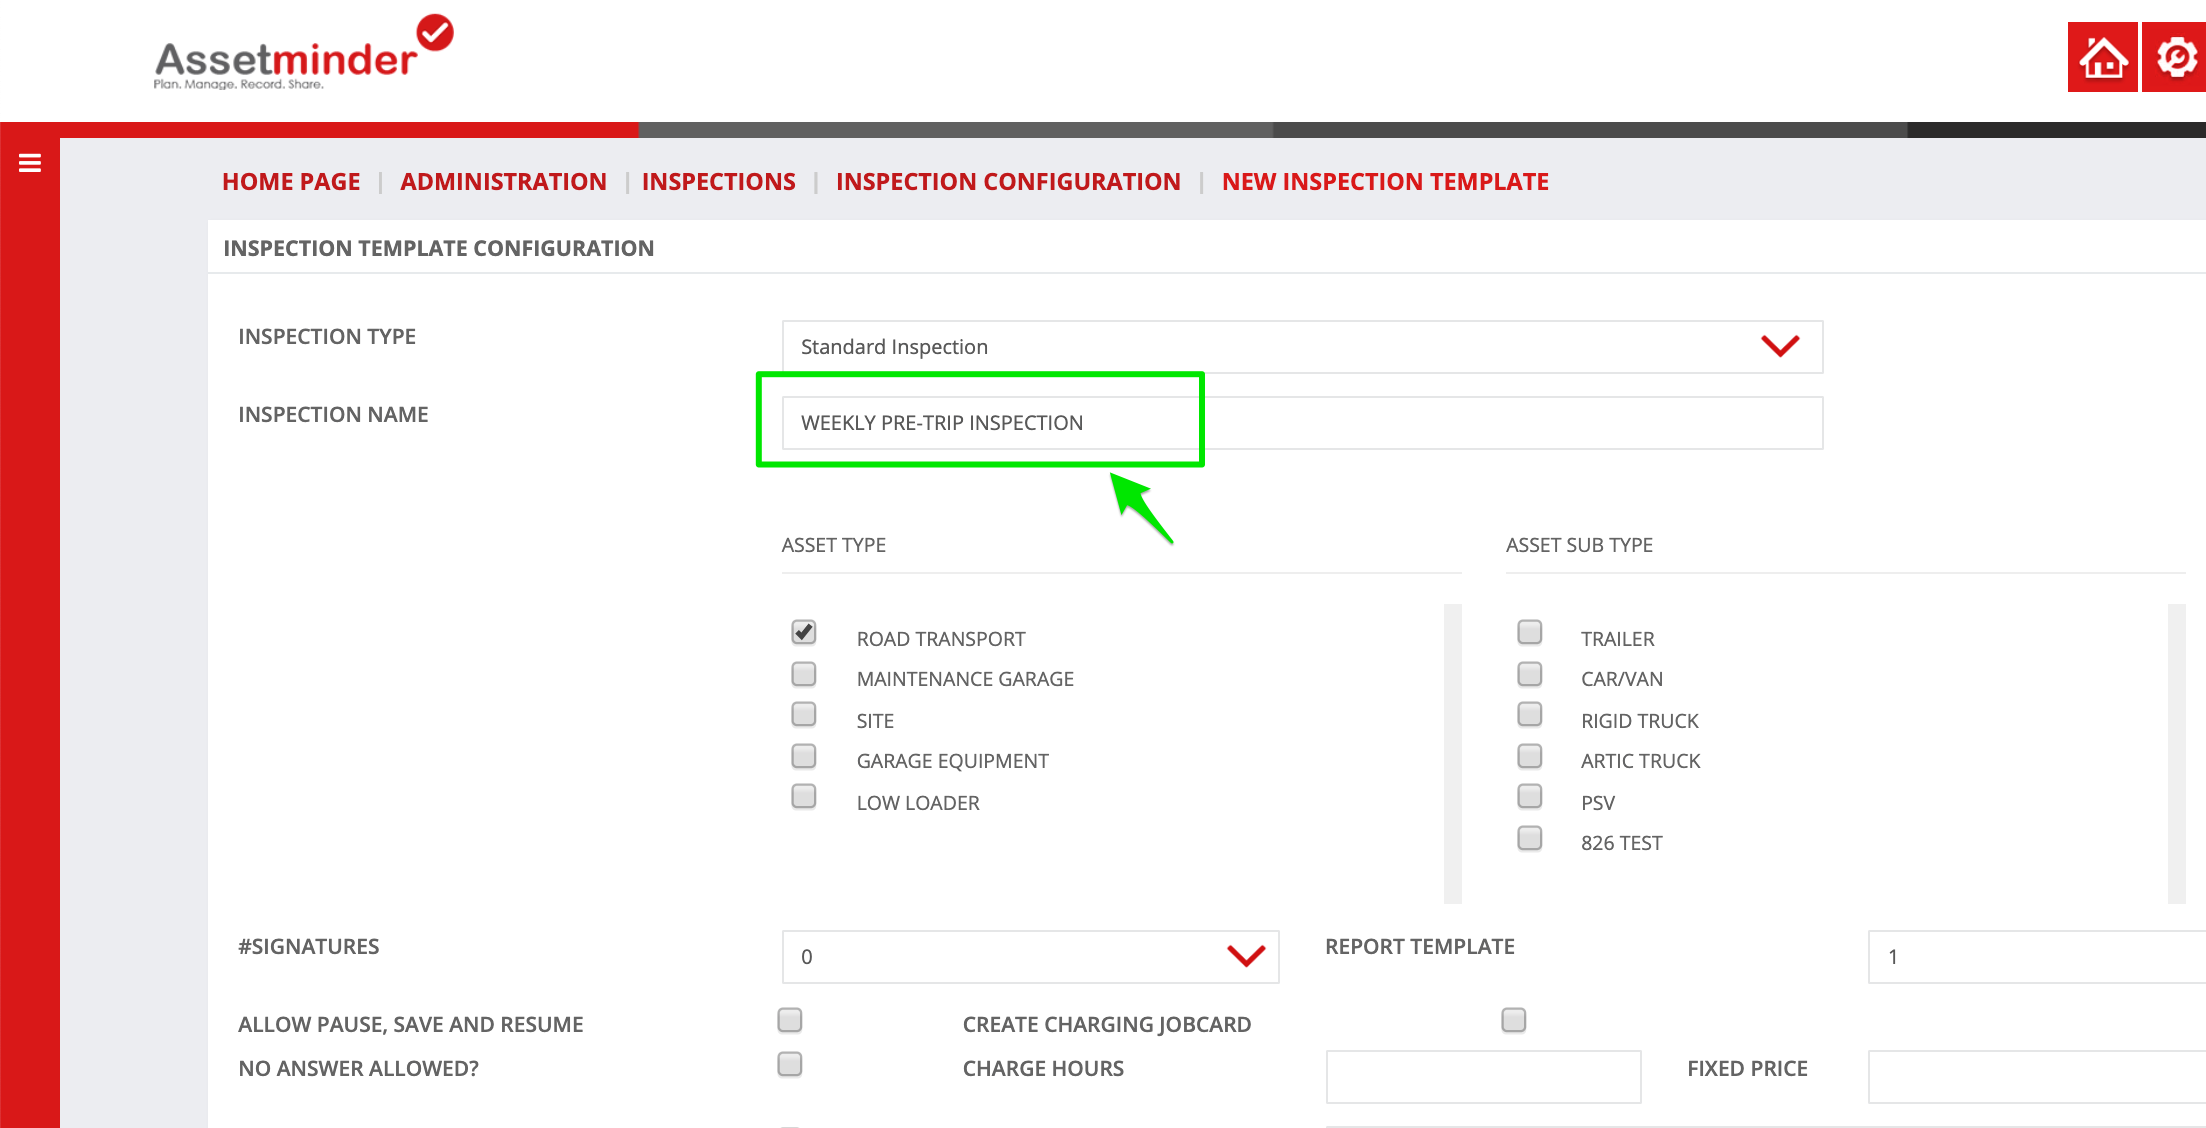
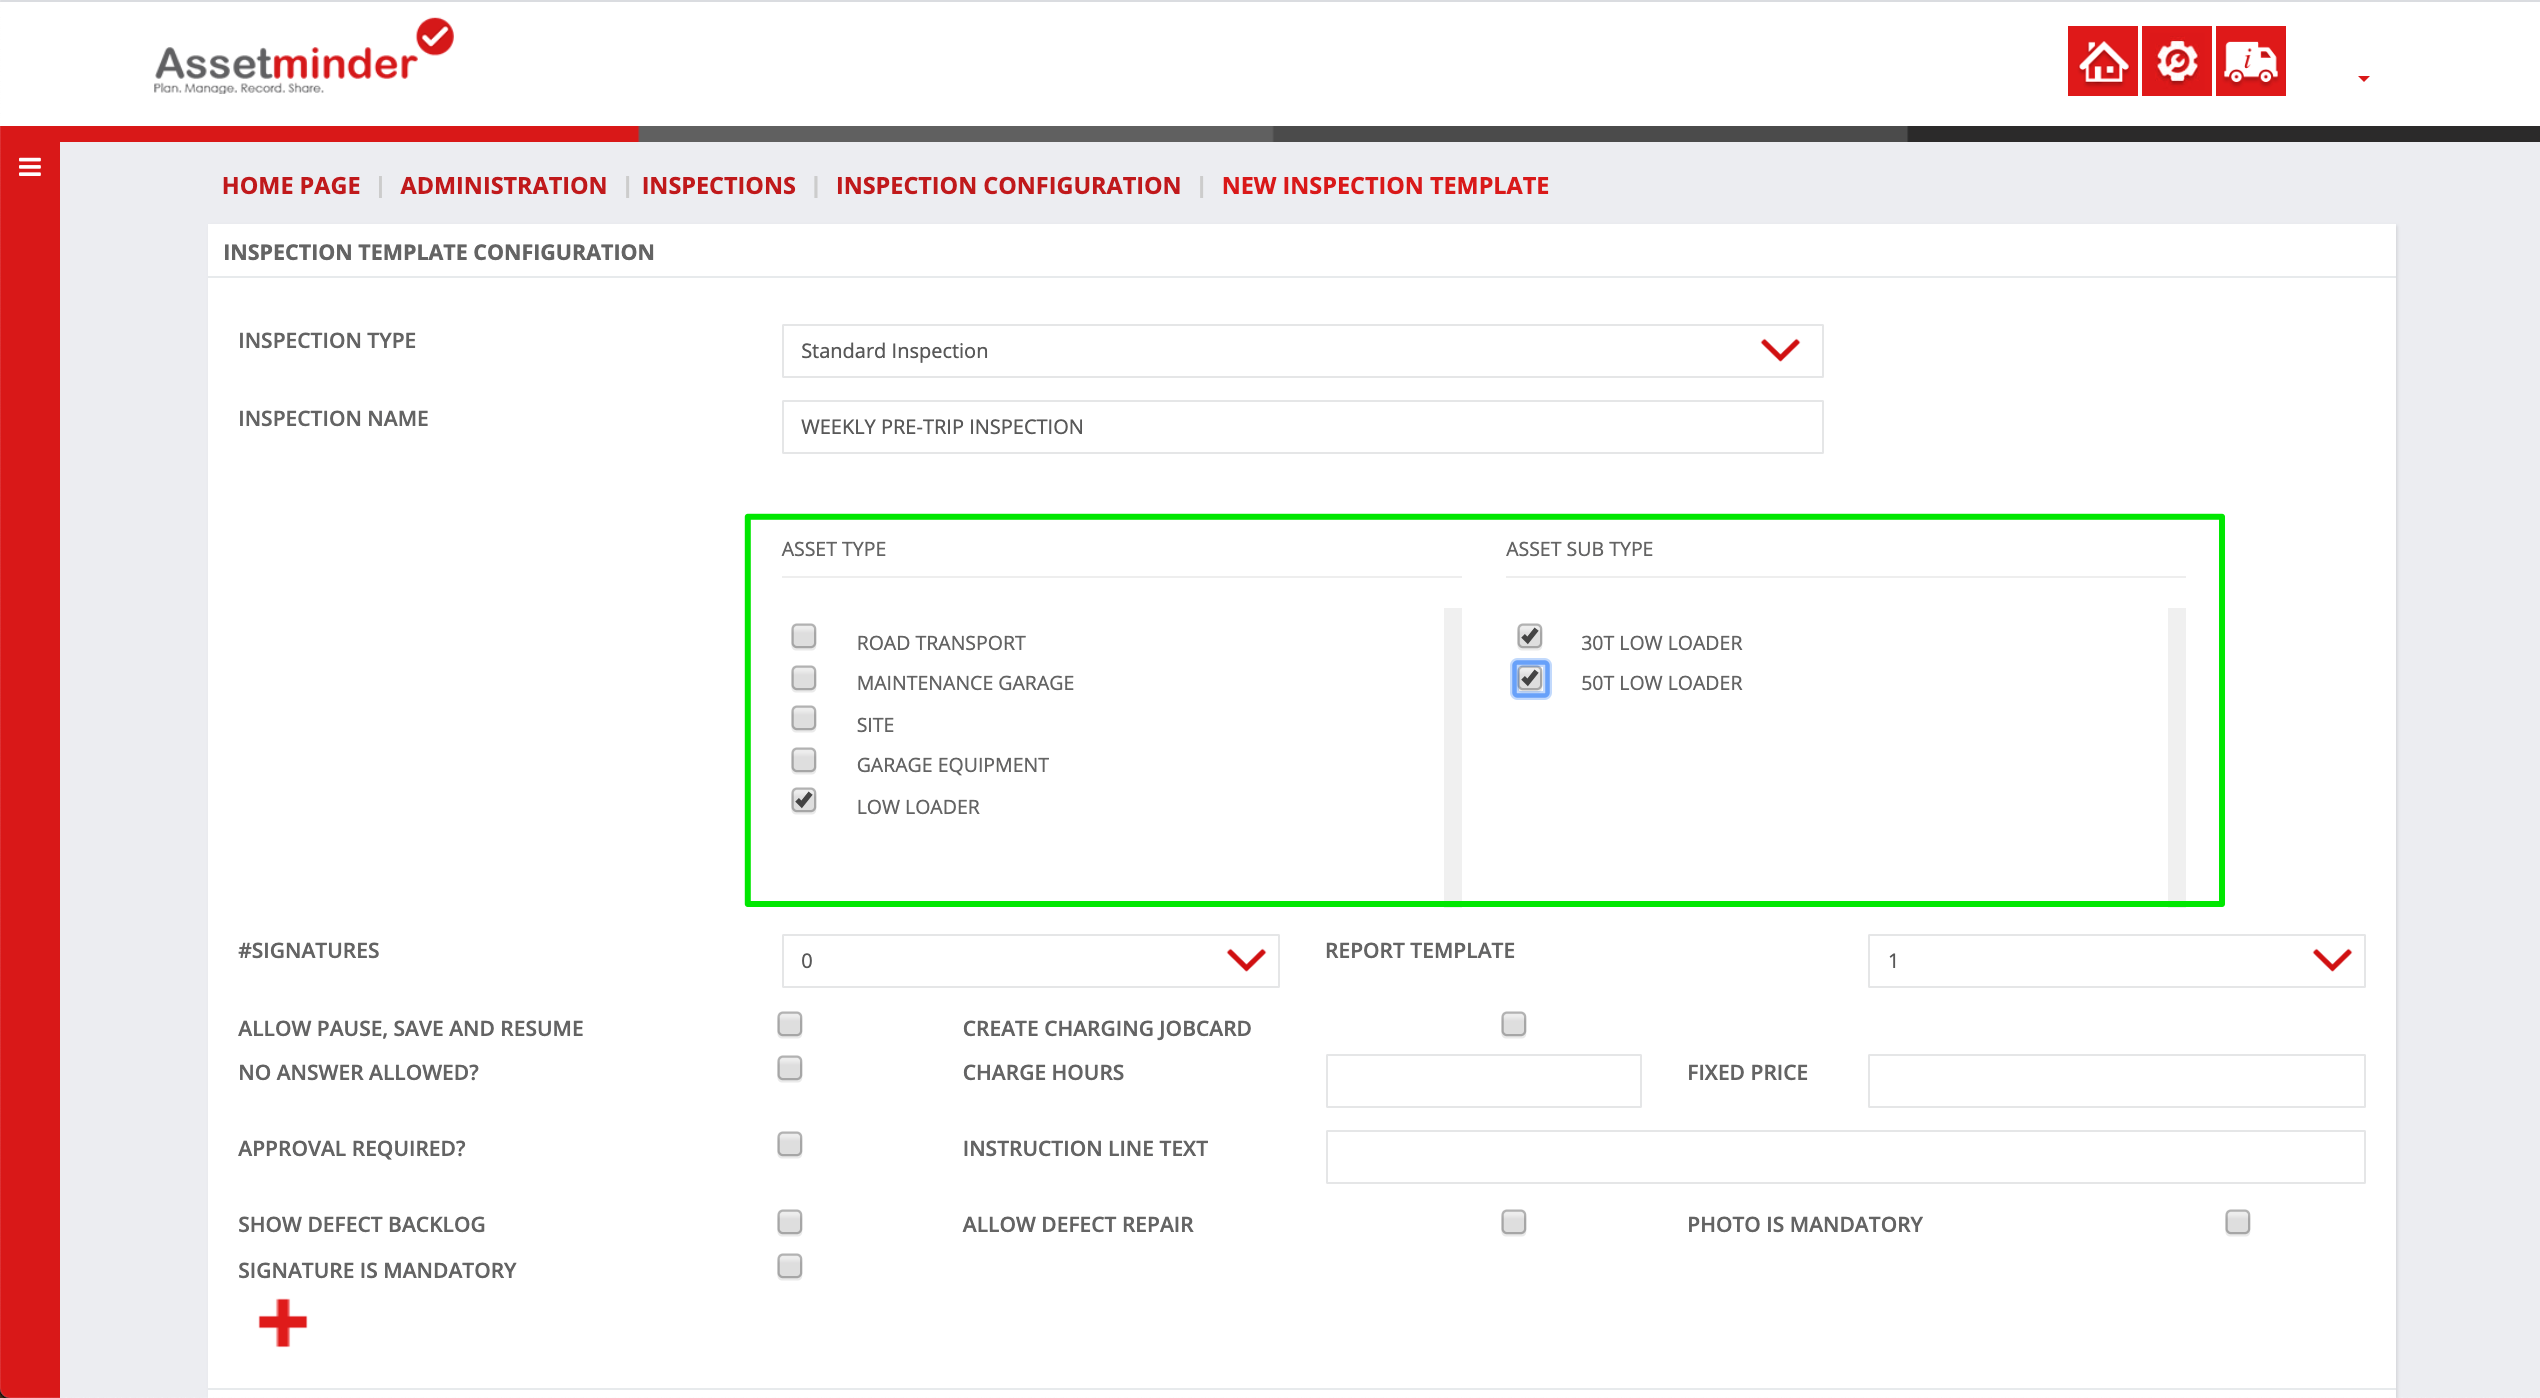
7. Assign the inspection type to asset type and subtype. In this example, this inspection checklist applies to all low loader type assets
8. Configure the inspection as required:
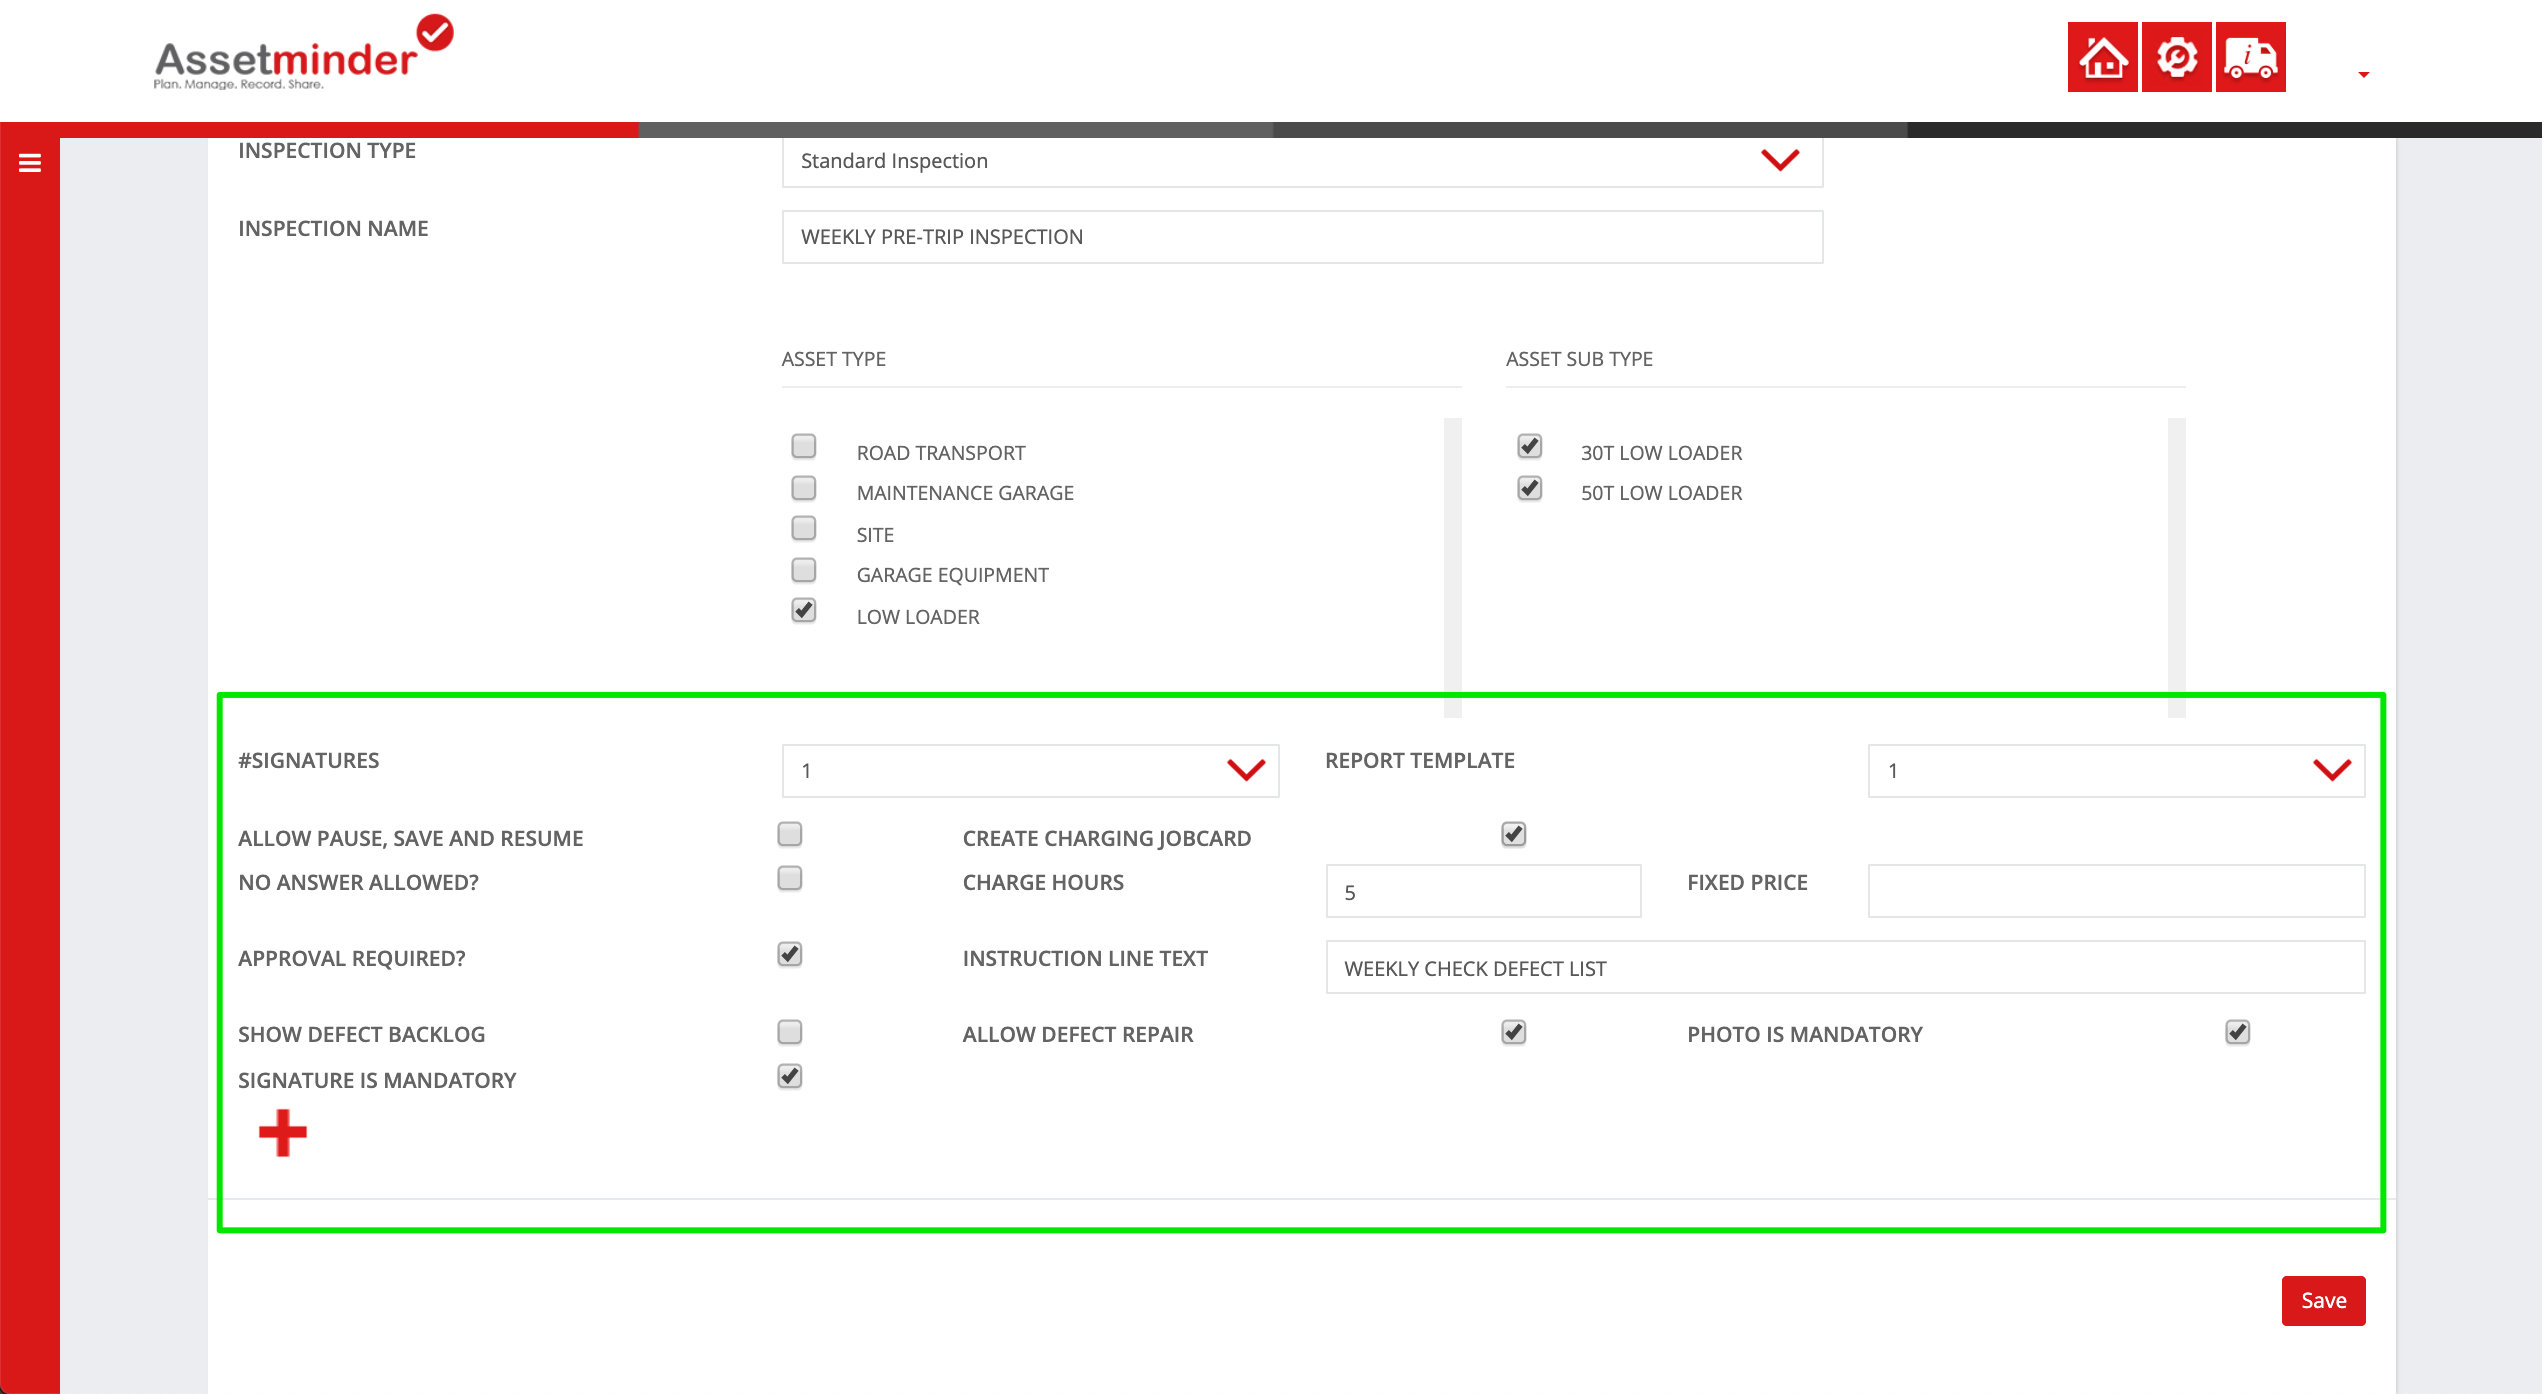
- #SIGNATURES - some work requires sign off from multiple folks such as the mechanic and their supervisor. Select the option from the dropdown for the number of signatures required
- ALLOW PAUSE, SAVE AND RESUME - allow the user to save the inspection and come back to it
- NO ANSWER ALLOWED? - allow the user to skip checks during the inspection
- APPROVAL REQUIRED? - allows inspection approval processes too take place. If deselected, does not require approval from
- SHOW DEFECT BACKLOG - Show backlog on report
- USE AXLE MAPS - This shows the axle map configuration within the app that technicians perform.
- SIGNATURE IS MANDATORY - force the user to provide a signature when the inspection is complete
- REPORT TEMPLATE - assign the report template best suited to this inspection
-
CREATE CHARGING JOBCARD - When doing the inspection, automatically creates a job card for that customer.
- CHARGE HOURS - charge a number of hours for the inspection to the asset customer. Note - You can only fill in either charge hours or fixed price.
- FIXED PRICE - charge a fixed price for the inspection to the asset customer. Note - You can only fill in either charge hours or fixed price.
- INSTRUCTION LINE TEXT - appears on the instruction line in the job card
- ALLOW DEFECT REPAIR - Shows the defect repair comment field on the mobile app. Lets the inspector fix the defect as they go.
- PHOTO IS MANDATORY - force the inspector to provide an photo of the inspection item when the inspection is complete
For this example, 1 signature is required, the inspector can repair the defect themselves if they so choose, and the work will be charged to the customer via a job card.
9. Adding Inspection Tasks
This procedure will cover the 3 task types:
- Meter readings
- General tasks or single level pass/fail tasks
- Nested pass/fail tasks
Examples
| Task | Type | Level 1 | Level 2 | Level 3 |
| 1 | Measurement | Record pressure | ||
| 2 | Single Level defect check |
Top up the windscreen fluid | ||
| 3 | Nested Defect |
Check exhaust is secure | 1. Check for Excess Noise 2. Is the fitting Loose? 3. Check for Rust |
|
| 4 | Nested Defect | Headlights | Front Left Front right |
1. Check for cracks 2. Checks bulb shining ok 1. Check for cracks 2. Checks bulb shining ok |
A. Add a Meter Reading Task
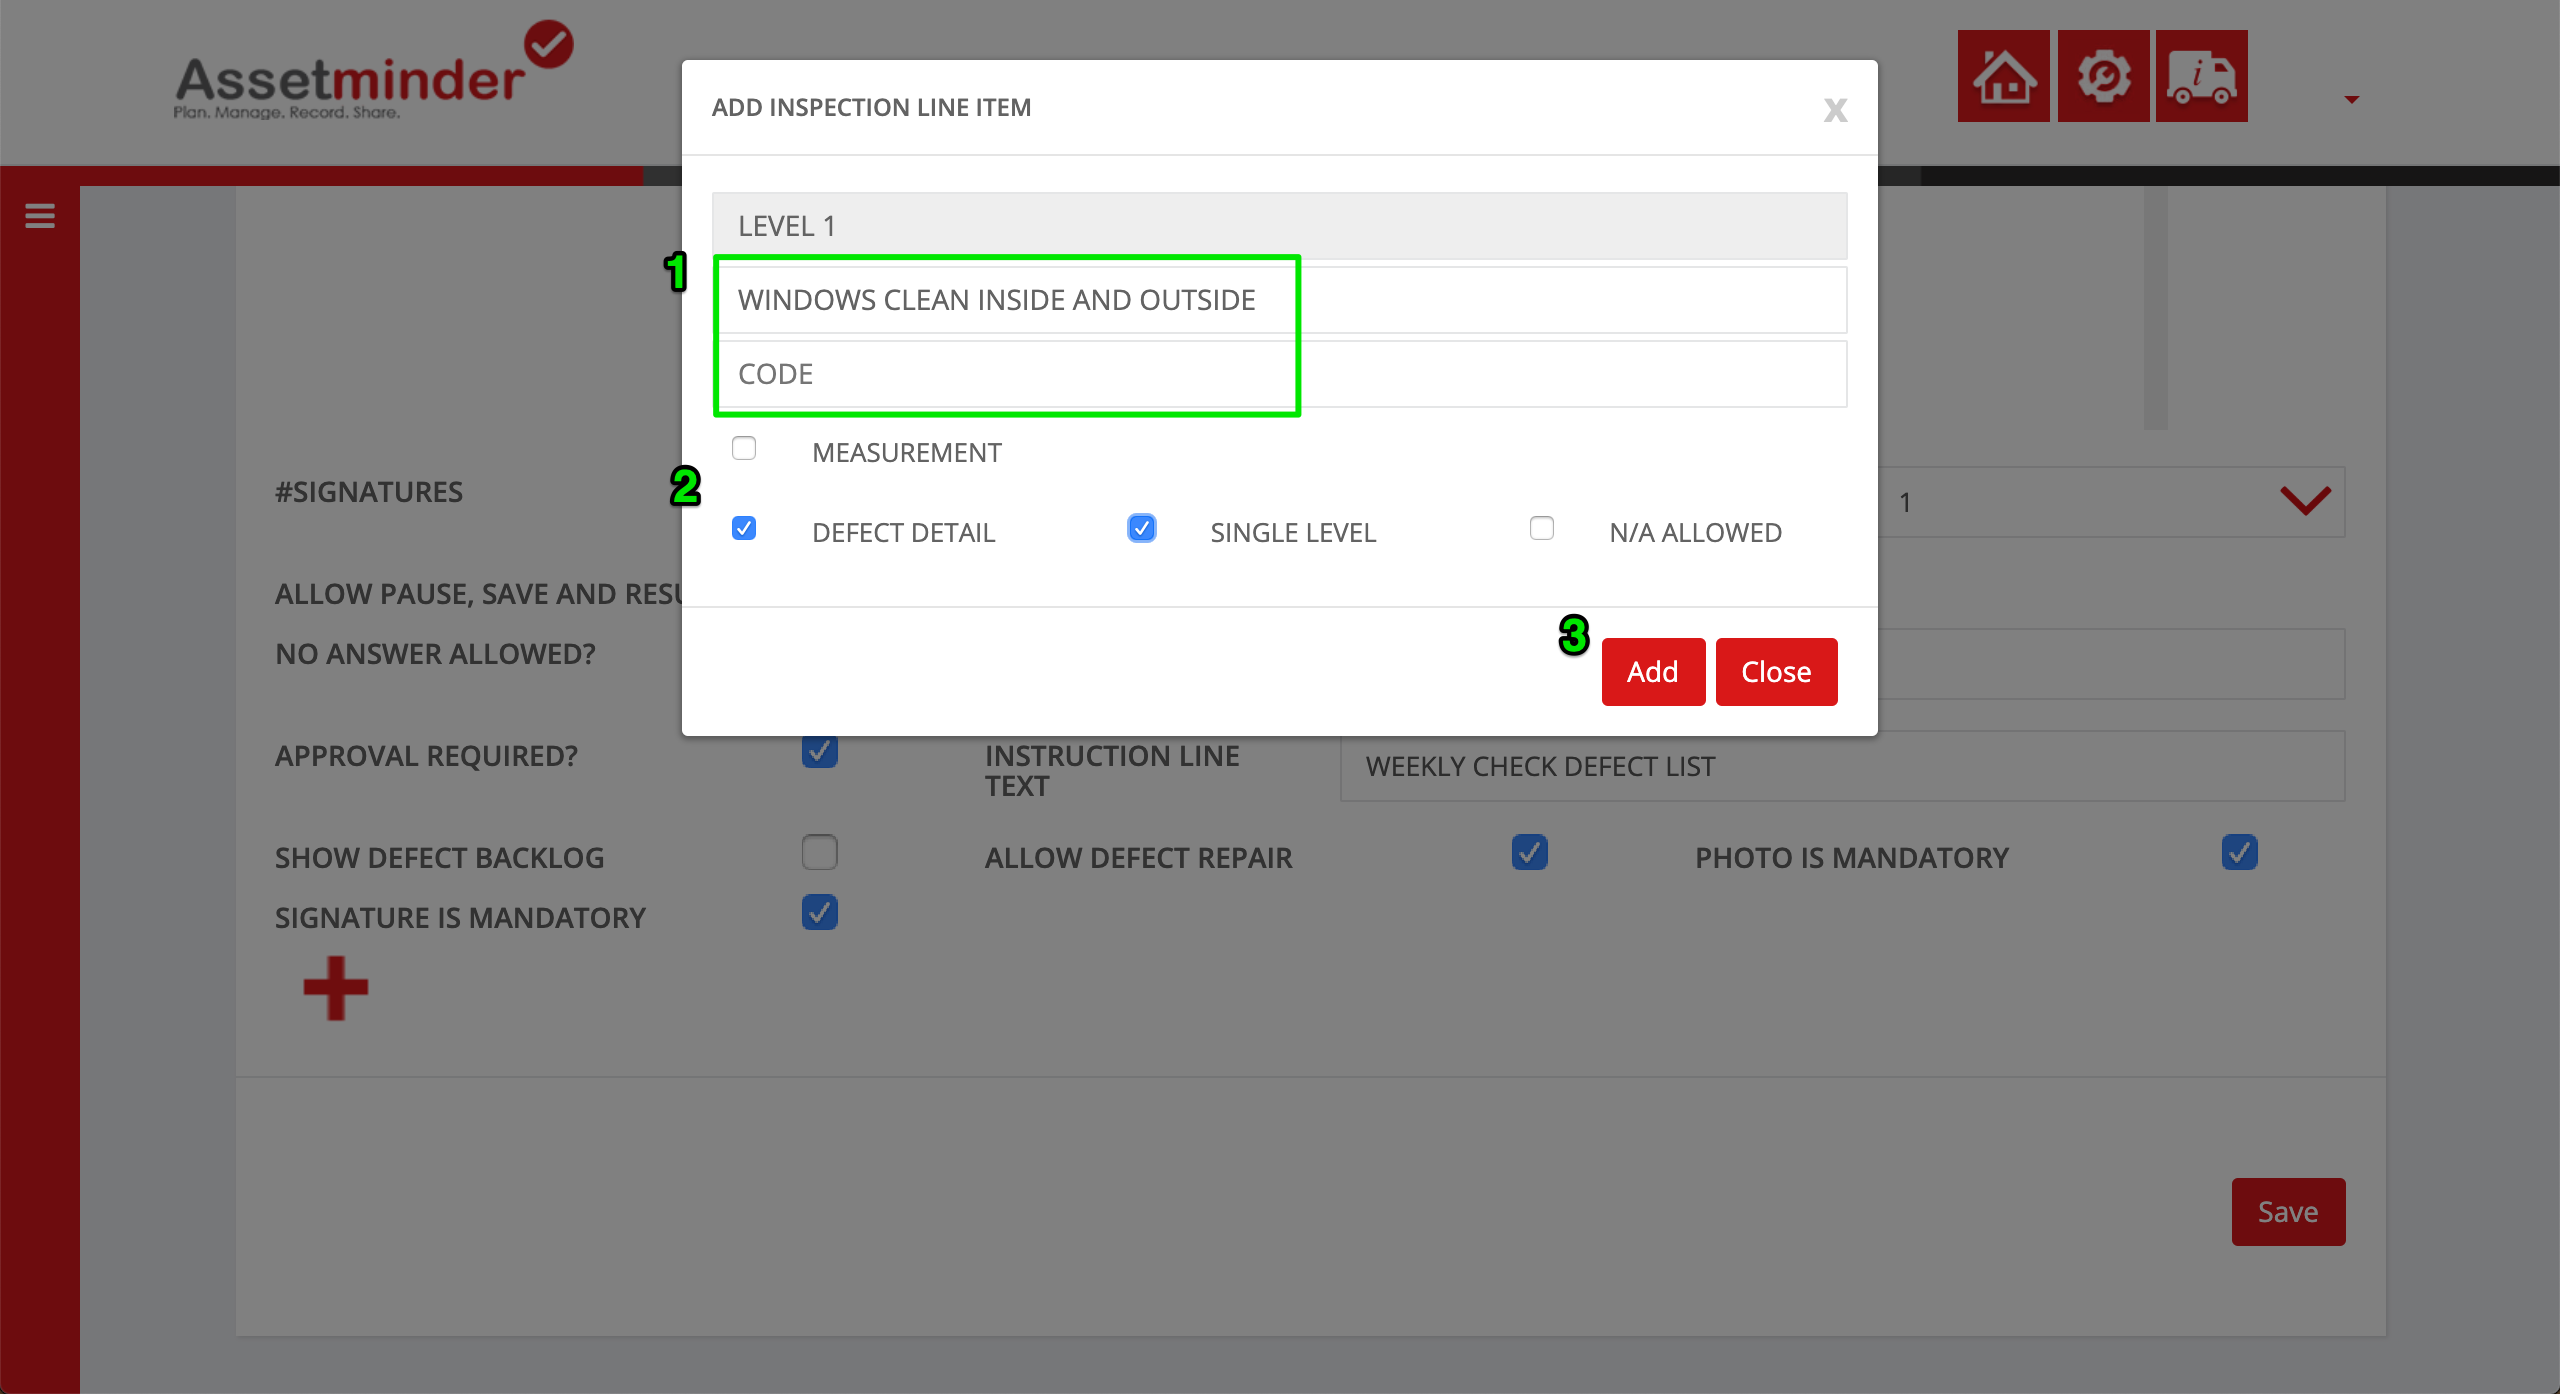
A1. Next, add the checklist line items by clicking the Add Icon
A2. Fill in the details for the first task in the inspection
A3. To add a measurement-based task, check the measurement checkbox and select the measurement type from the dropdown.
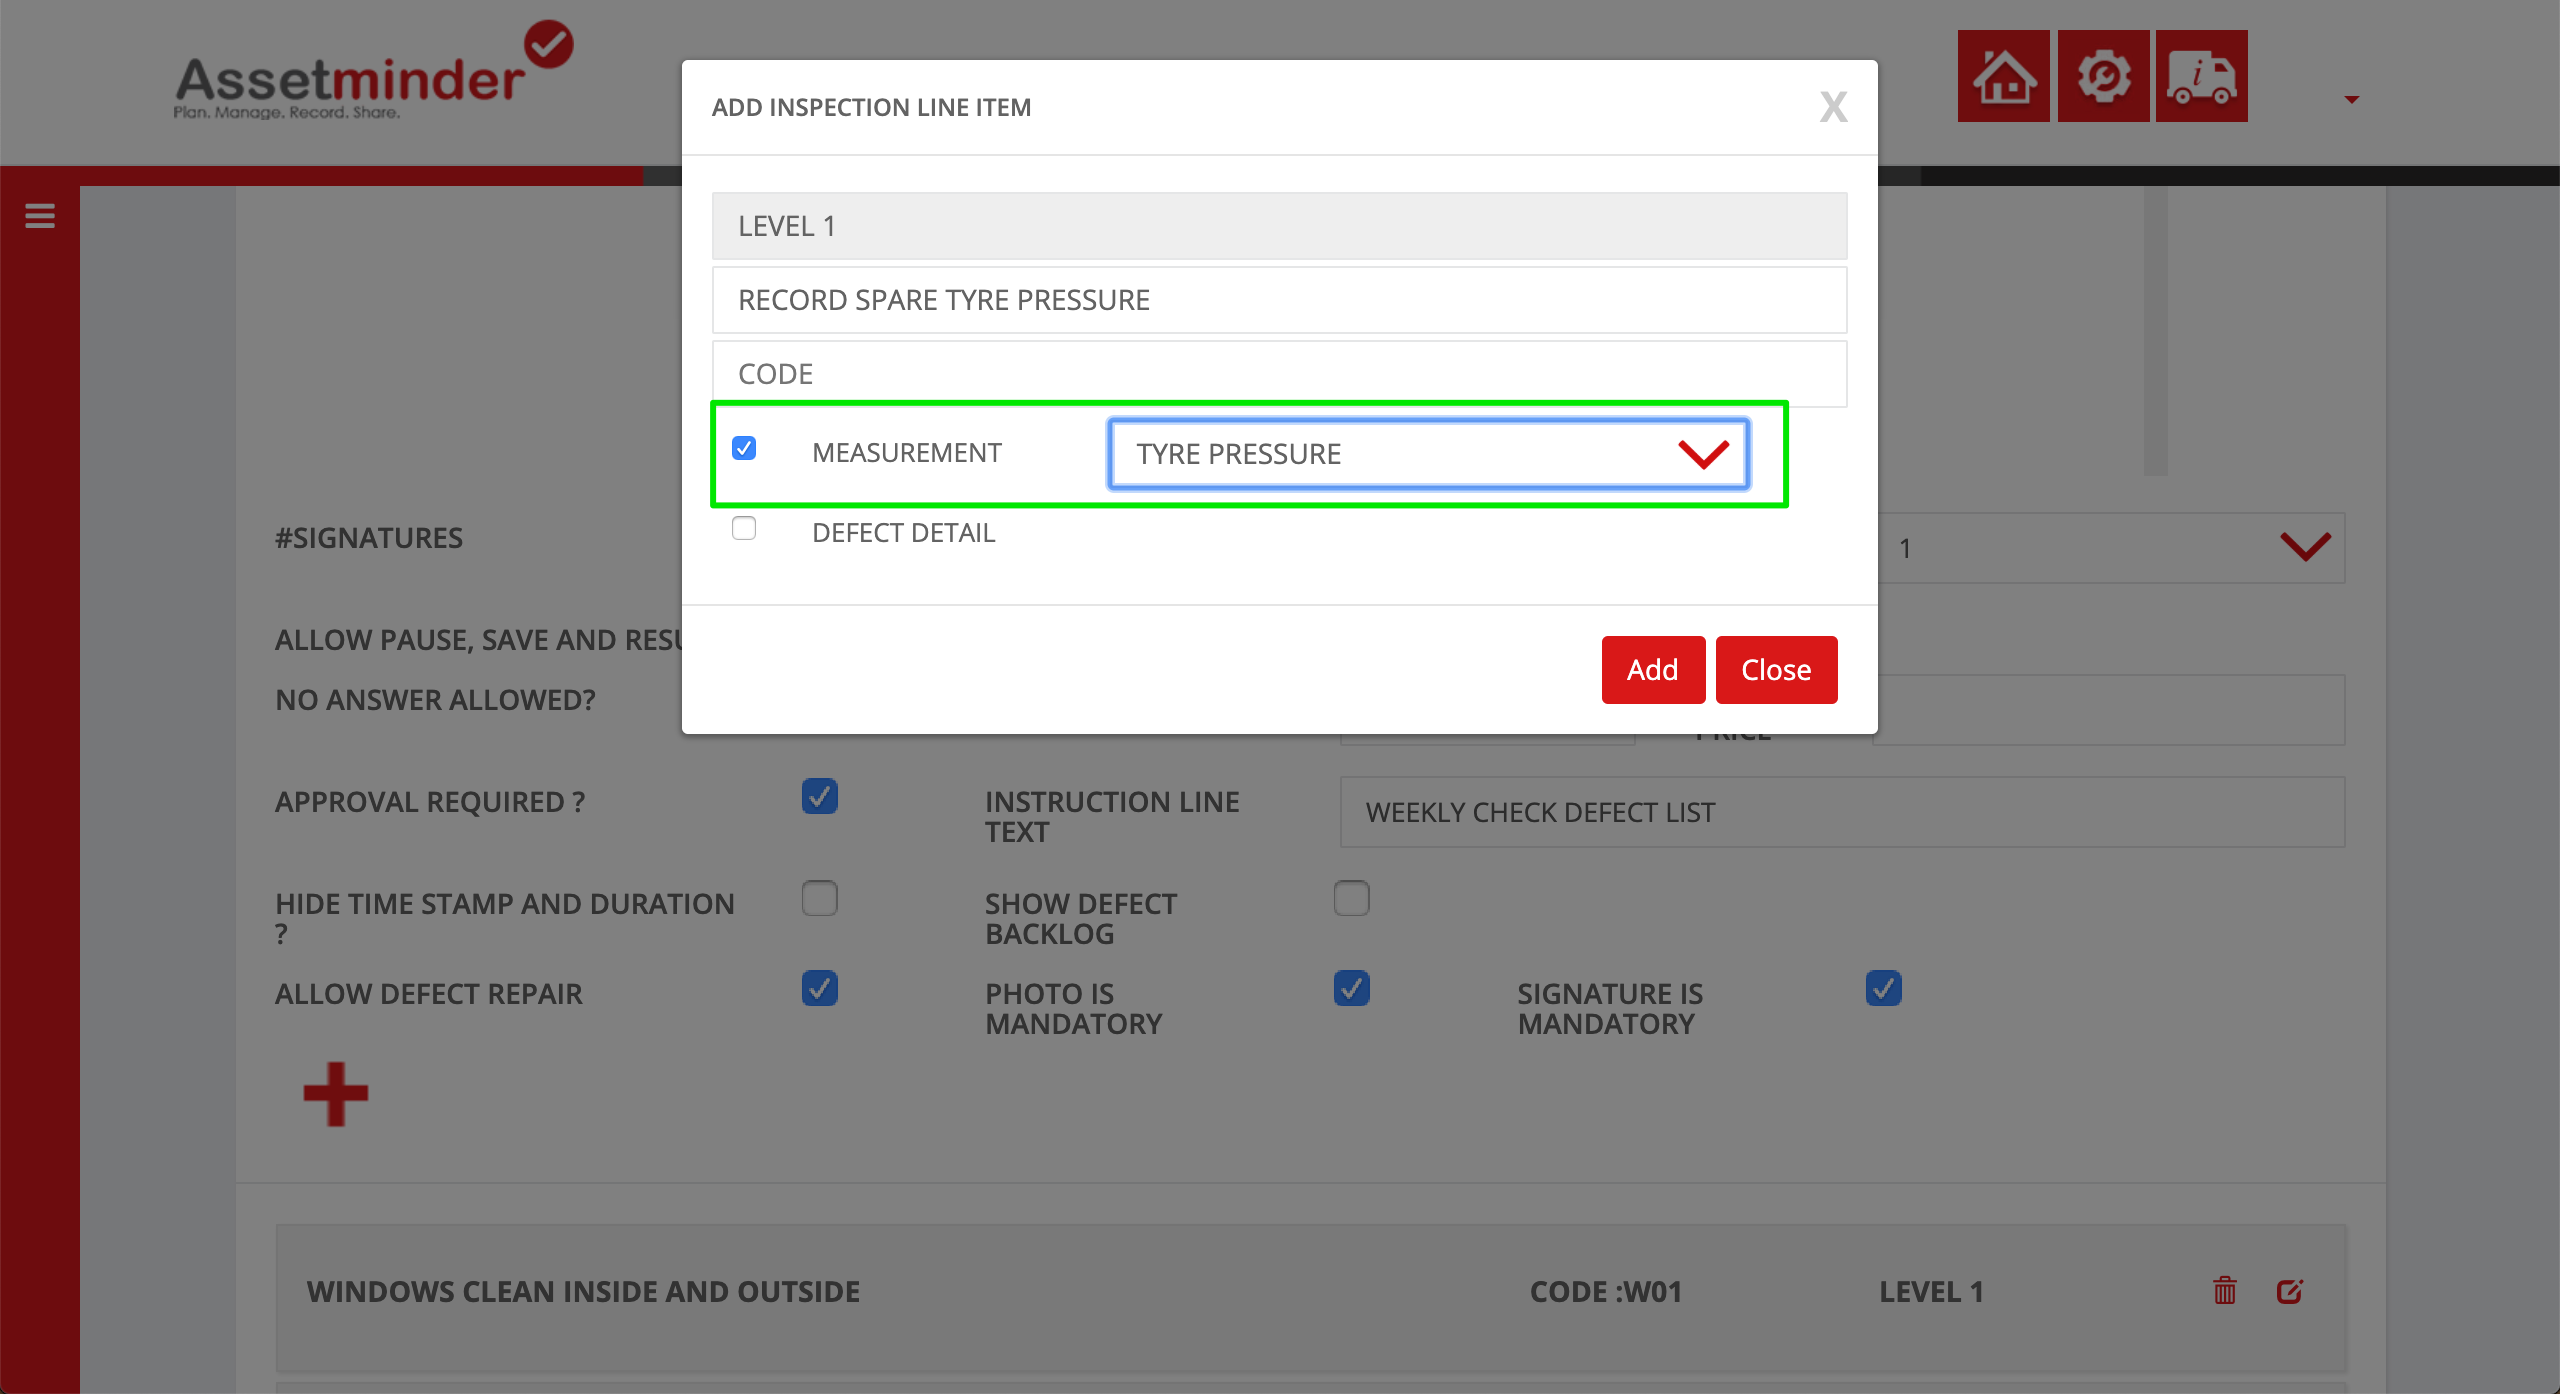
A4. Click Add when ready to move onto the next task.
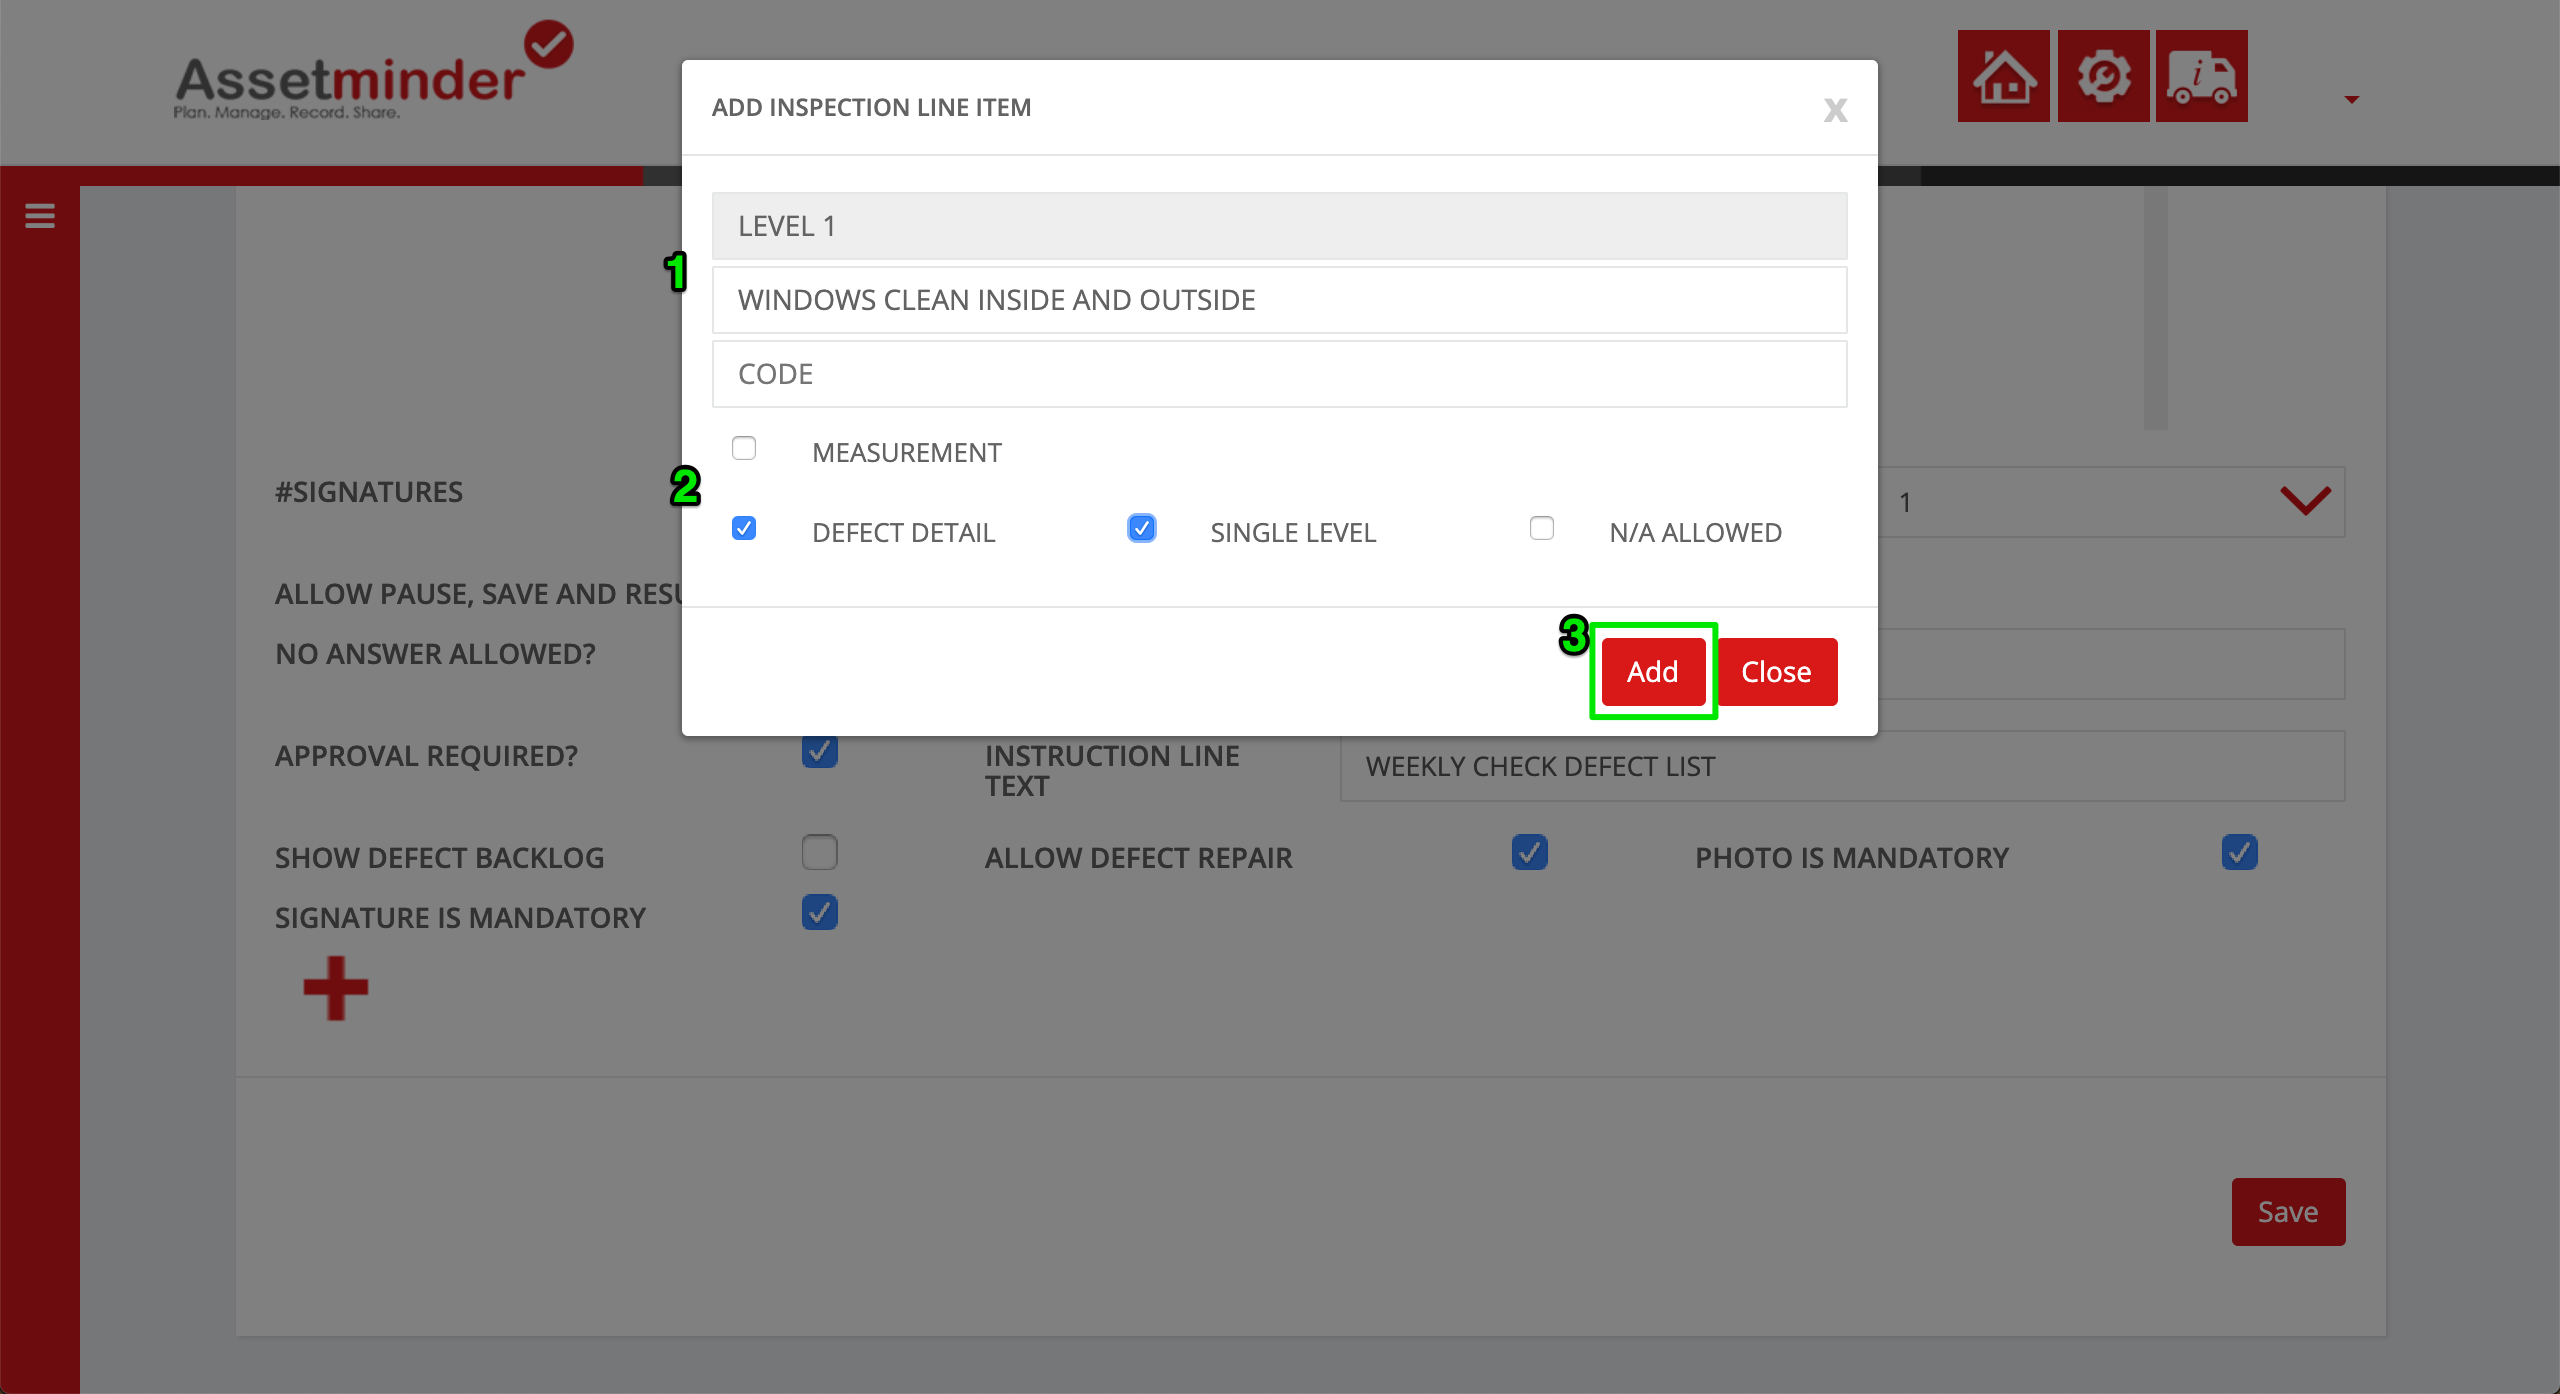
B. Add a Single Level Task
B1. Add the next line item by clicking the Add Icon
B2. In this example, this task does not have any sub-tasks.
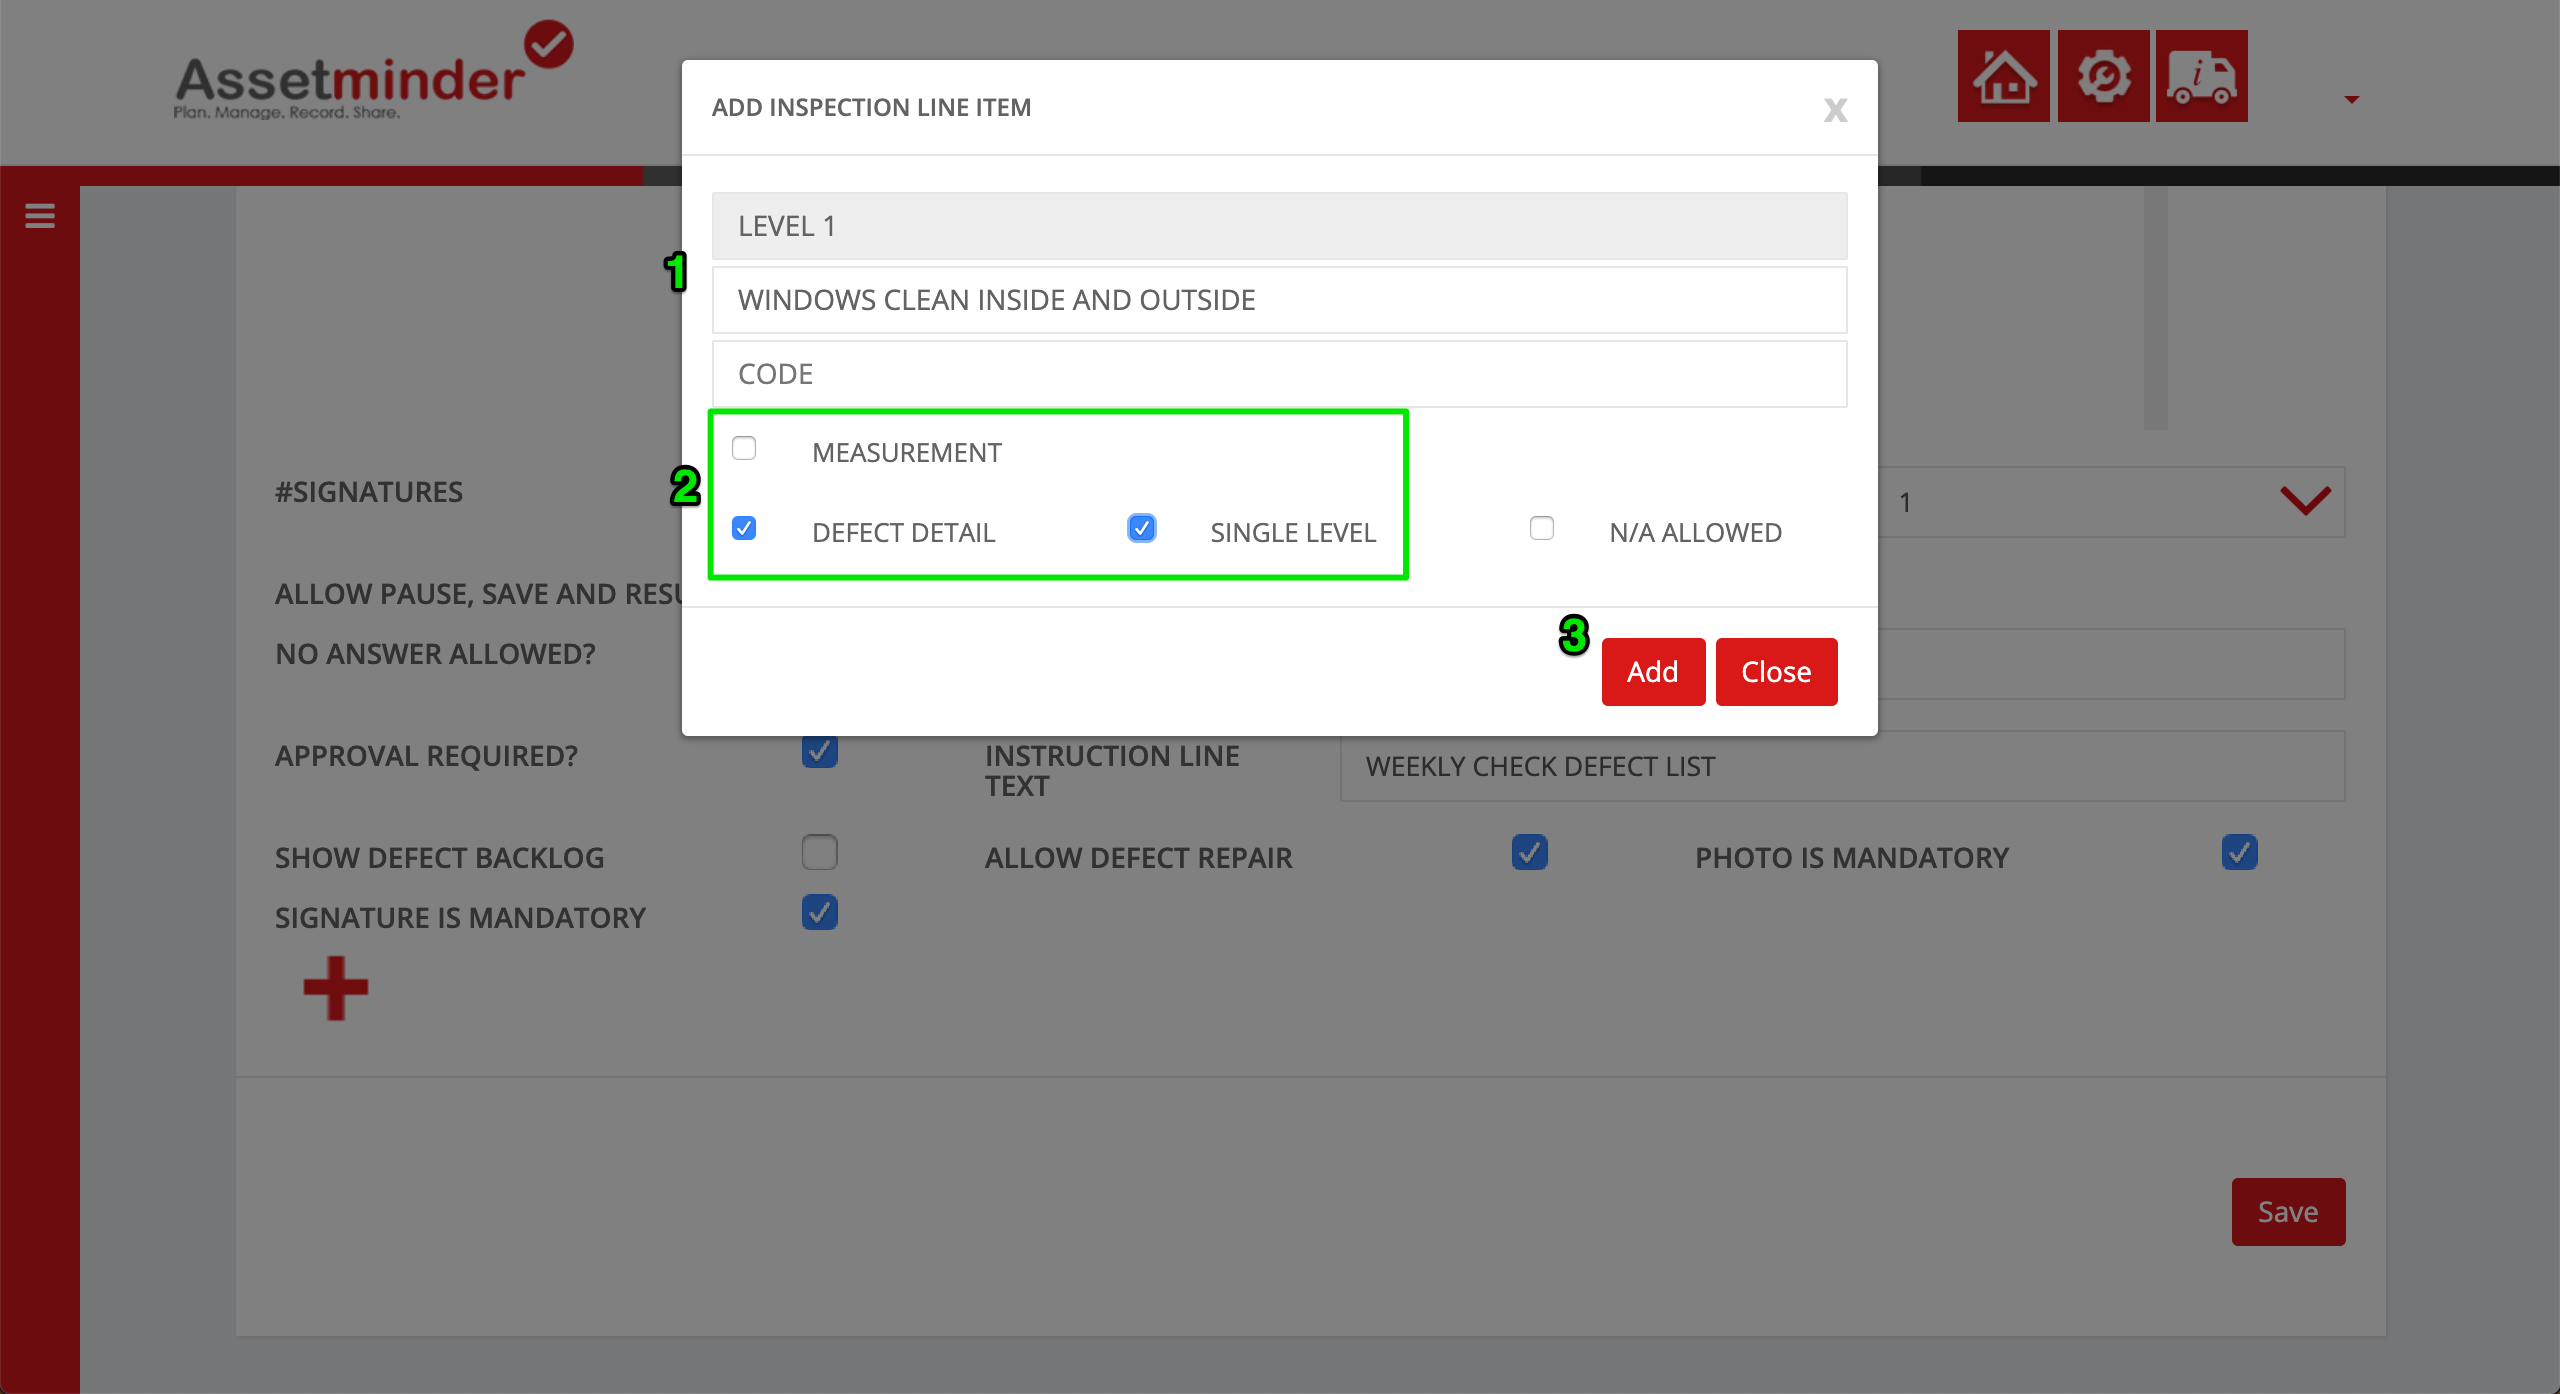
B3. Click Add when done
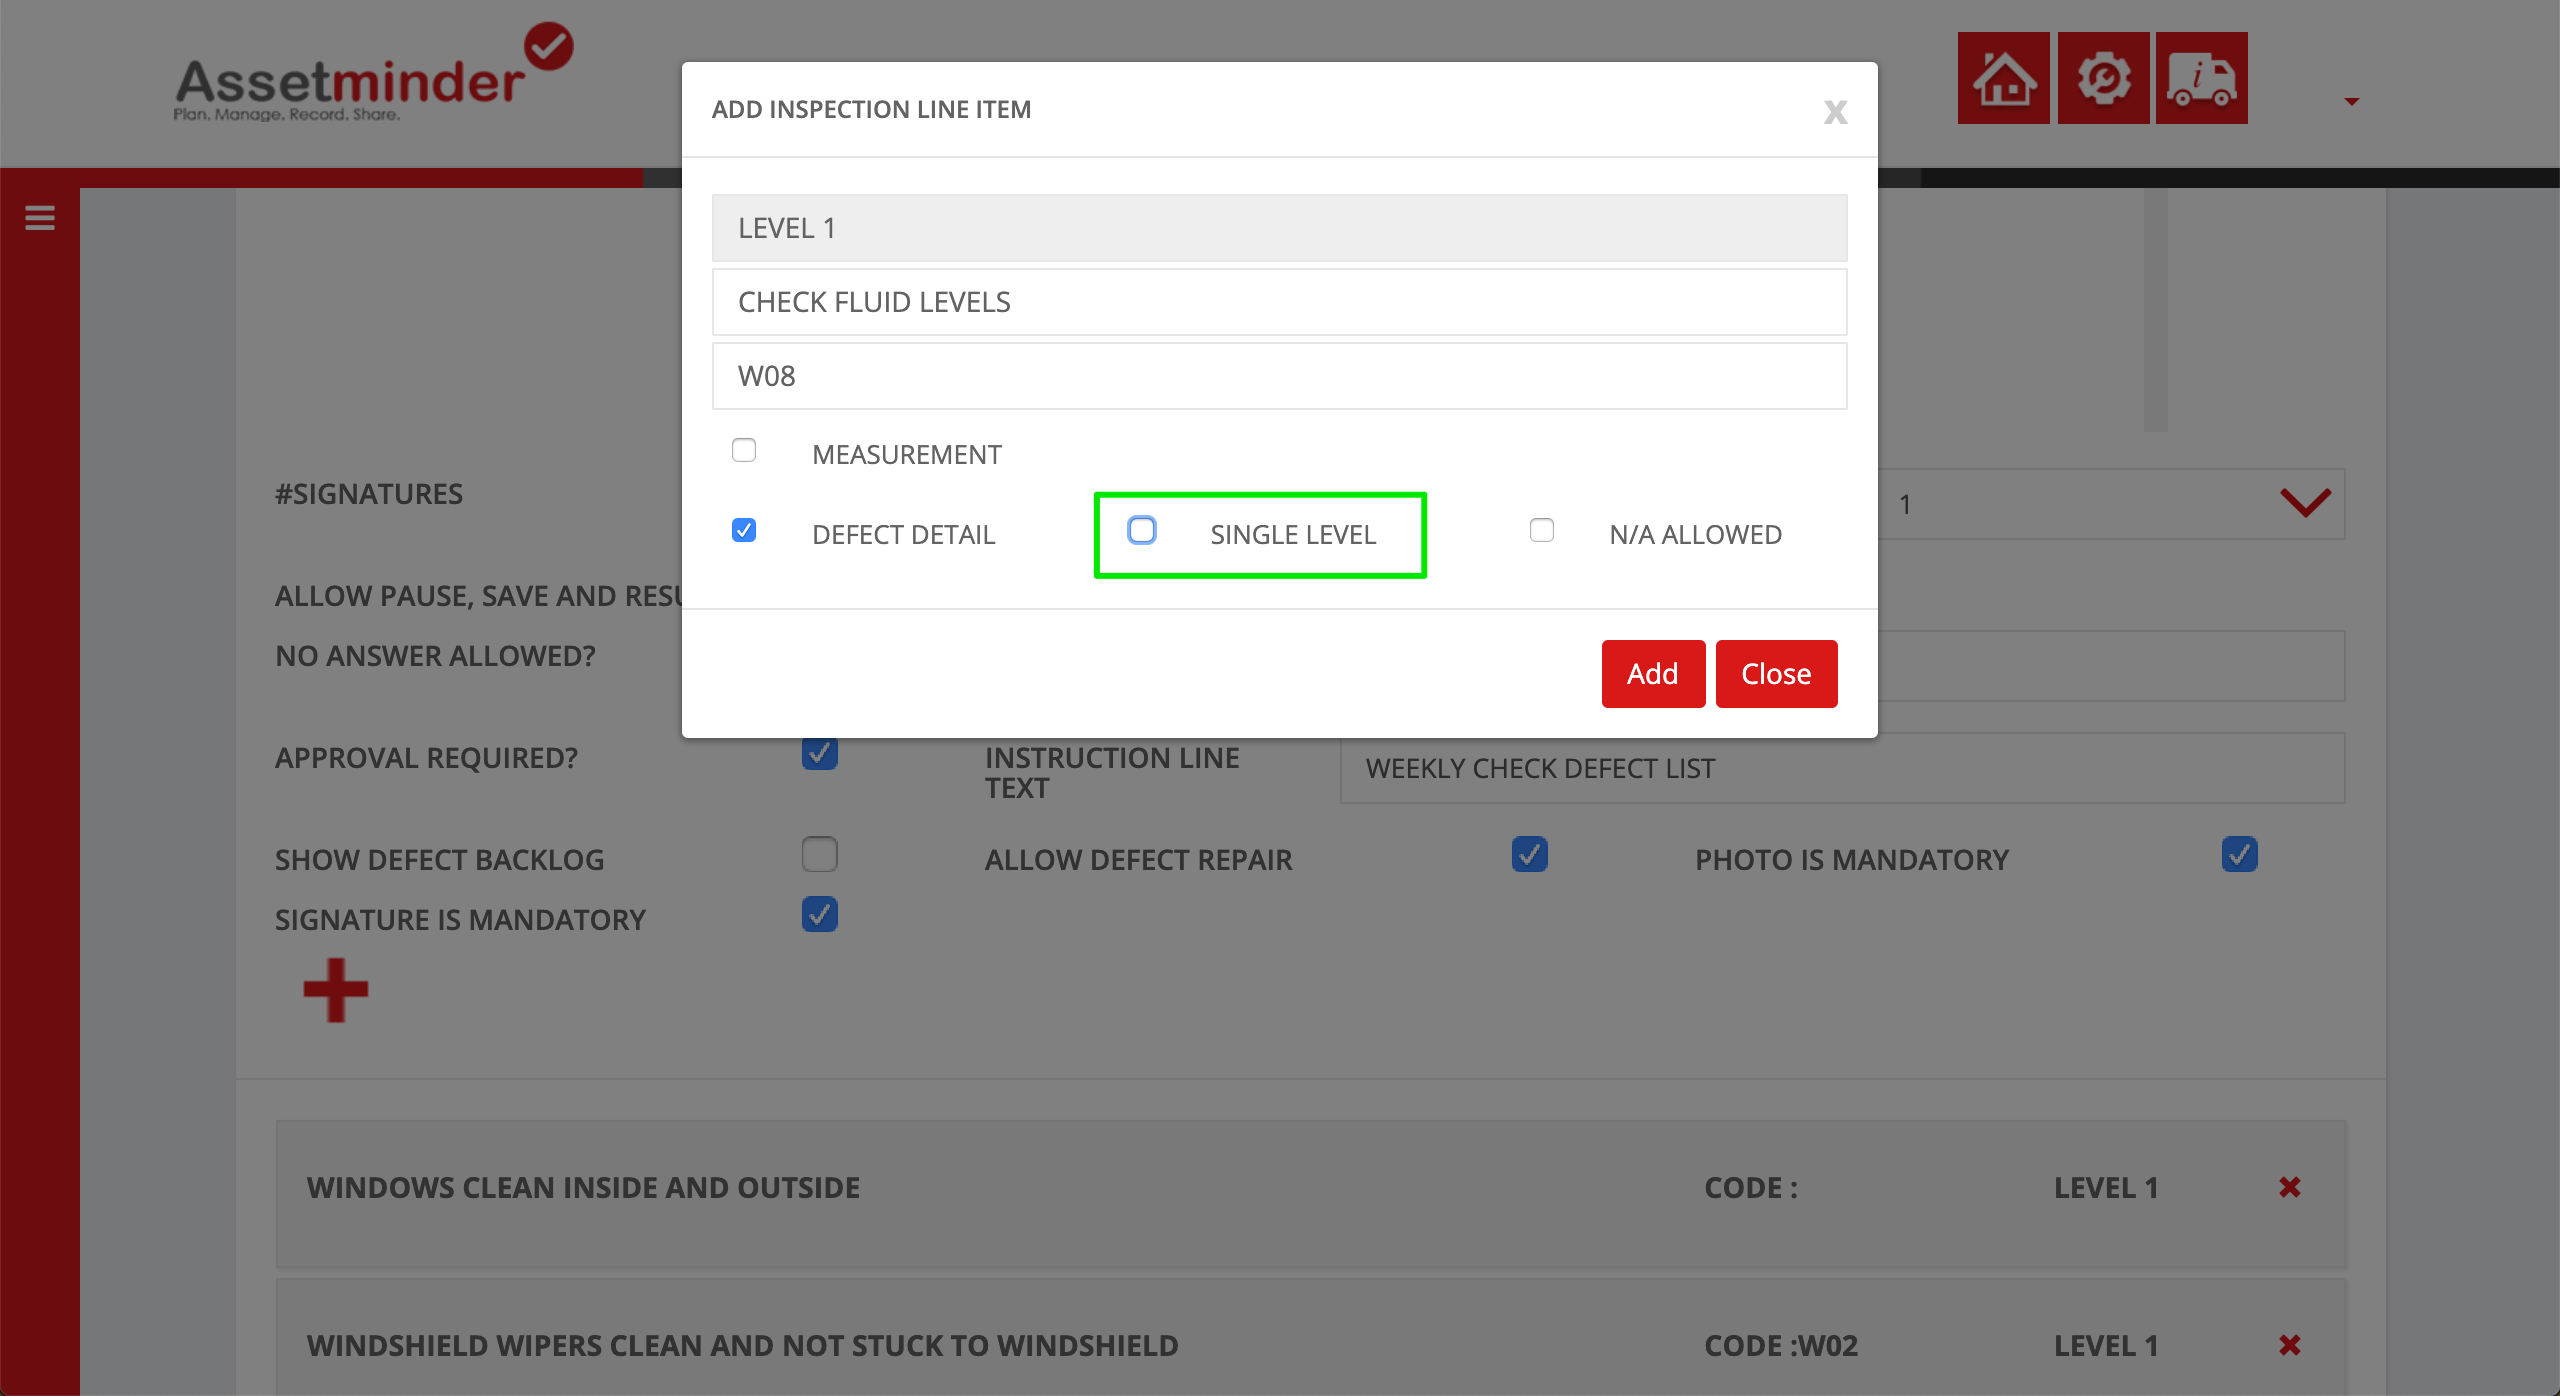
C. Add Nested Tasks
C1. To create a Nested Pass/Fail task, add in the task details and leave the Single Level checkboxes unchecked
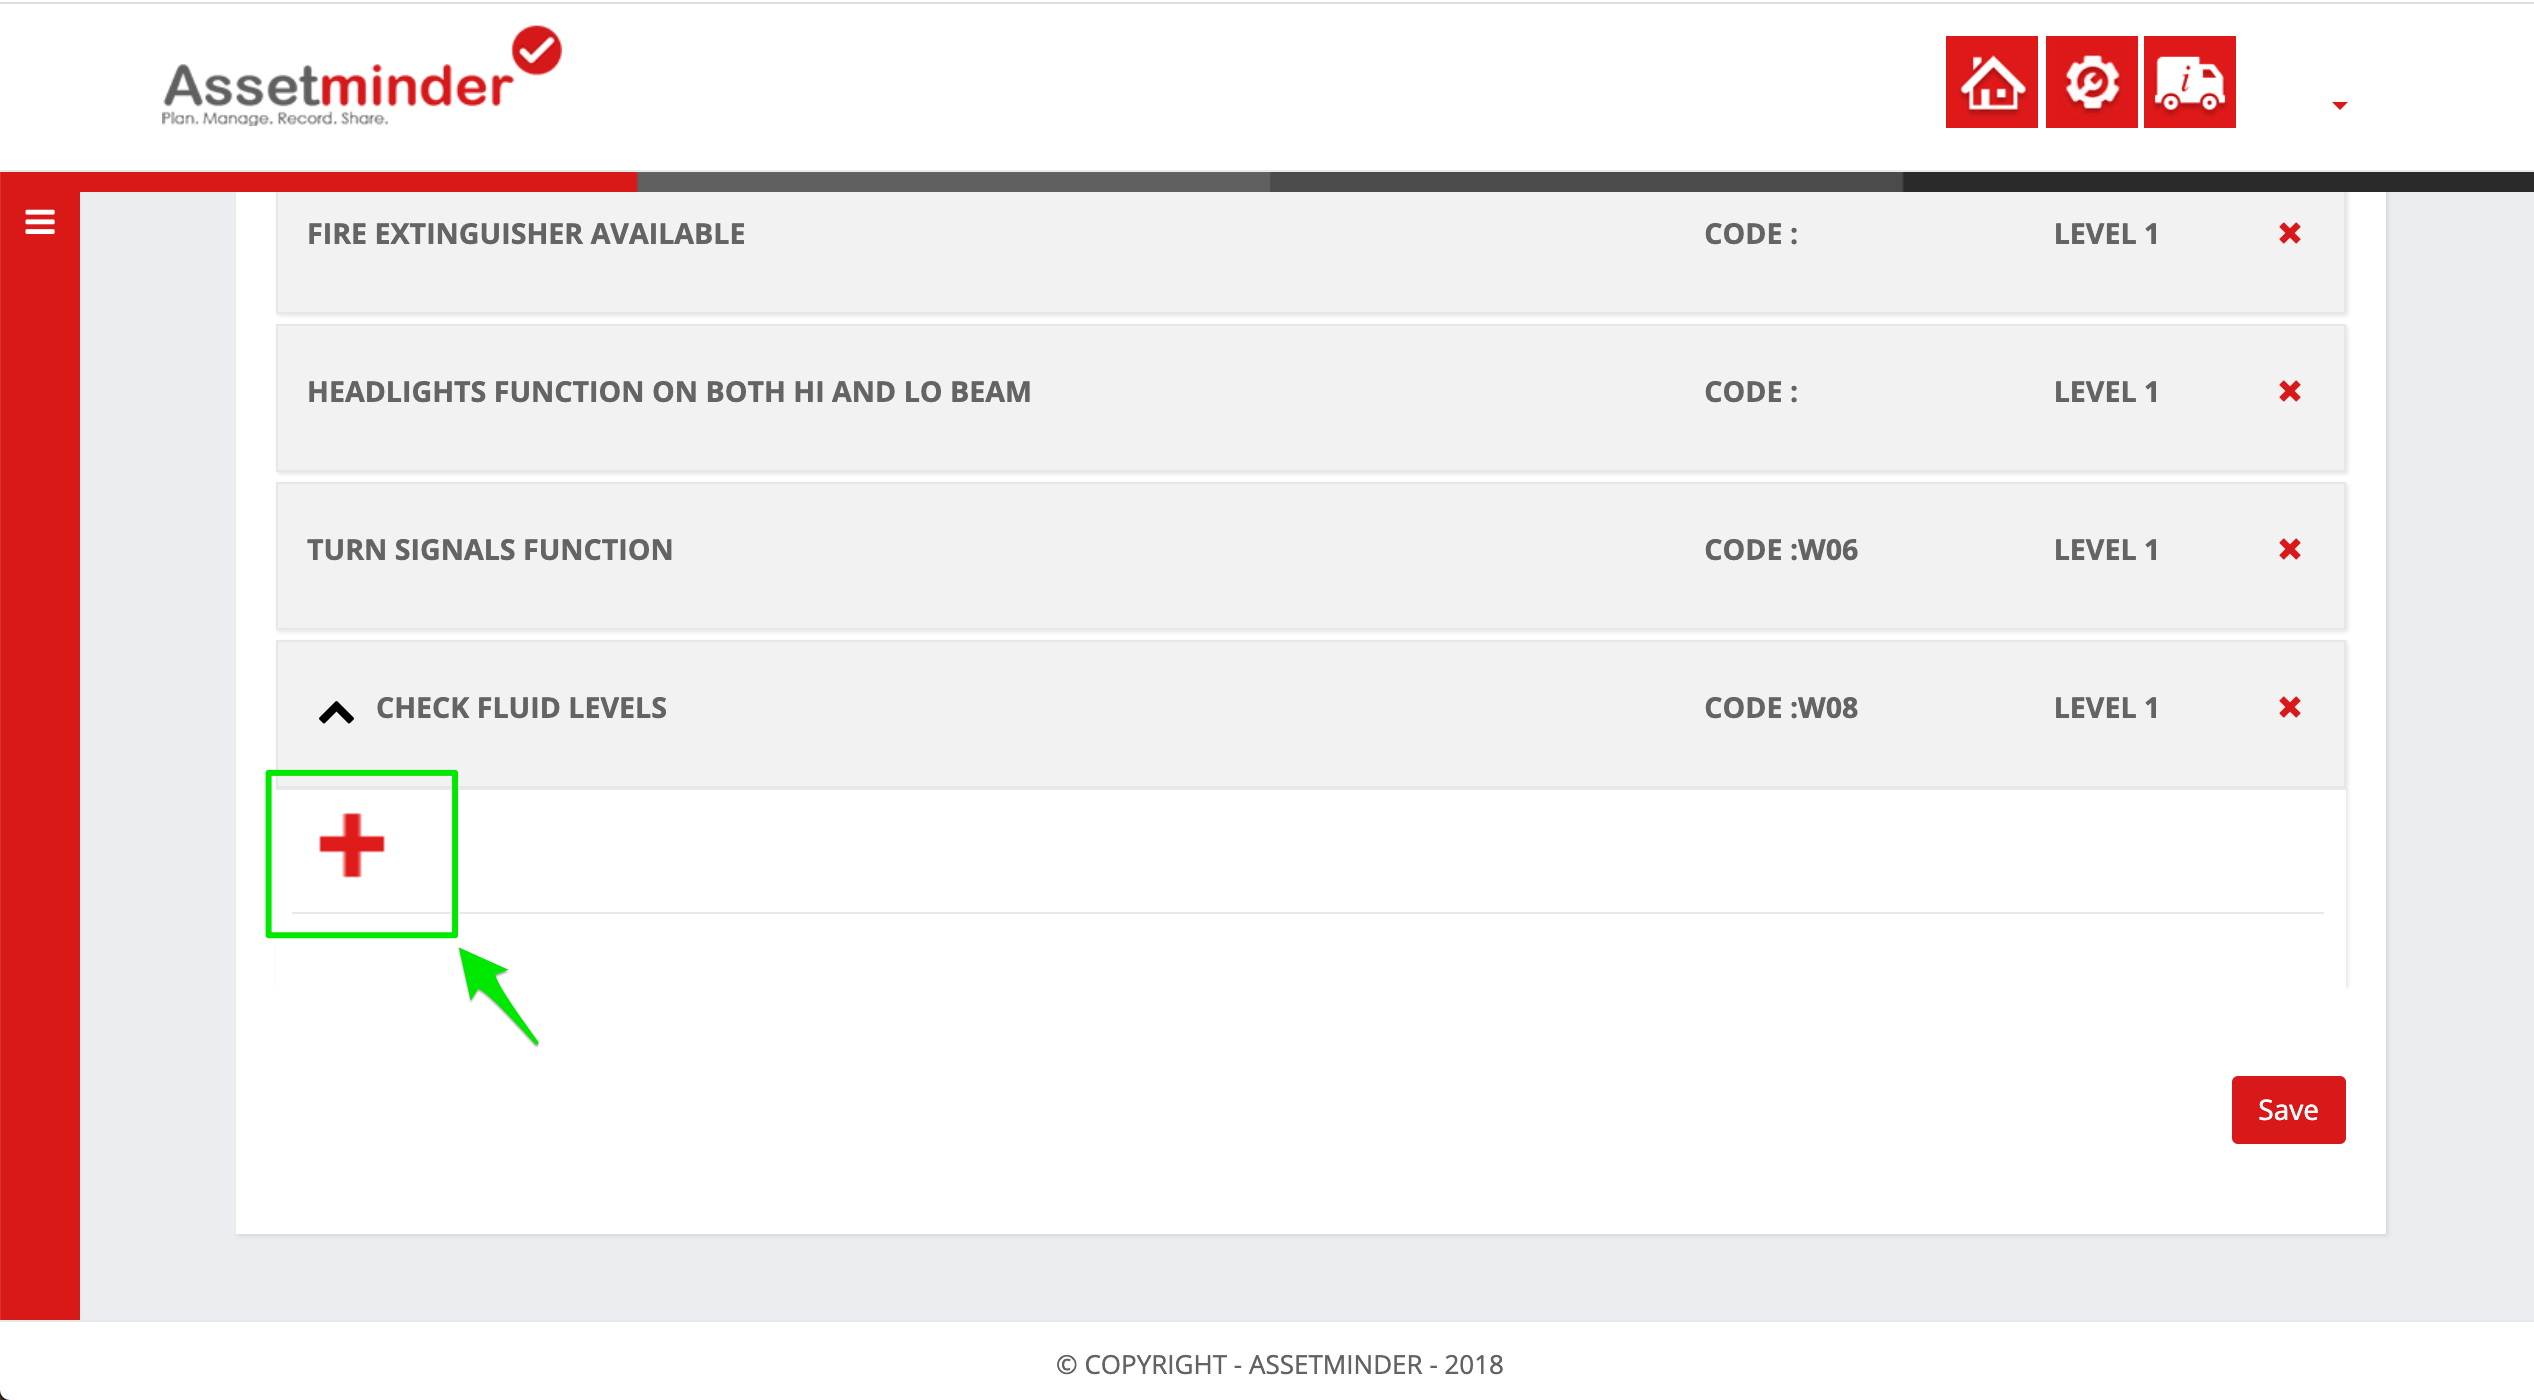
C2. That creates a new level 1 nested task. Under the level 1 nested task, check the Add New icon to add the sub-tasks
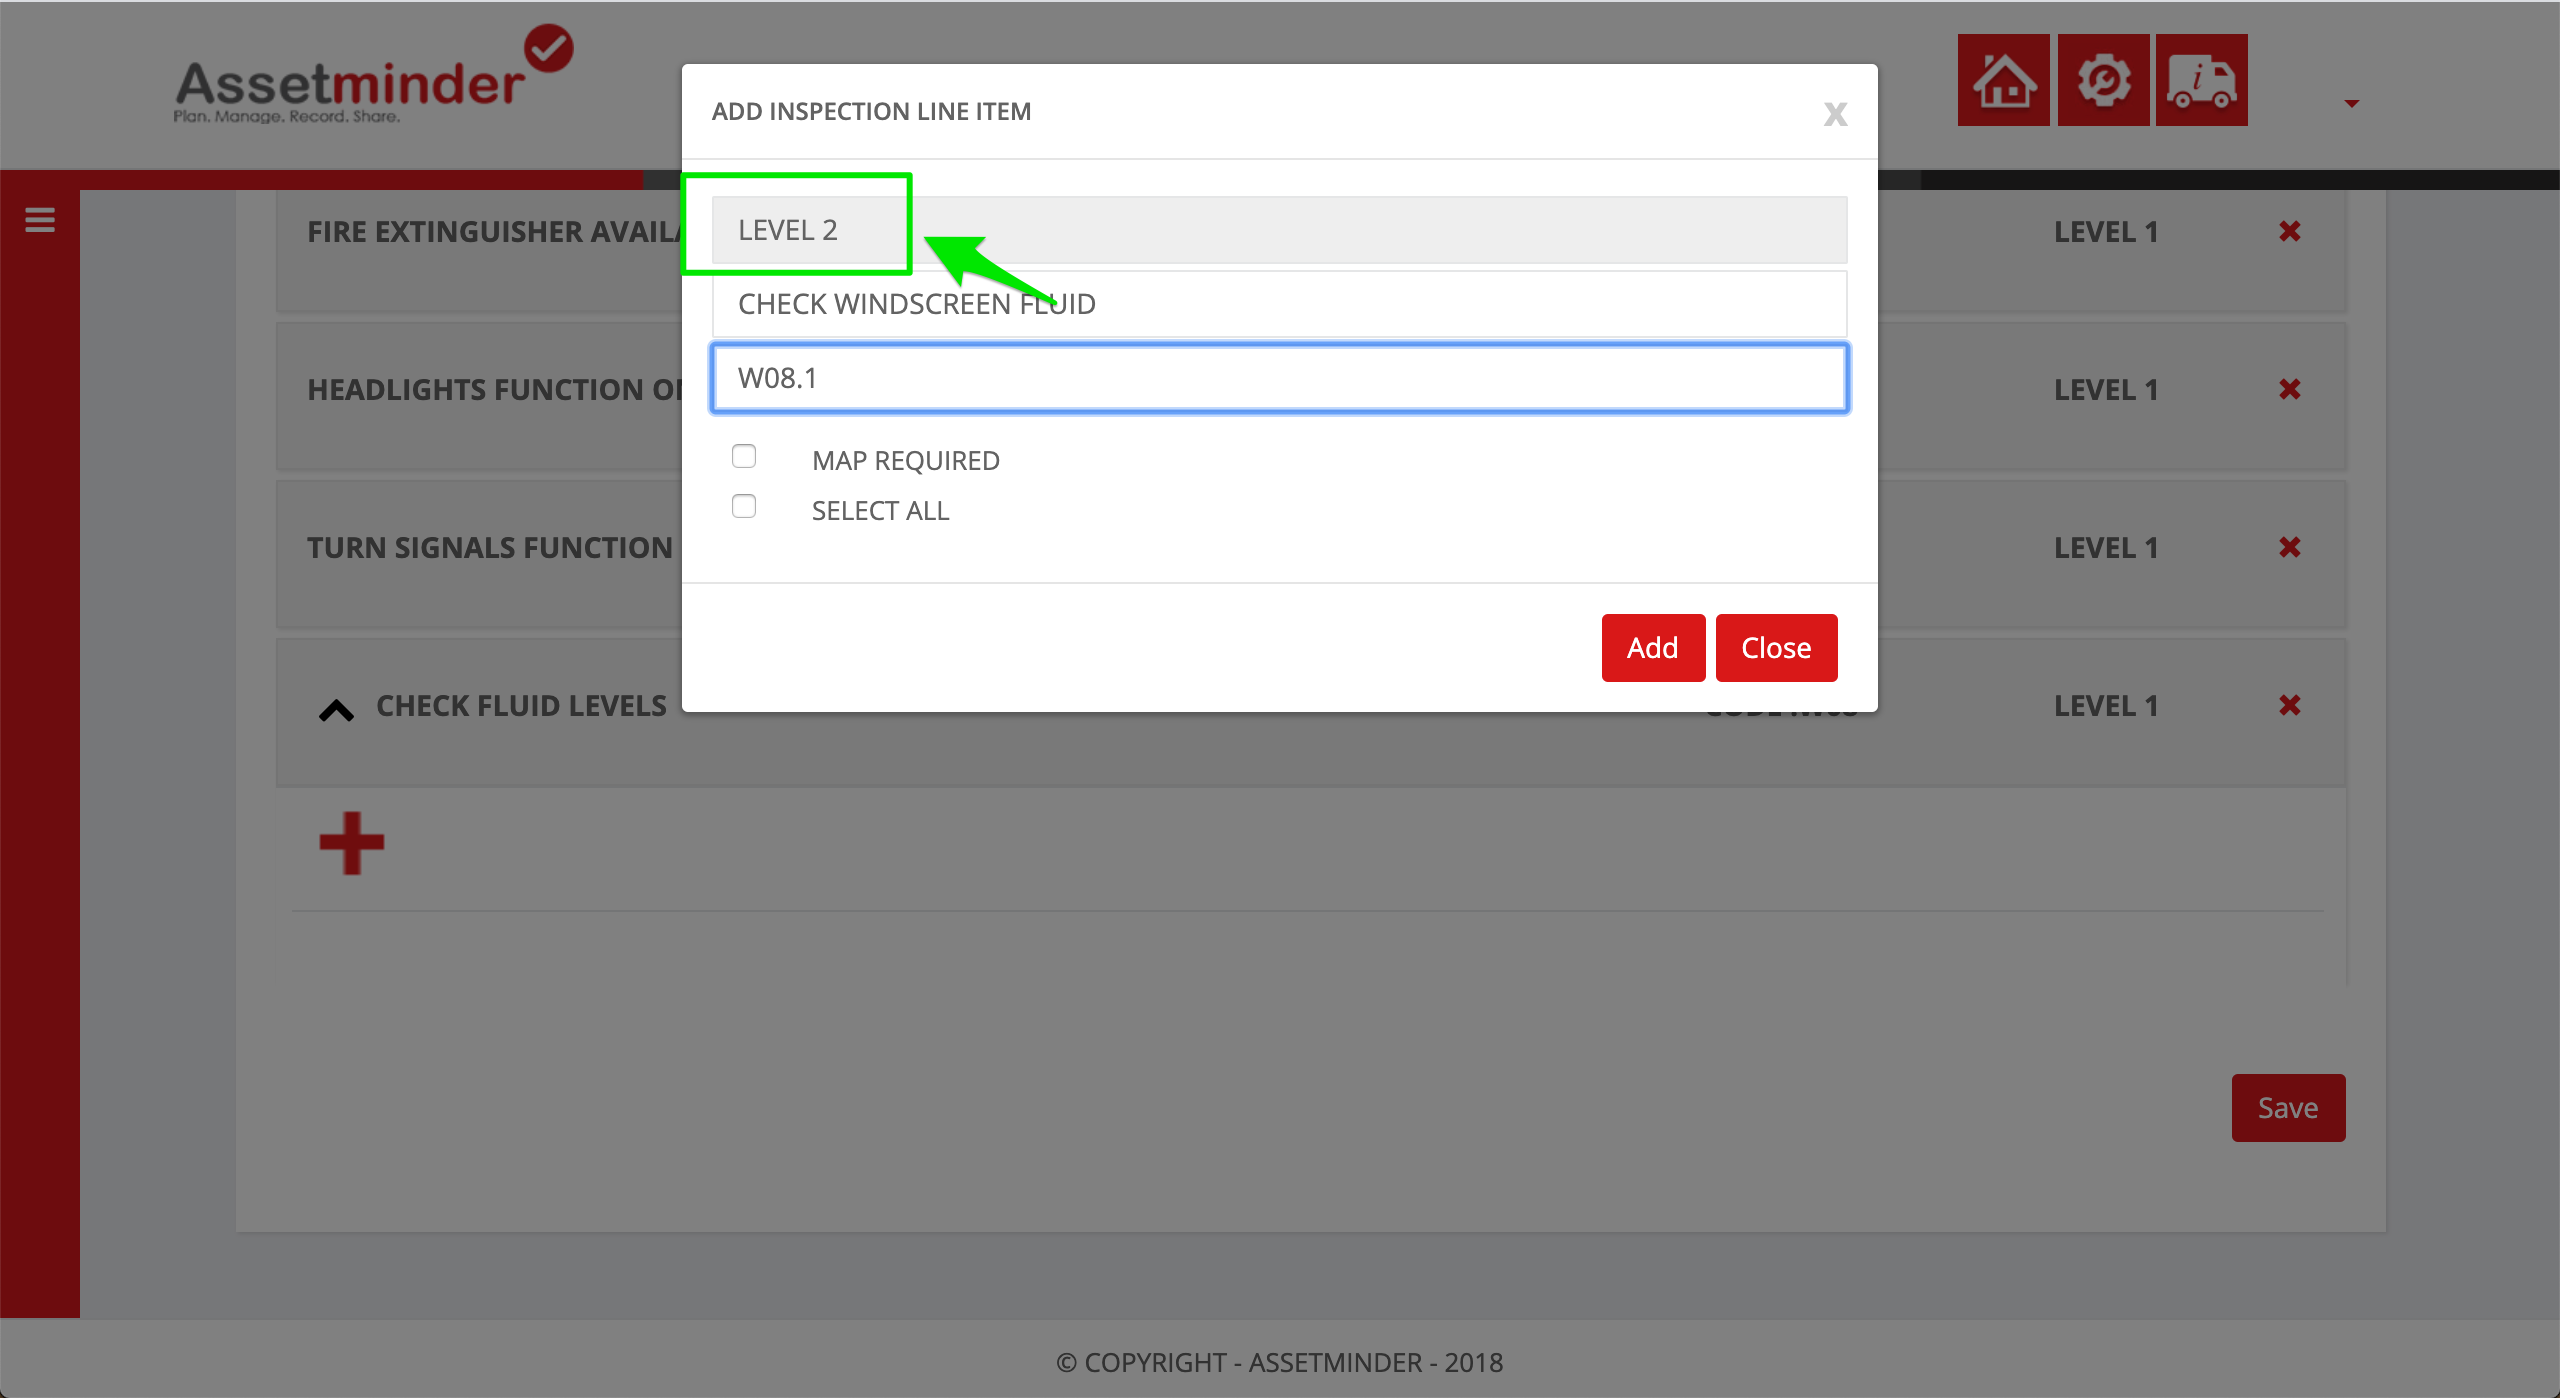
C3. Add in the subtasks and click Add
C4. Click Close when all tasks have been added. The inspection will look something like this with tasks and subtasks
Procedure continued:
10. Click Save/Update when done
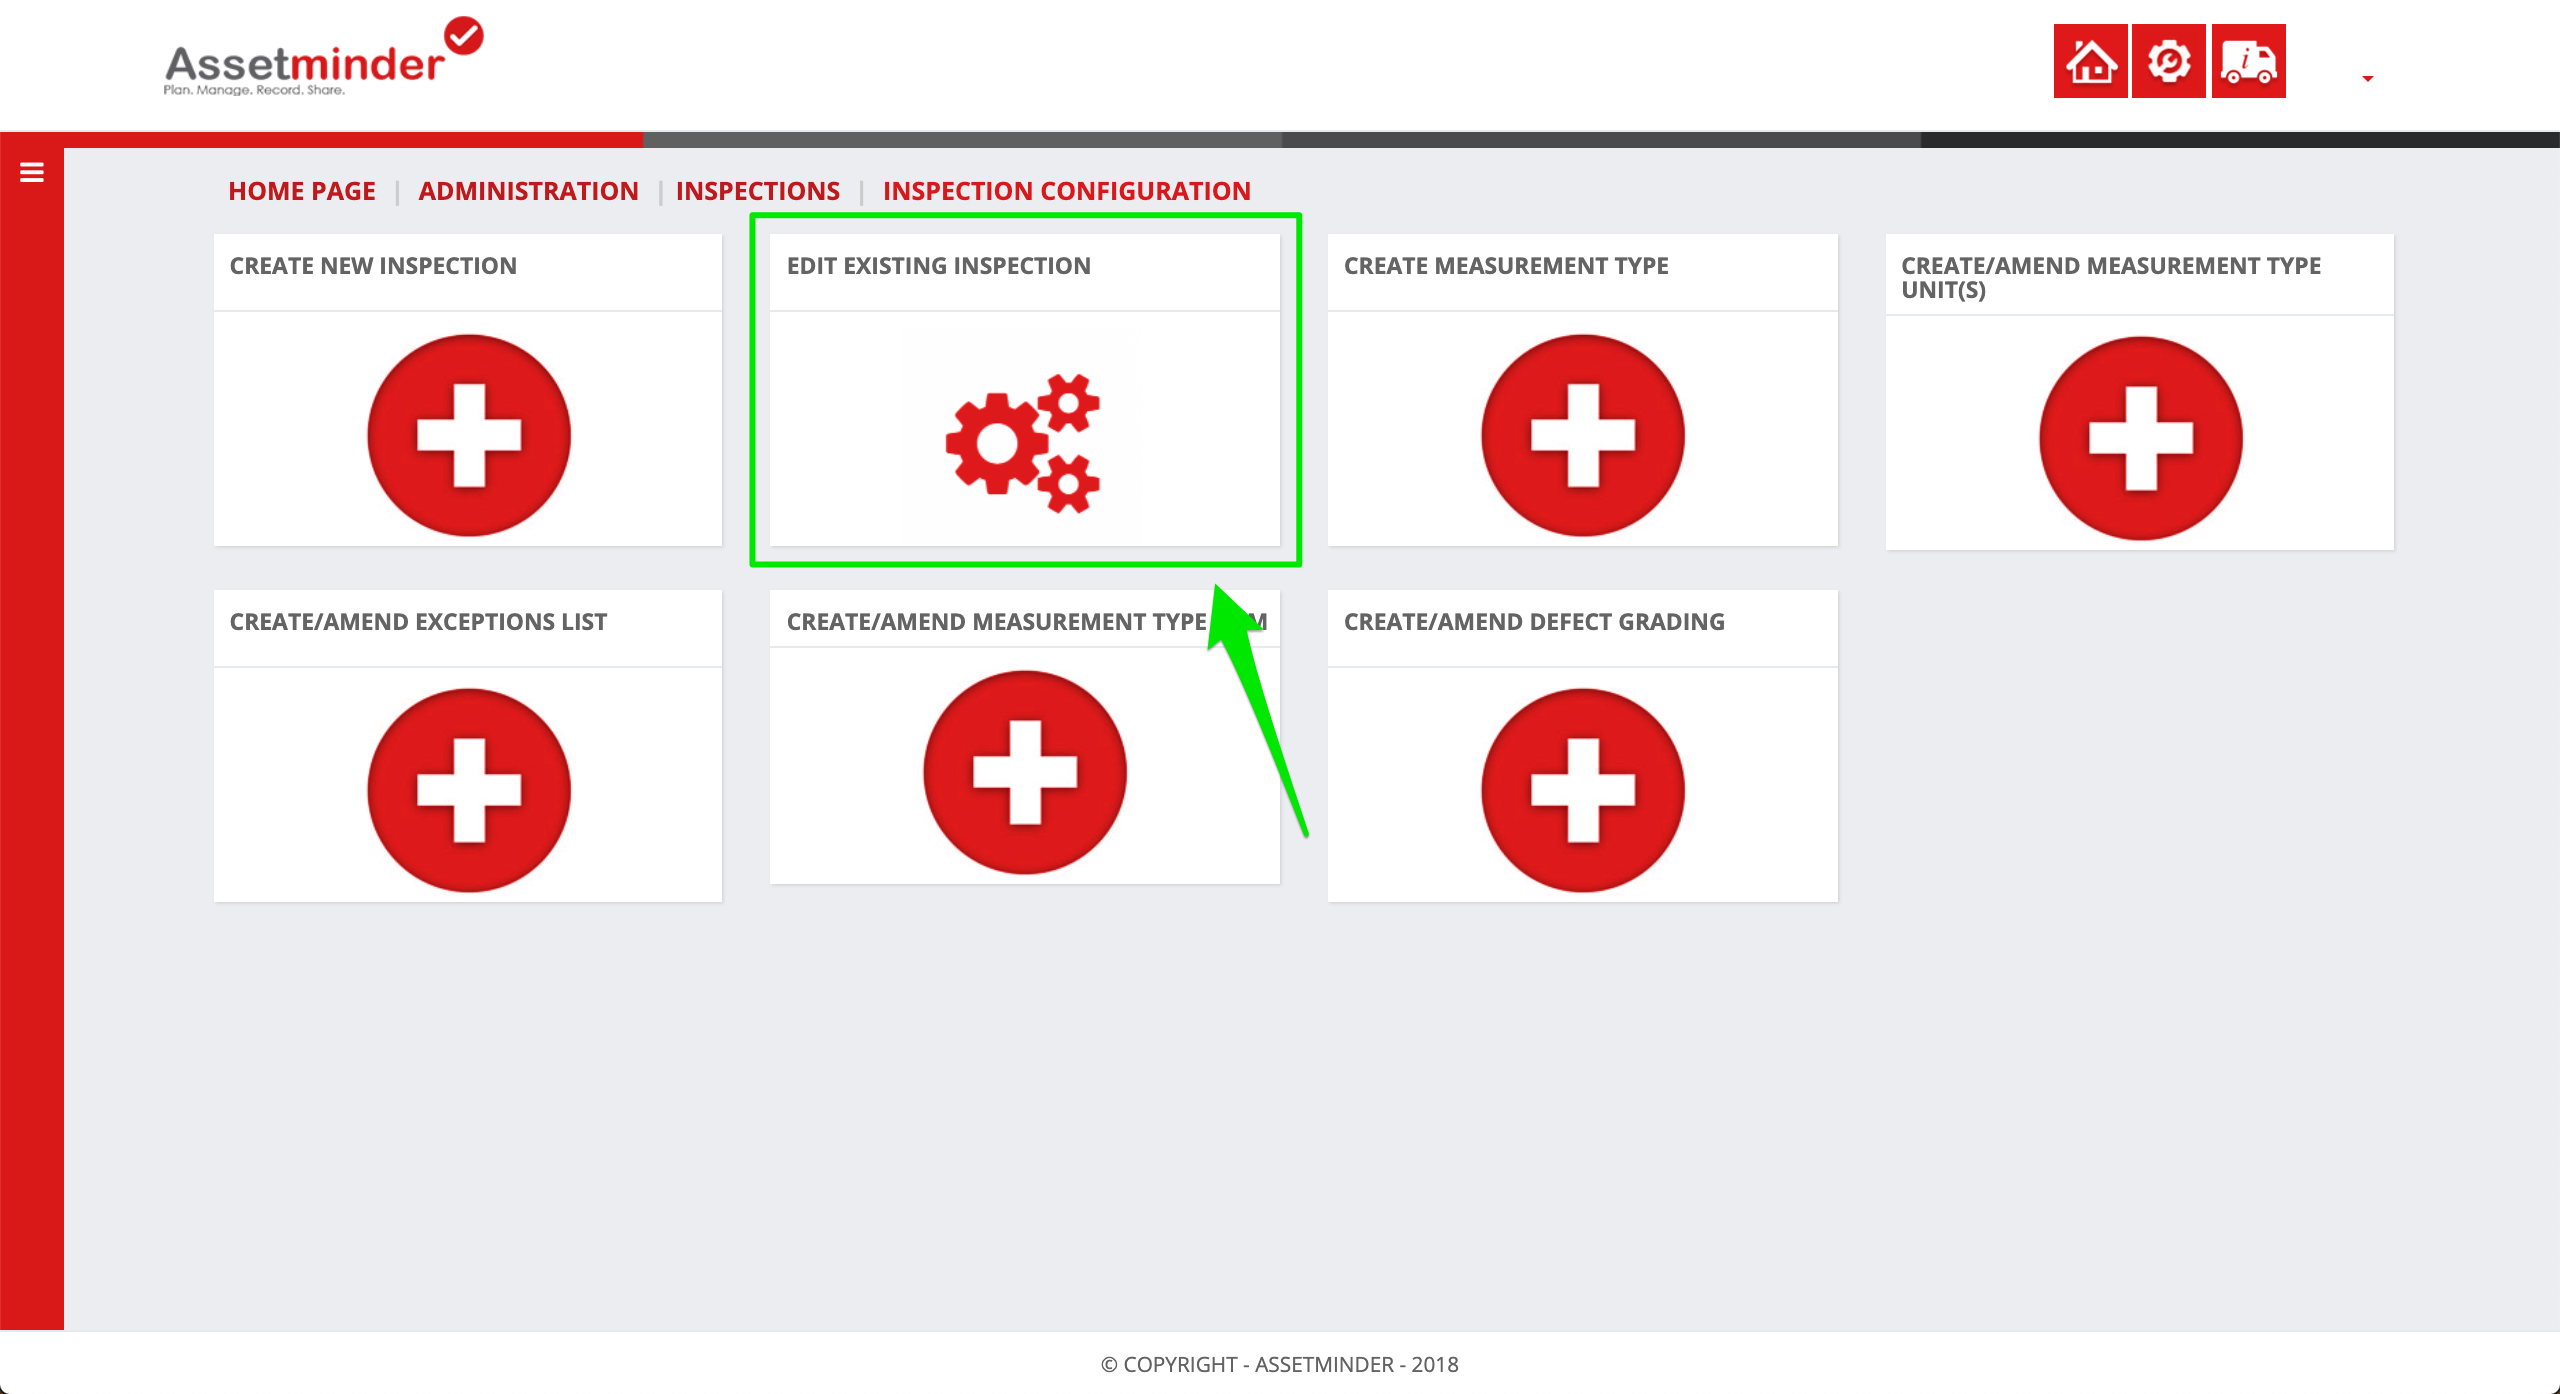
11. The inspection checklist is complete, but it is not yet available for selection. The final critical step is to activate the inspection checklist. Navigate back one step to the Inspection Configuration screen
12. Select Edit Existing Inspection
13. Search for the relevant inspection on the list. Check the Publish checkbox to activate and make it available for selection on the mobile app.
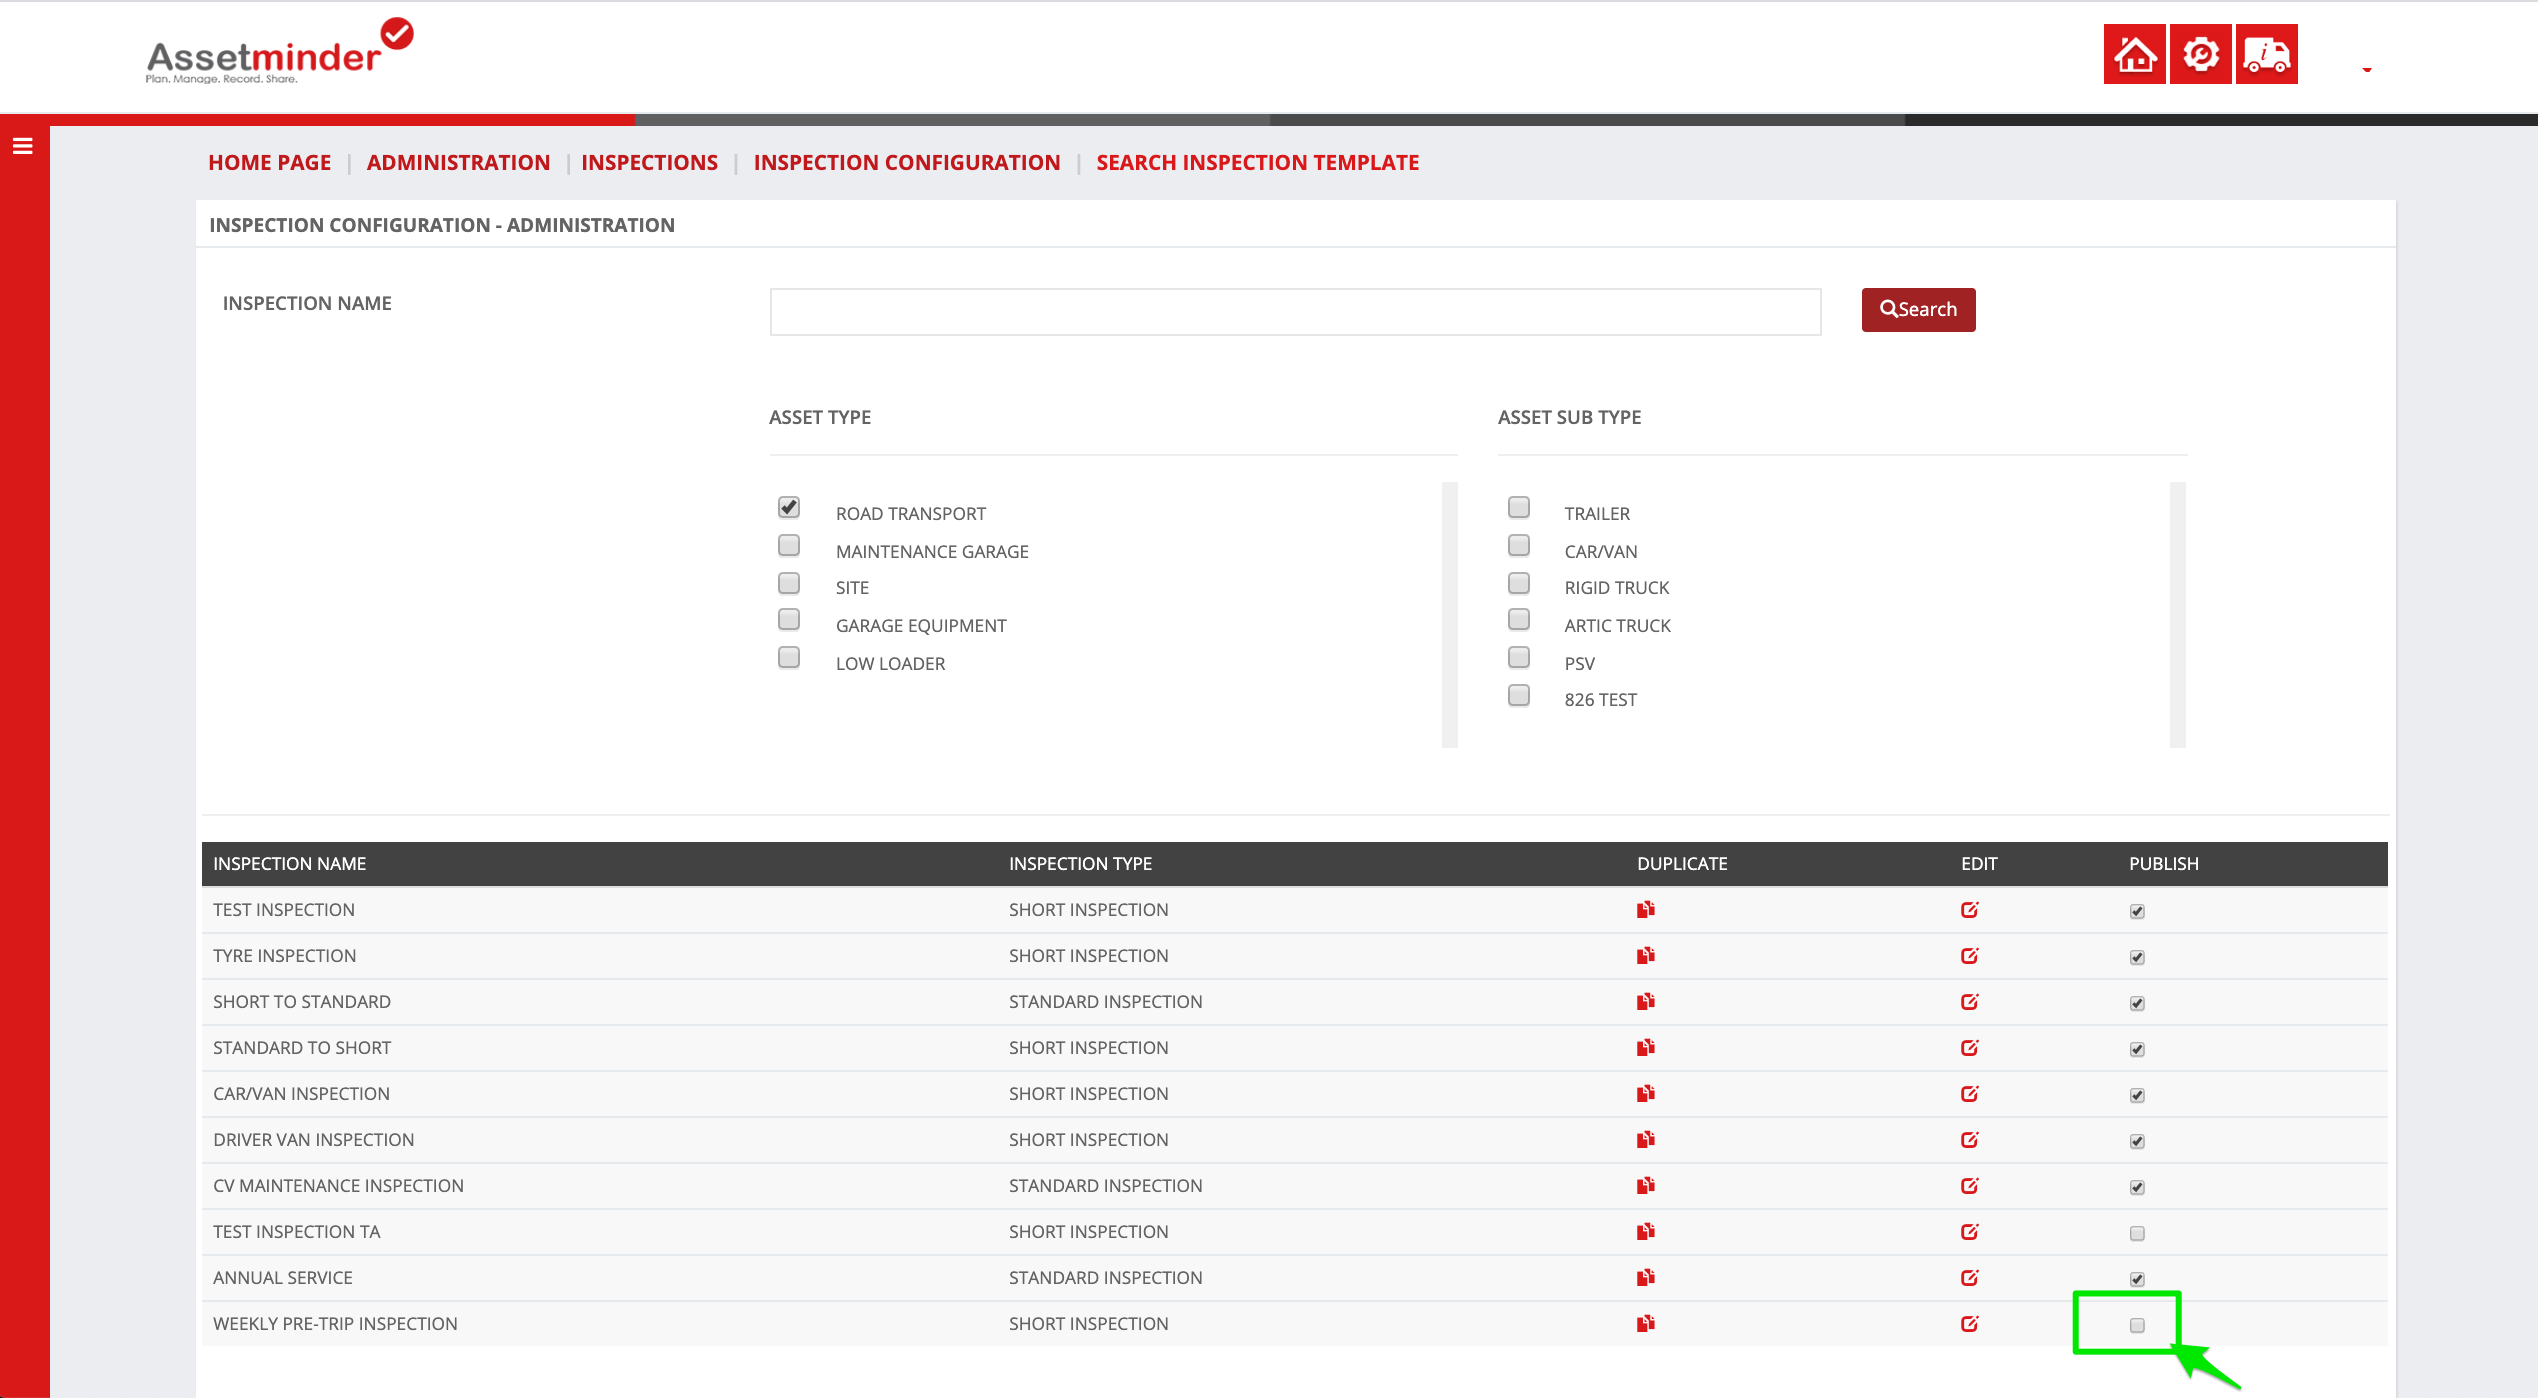
Note:- If changes are made to the inspection checklist, it must be re-published again by checking this checkbox.
14. Repeat the process for all inspection types.
Paul Murray
Comments