When adding a part to a Job he warranty can be configured to the part.
PROCEDURE
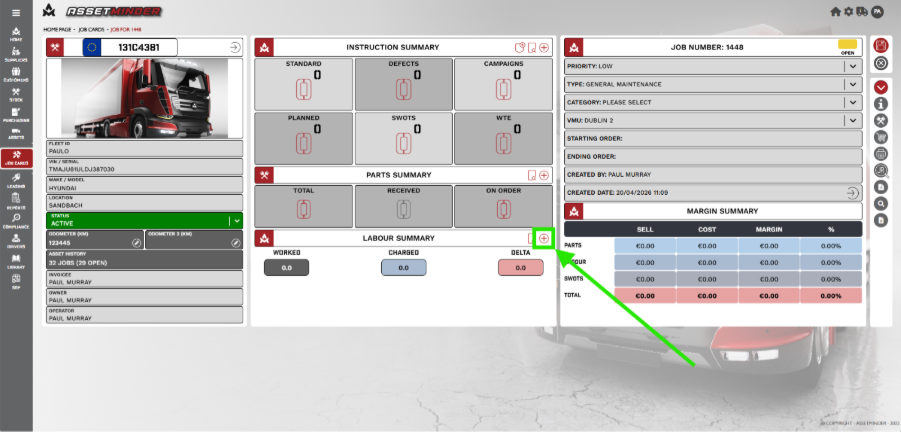
1.Open the job card and click on the Add icon in the Parts Summary section.
2. A dialogue box will open.
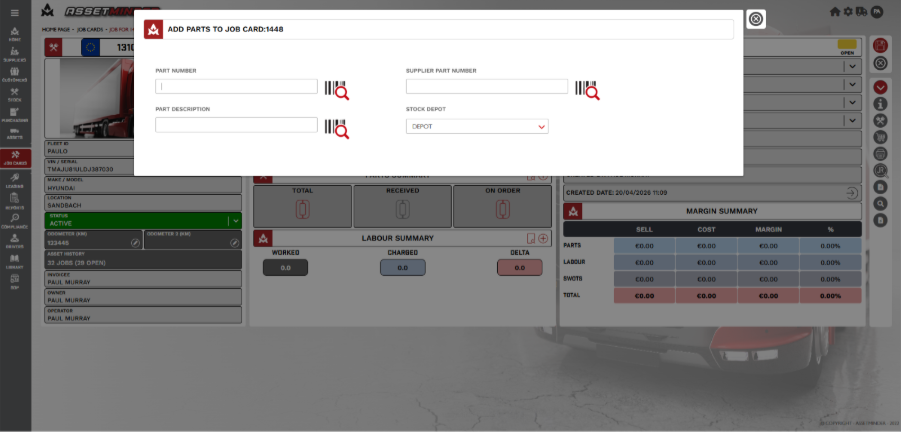
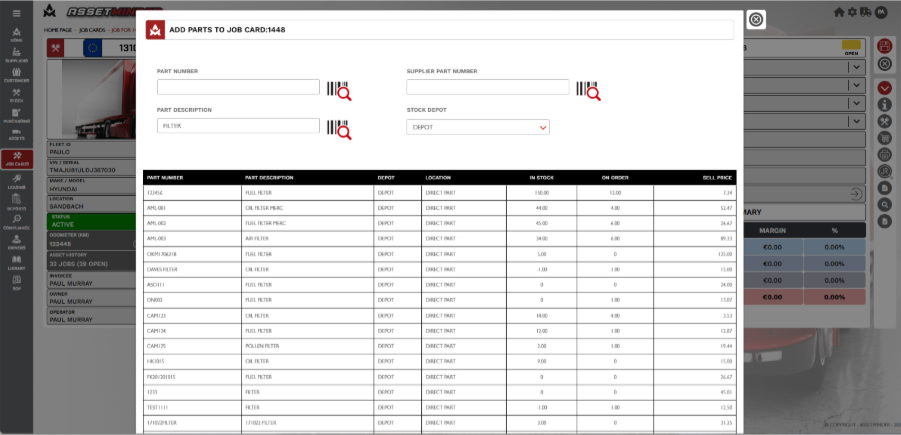
3. You can search for the part by part number (as recorded / used by your organisation), by part description, or by supplier part number. After entering whichever data you are using, click on the search symbol.
In this example, the user has entered the part description, ‘FILTER.’ Assetminder then shows a list of parts that match this term.
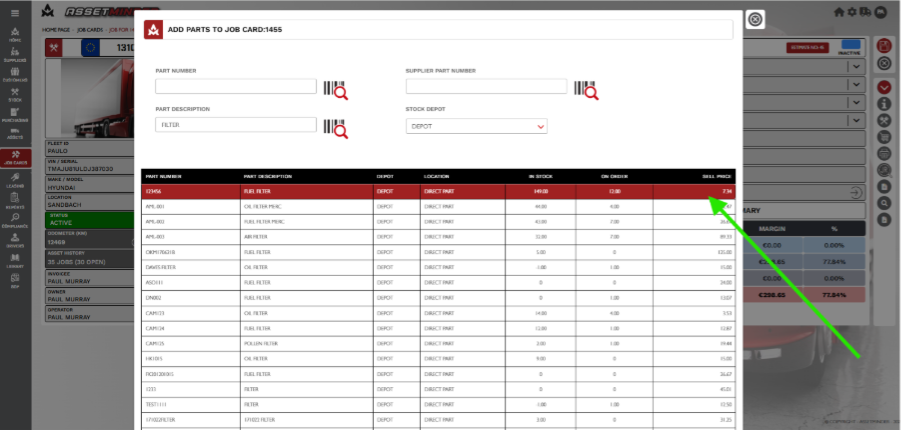
4. Select the part required by highlighting the line and clicking on it. A dialogue box will open with the part details.
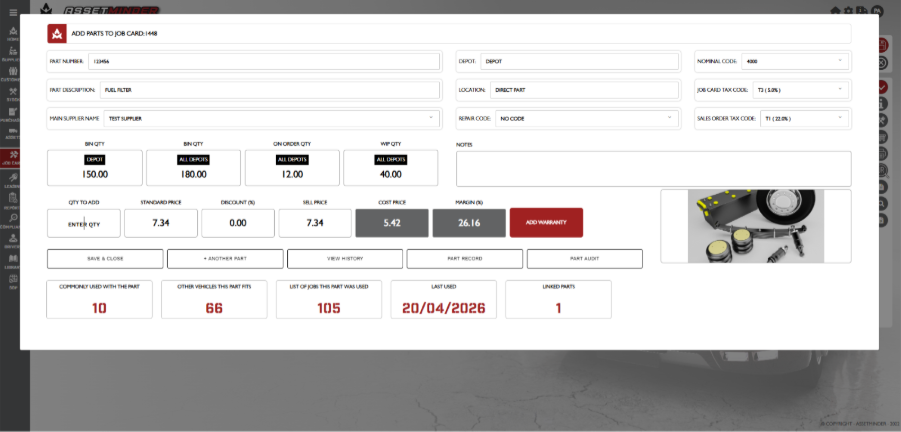
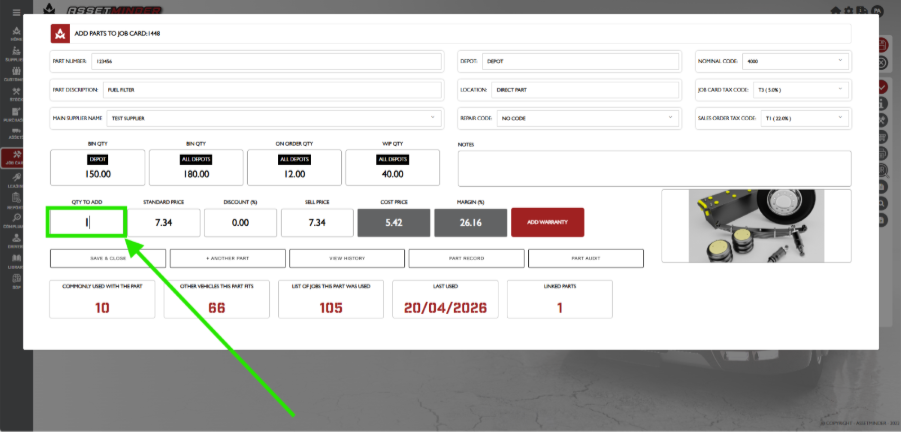
5. Adjust any of the available fields as needed such as the repair code, nominal code etc. Add the number of parts needed for this job card to the Quantity to Add field.
6. If this part has a warranty, click on the ‘ADD WARRANTY’ button.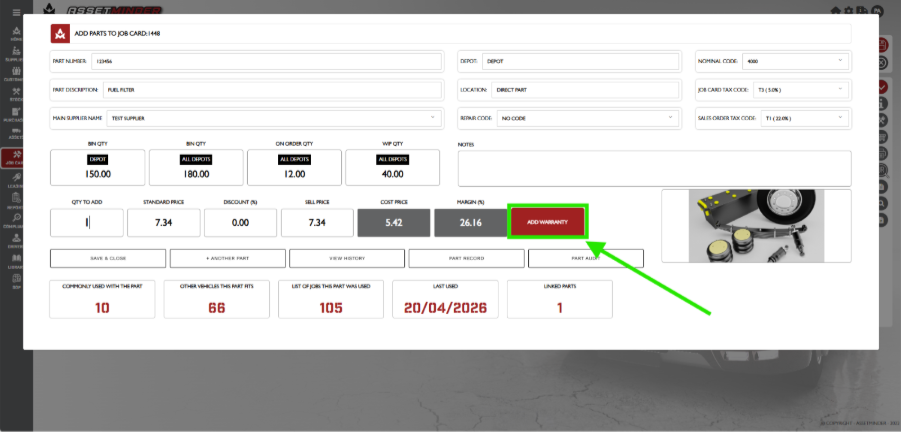
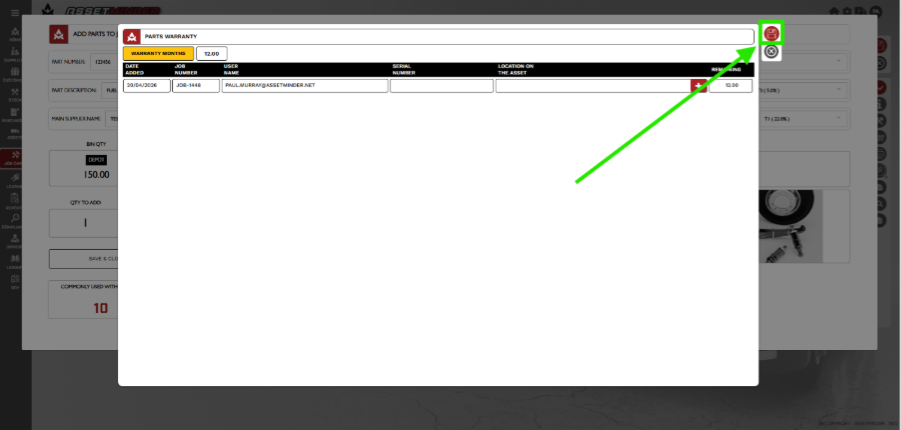
7. The Warranty box will now be shown.
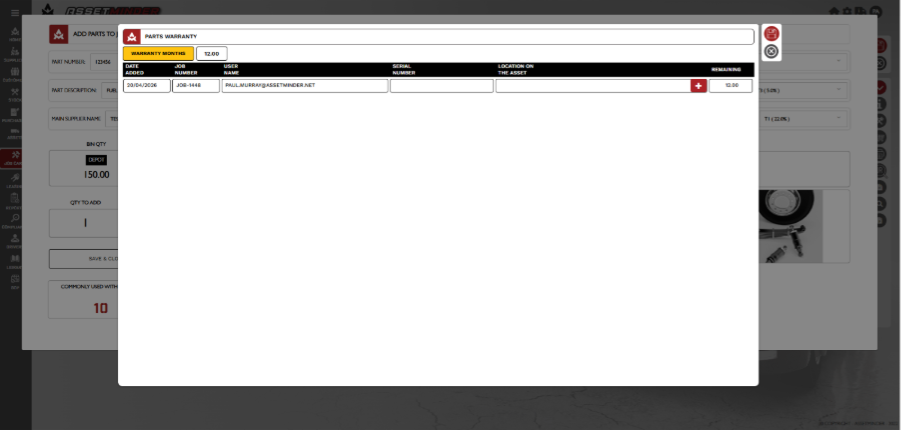
8. The user can now add the amount of warranty in months, serial number and (where relevant) the location where the part has been fitted.
9. When complete, click on SAVE.
Paul Murray
Comments