There are two steps in this procedure
- Add the new warranty type
- Assign the warranty type to the asset subtype (i.e., make a warranty that is already set-up on Assetminder available for use with a particular Asset Sub Type).
PROCEDURE
Note: Adding a Warranty Type requires the user to access the Administrator settings of Assetminder.
1. Access the Administrator Settings by clicking on the Tools icon on the home page.

2. Click on ASSETS icon

3. Click on WARRANTY icon.
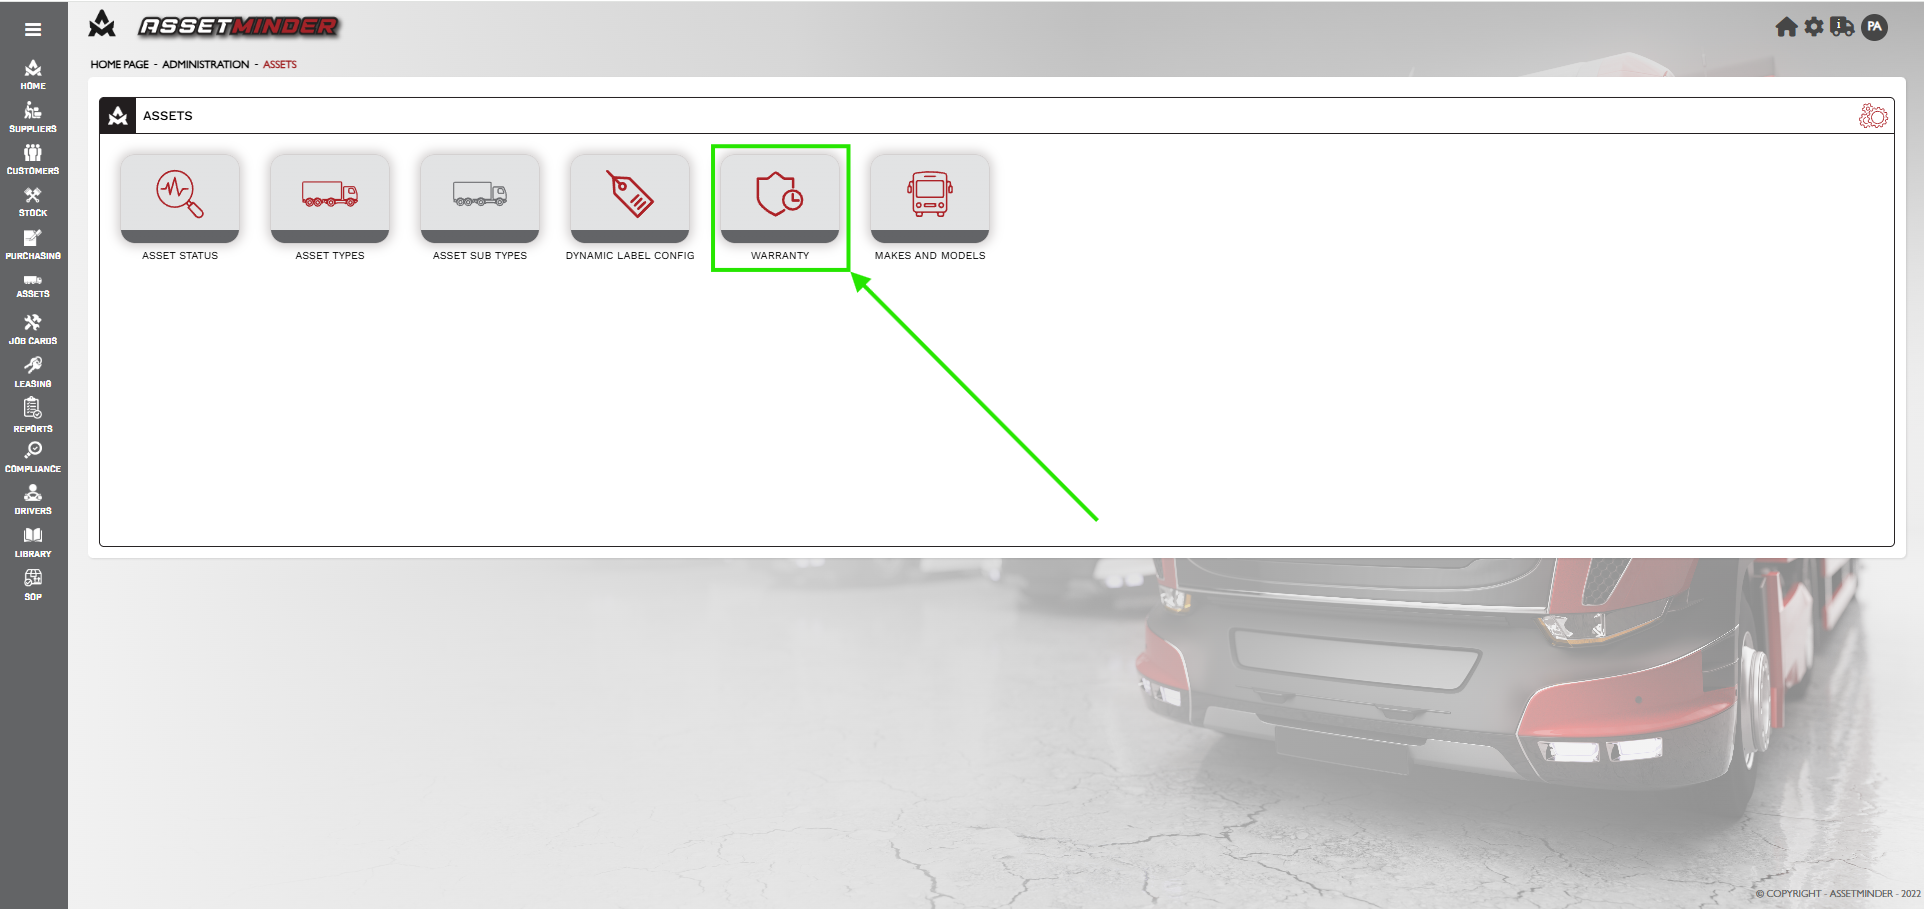
4. Due to space constraints, the text on the buttons reads:
- SET-UP / AMEND WARR... for which the full text is, SET-UP / AMEND WARRANTY NAMES
- CREATE / AMEND SUB... for which the full text is, CREATE/AMEND SUB ASSET TYPE WARRANTY

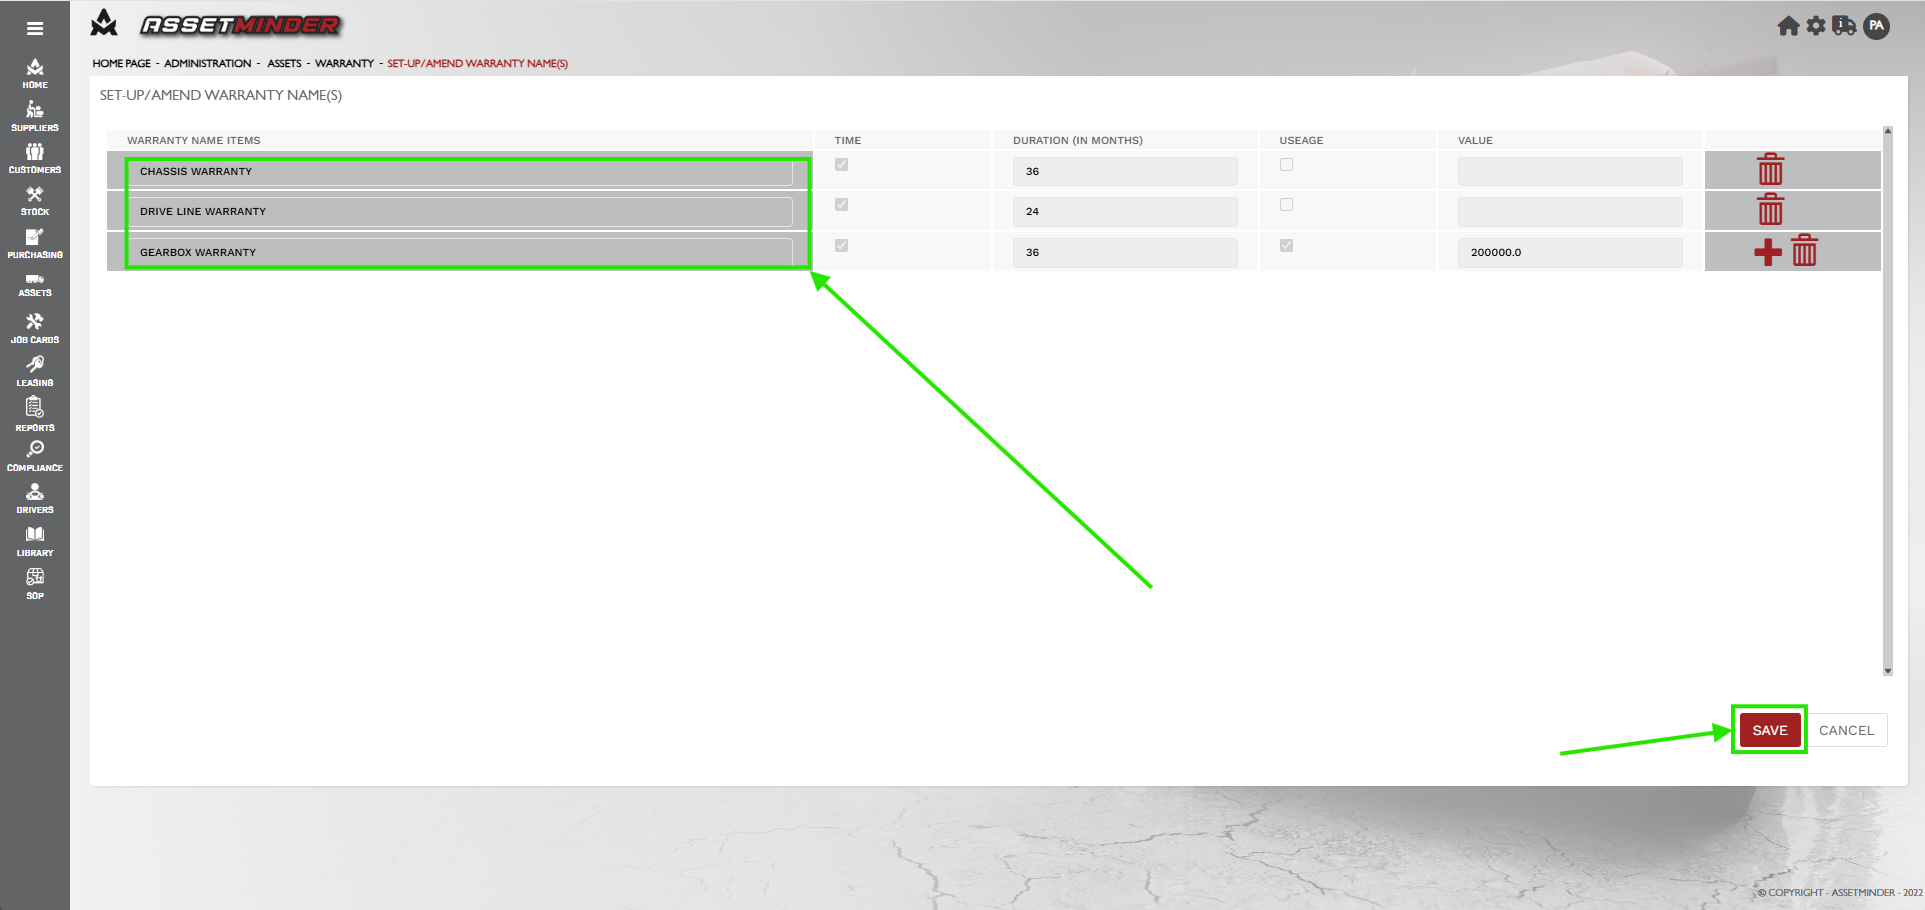
5. SET-UP / AMEND WARRANTY NAMES
Click on the SET-UP / AMEND WARR button

6. The warranty types already set-up on Assetminder (if any) are shown.
To amend the name of an existing warranty, simply type the details into the WARRANTY NAME field. Note that it is not possible to change any other detail.
Click SAVE.
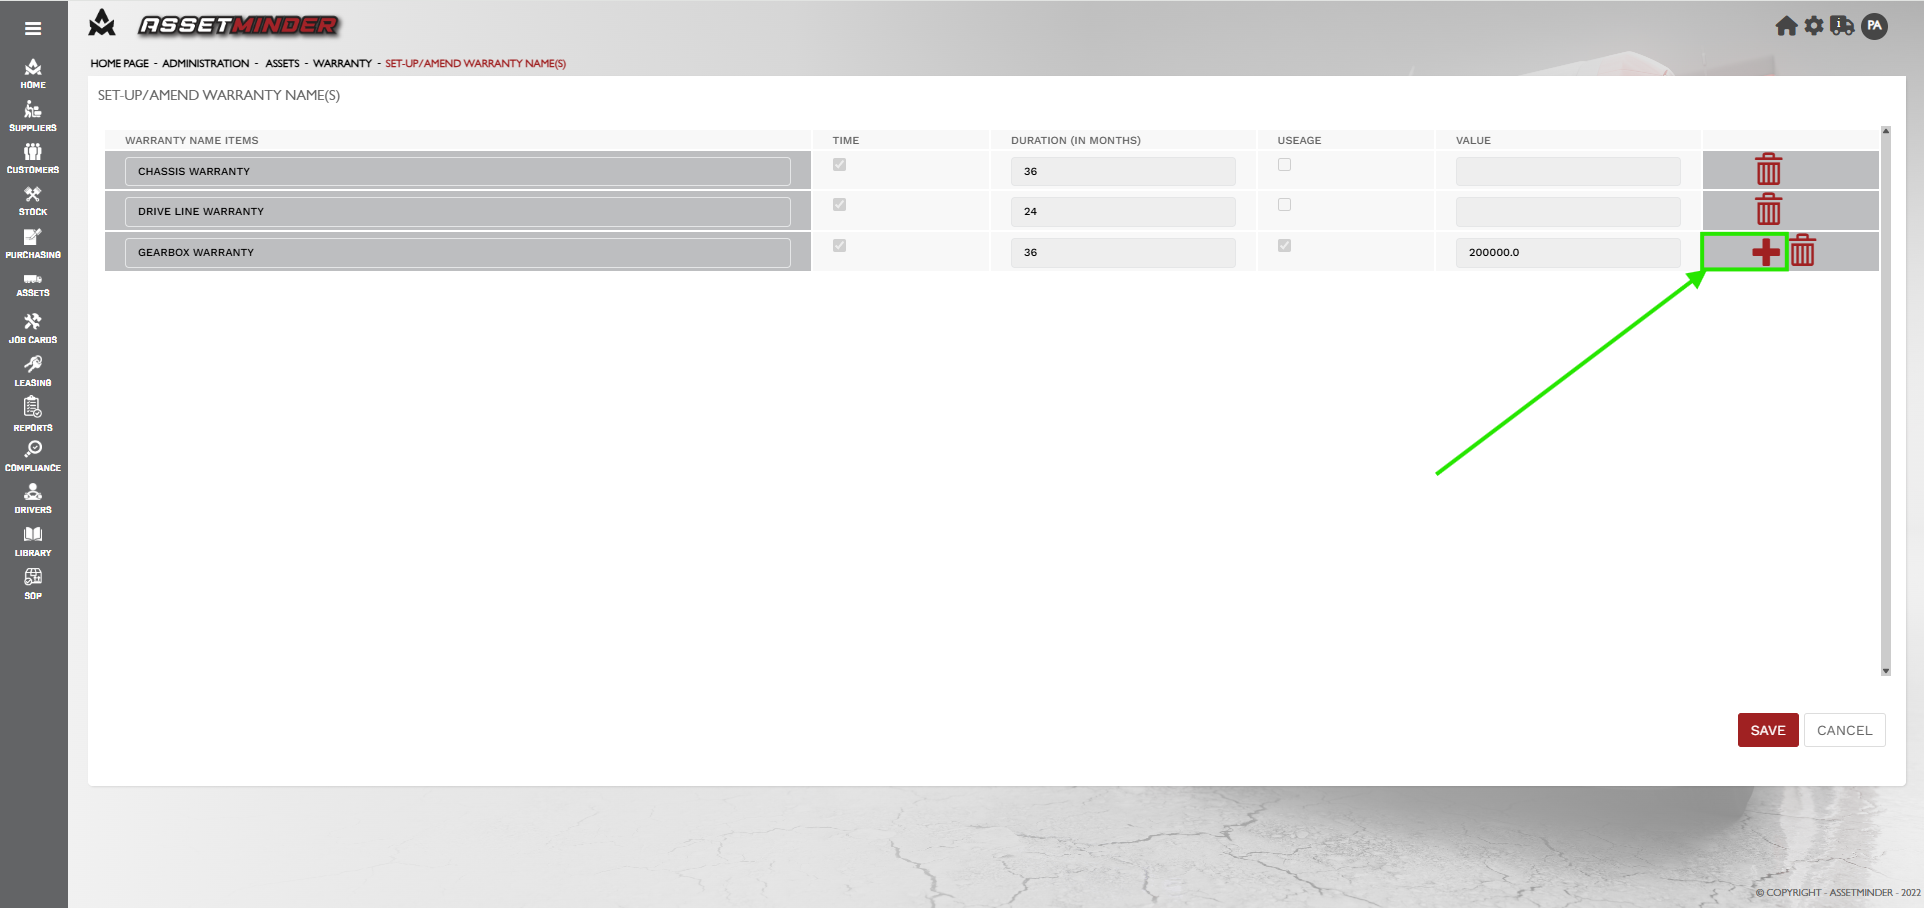
7. To add a new WARRANTY NAME click on the + symbol.
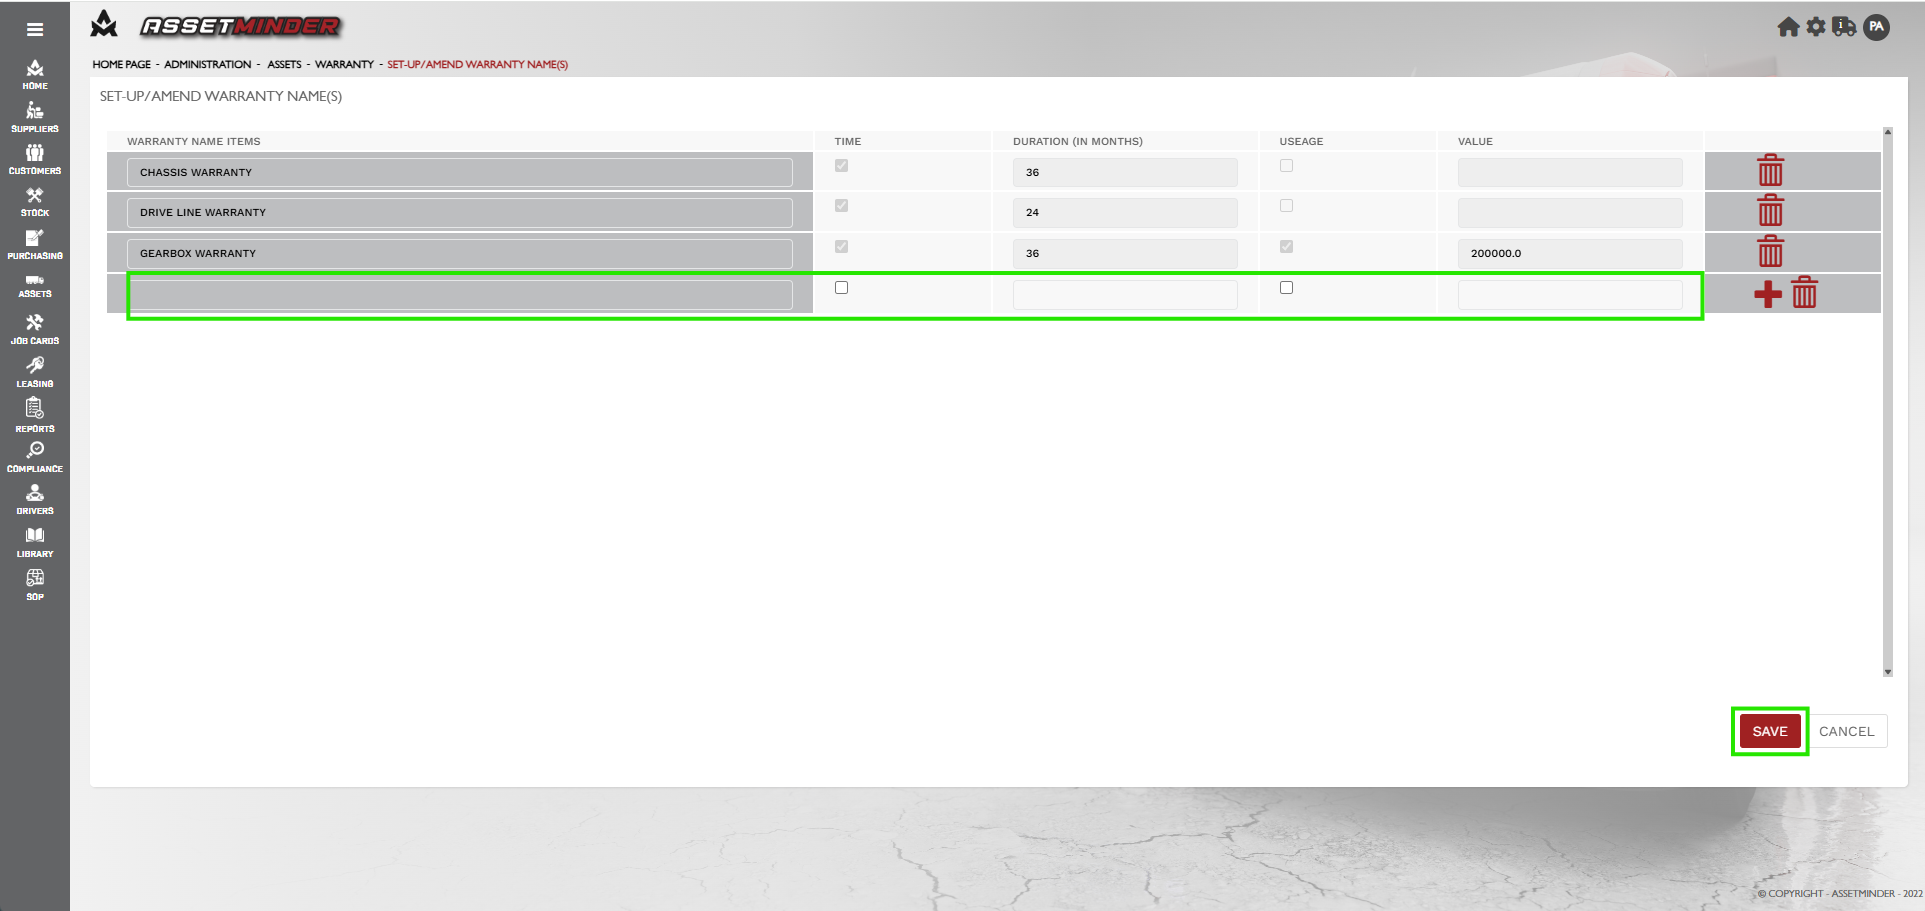
8. Type in the New WARRANTY NAME. Select Time, Duration ( in months ), Usage and Value fields.
Click SAVE.
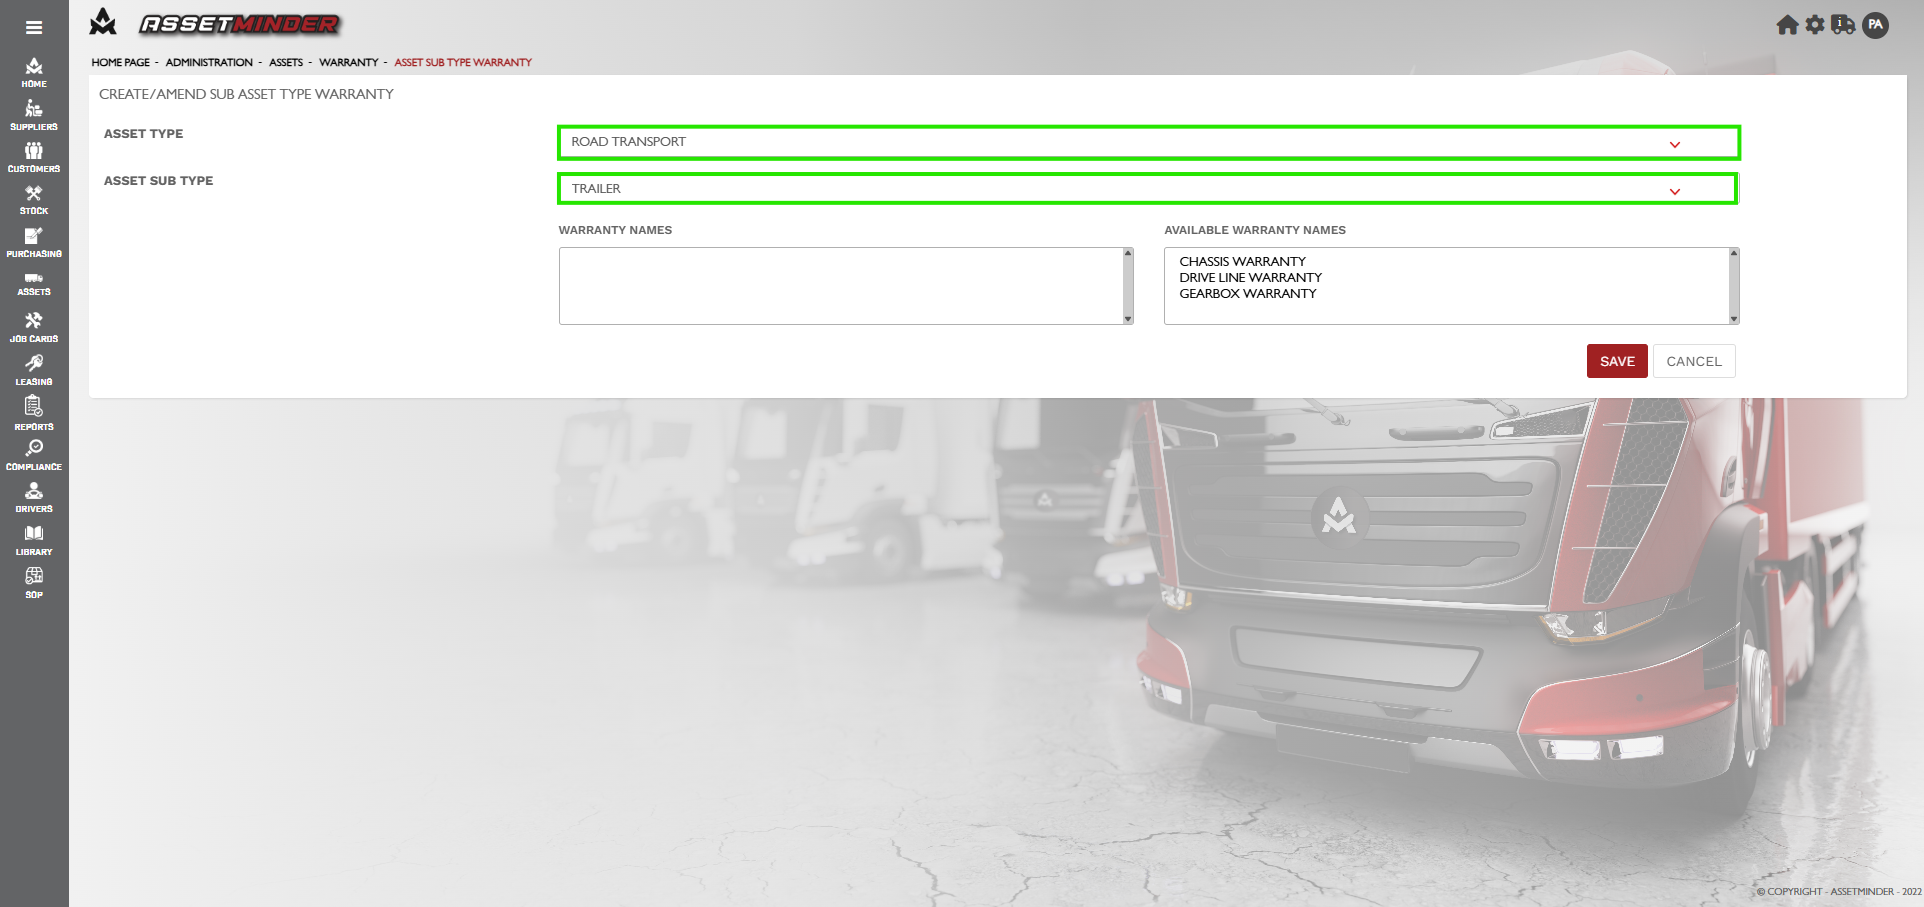
8. Assign the warranty type to the asset subtype
Click on the CREATE/AMEND SUB ASSET TYPE WARRANTY button.

9. Select the ASSET TYPE and ASSET SUB TYPE. The available warranty names already setup on Assetminder will be shown in the AVAILABLE WARRANTY NAMES.
10. To add one of the available warranty types to this Asset Type / Asset Sub-Type combination, double-click on the selected warranty in the AVAILABLE WARRANTY TYPES.
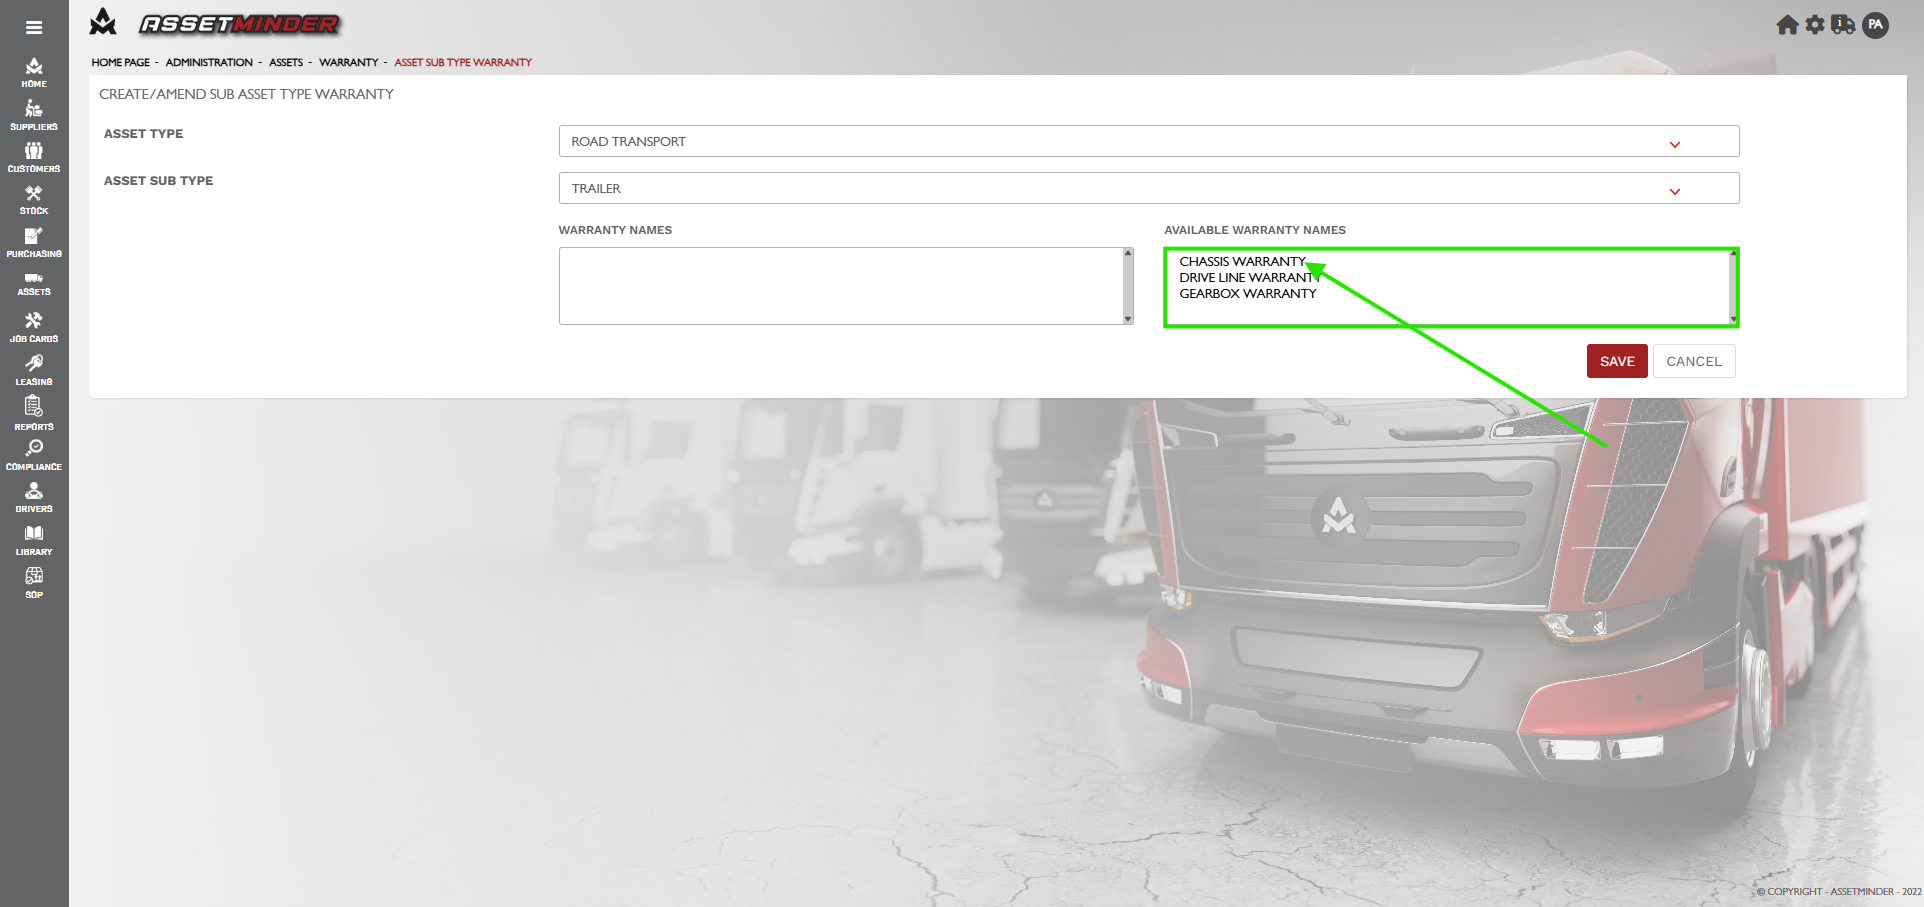
11. This will add it to the column on the left 'WARRANTY NAMES' column.
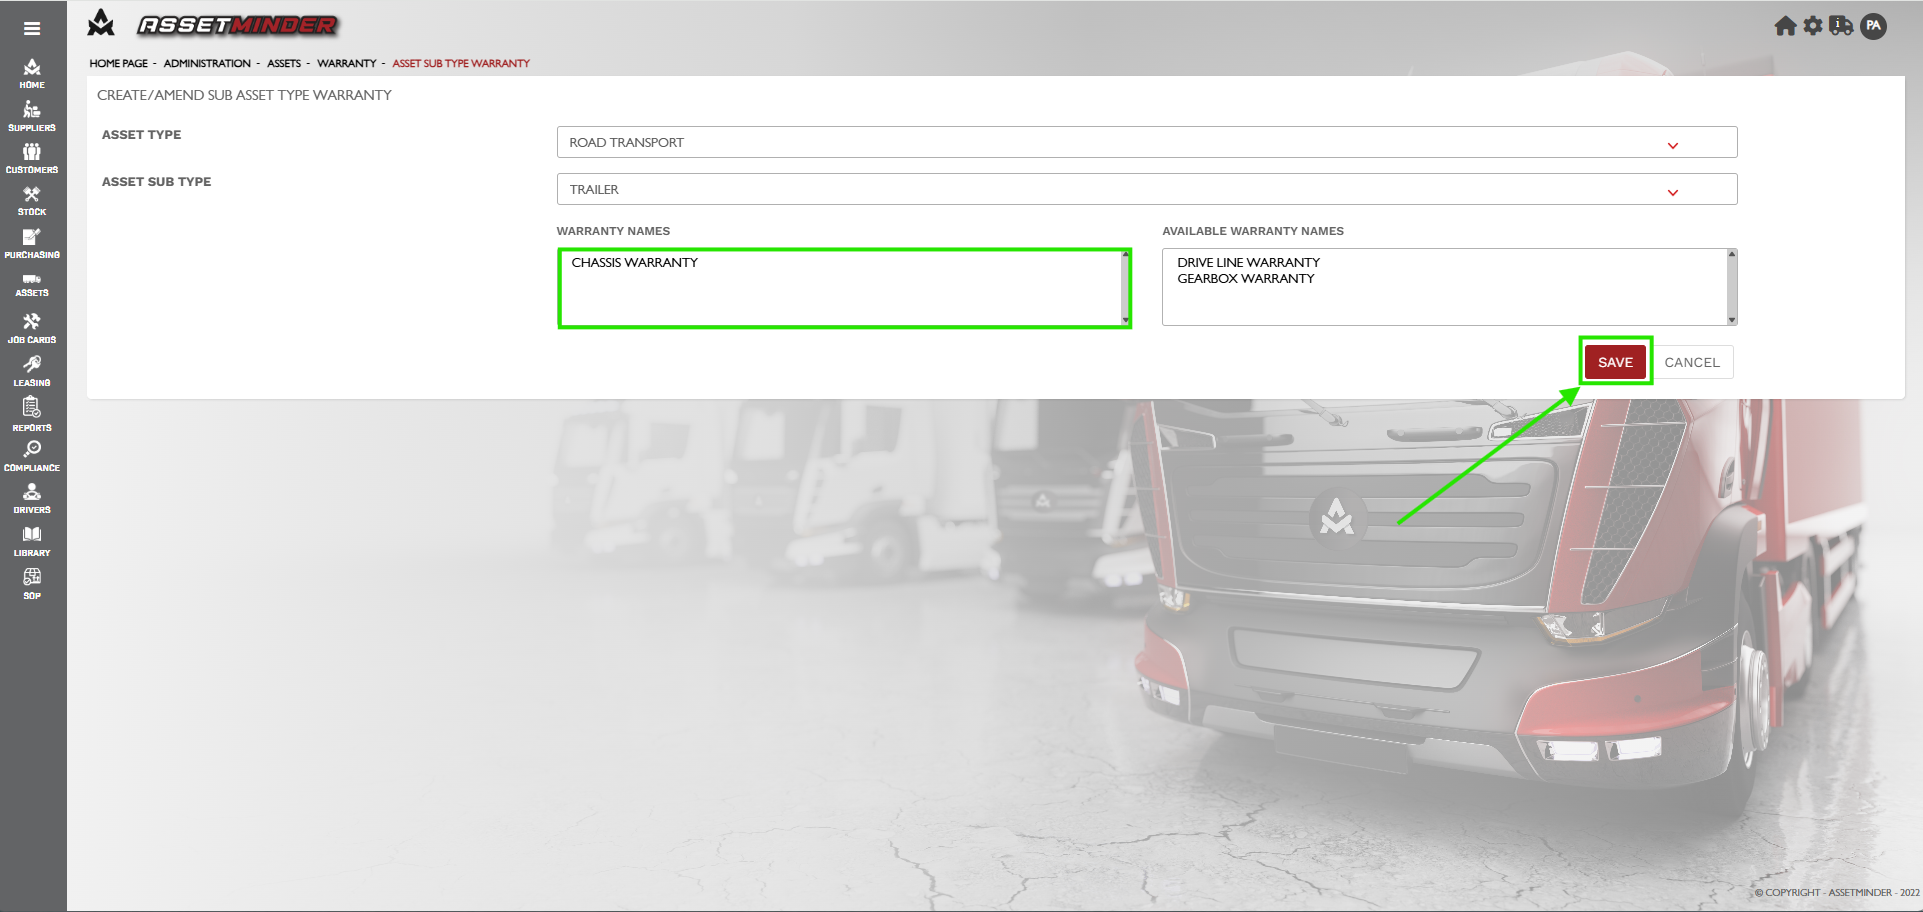
To finish, click SAVE.
Conor Gibson
Comments