Prerequisites before completing this procedure
Procedure
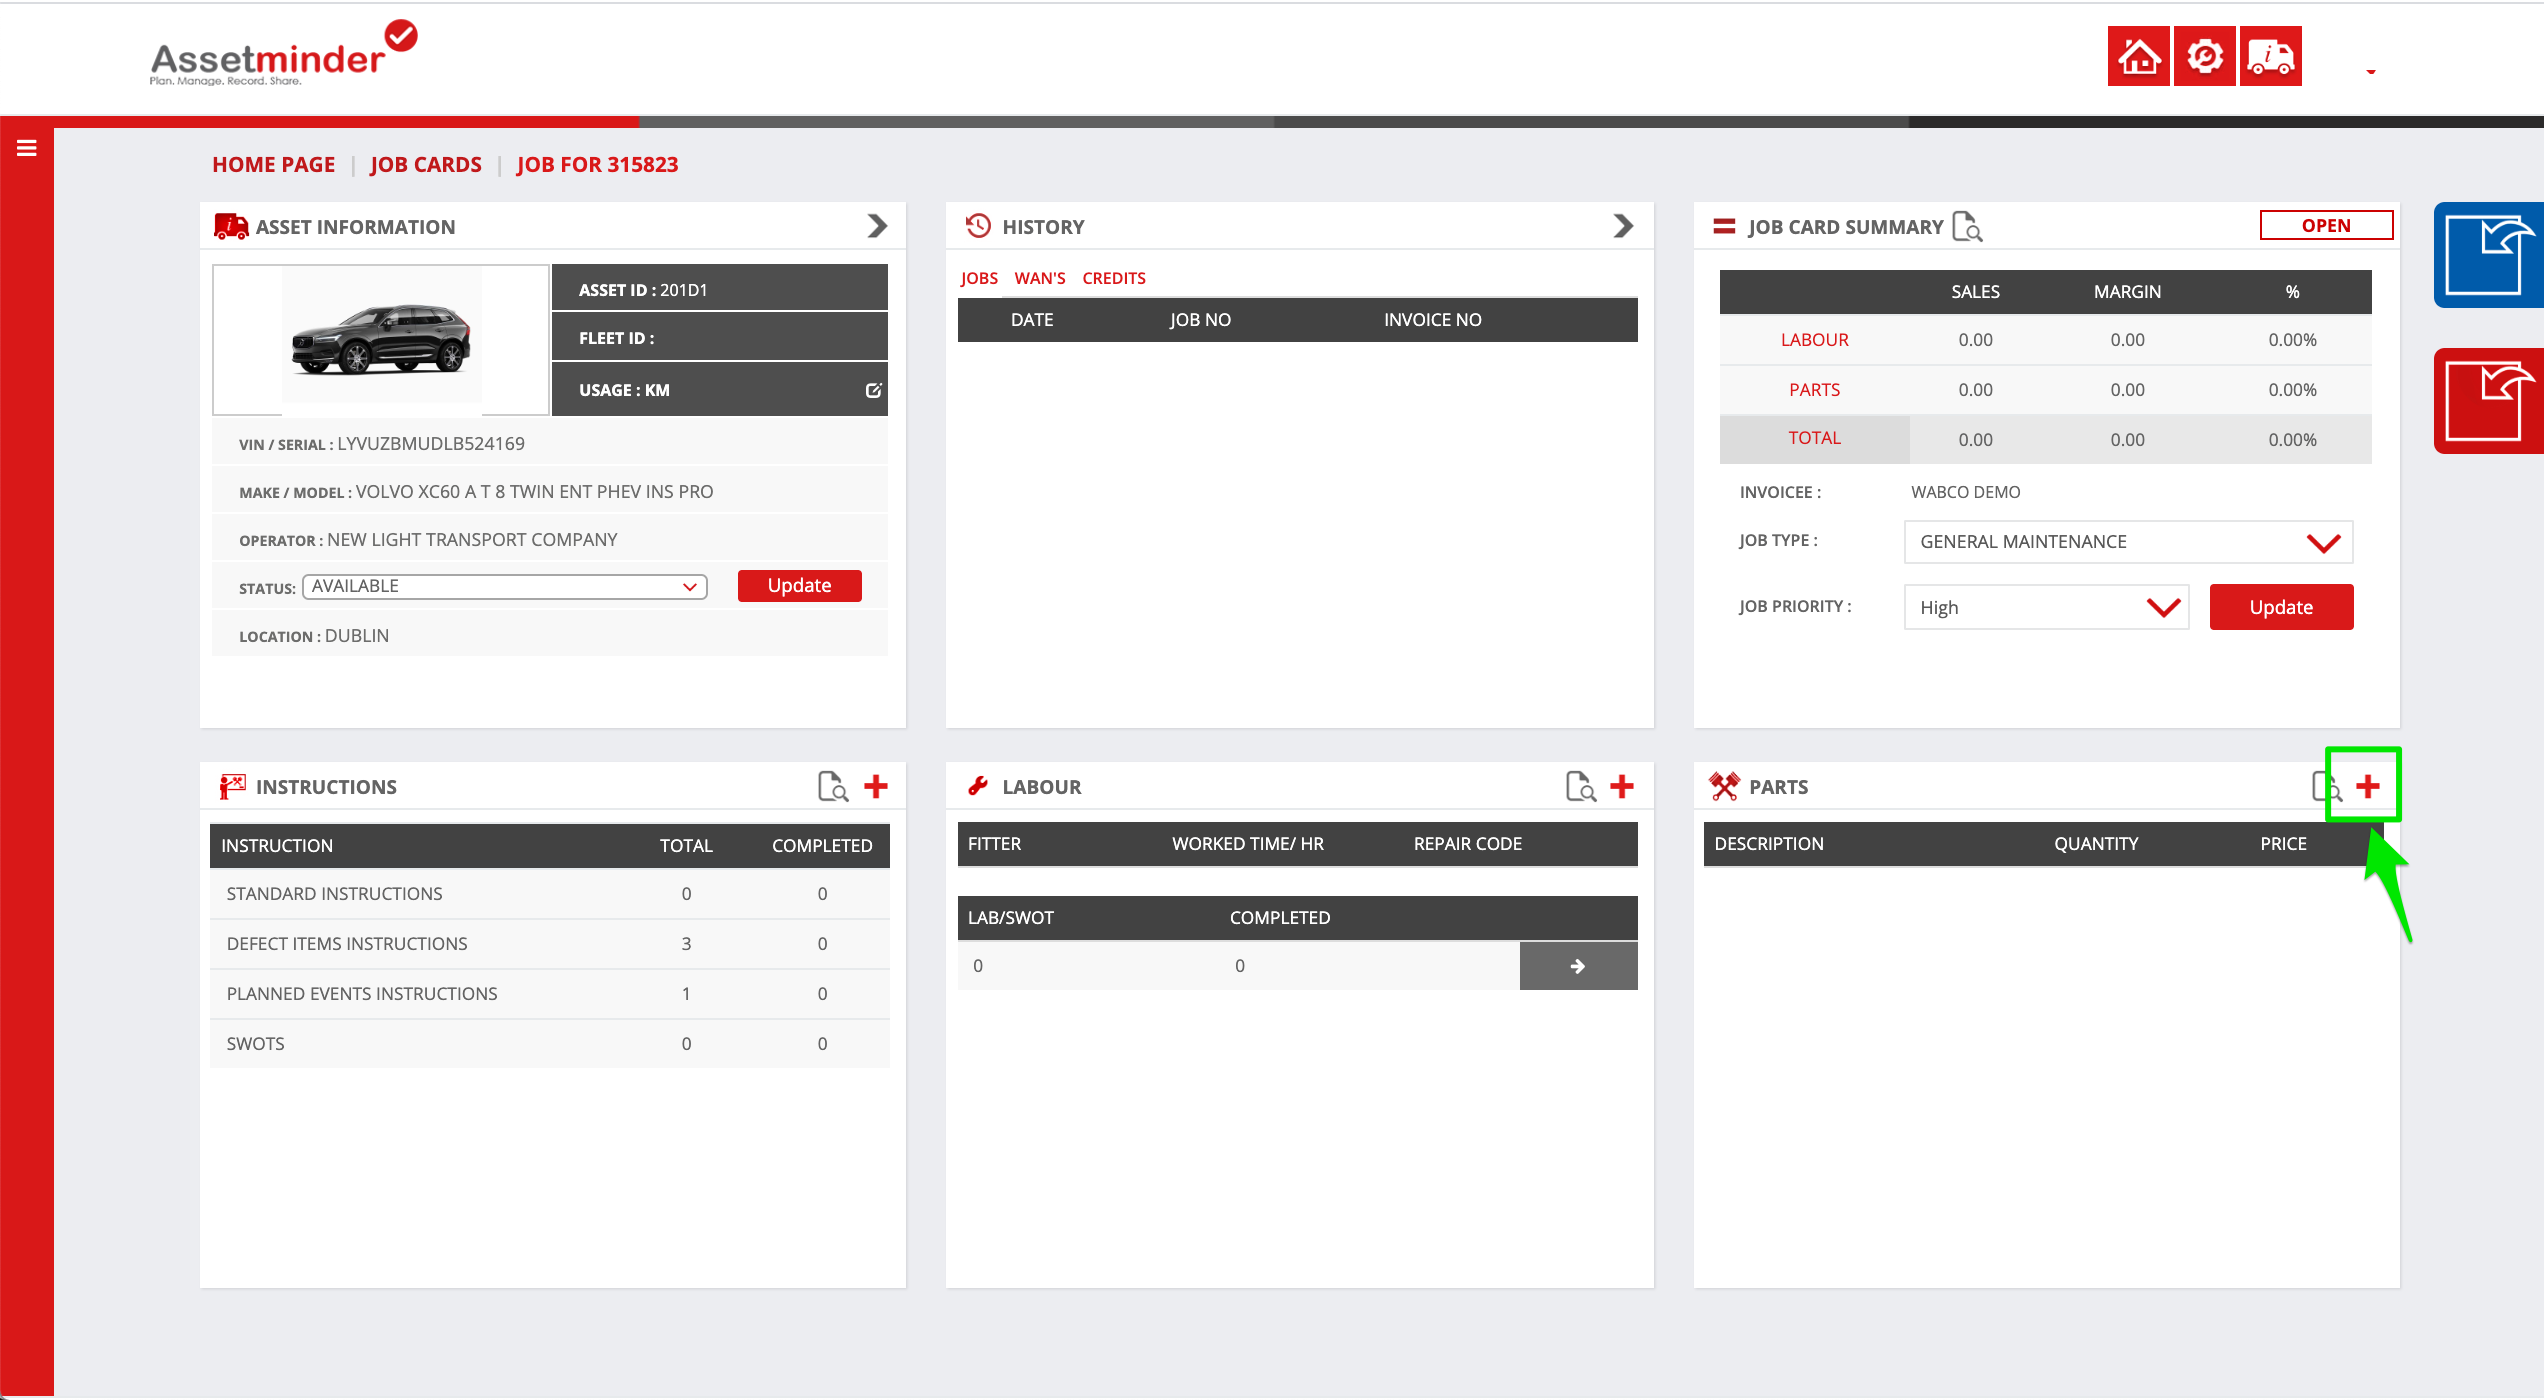
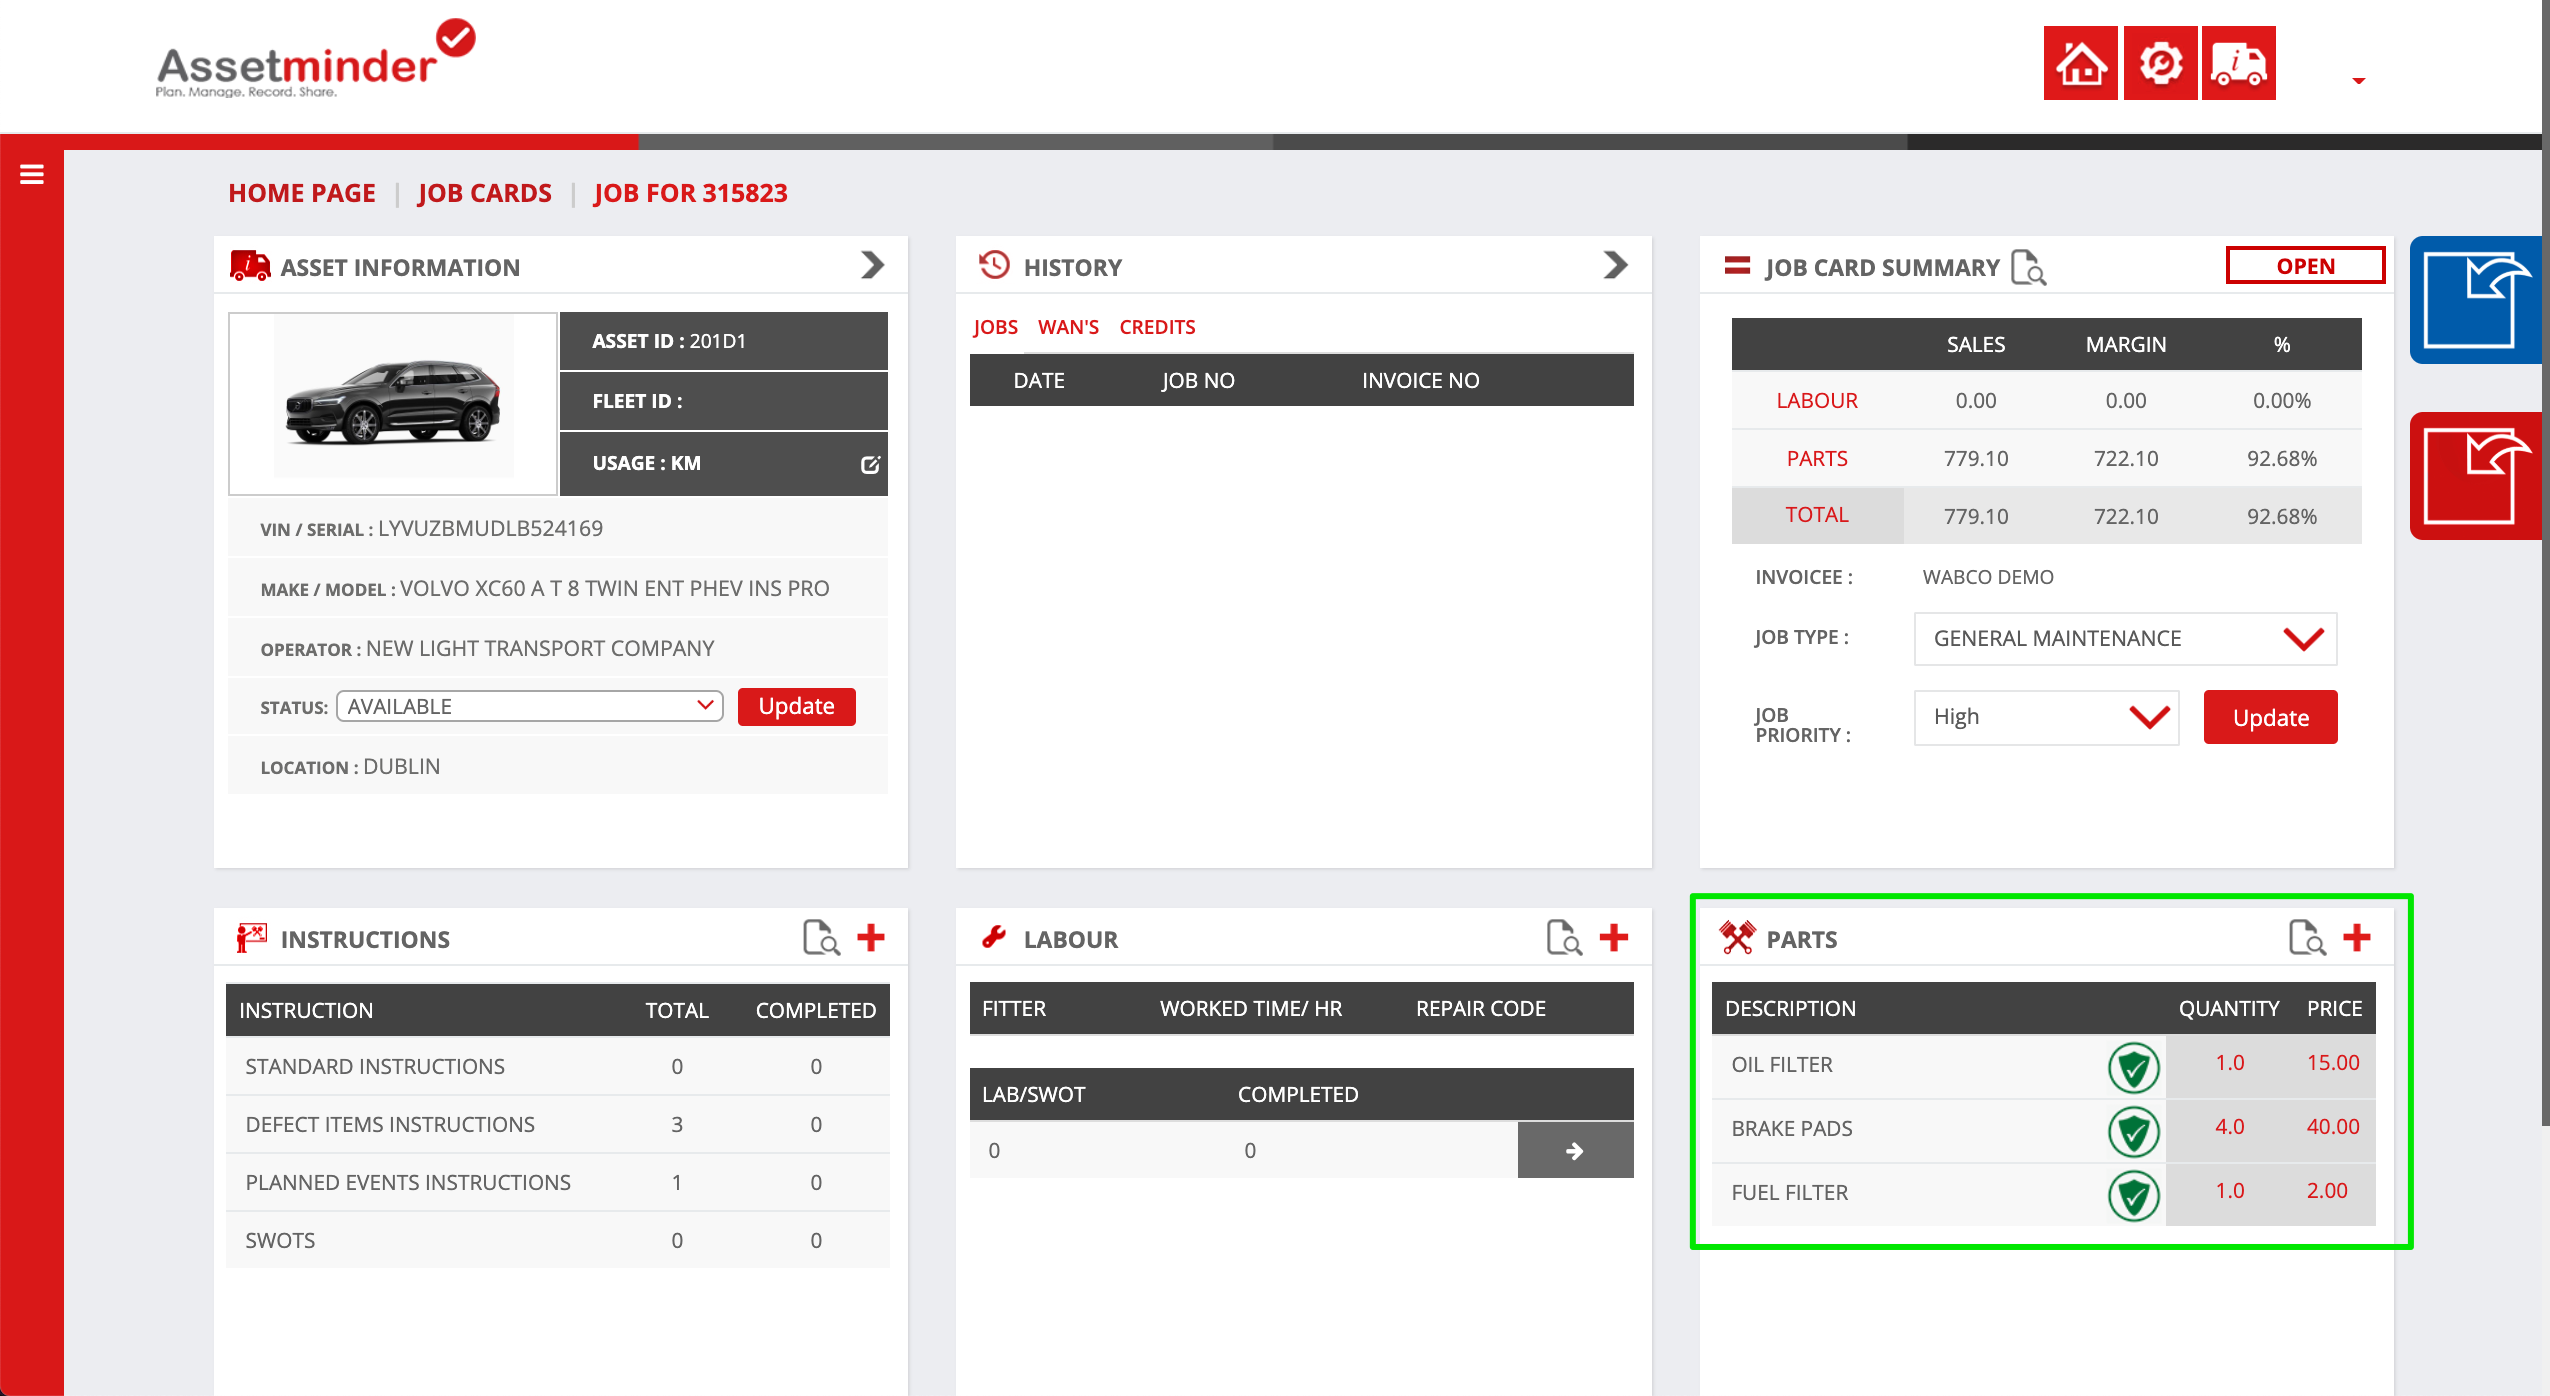
1. Open the job card and click the Add New icon in the parts section
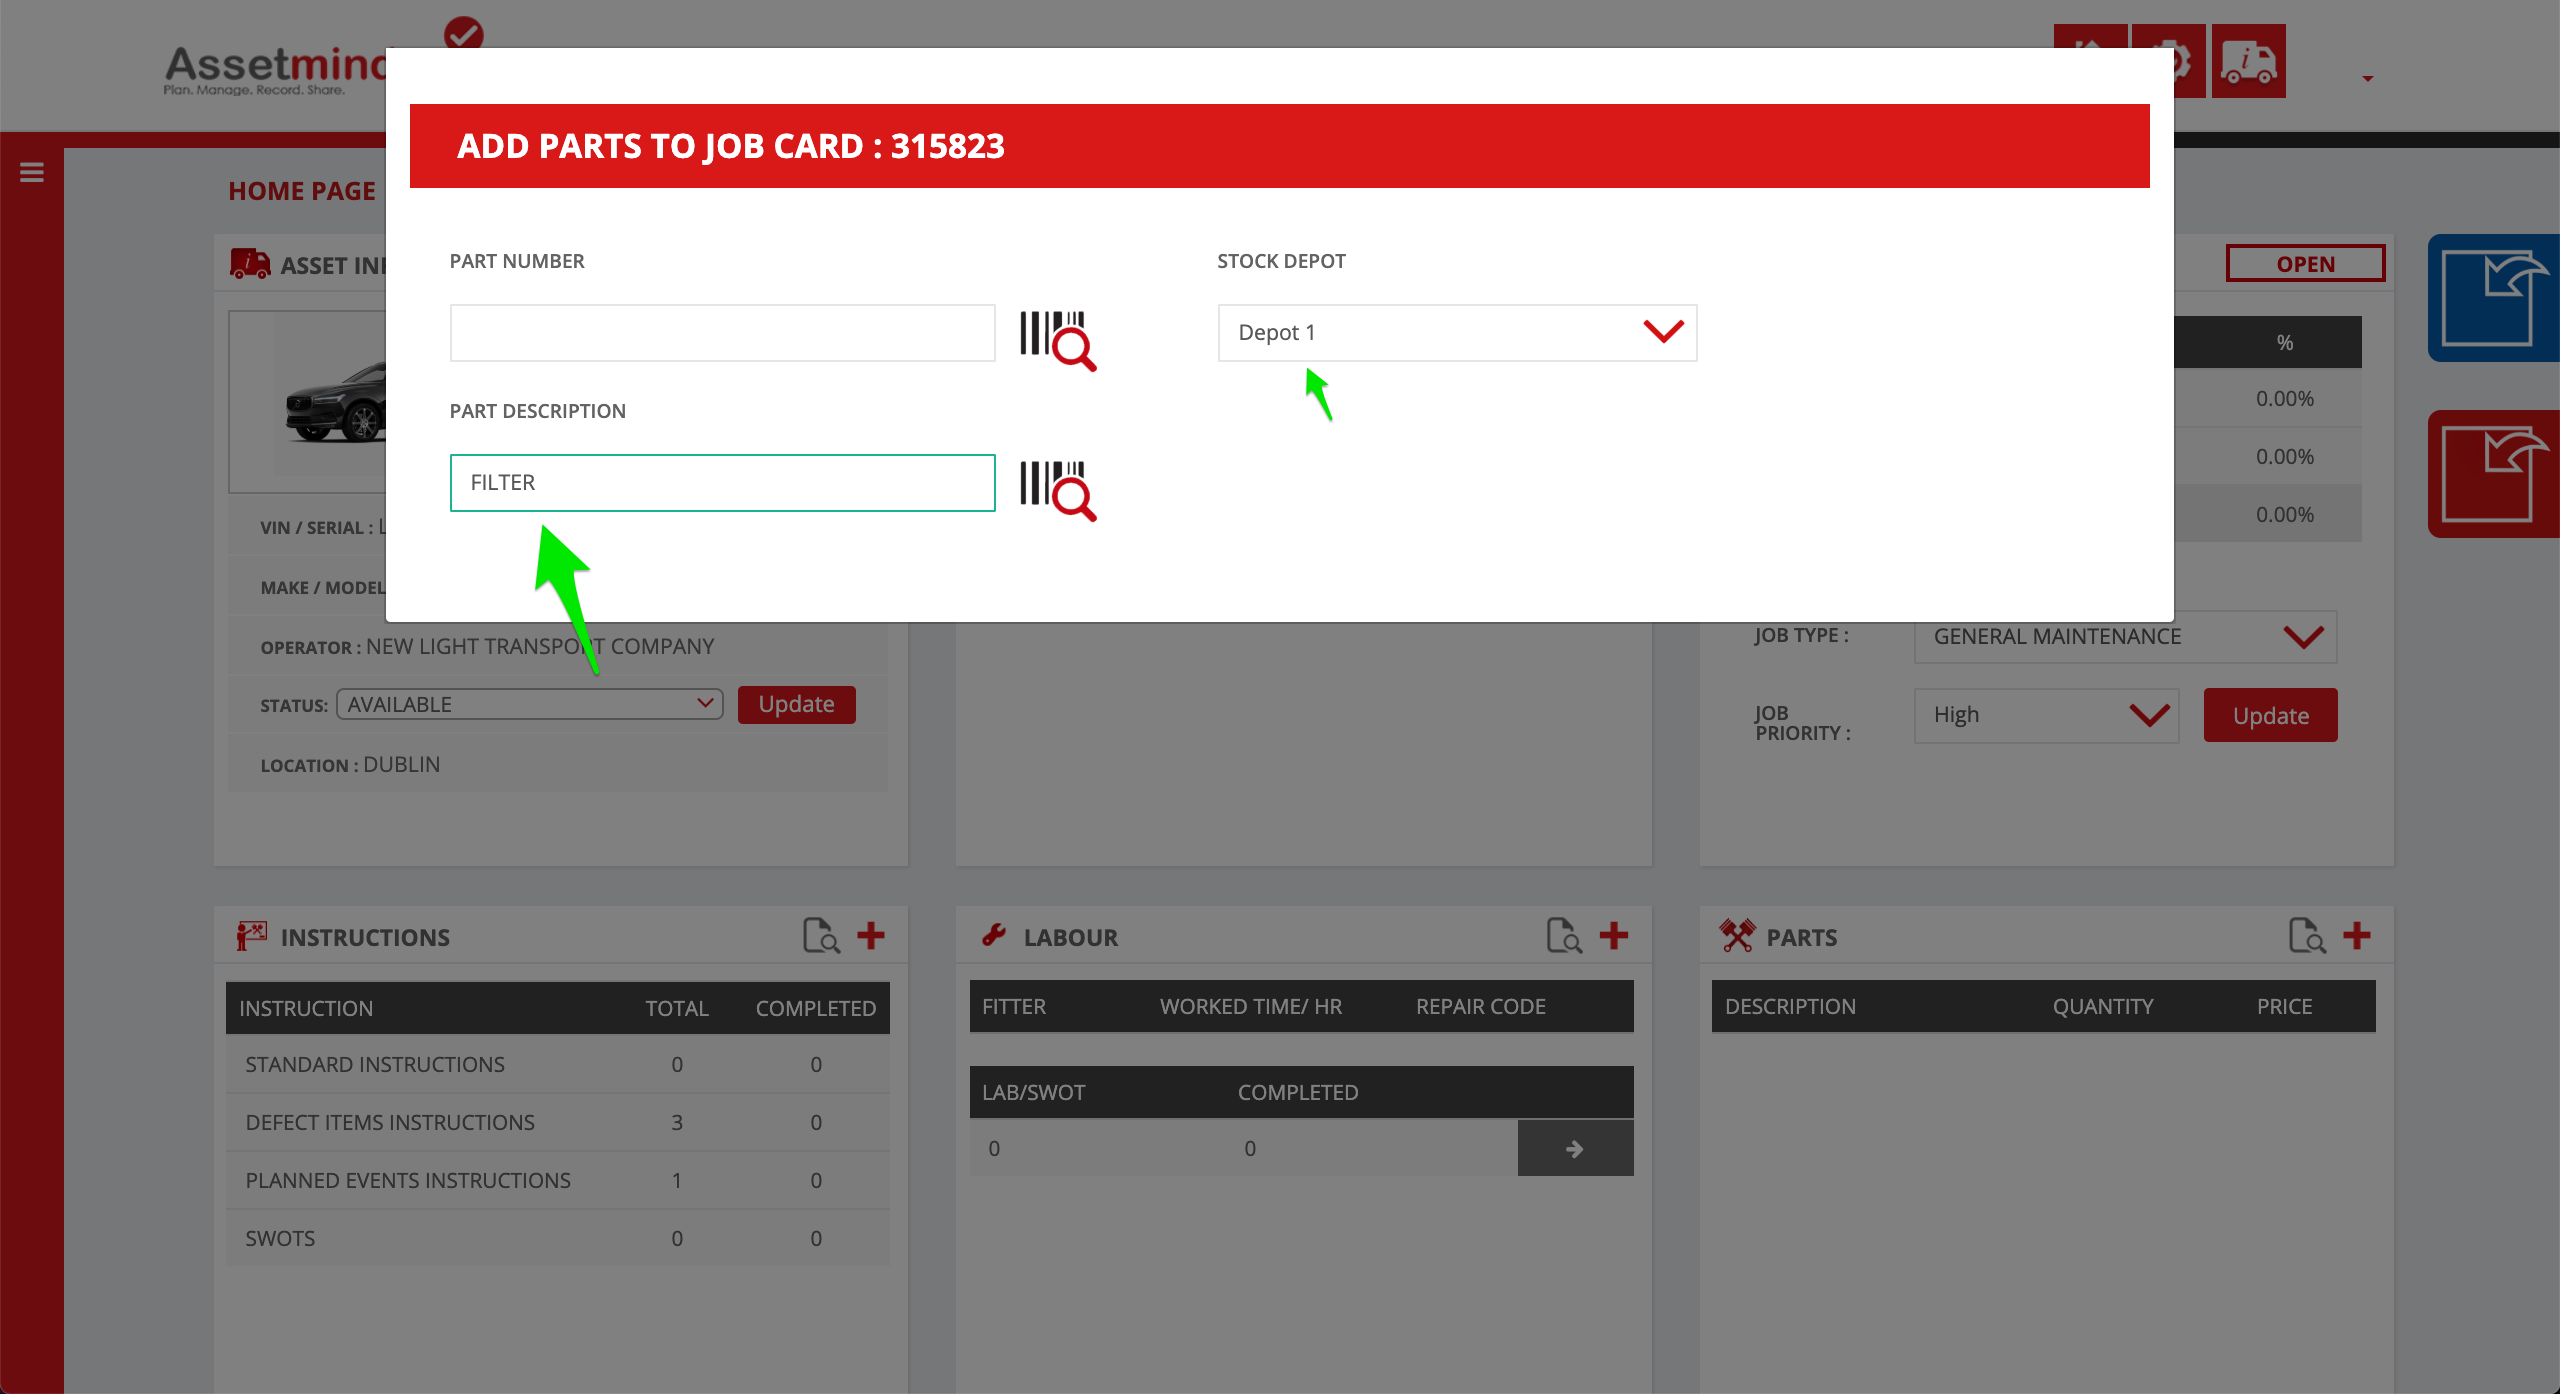
2. Search for the part number or description by typing into the relevant search field. Make sure to select the correct depot.
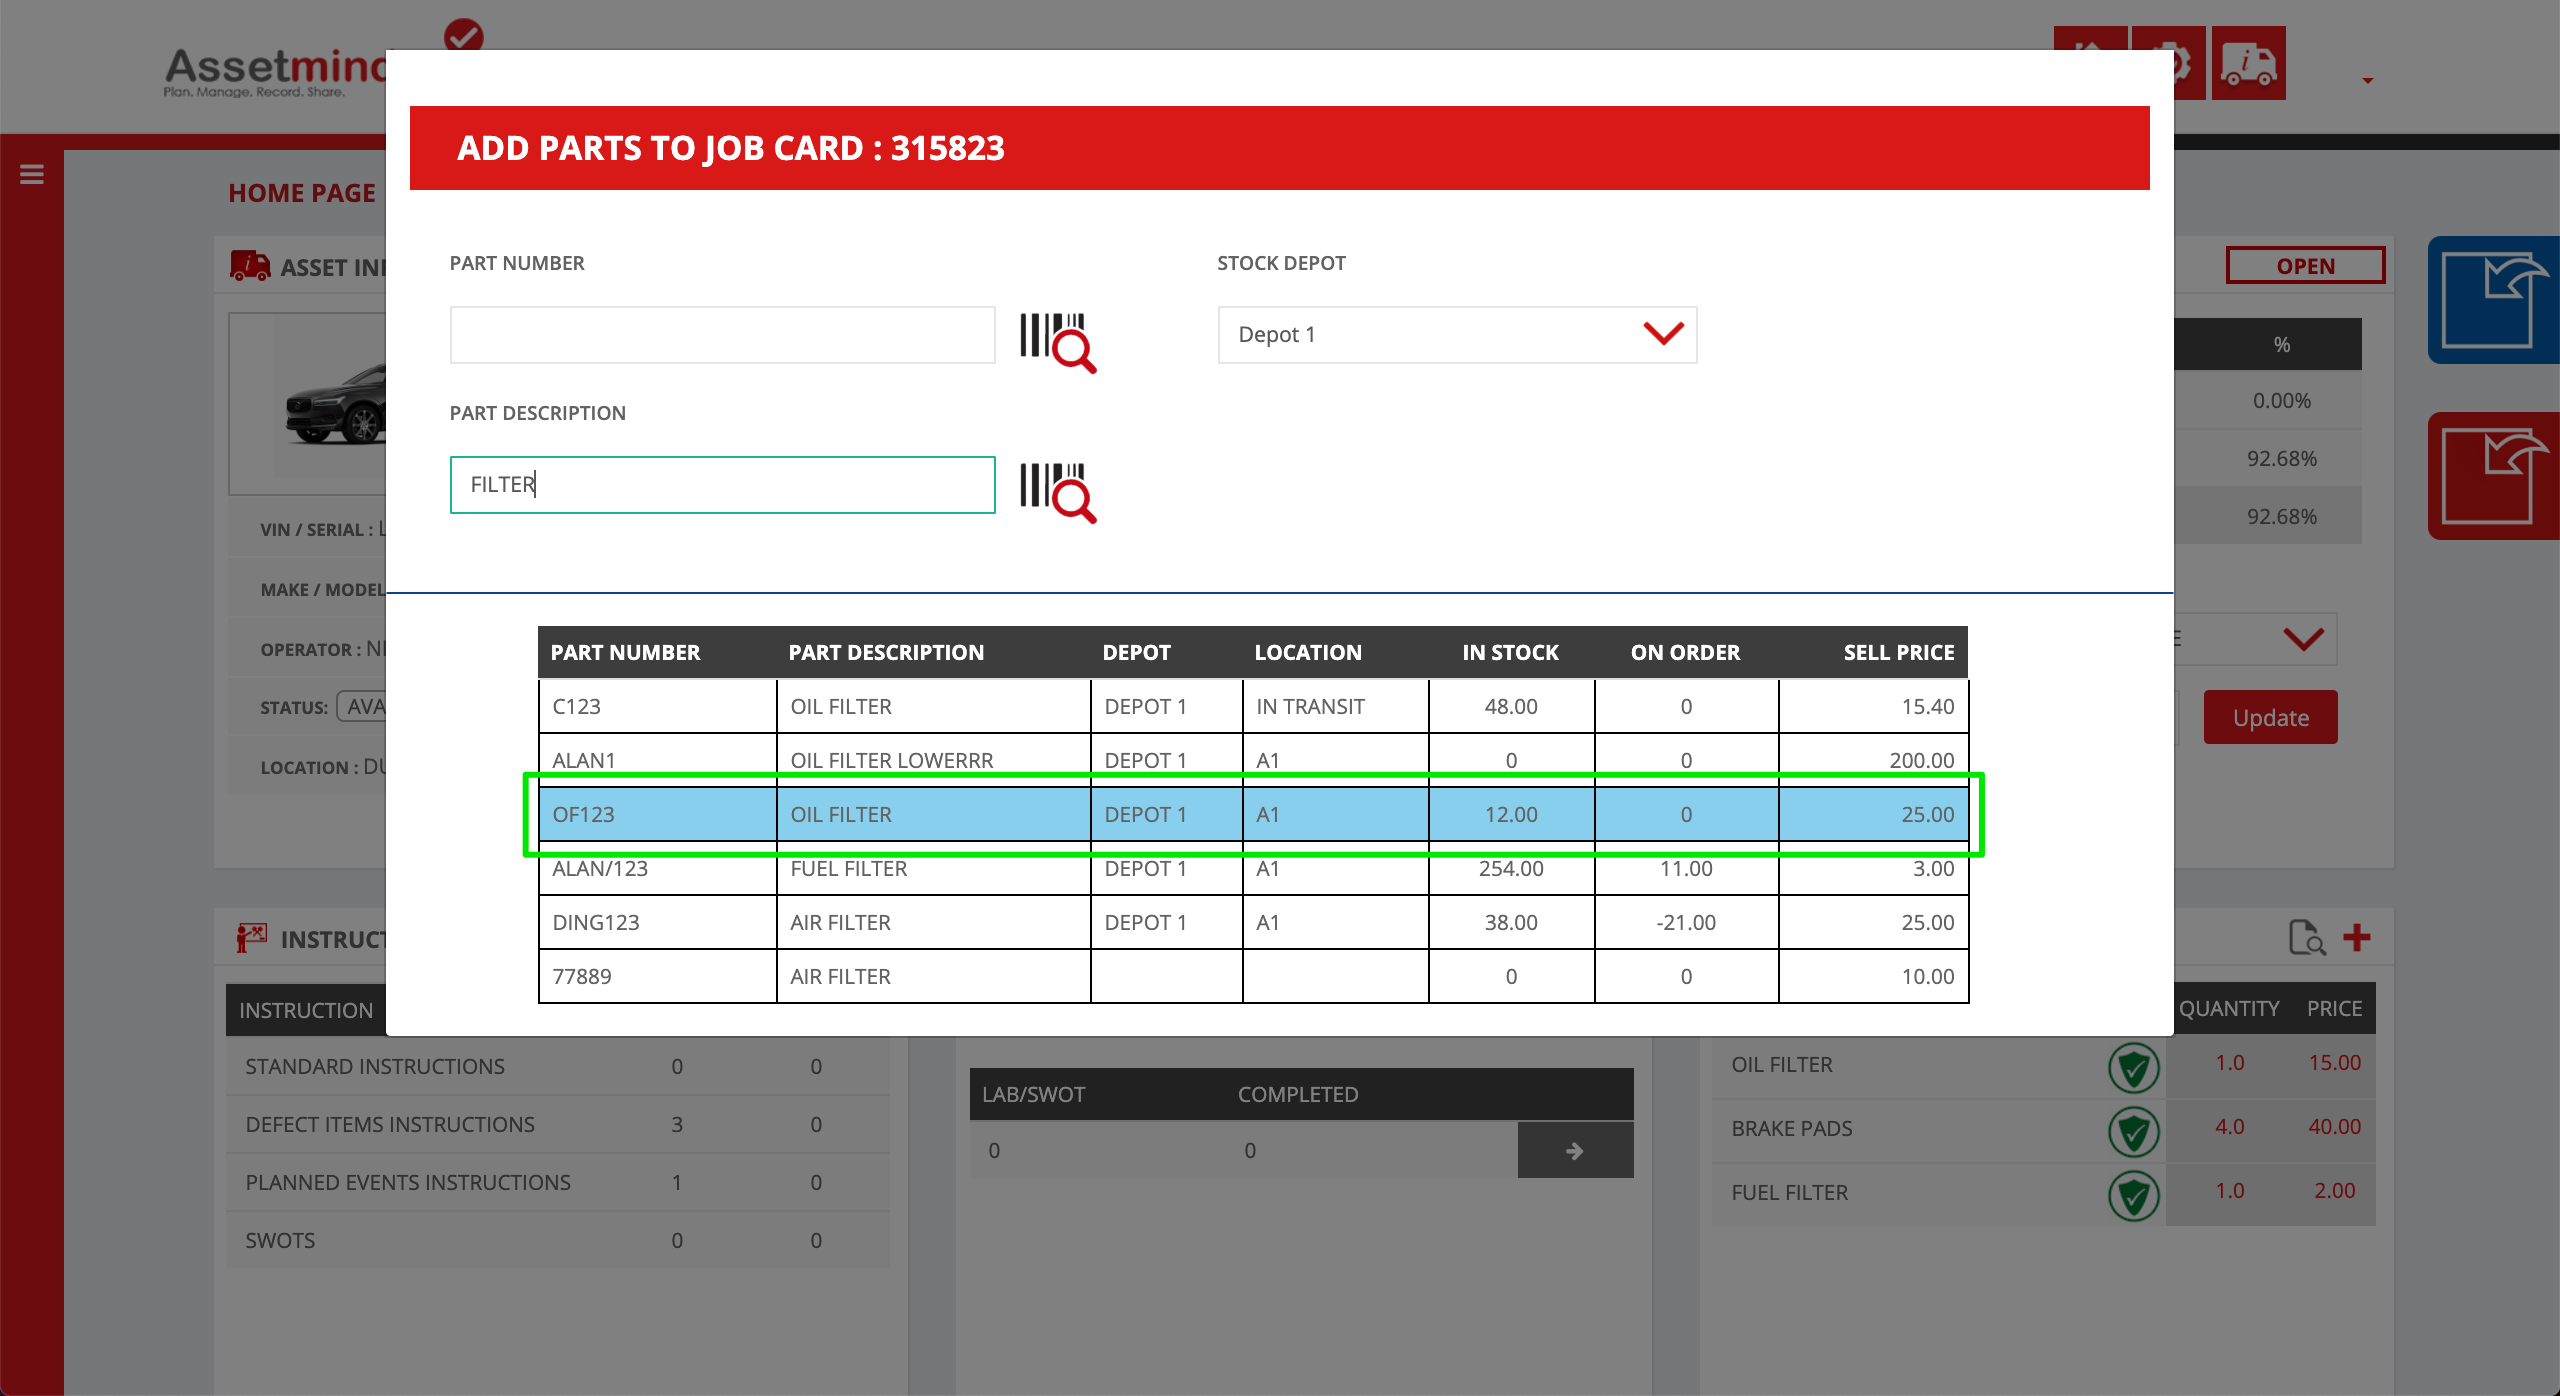
3. Locate the part in the search parts list and click the part to add. In this example, this depot has 12 of this part in stock
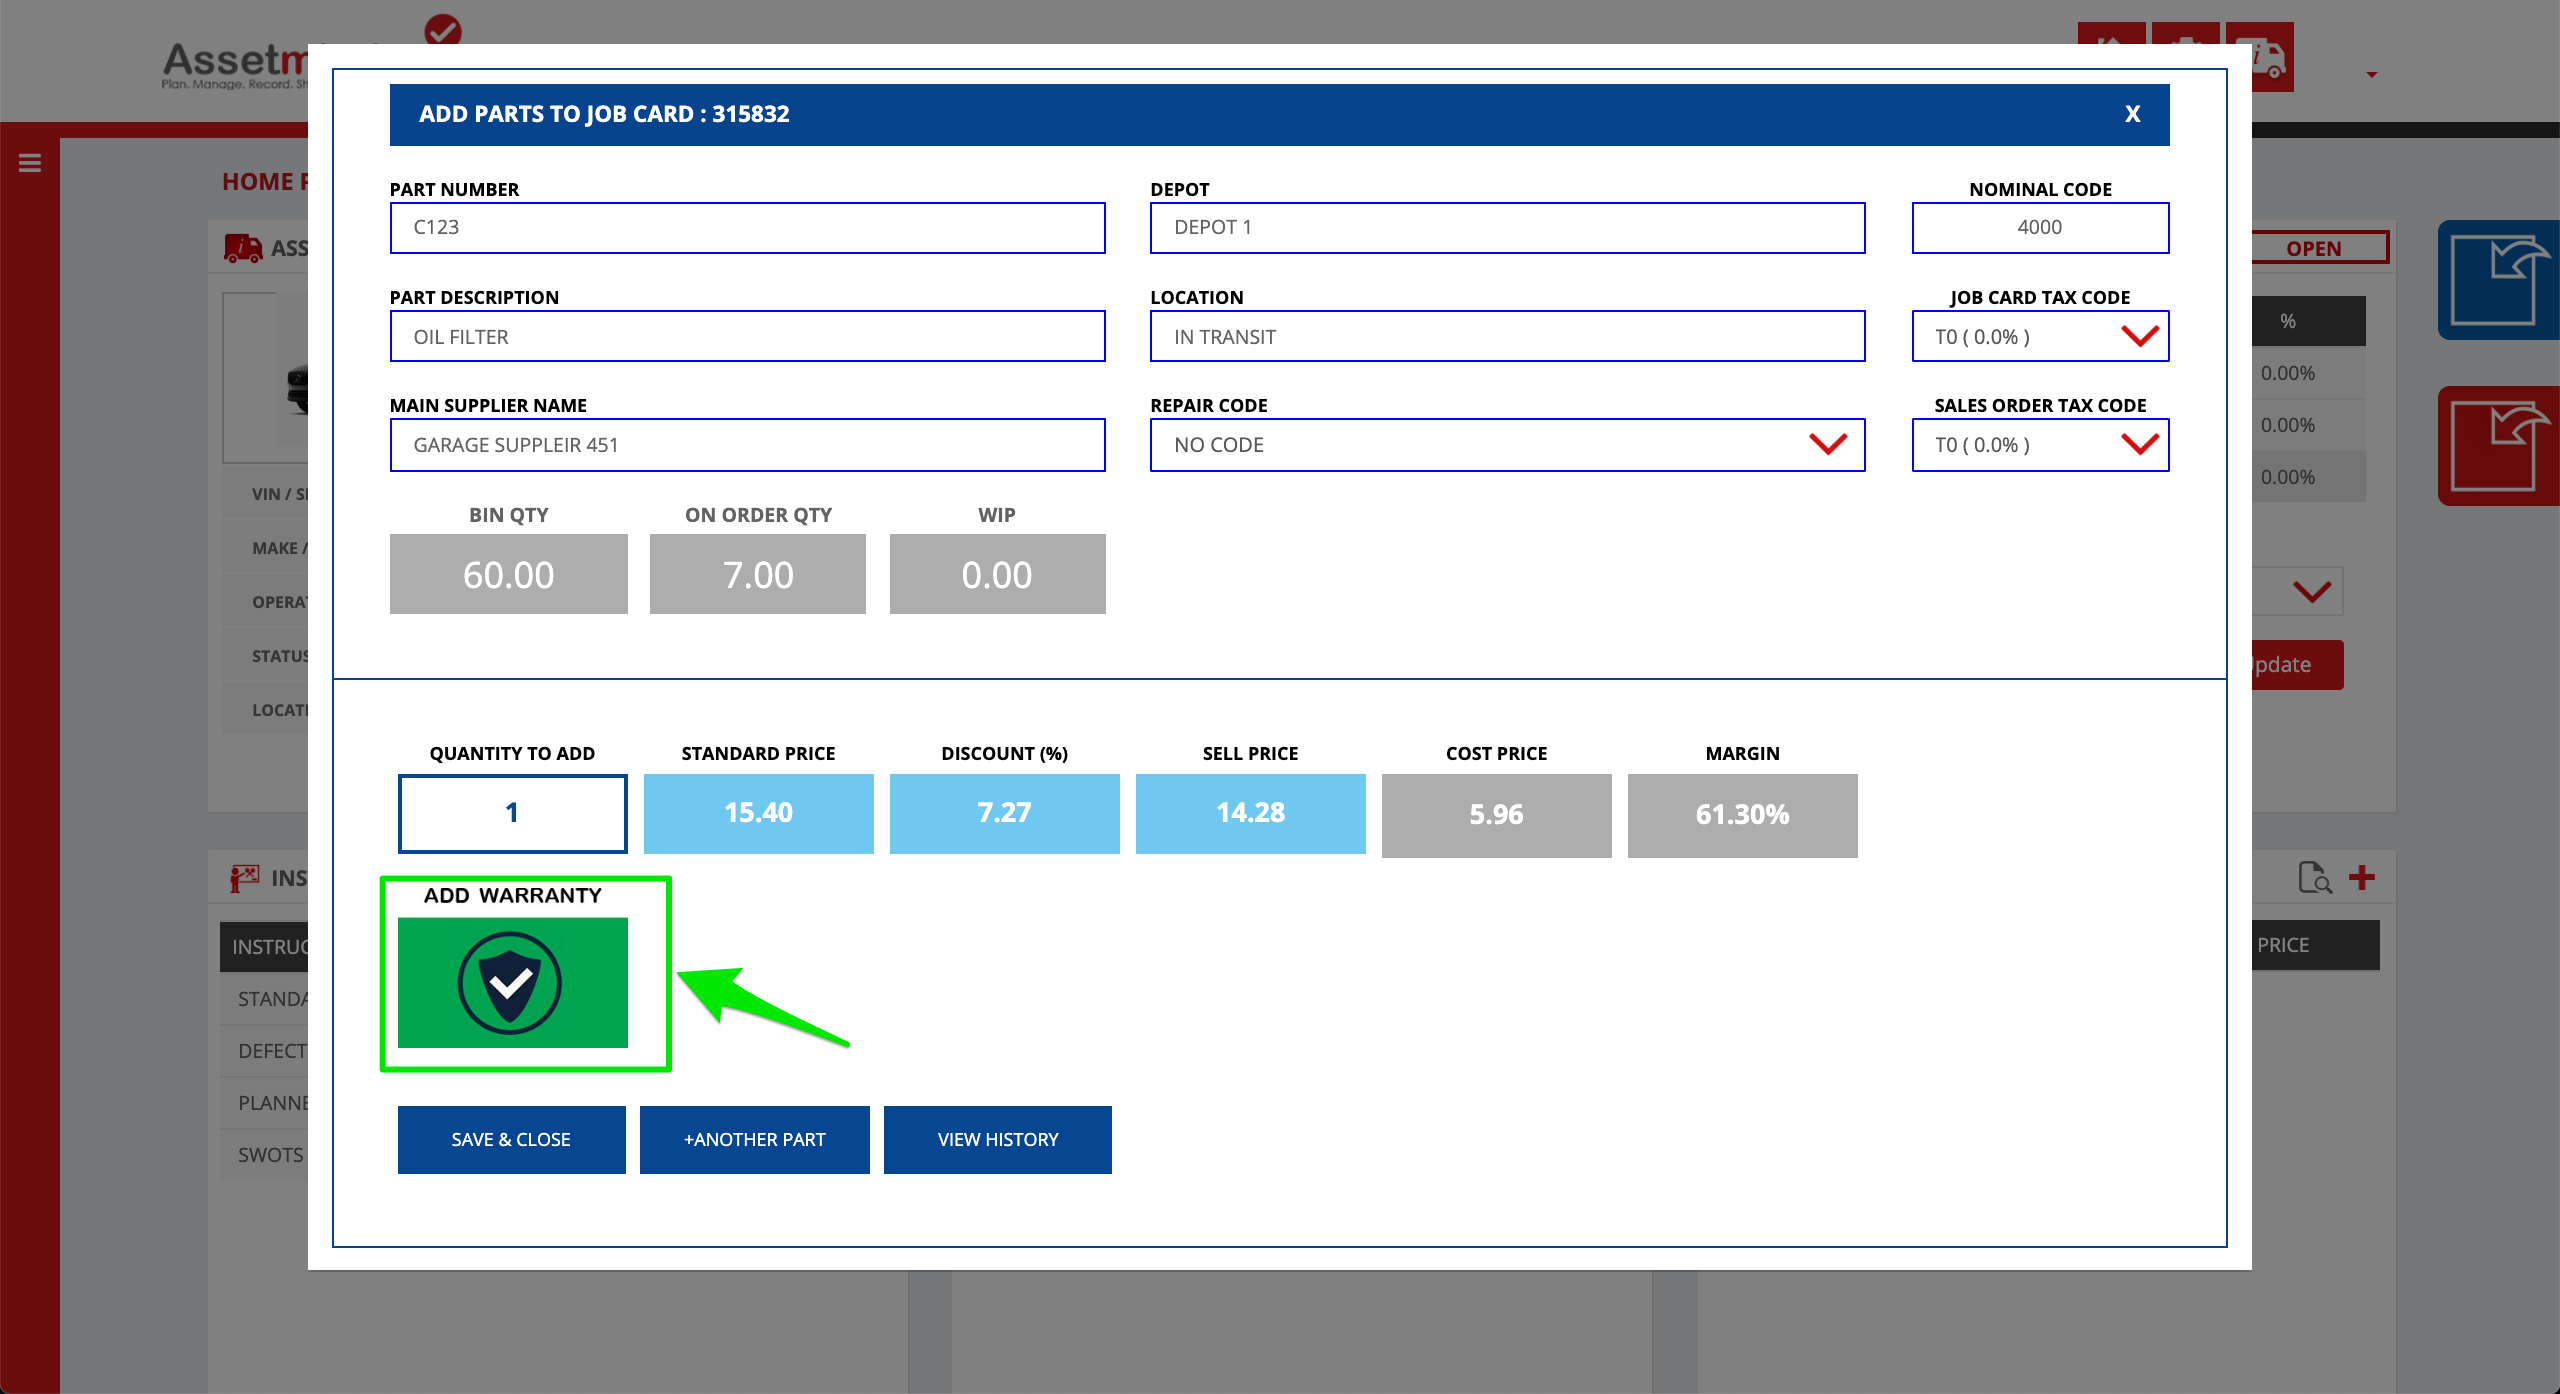
4. Adjust any of the available fields as needed such as the repair code, nominal code etc. Add the number of parts needed for this job card to the Quantity to Add field
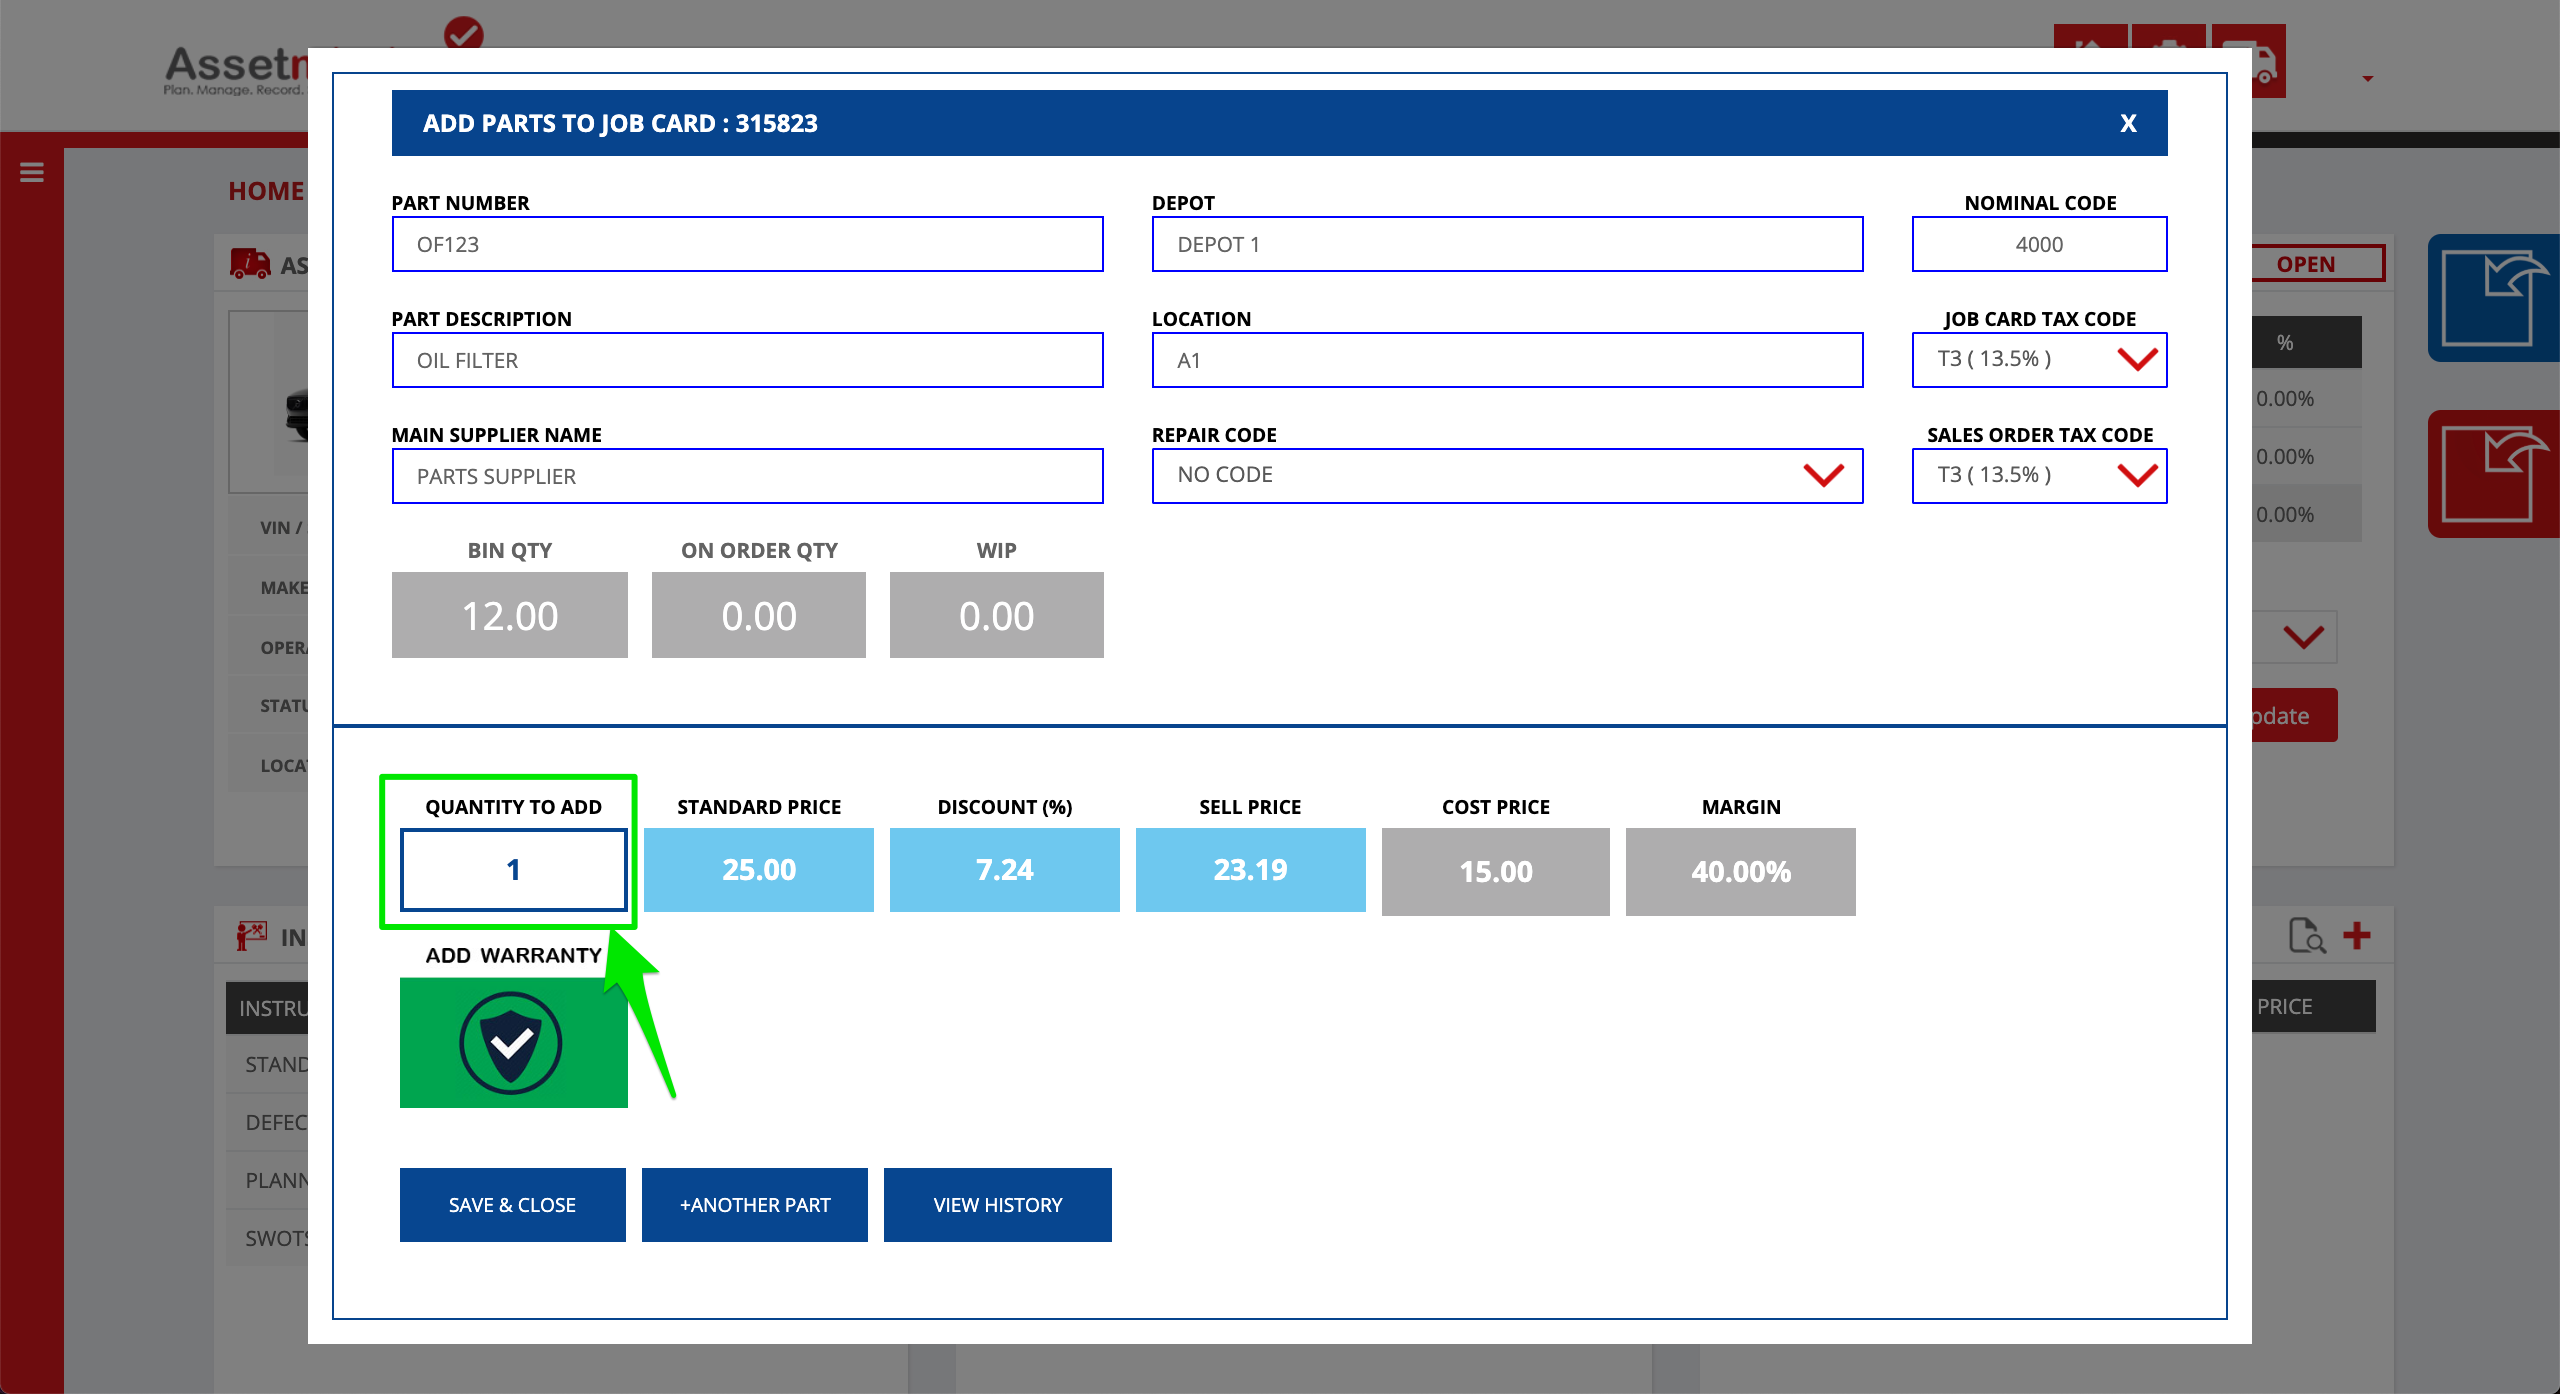
5. To add a warranty for the part, click the warranty icon
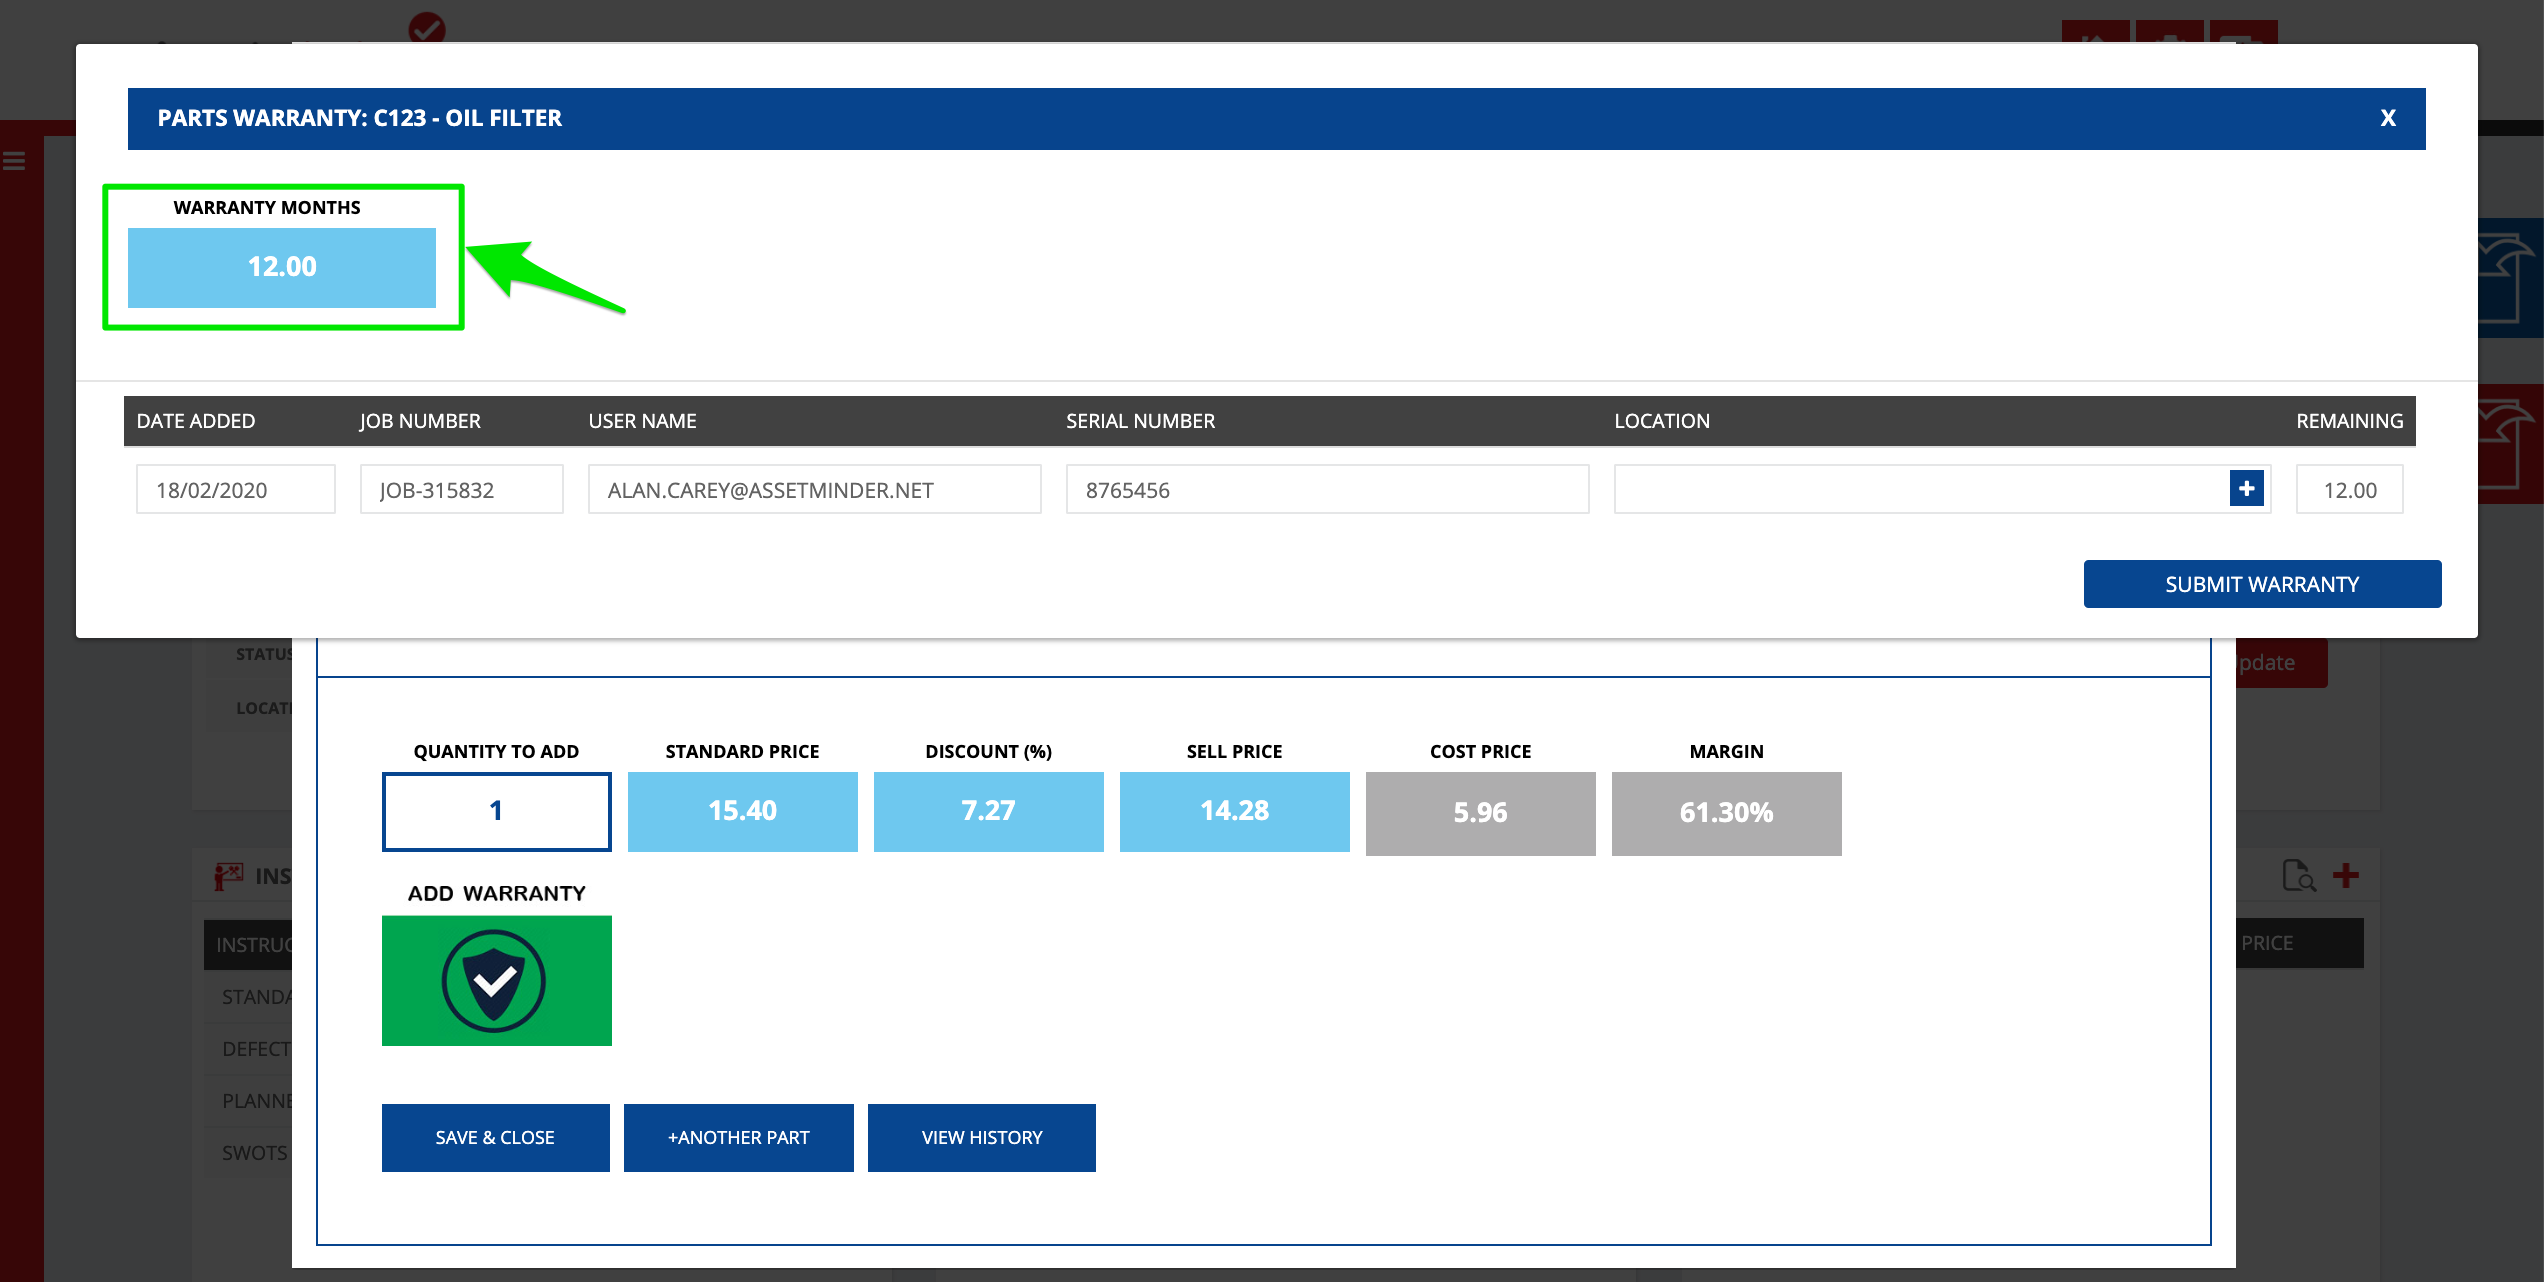
6. Adjust the default warranty period if needed
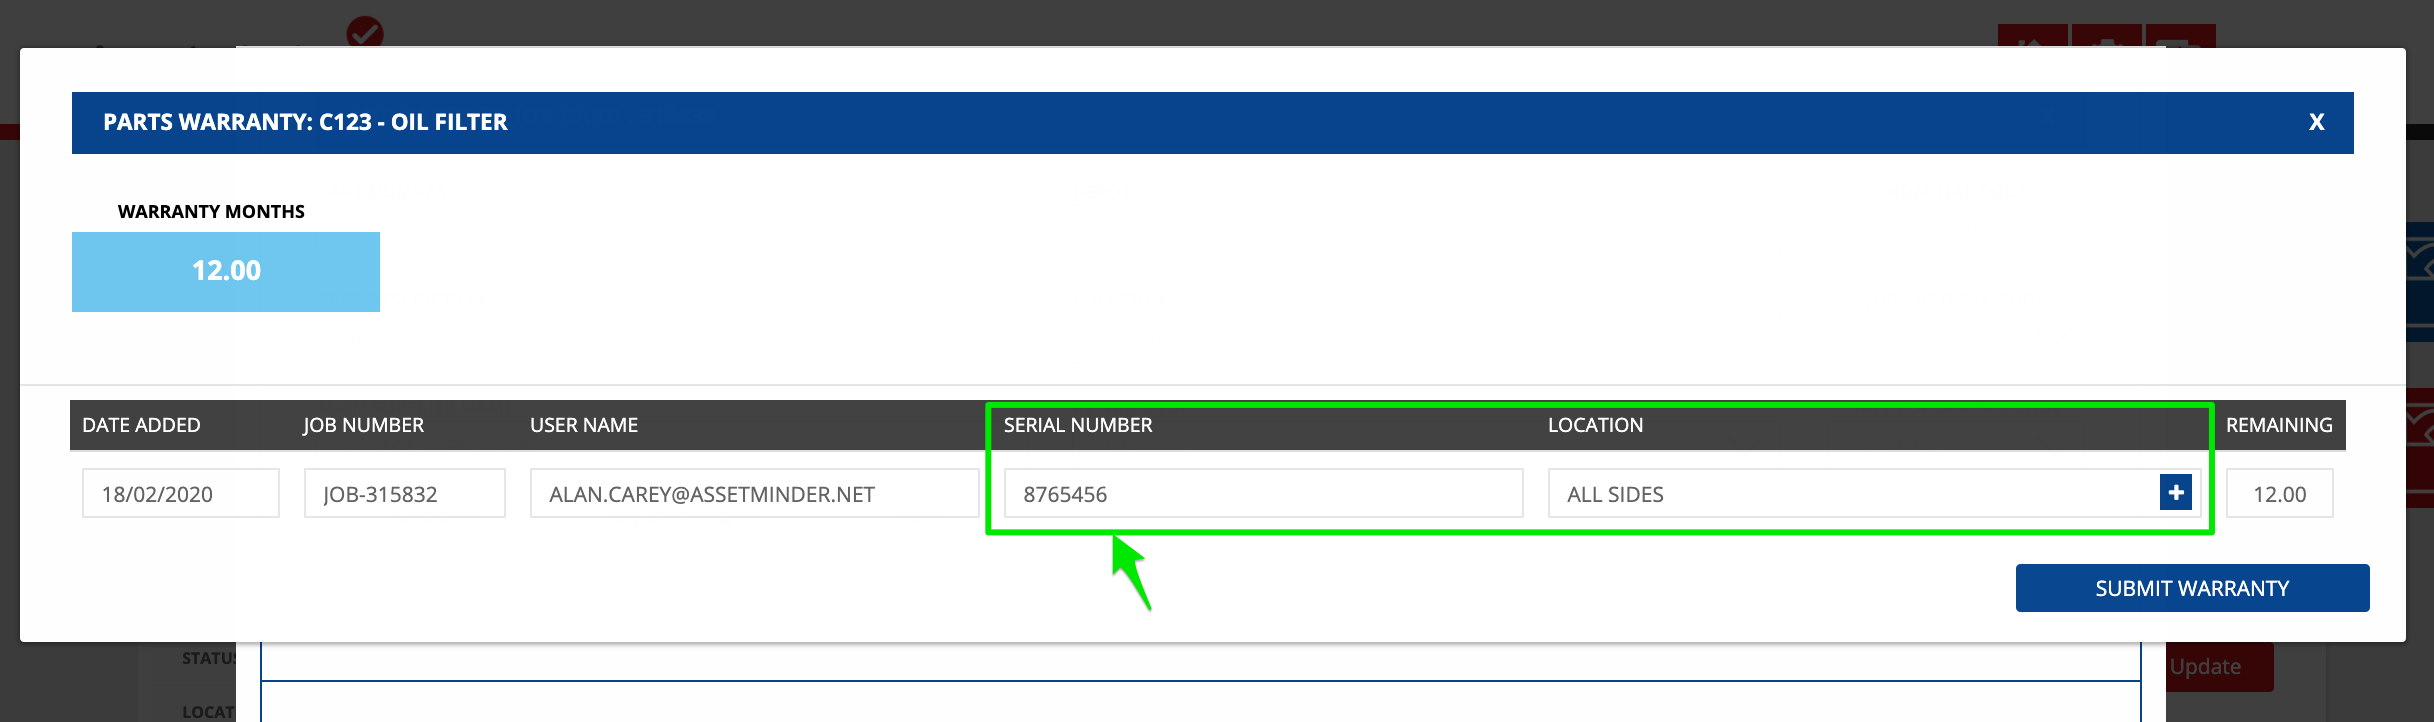
7. Add the part serial number and install location. Click Submit Warranty when done
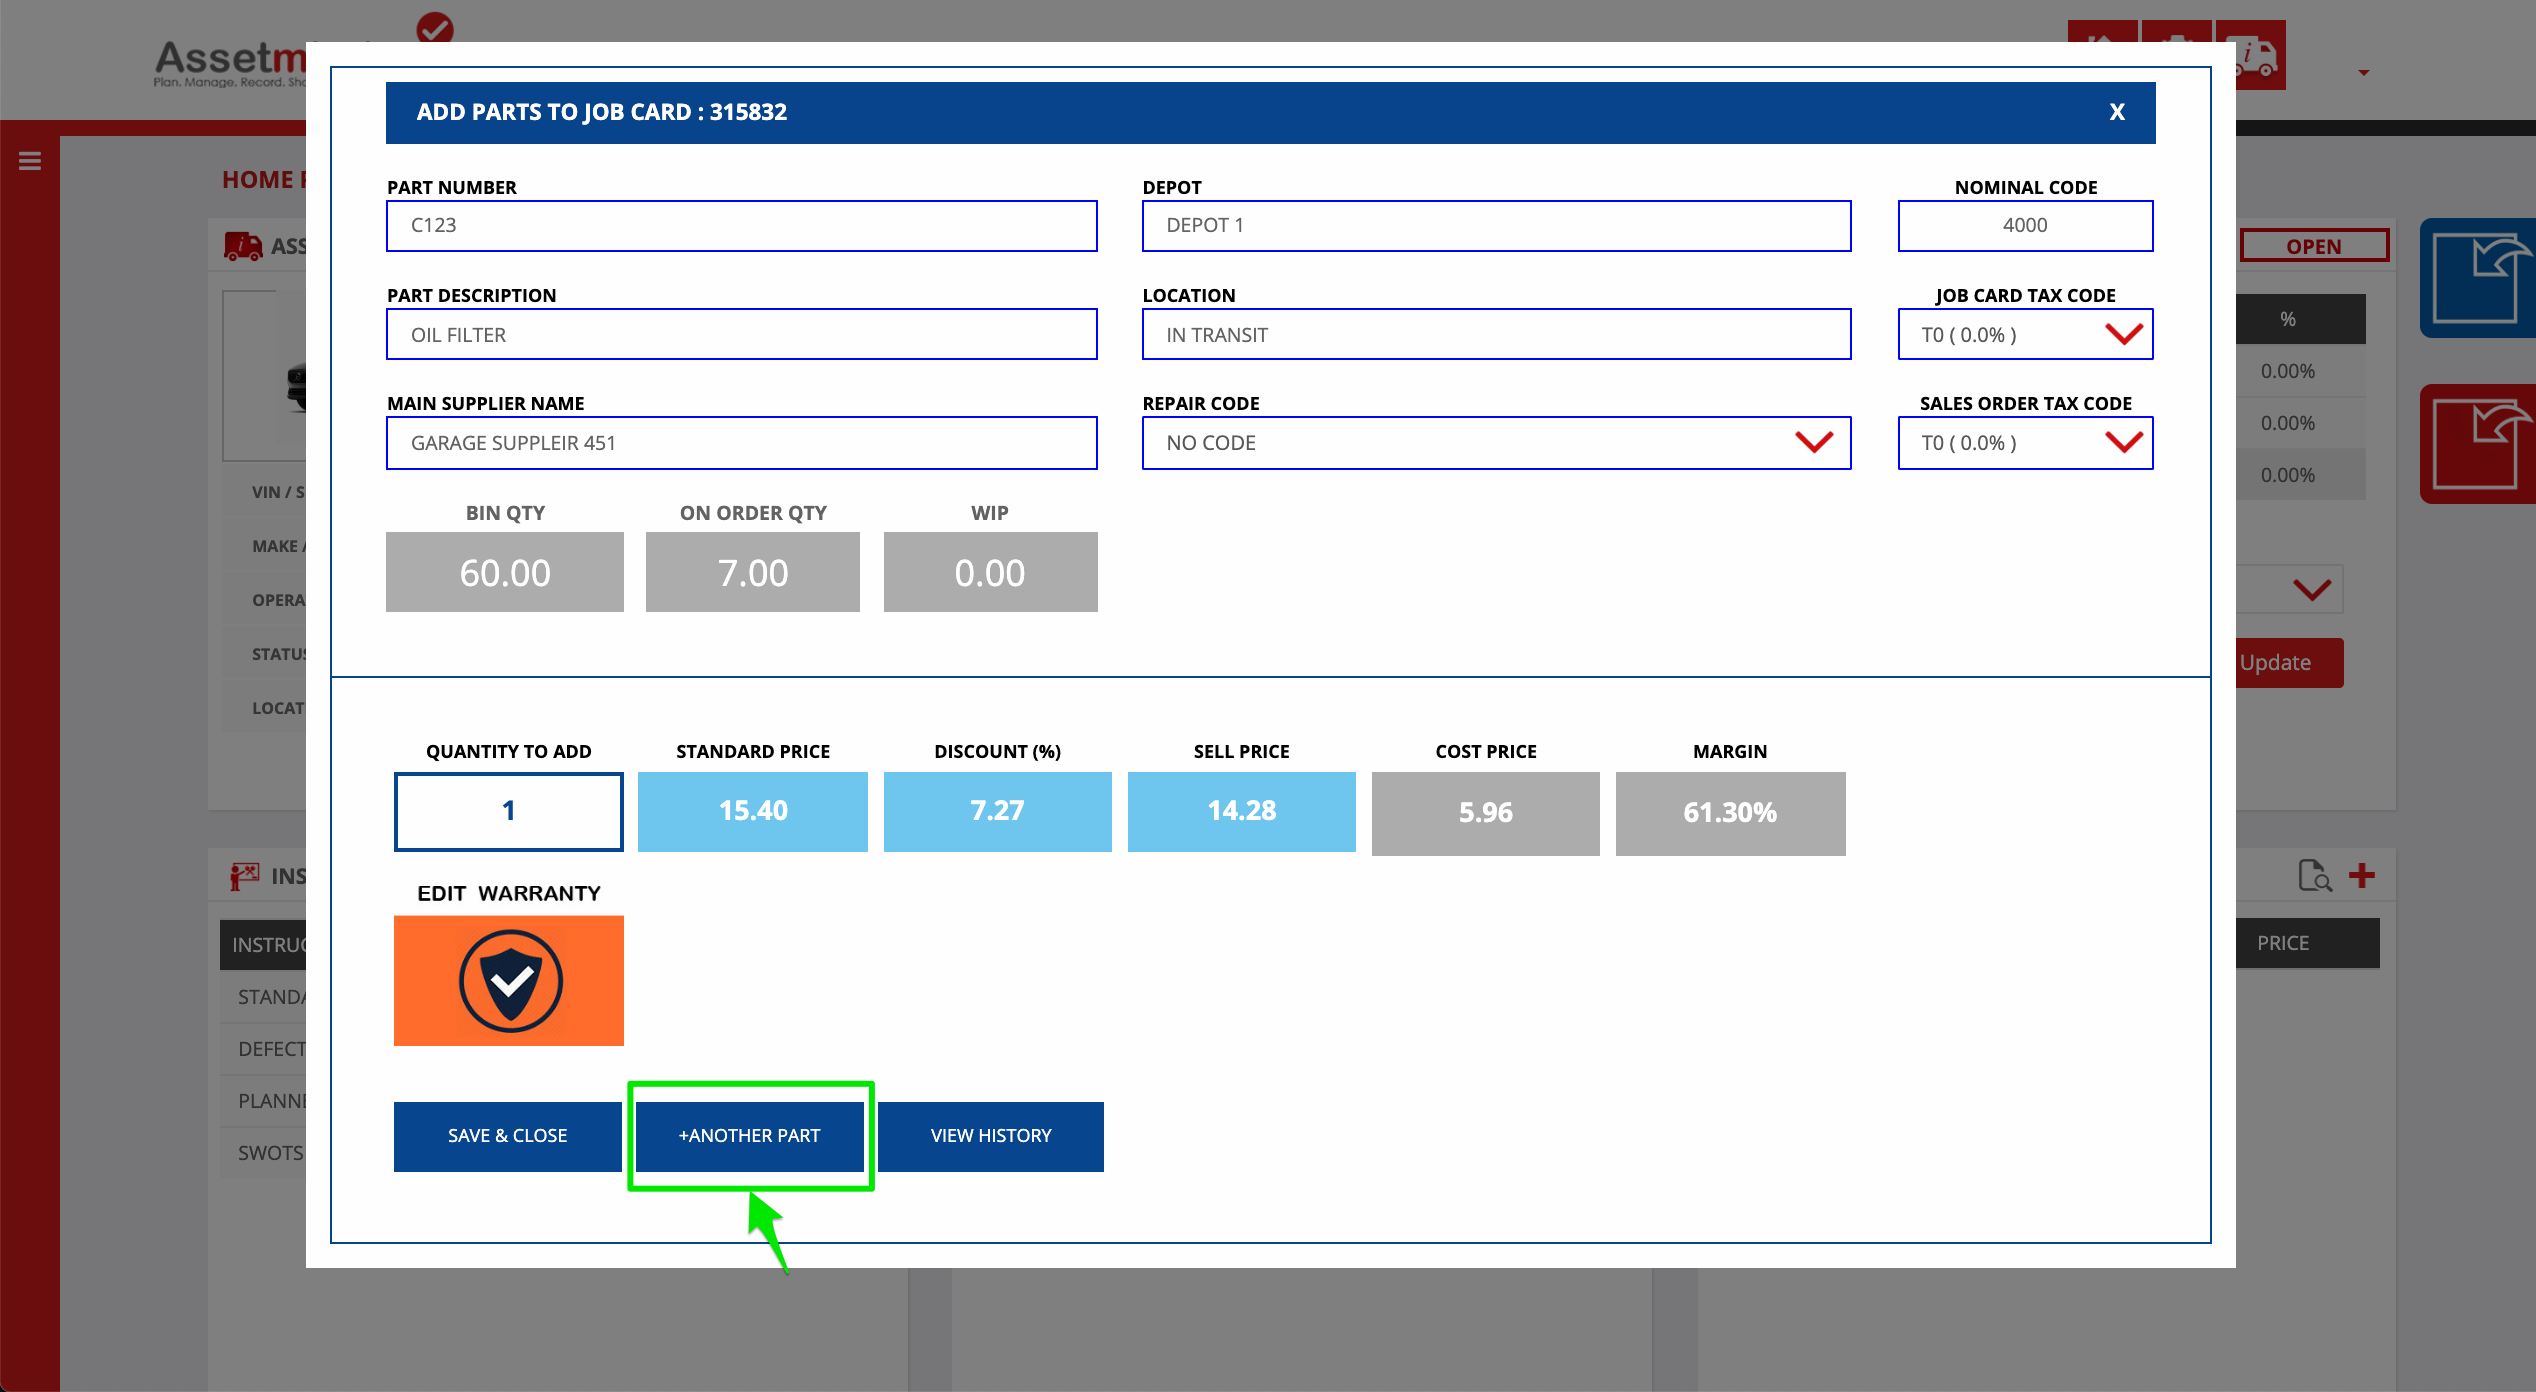
8. The warranty icon changes from green to red signifying a warranty is added for that part. Click +Another Part to add another part to the job card, or click Save and Close to complete.
9. Repeat the process until all required parts have been added to the job card
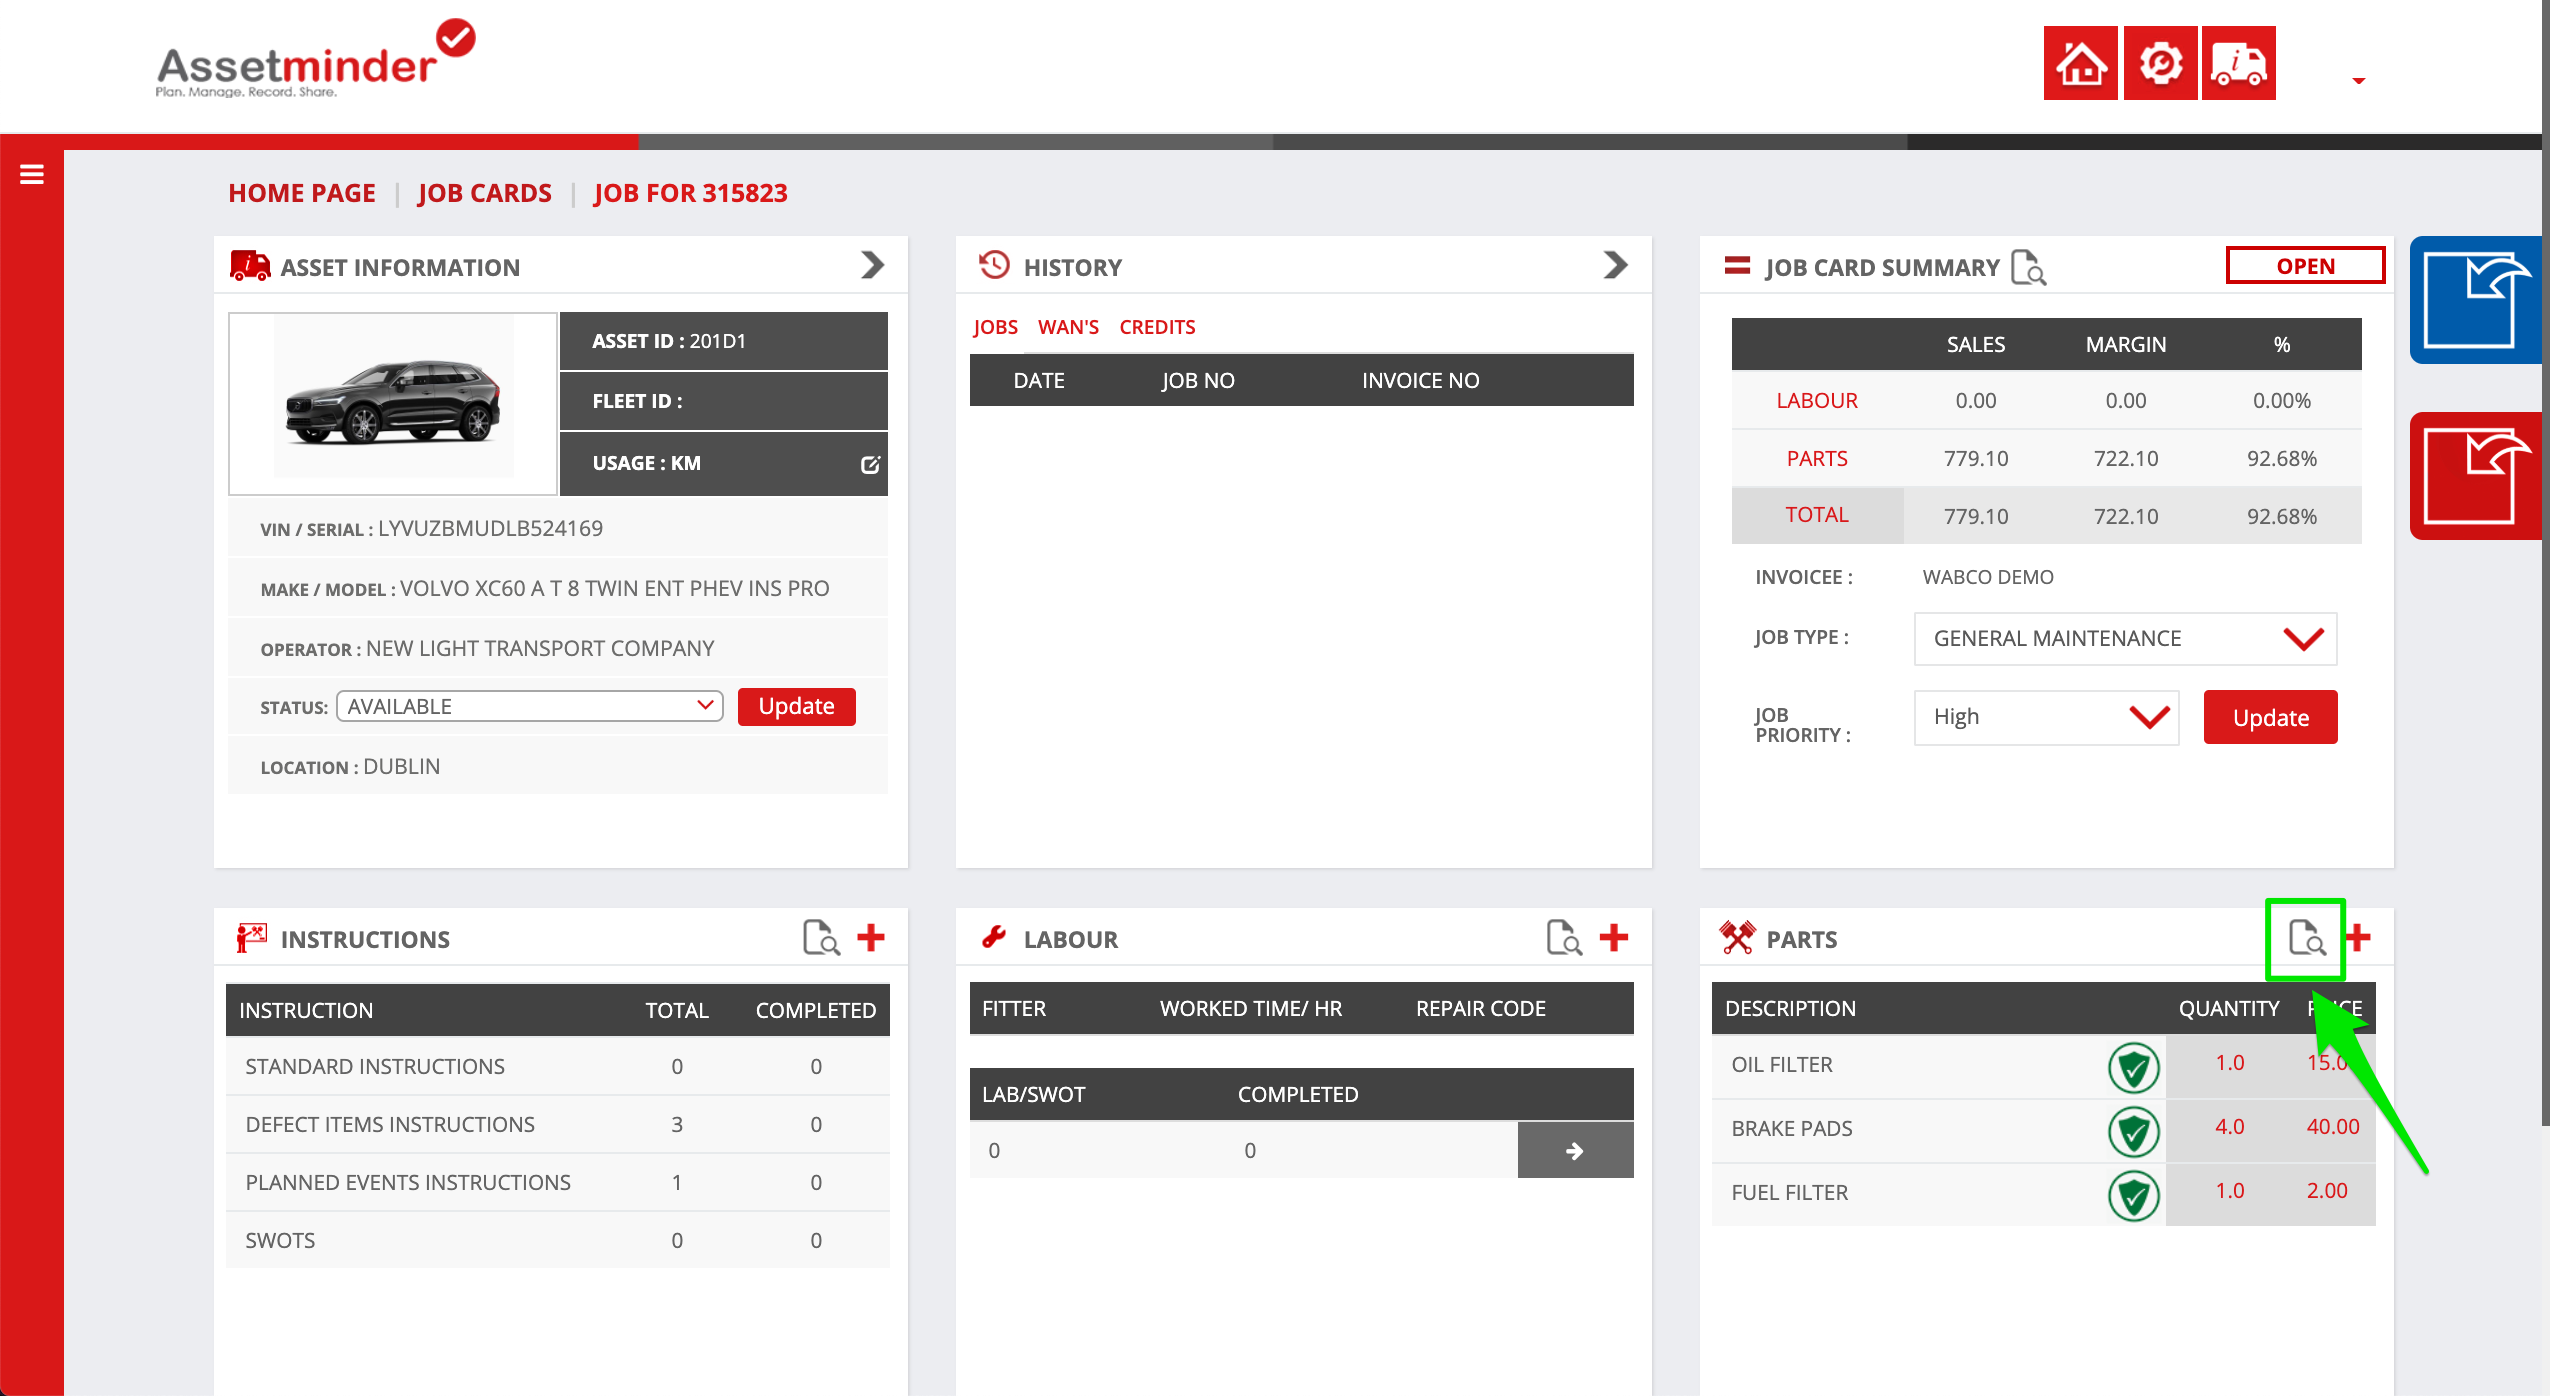
10. To adjust any quantities, sell prices, tax codes etc, click the view icon
11. Make any changes as needed in the pop-up window
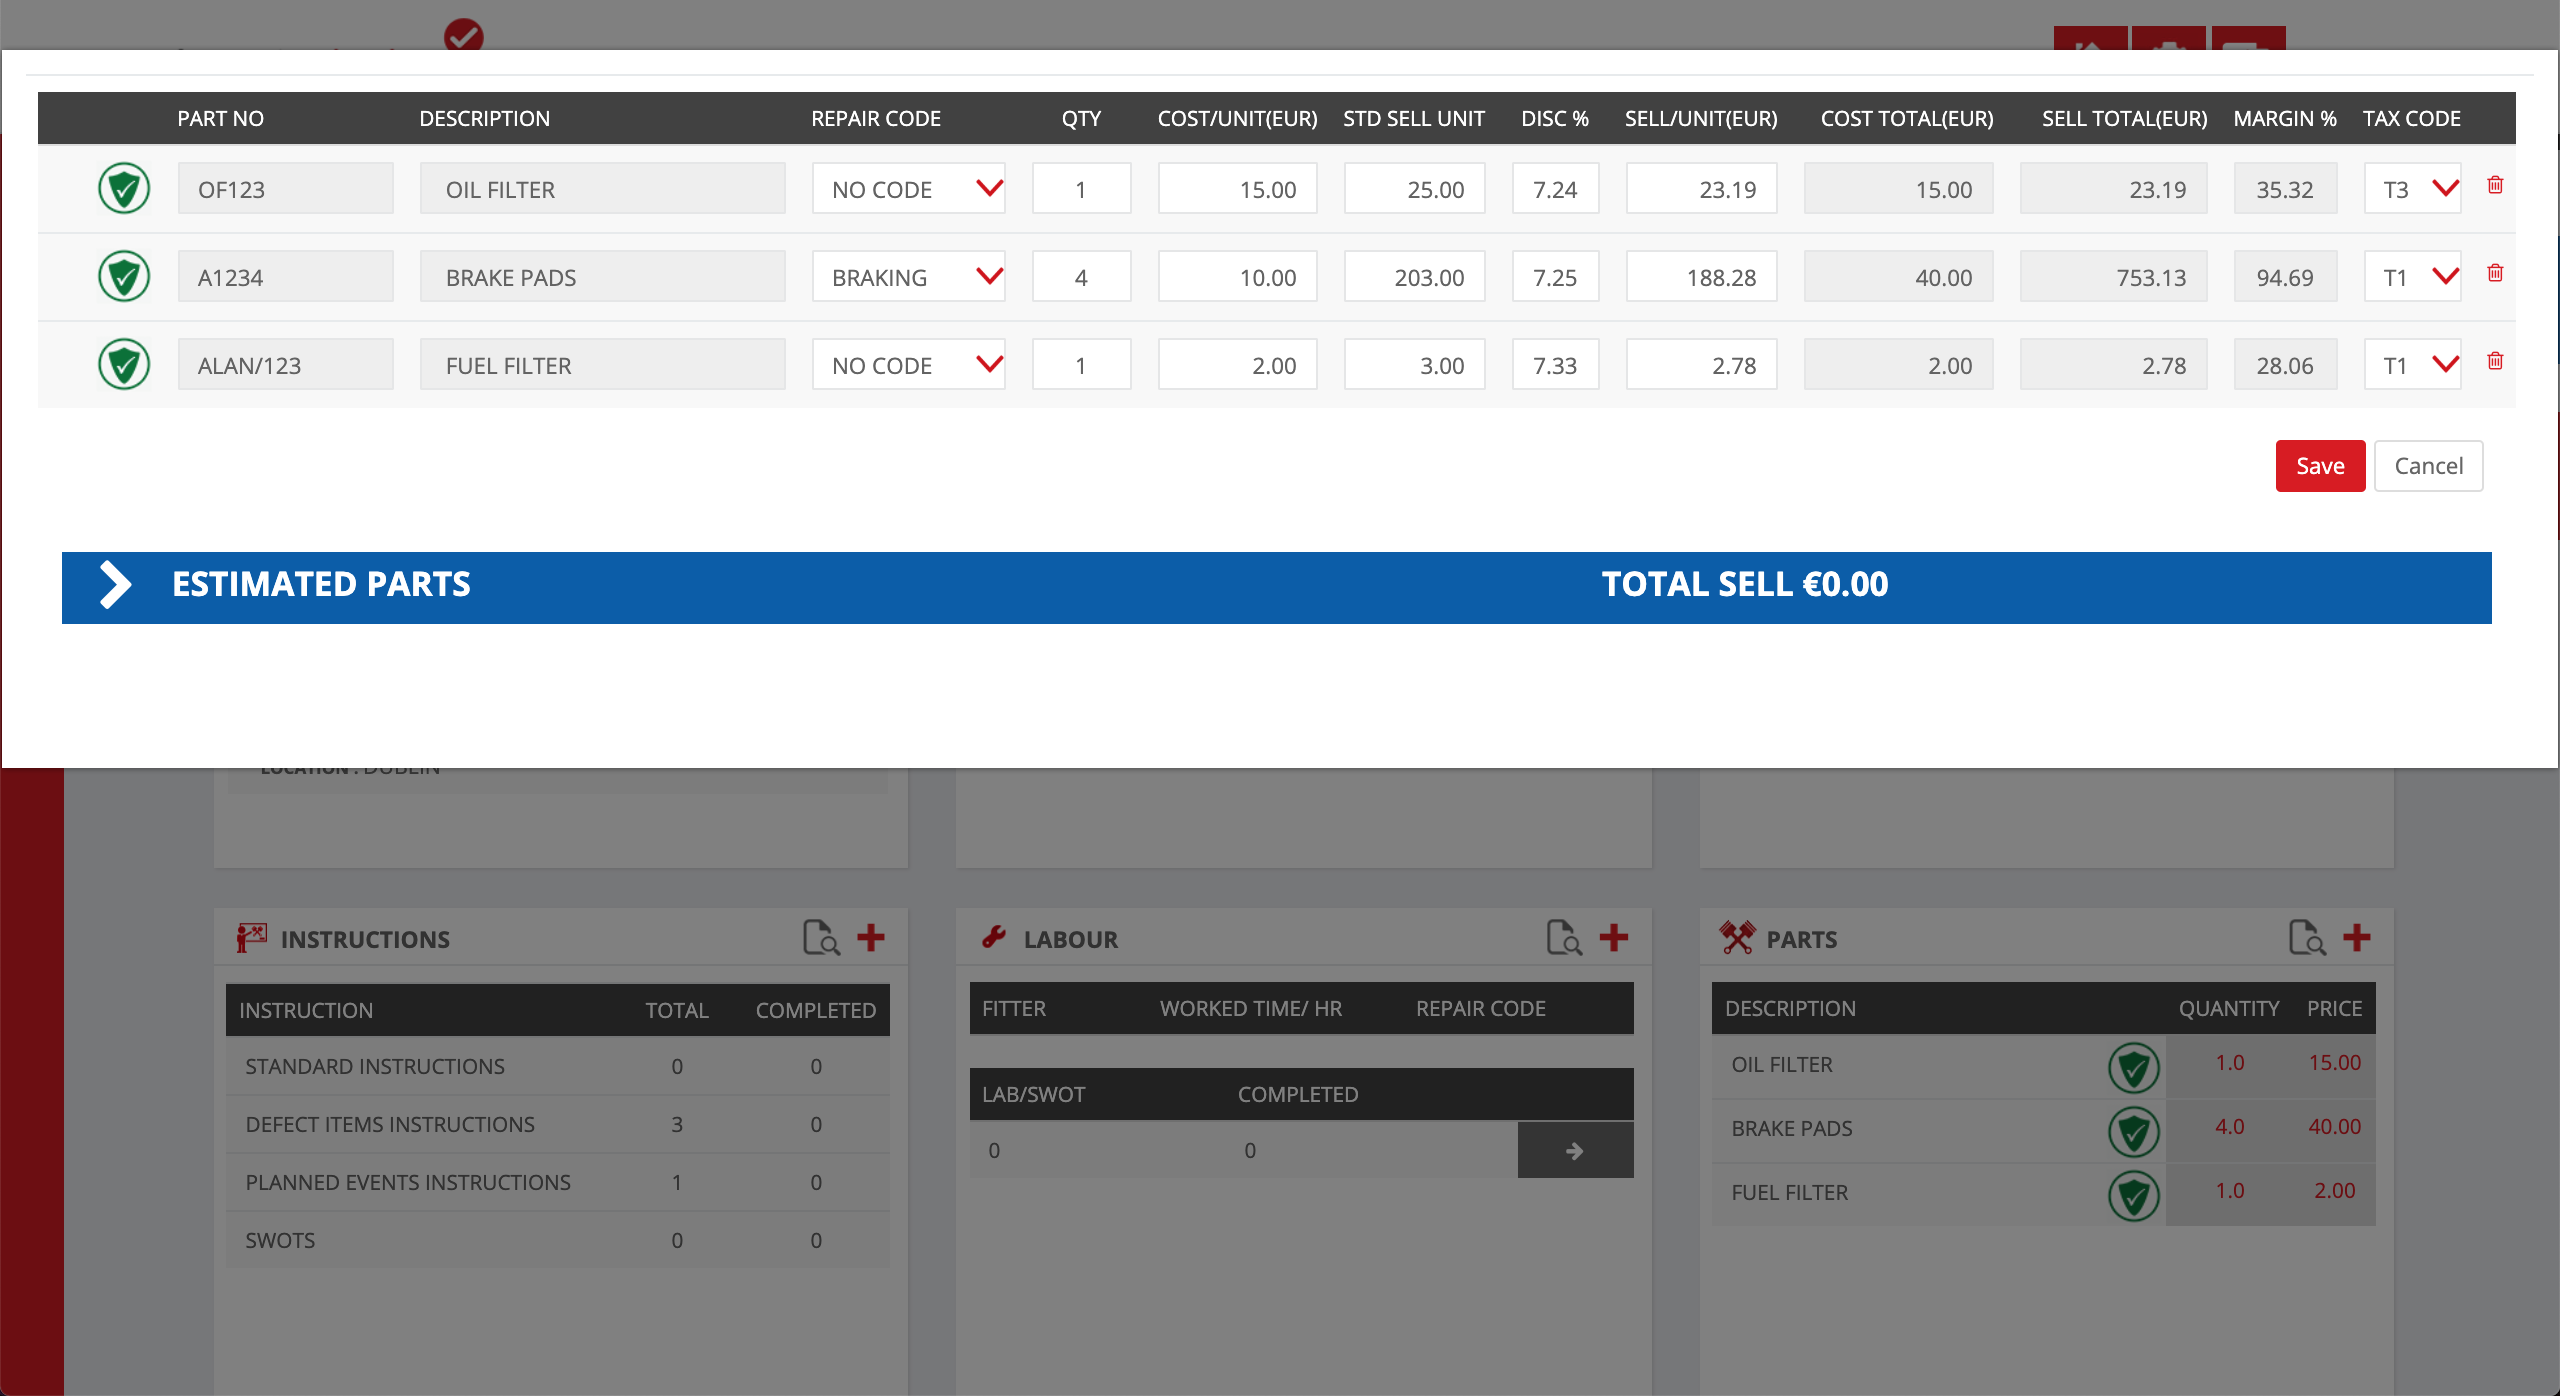
12. Click Save when done.
Paul Murray
Comments