Prerequisites before completing this procedure
Procedure
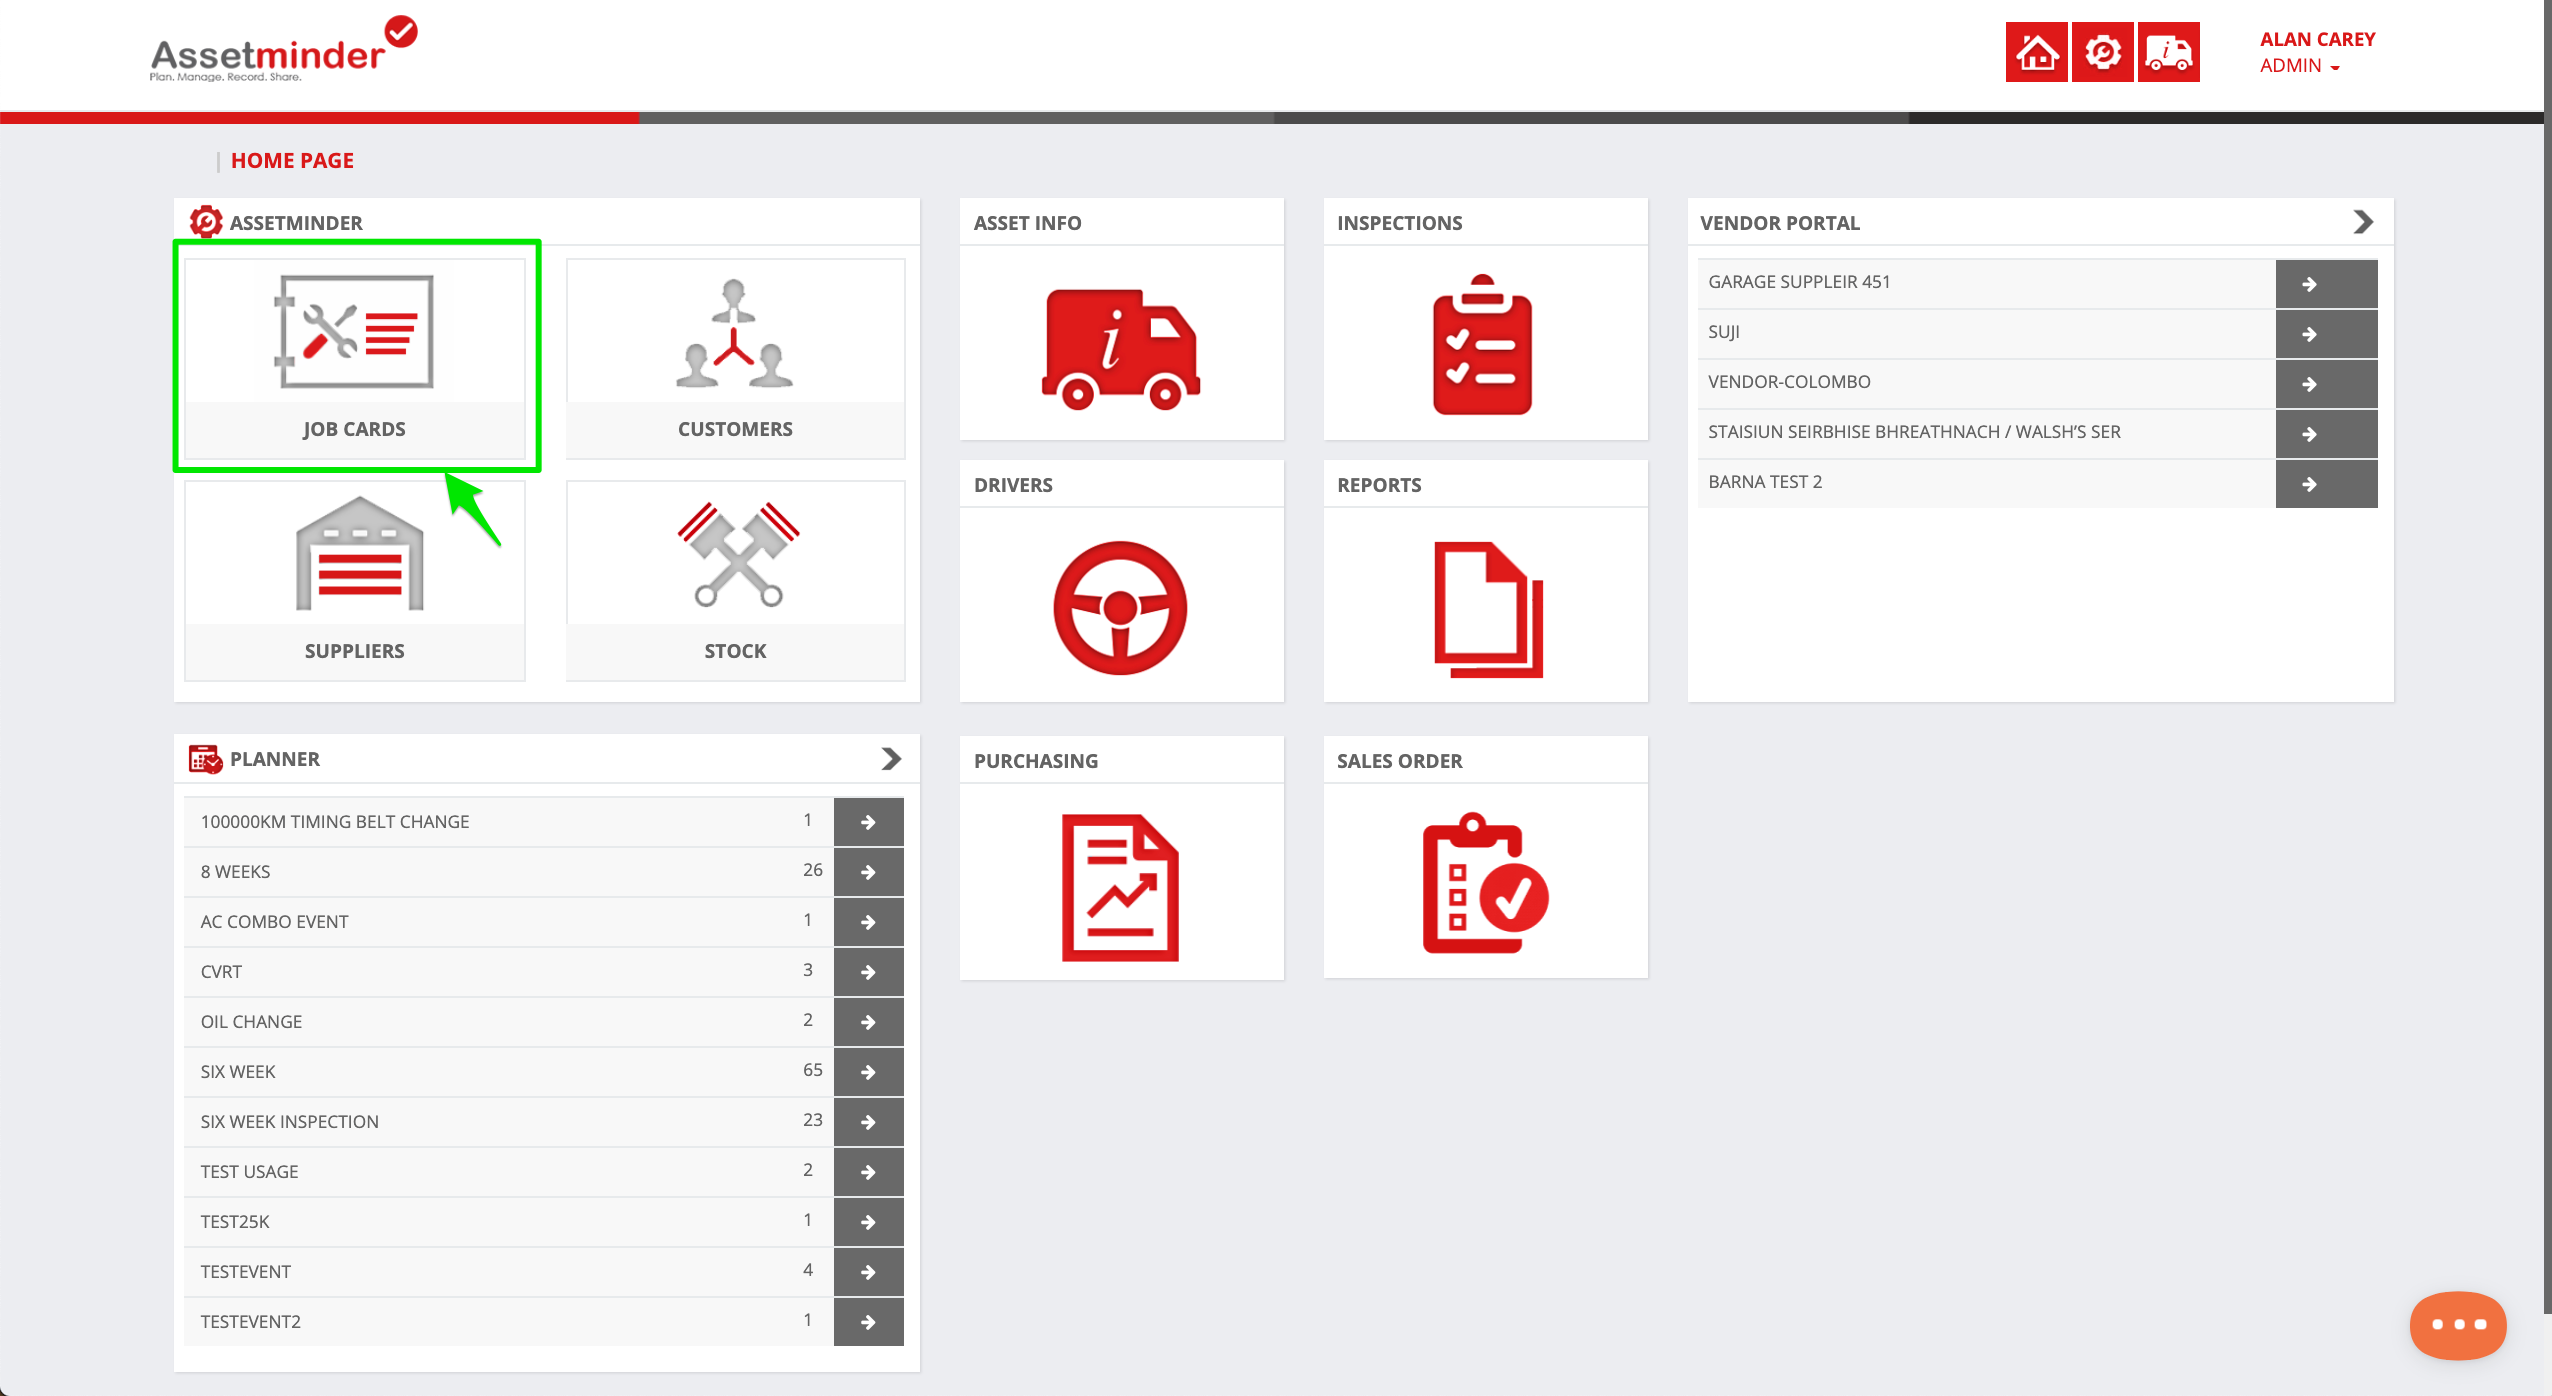
1. Locate the job card by clicking Job Cards on the home screen
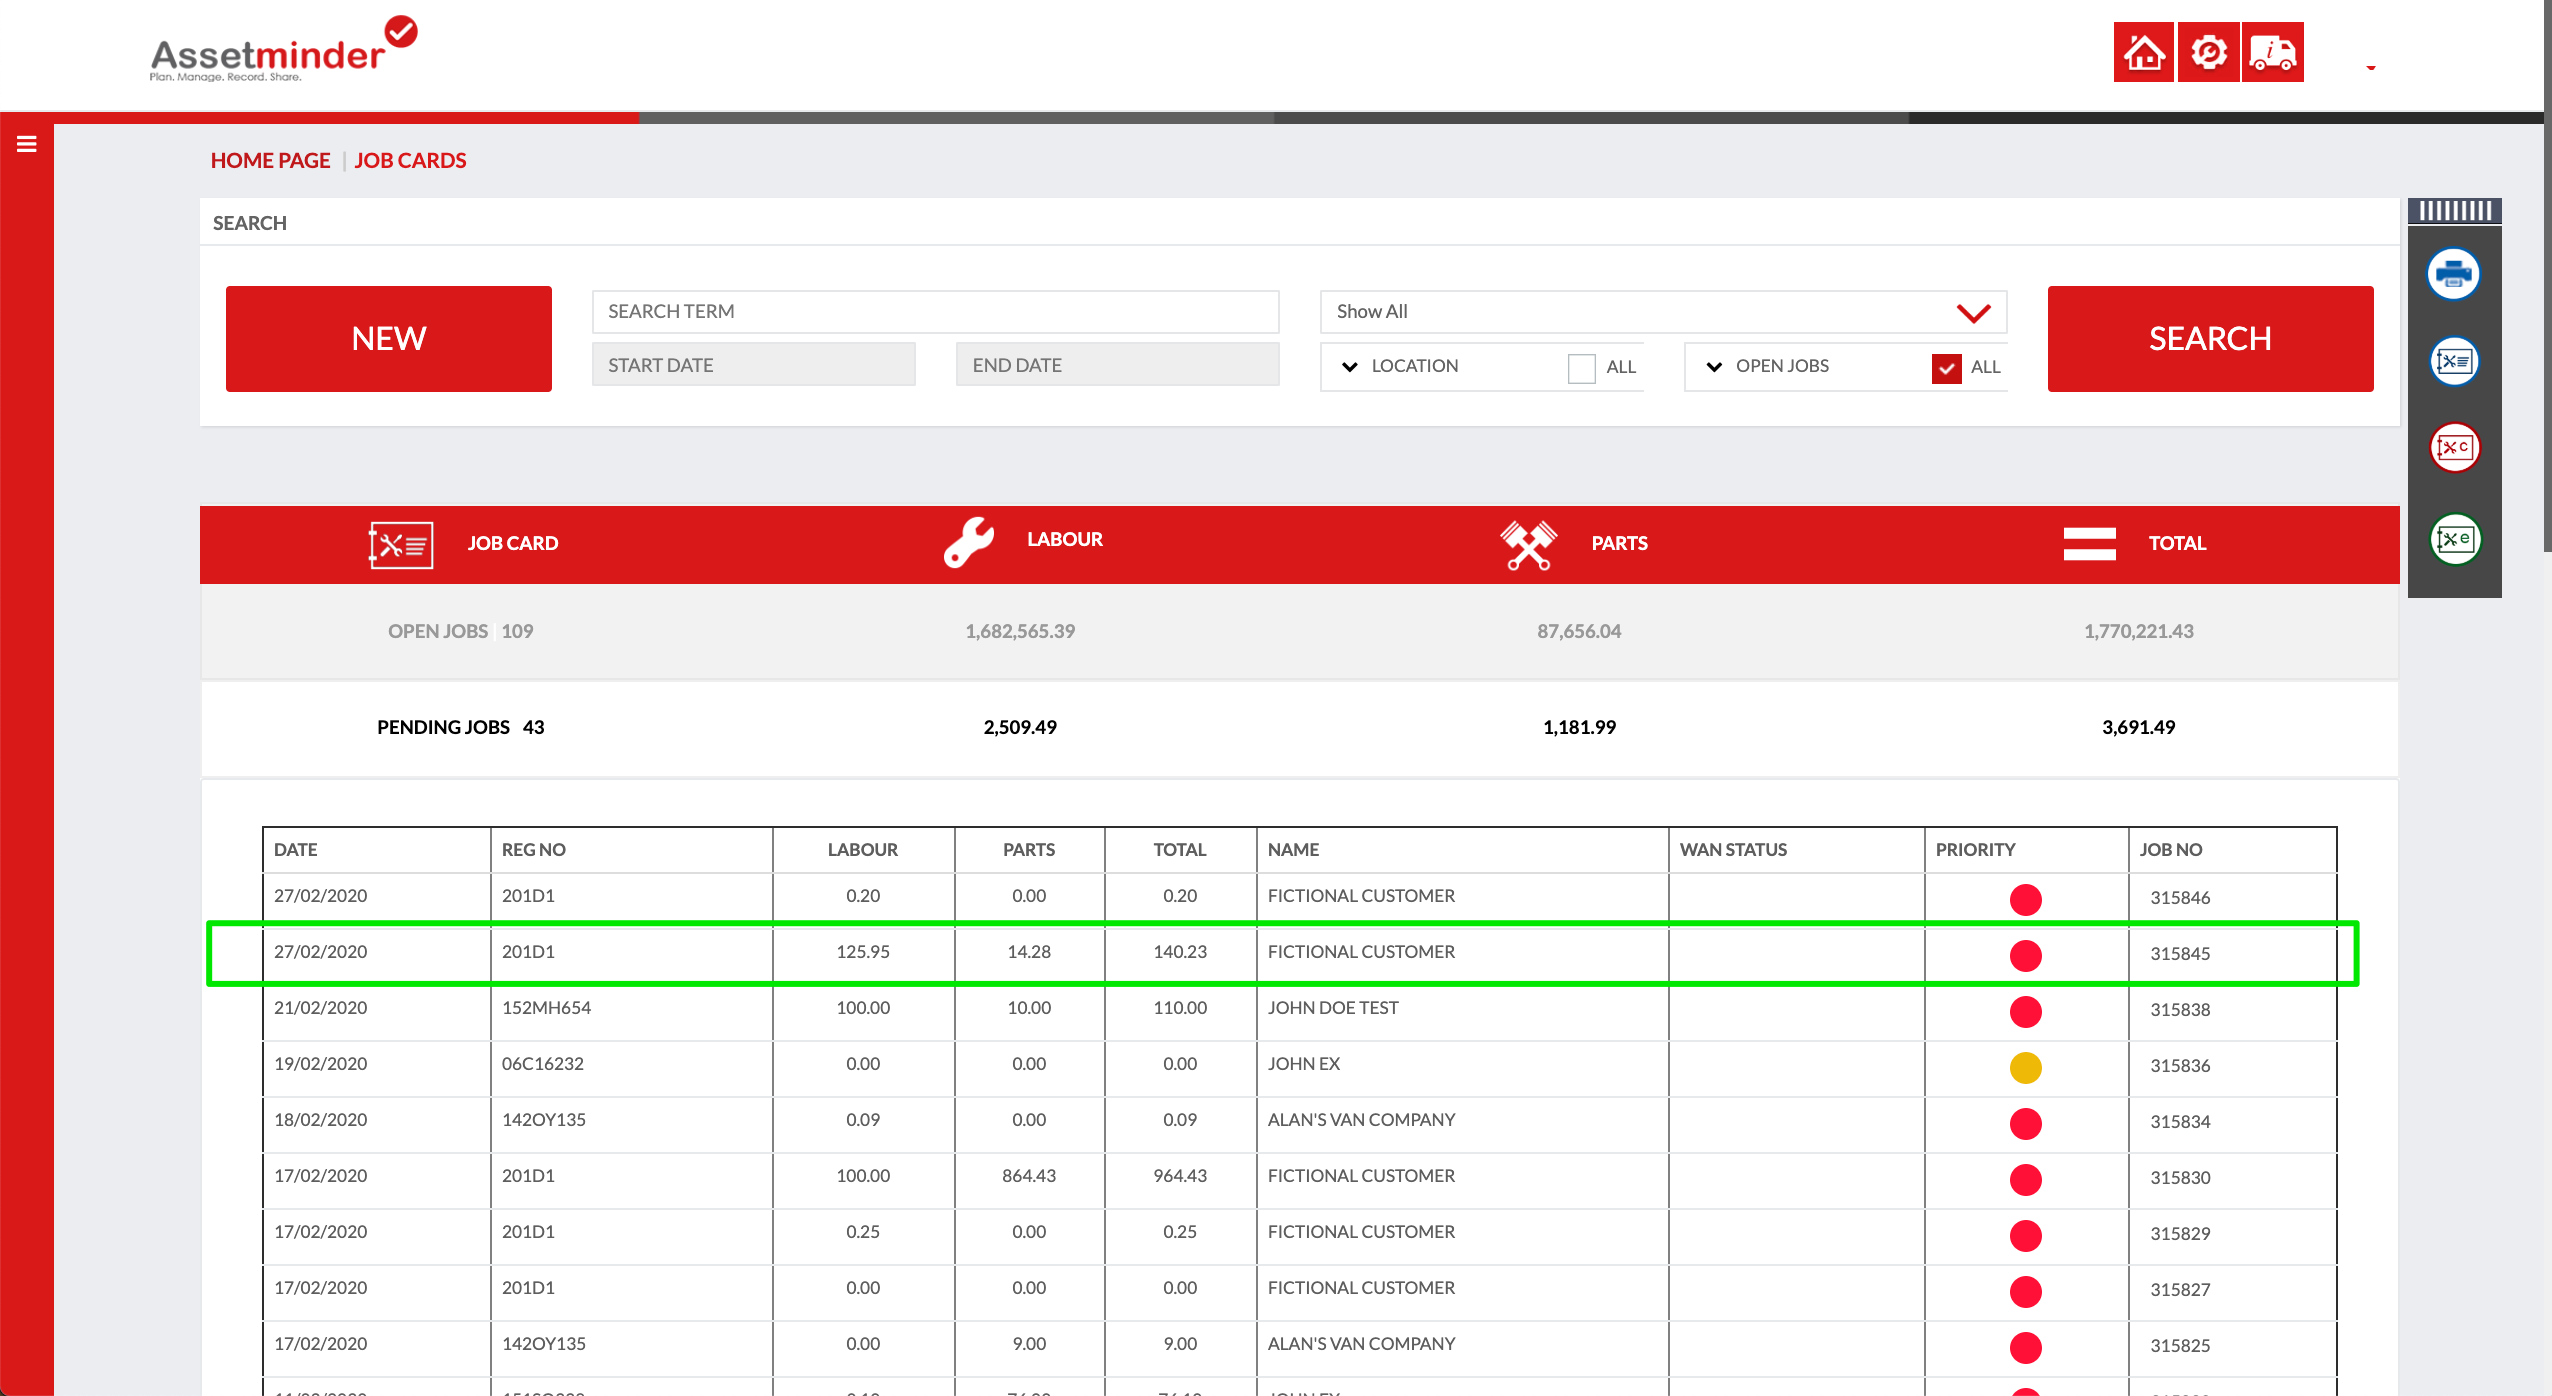
2. Search for the job card on the list. When the job card is located, click through to open
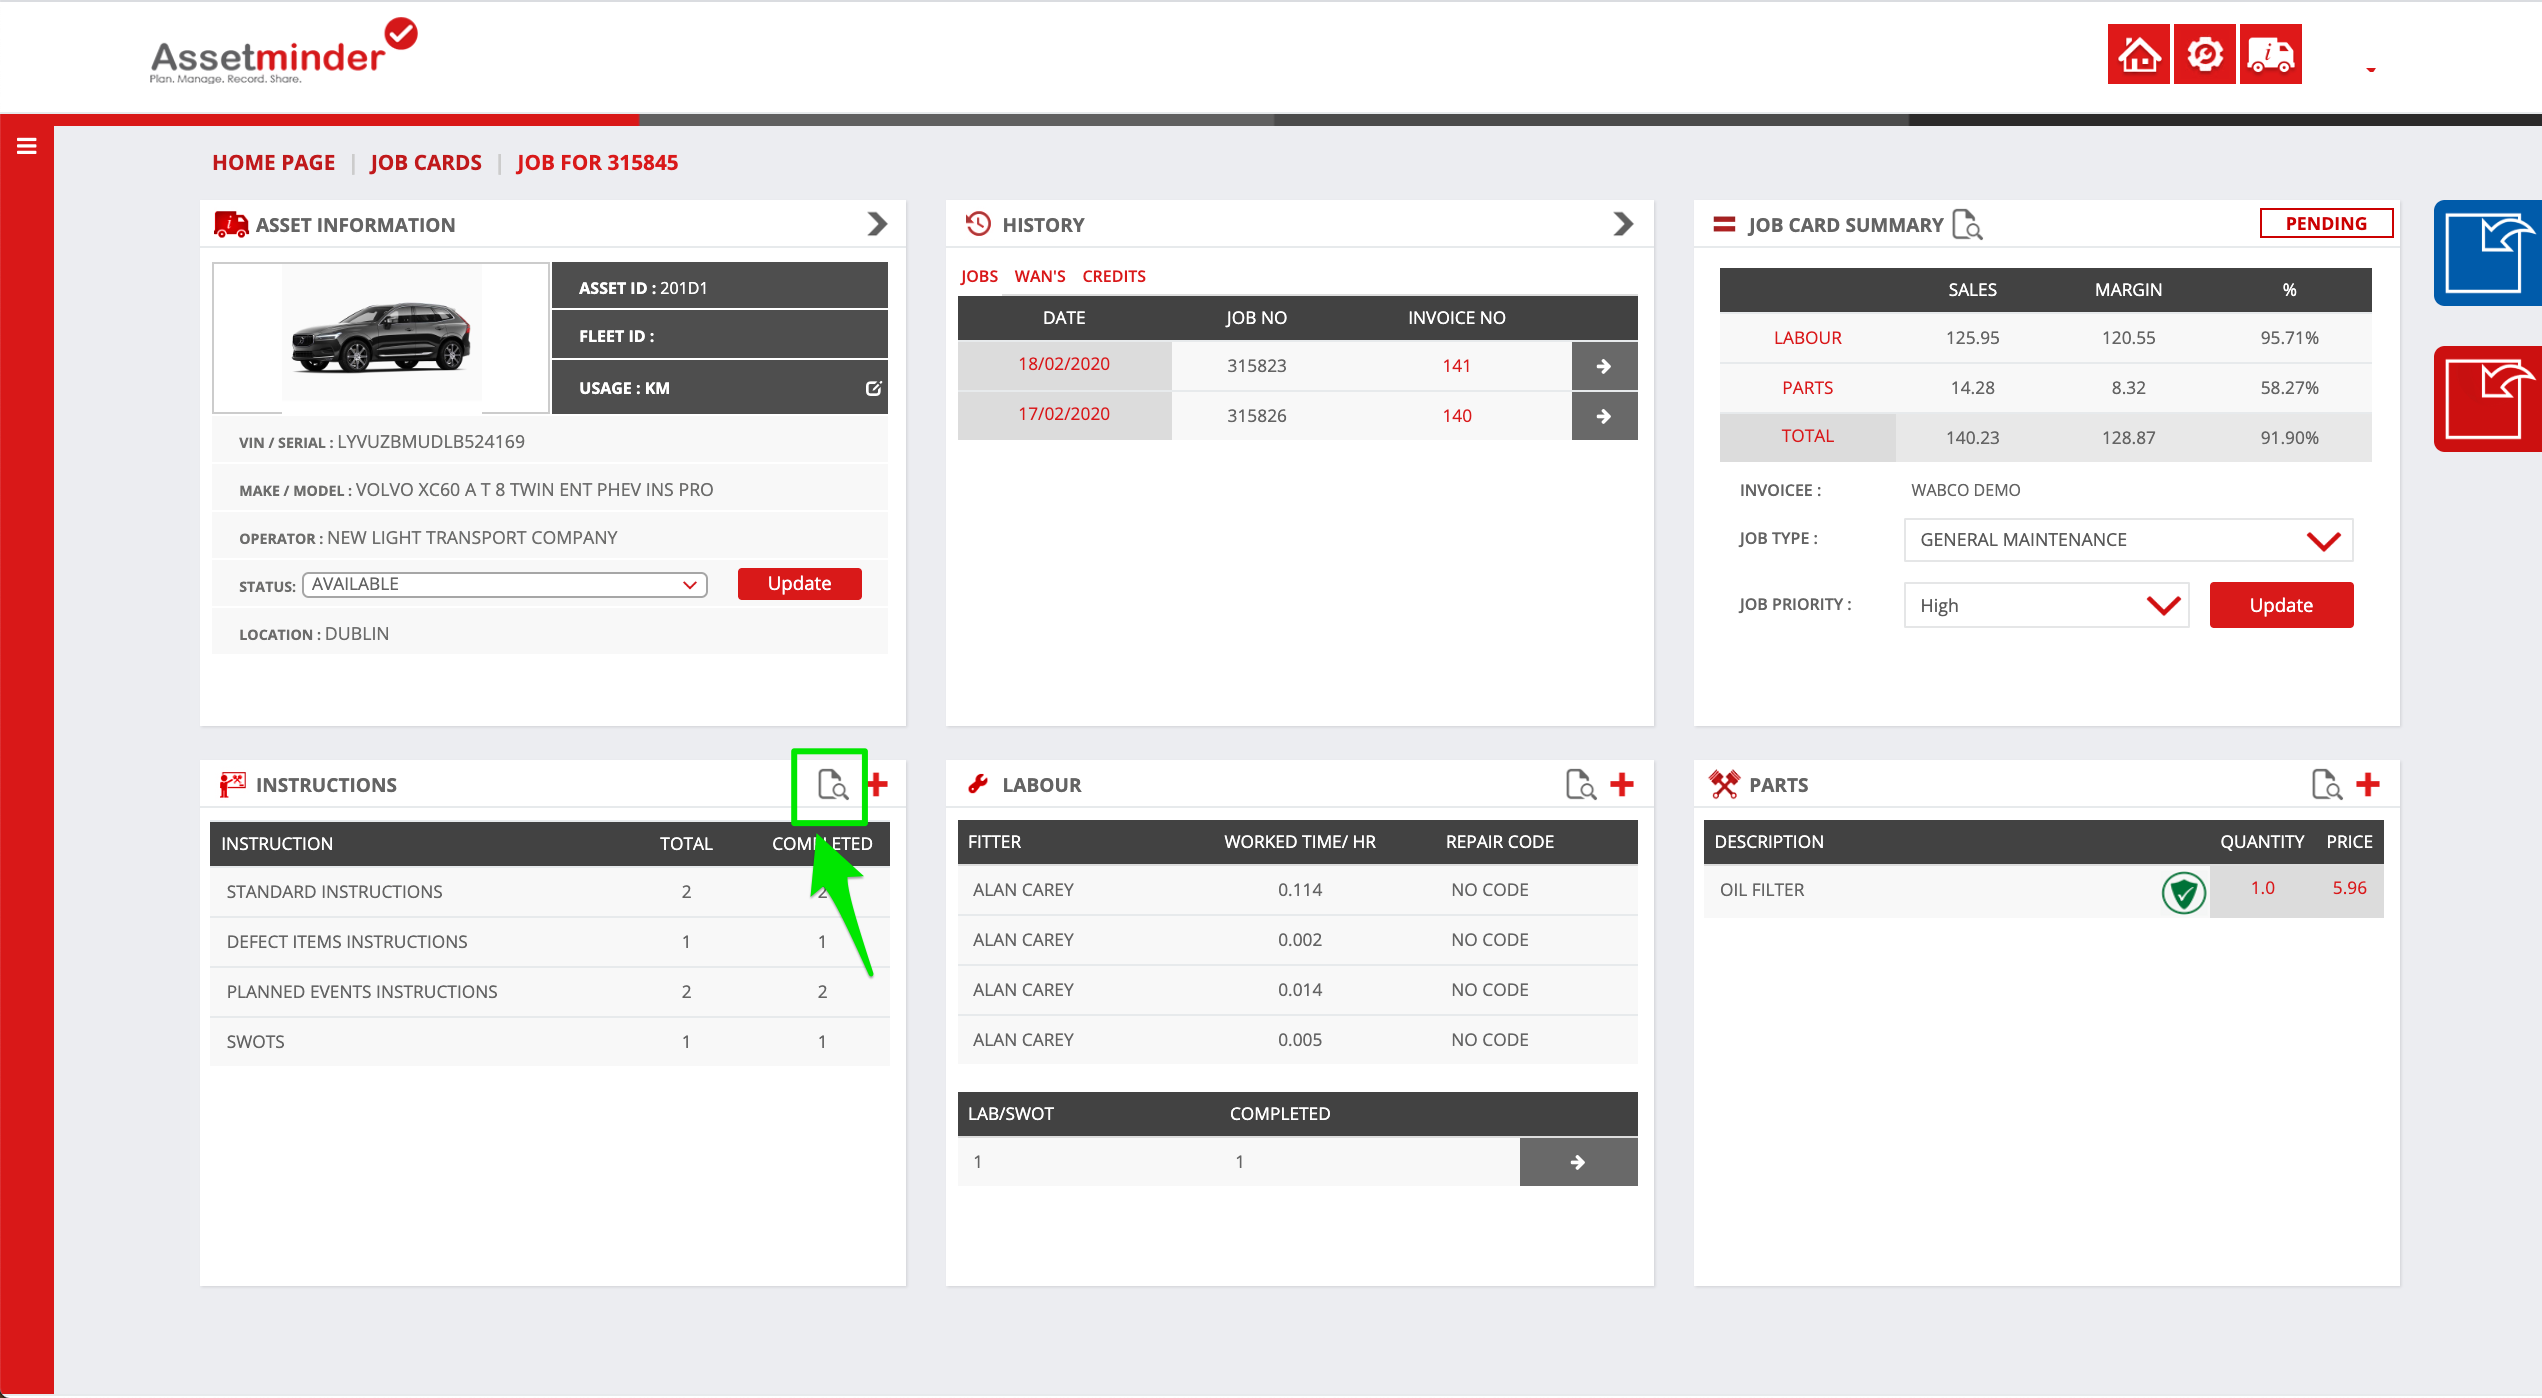
3. Click the View Page icon on the Instructions tile to review the work
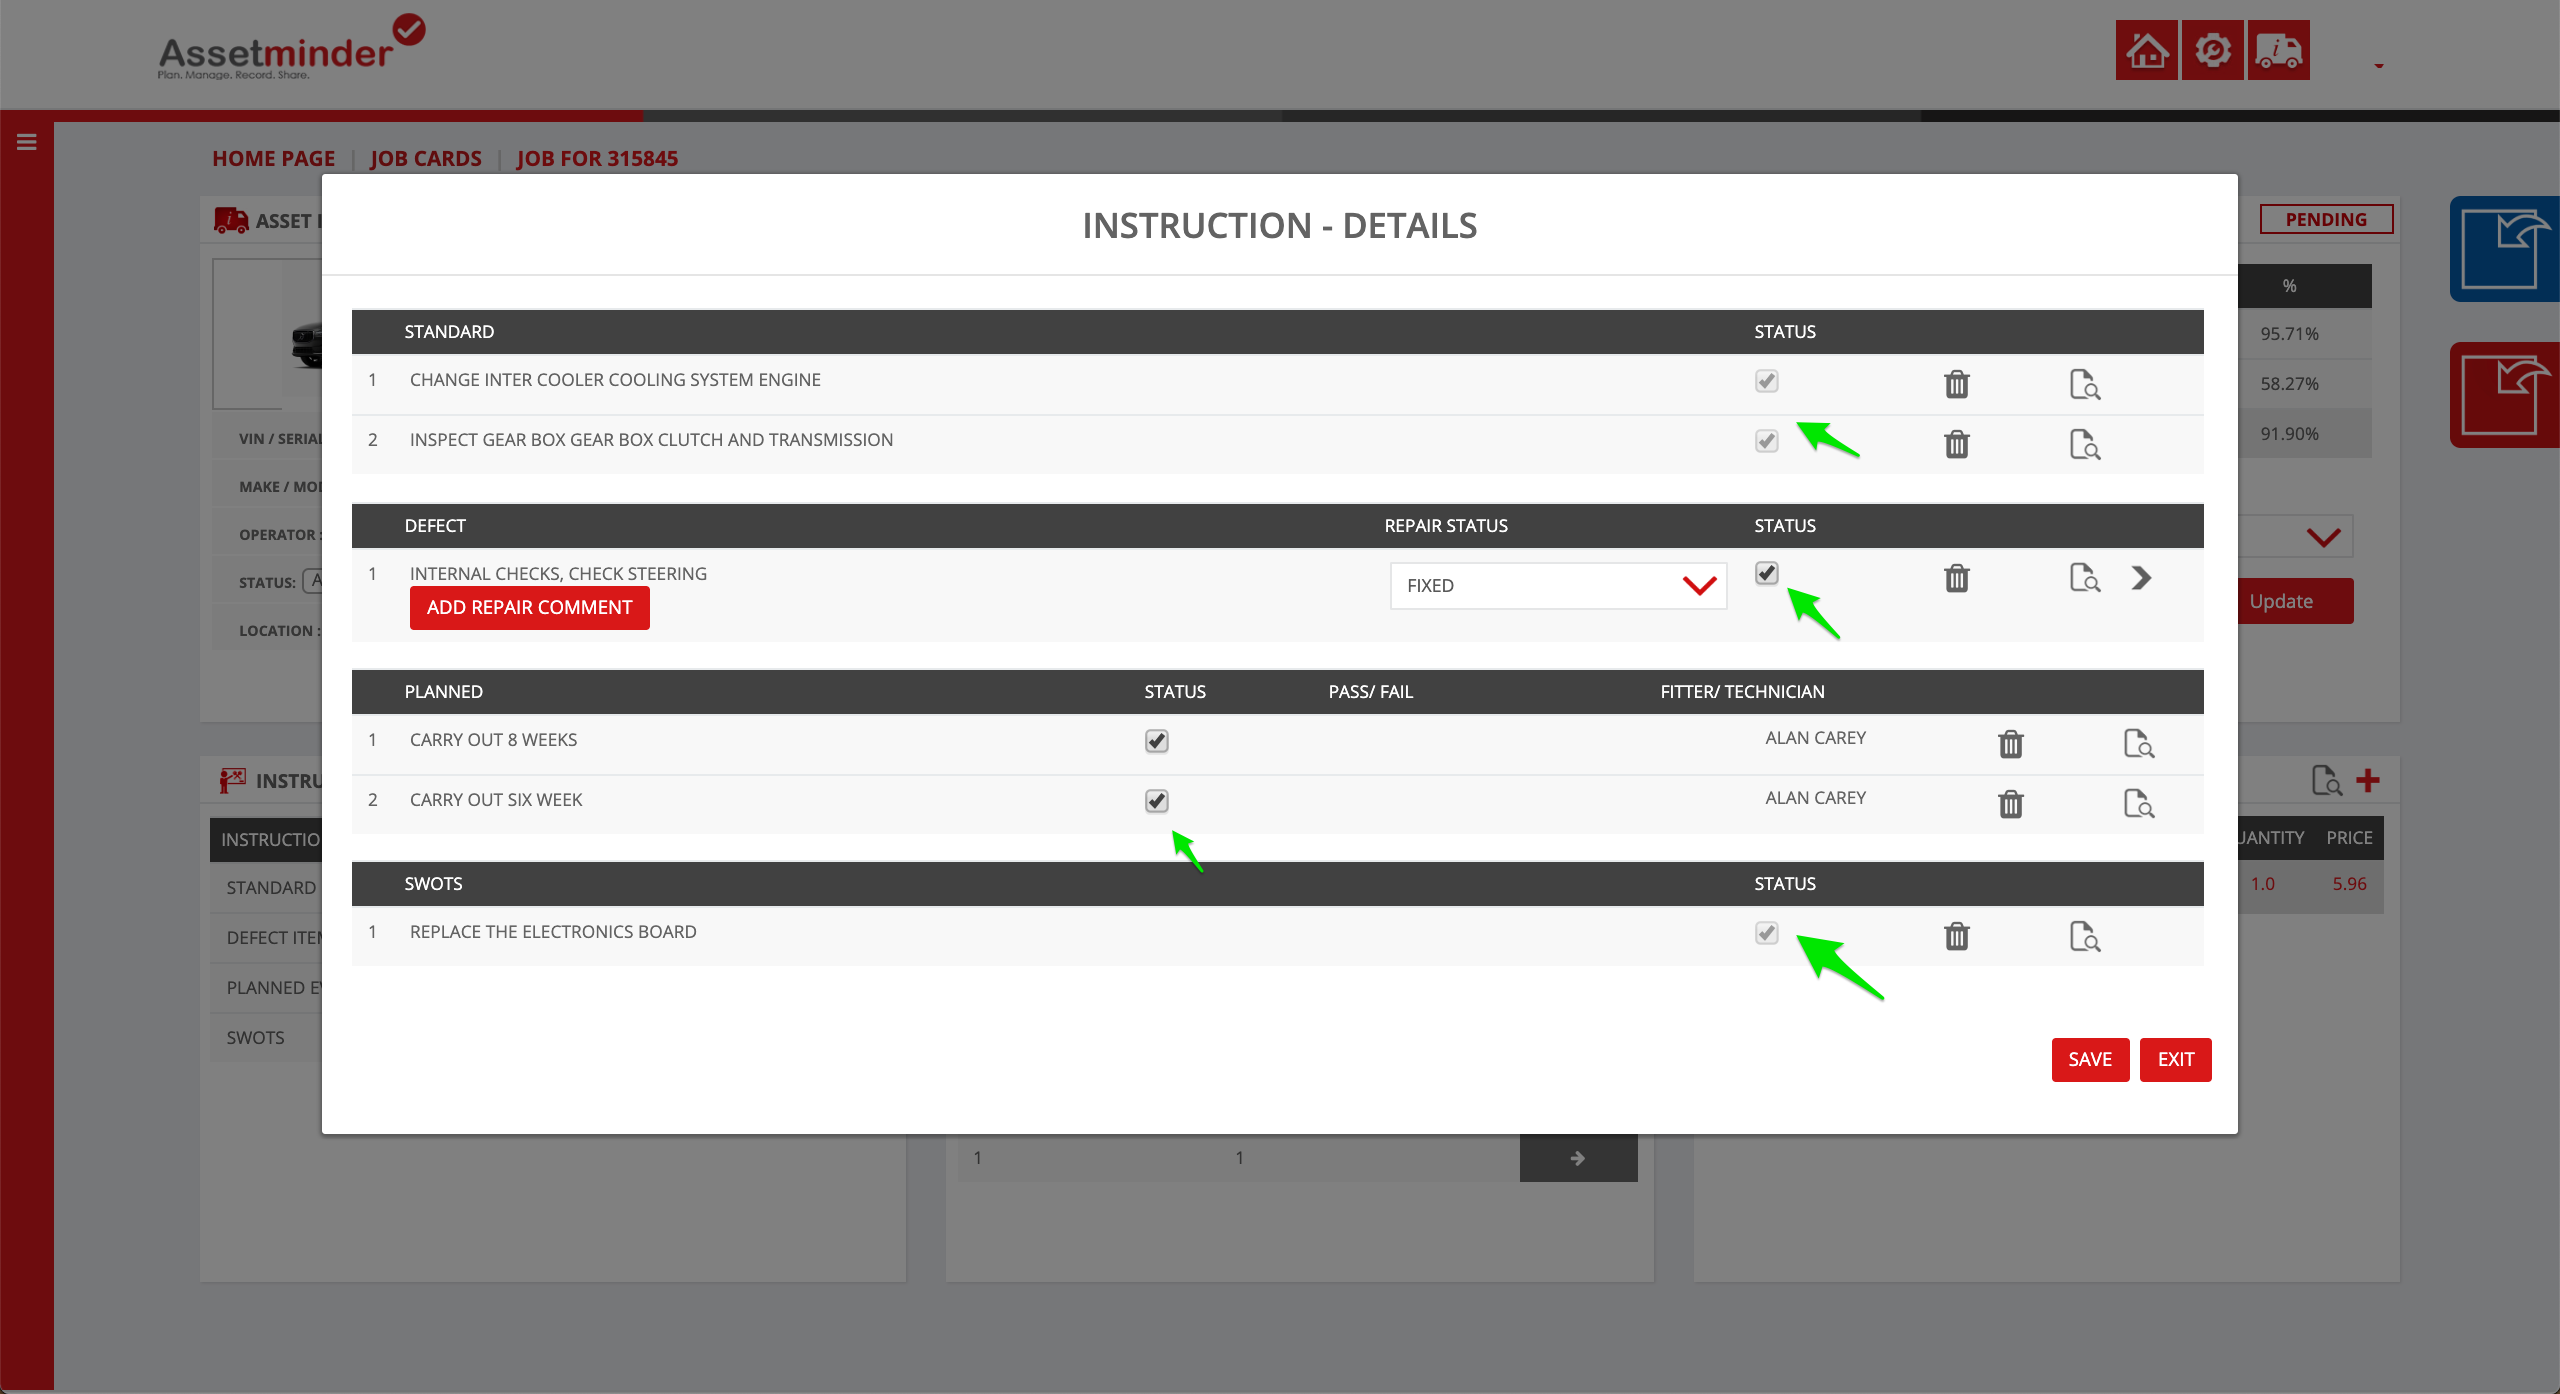
4. Make any changes as needed. If all the work is signed off as done, click Save
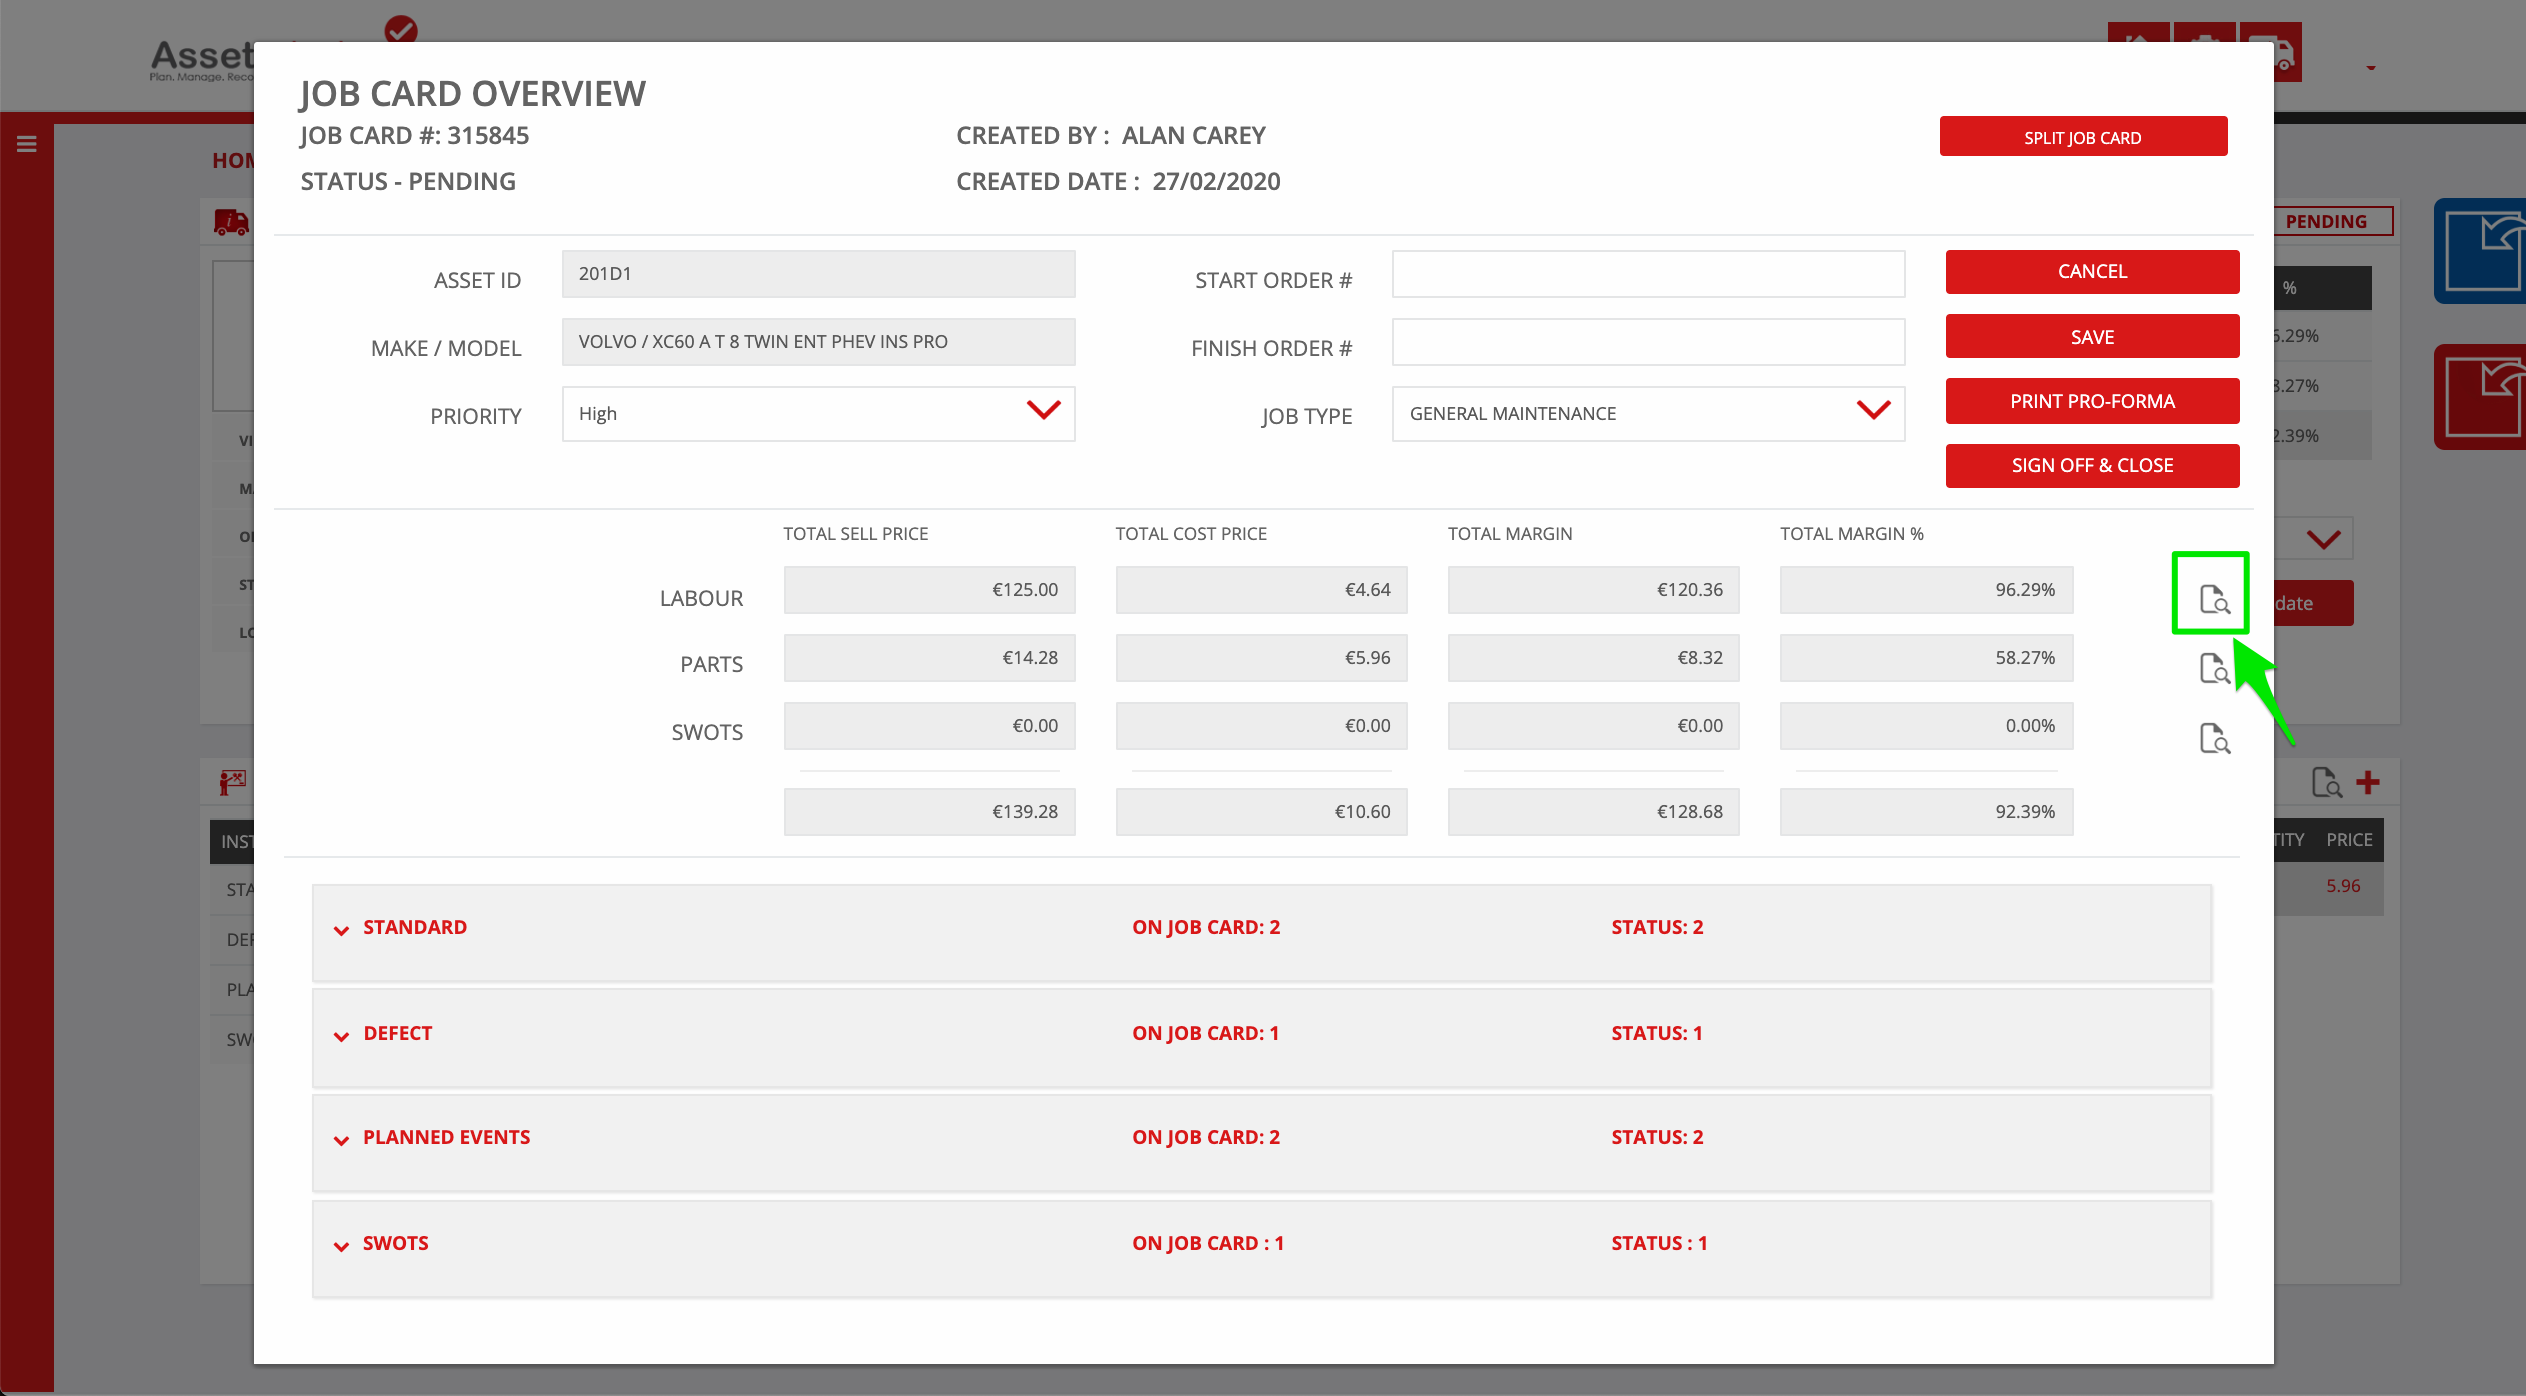
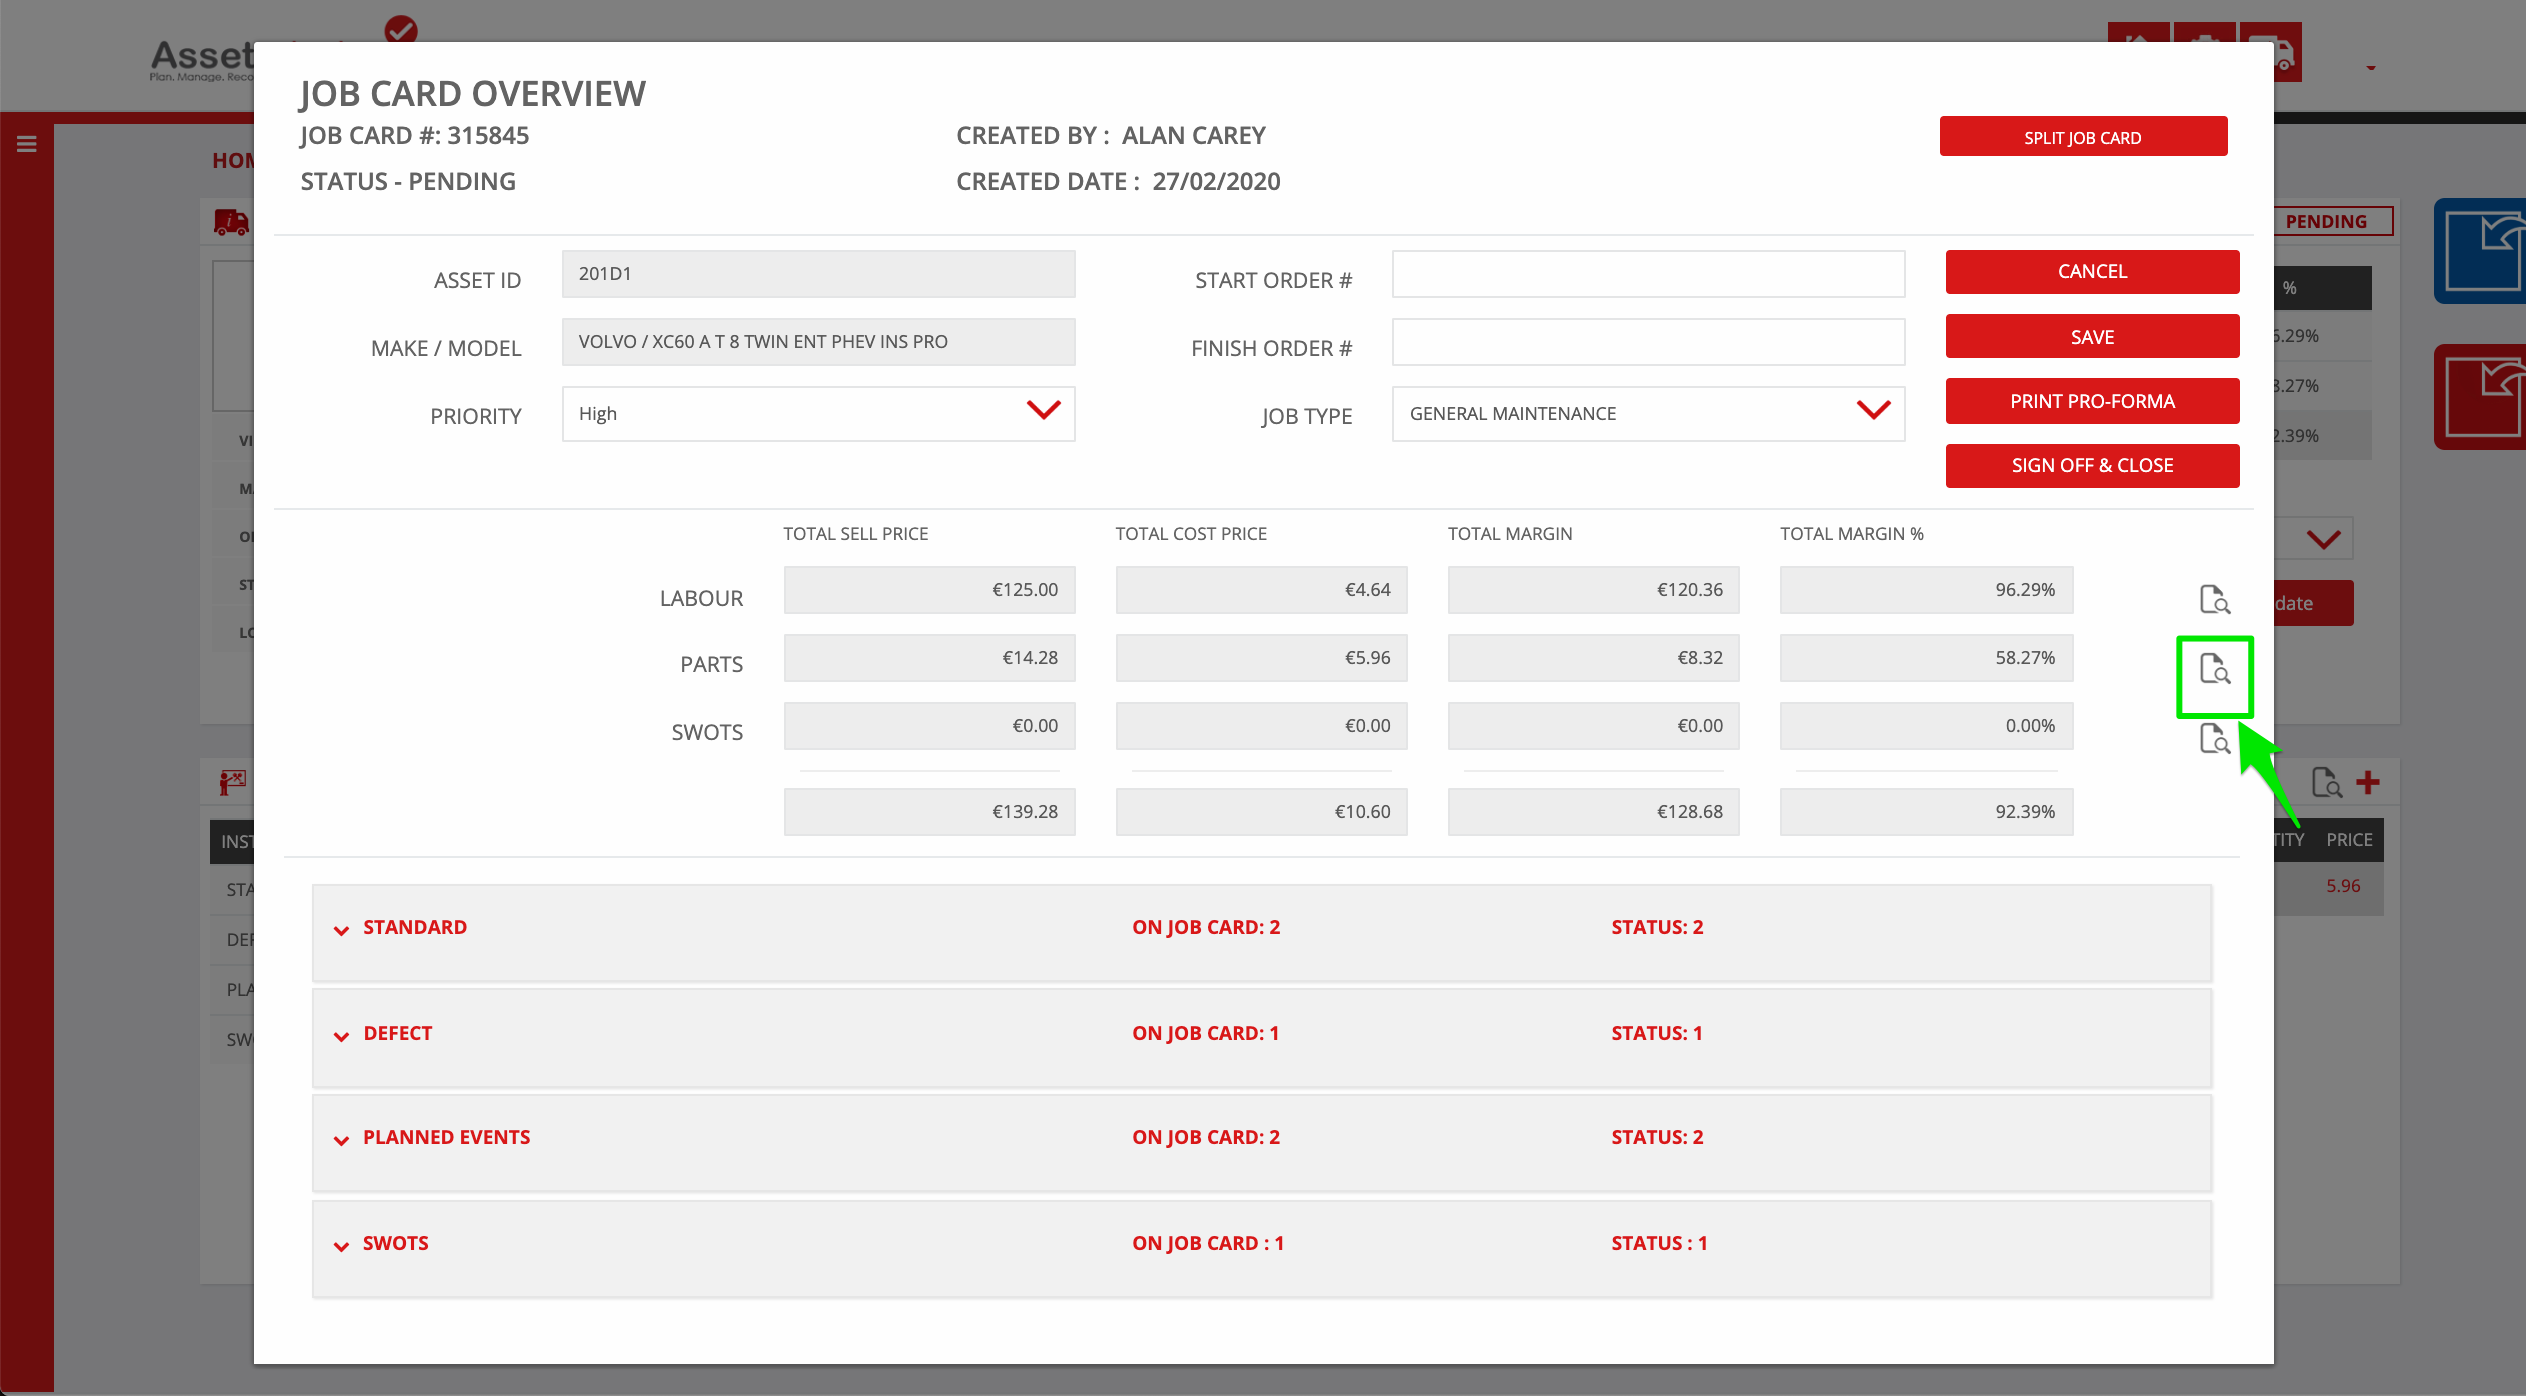
5. After reviewing the work, the next step is to close off the job card. Click the View Page icon in the Job Card Summary tile

6. Review the labour by clicking the View Page icon on the Labour line item
7. Review the labour hours allocated to the work. The SWOT labour hours are standard allocated hours and may not need any adjustment. The general labour hours may need adjustment as they are allocated by the mechanic using the clocking on/off feature on the app. Verify and adjust if needed
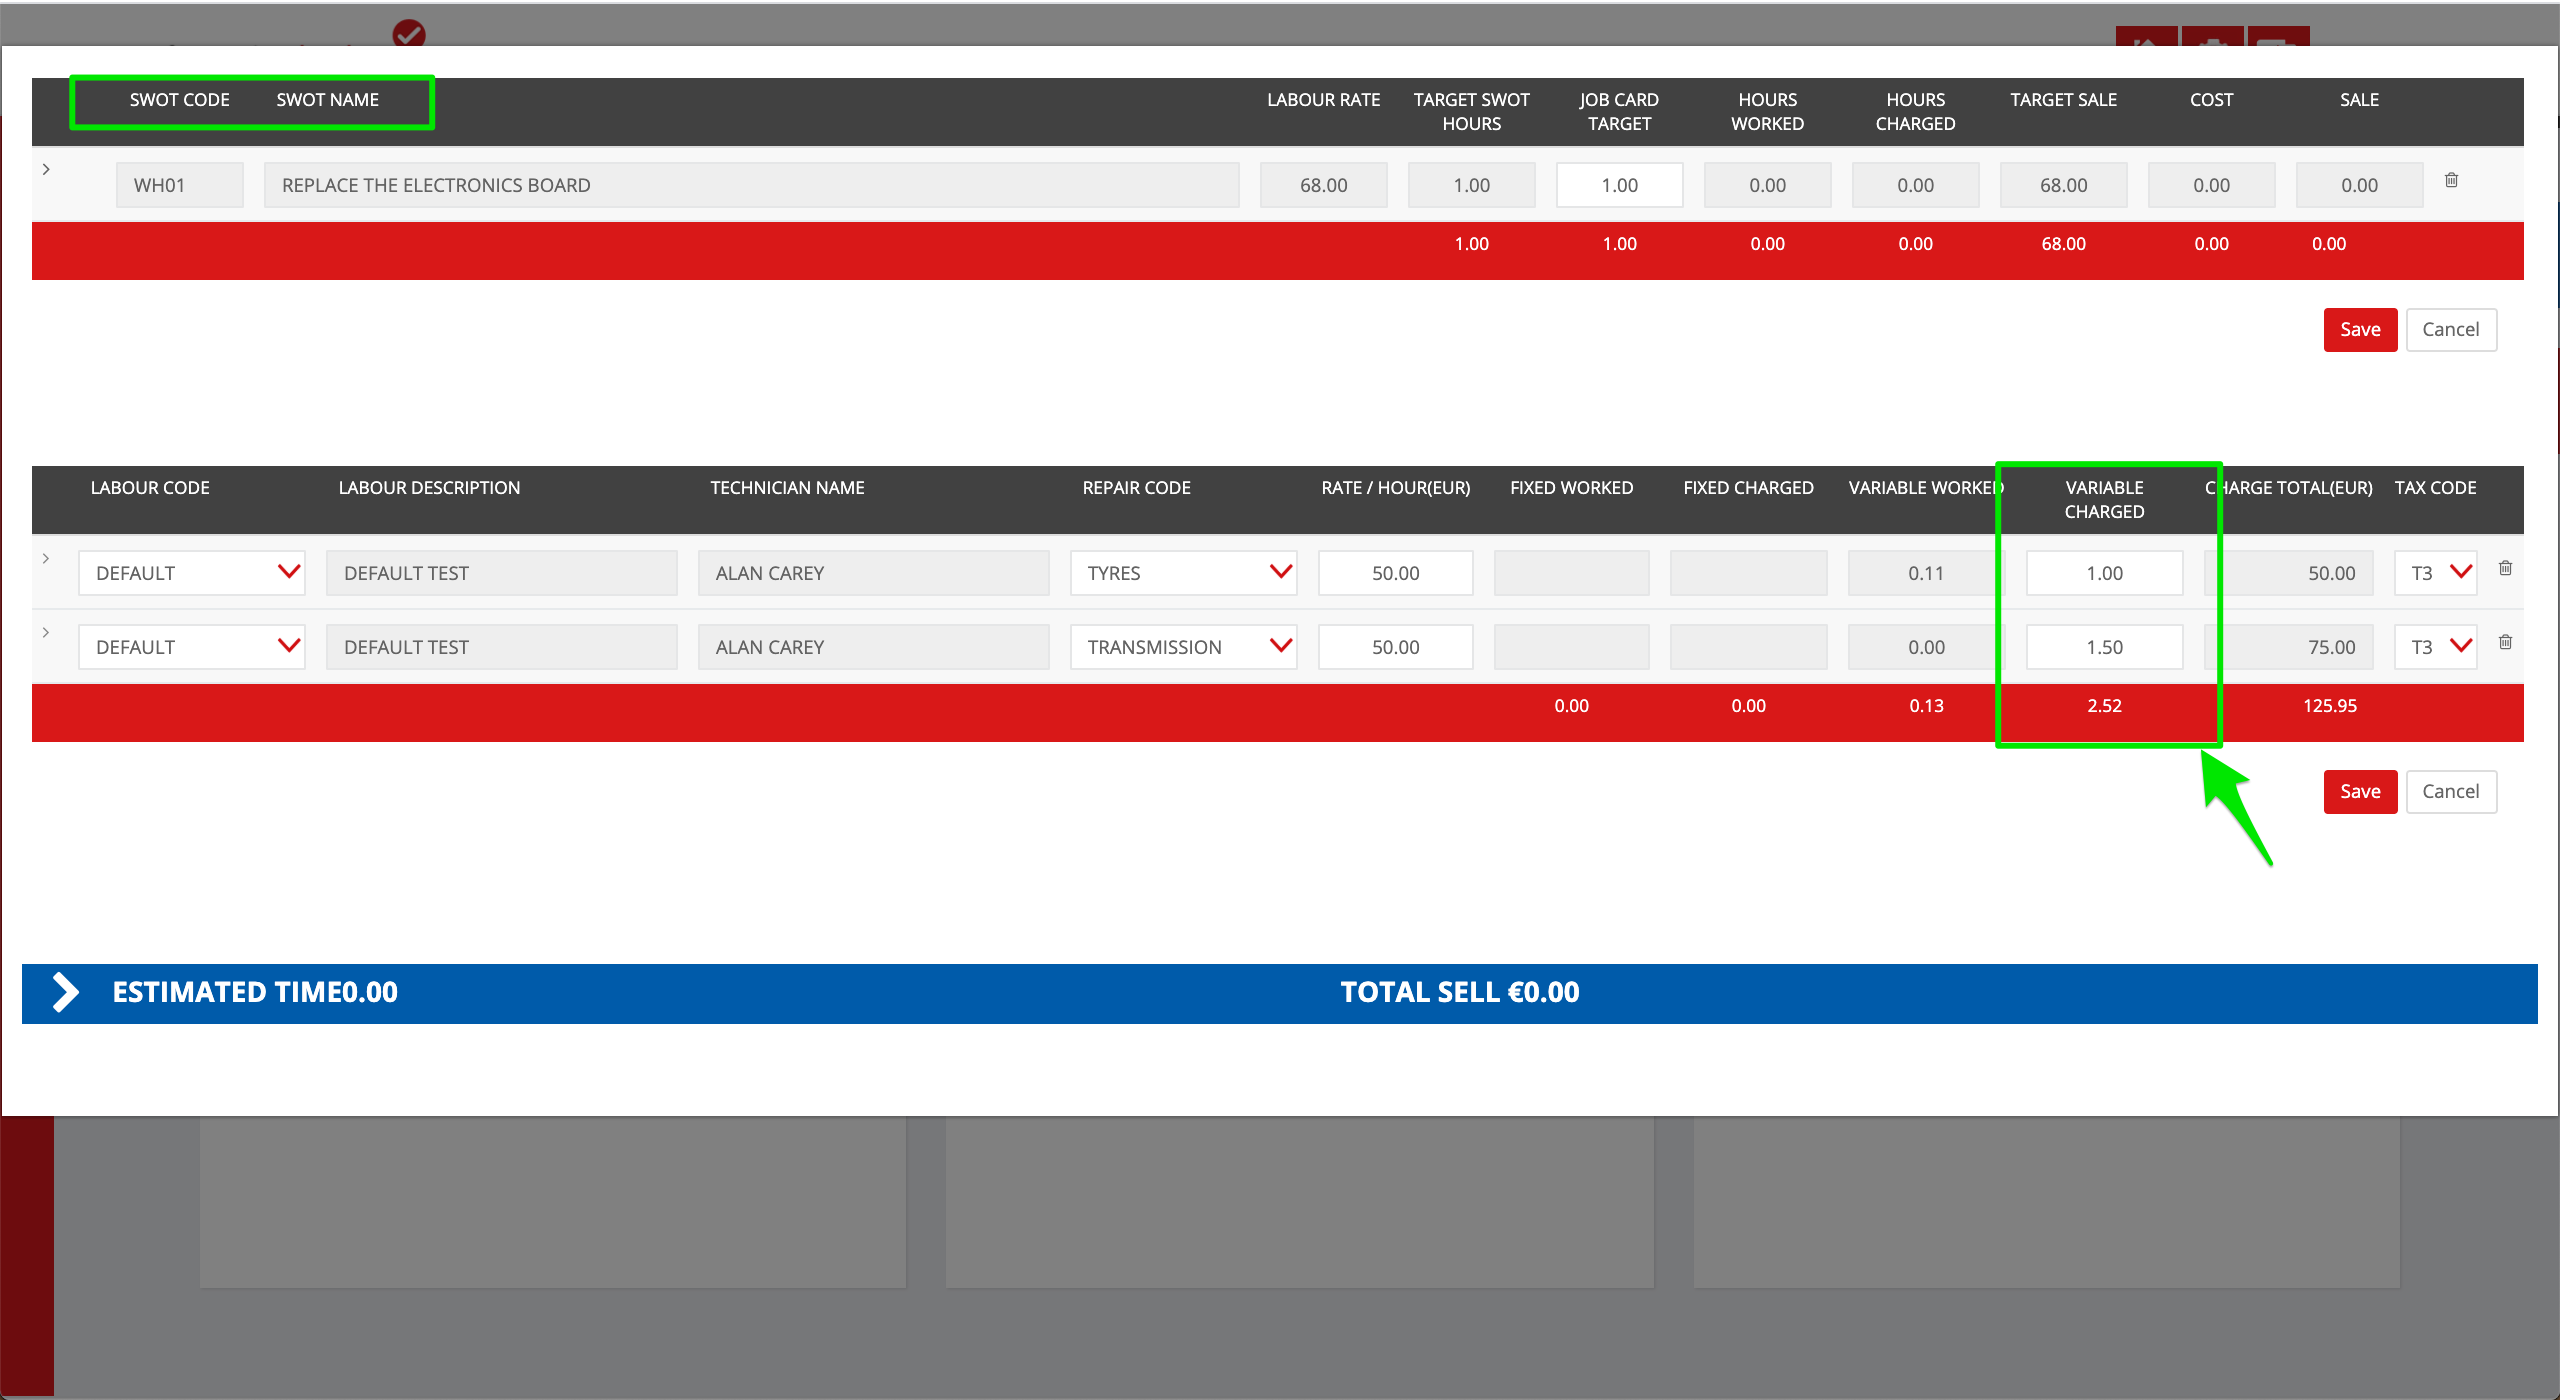
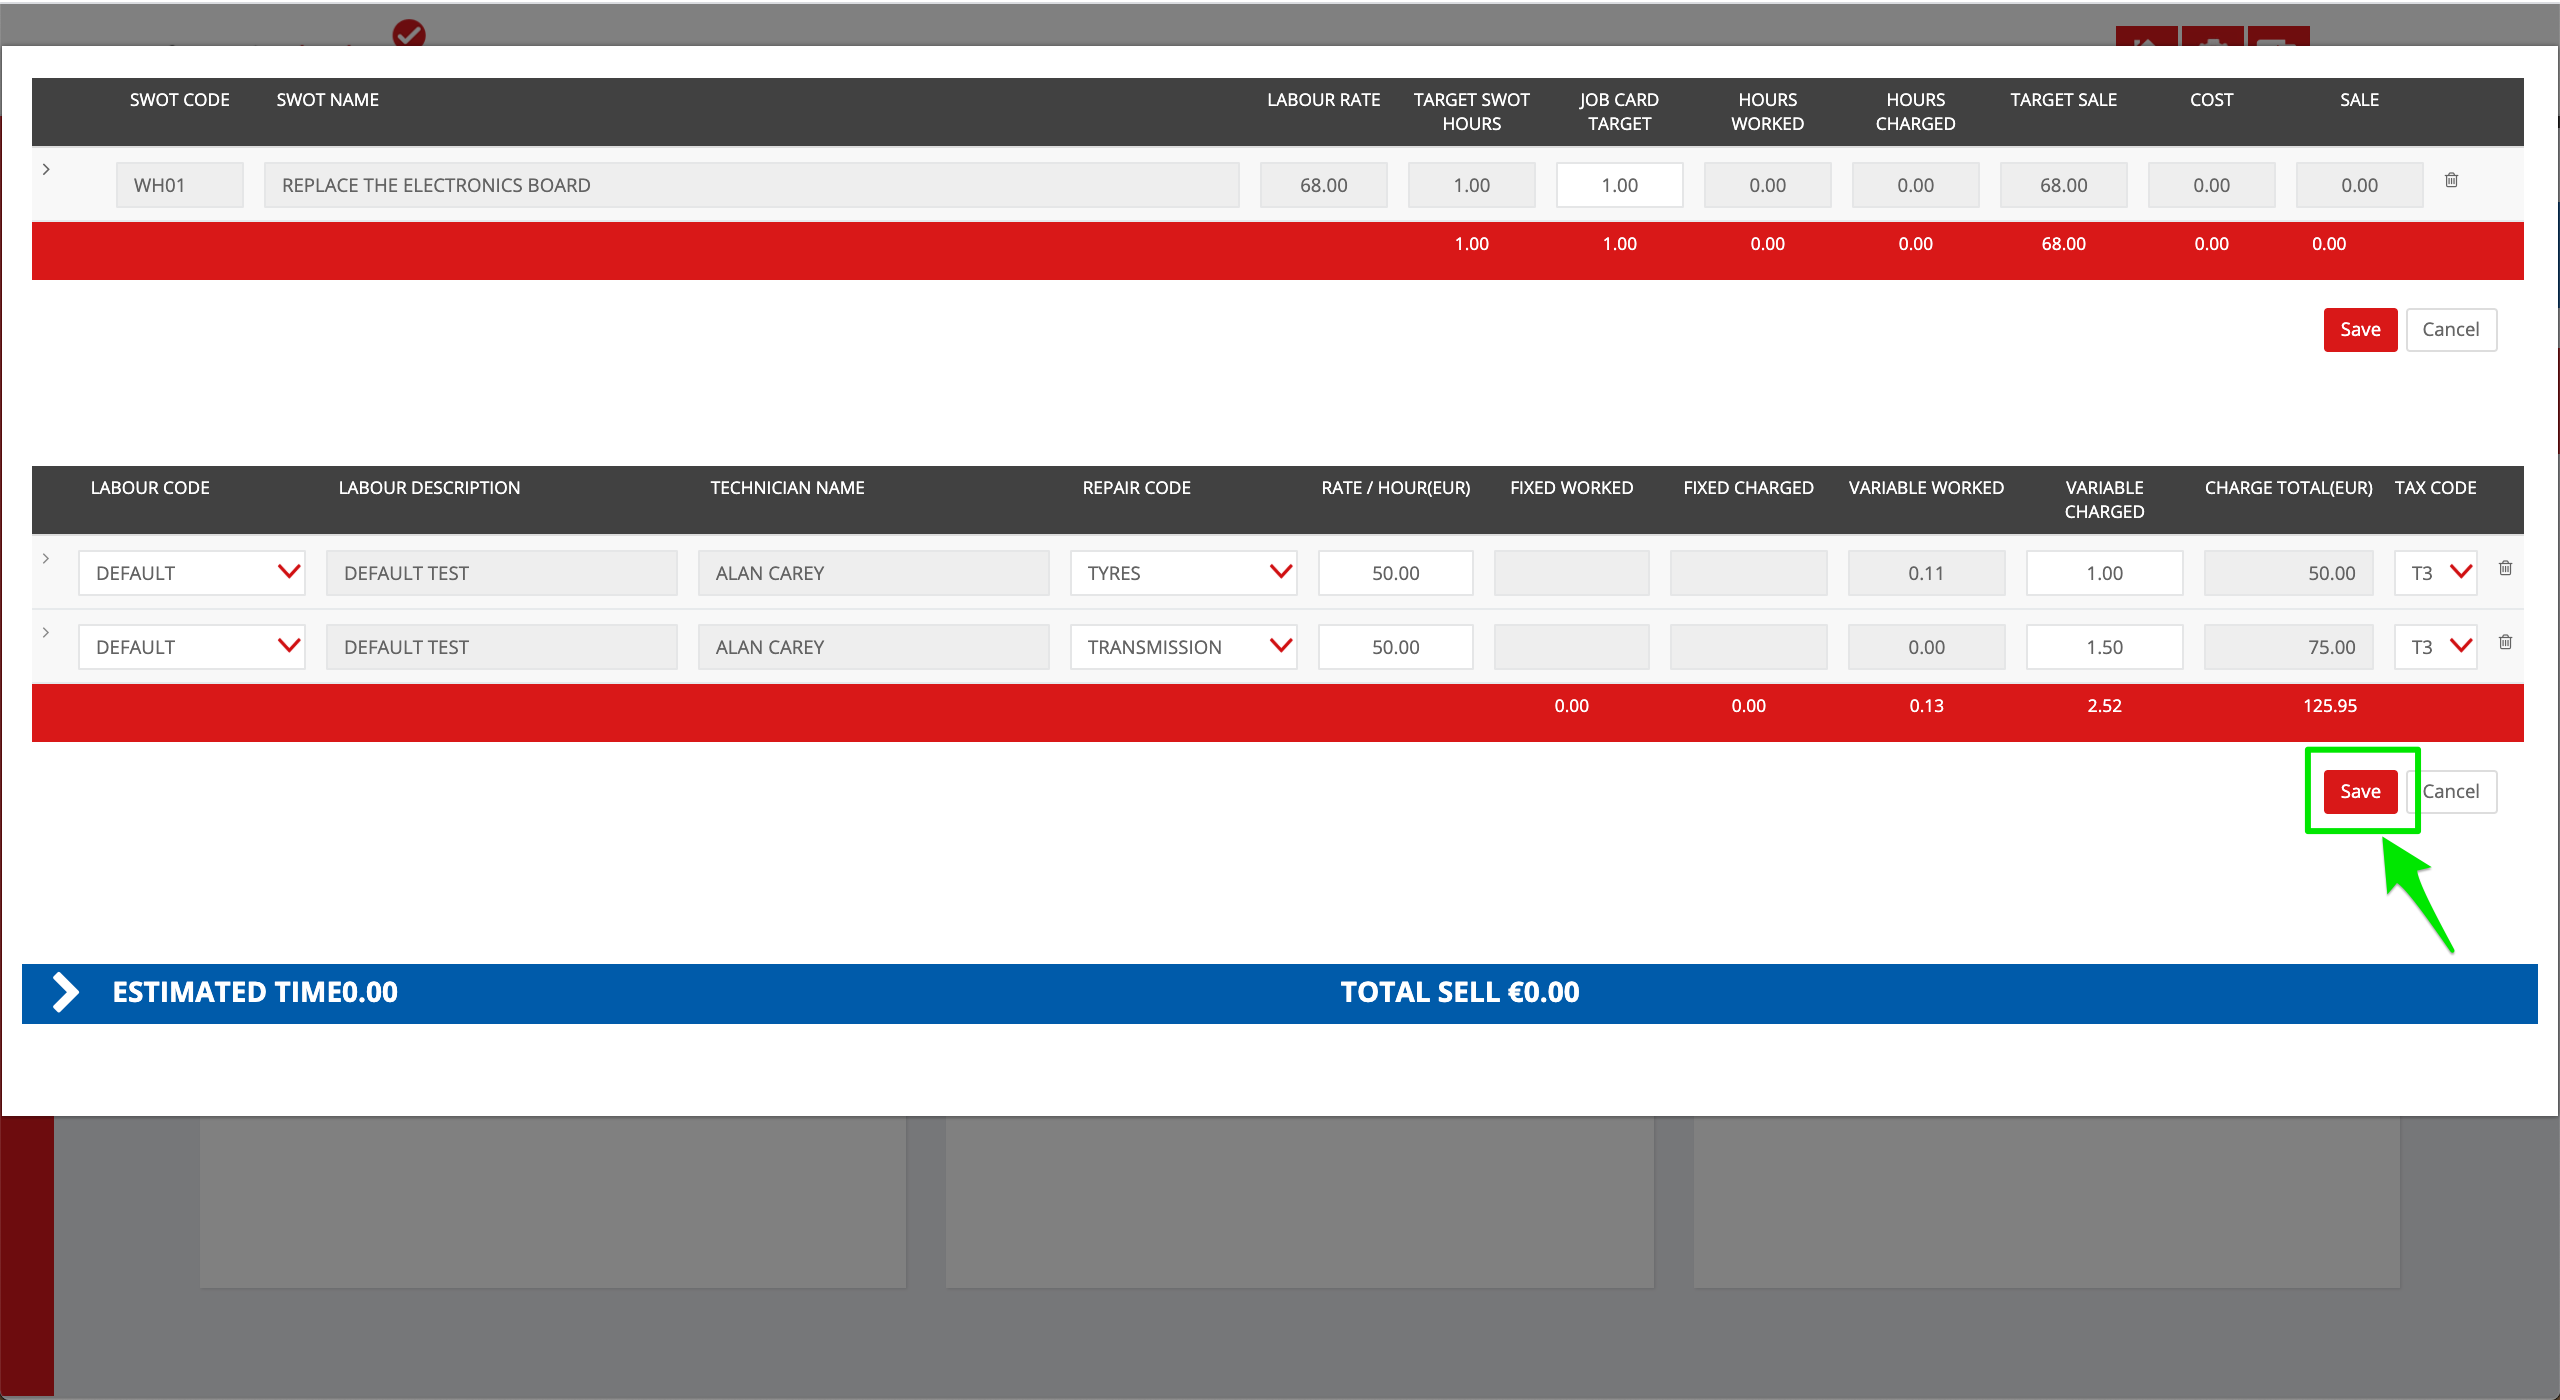
8. Click Save when done
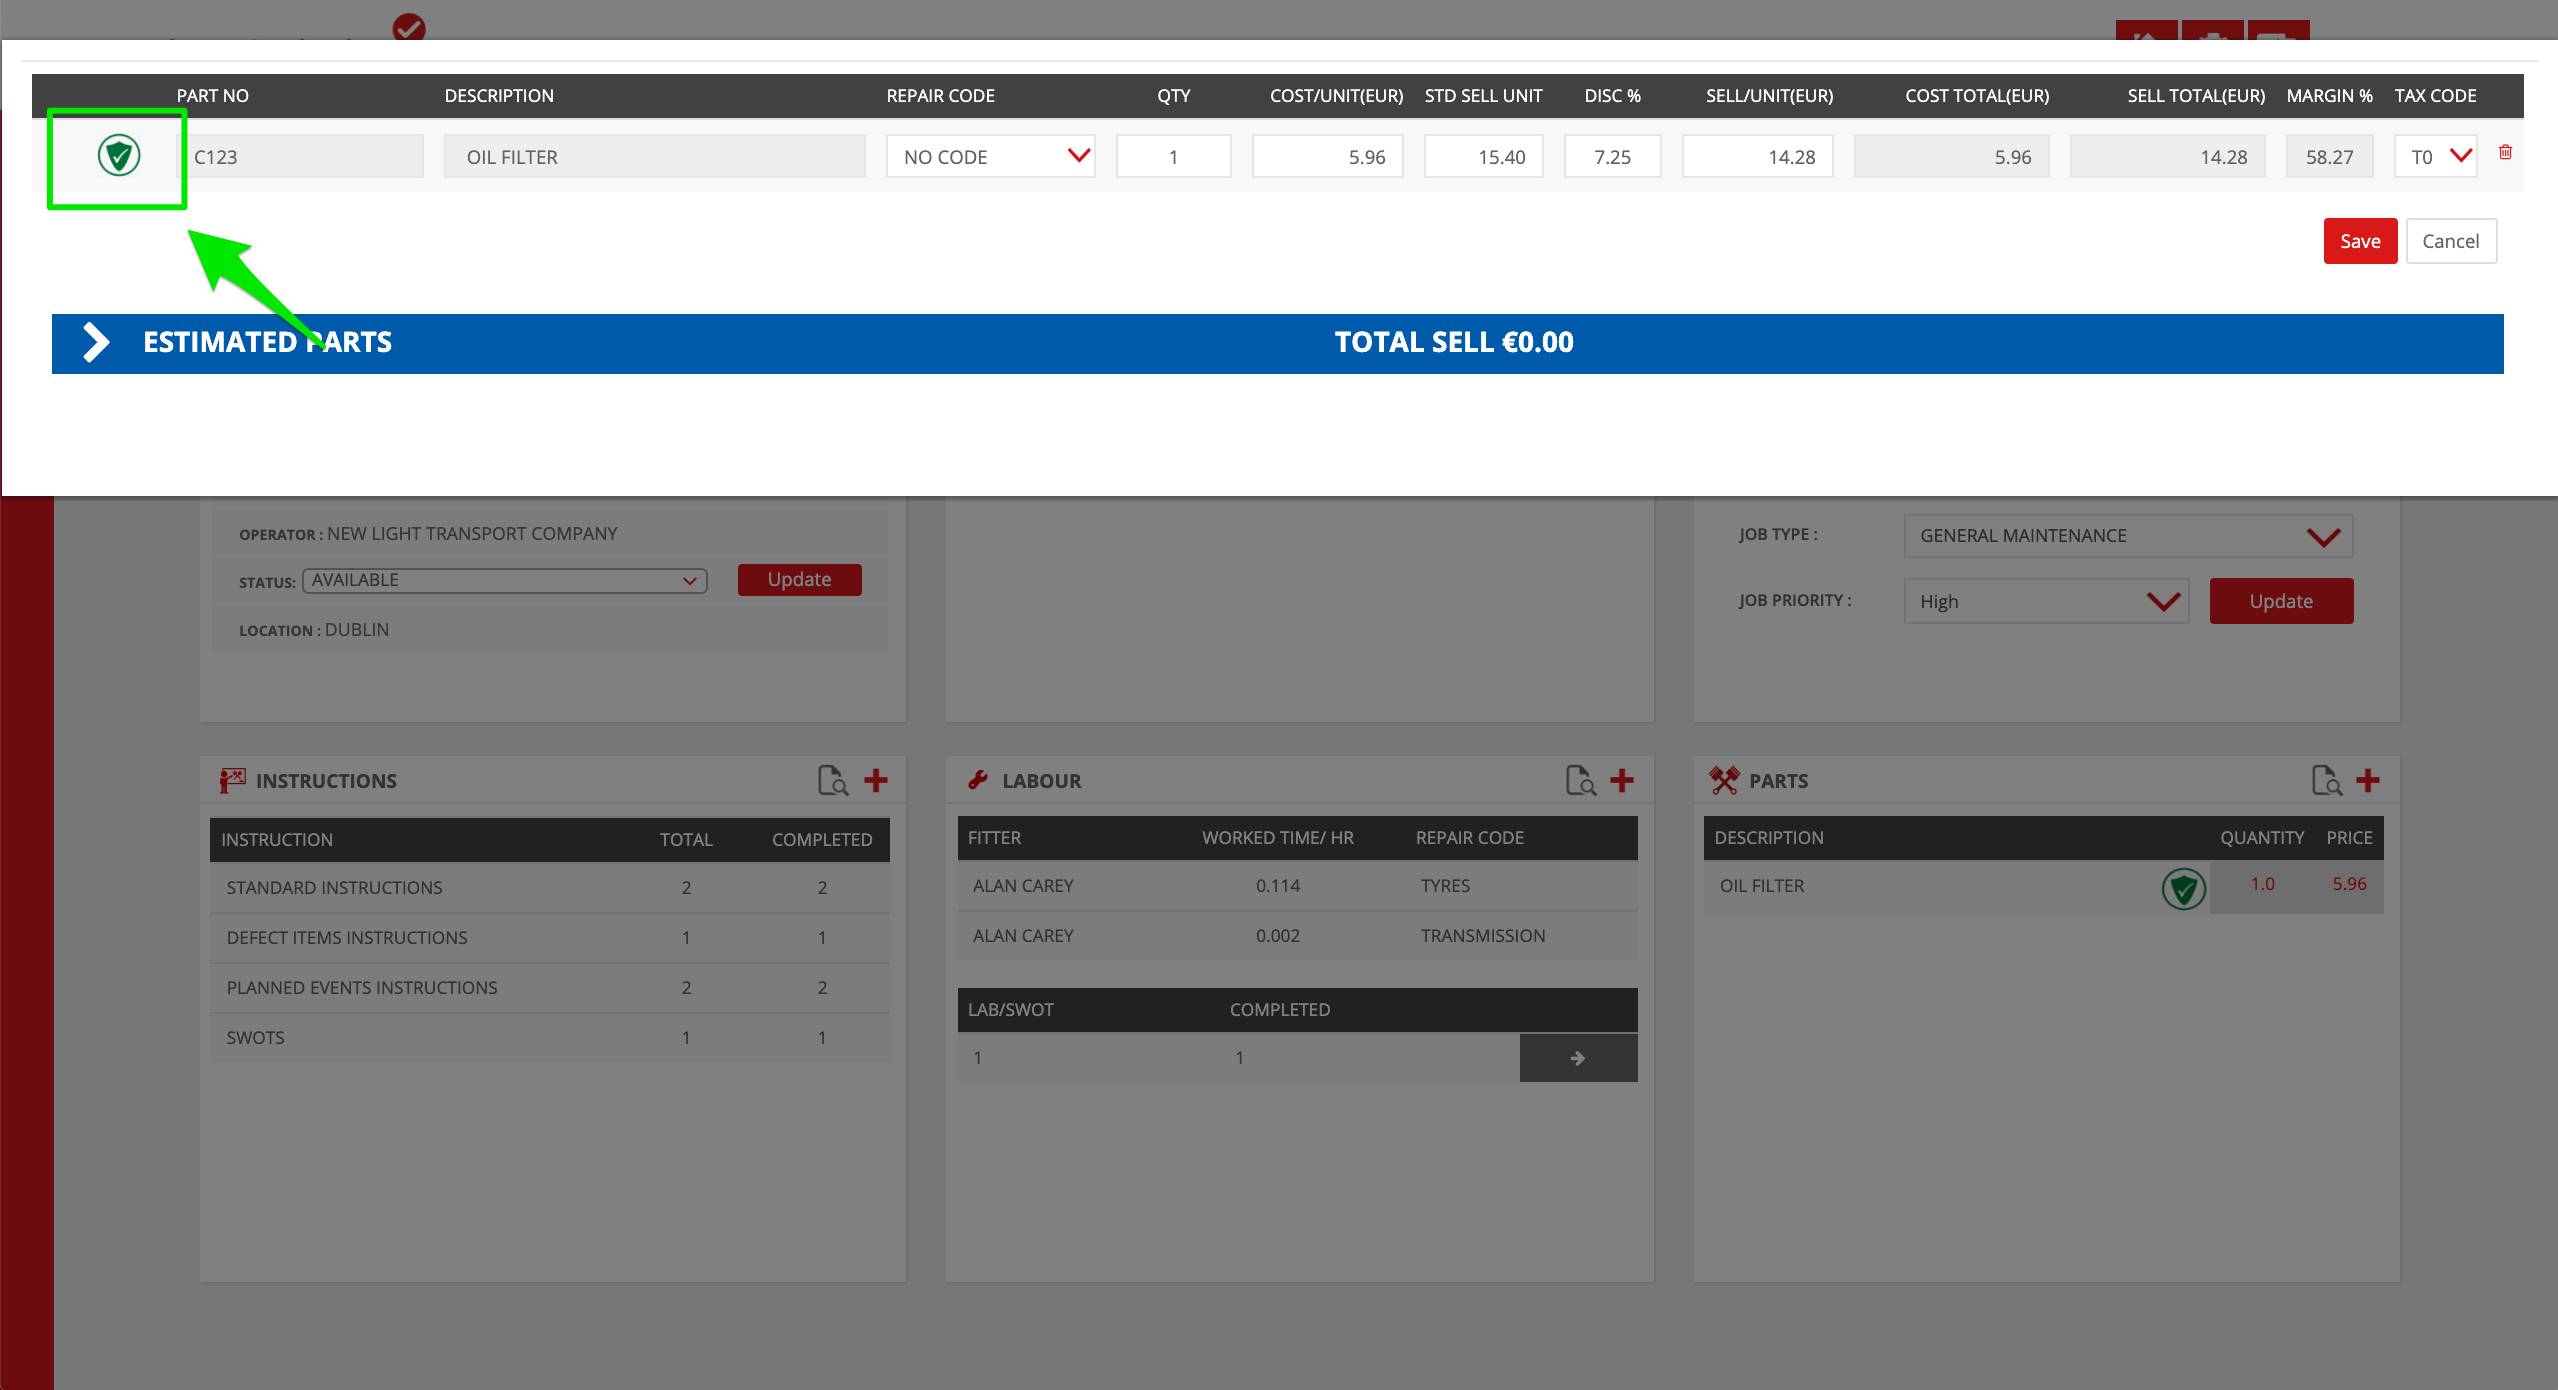
9. Review the parts used by clicking the View Page icon on the Parts line item
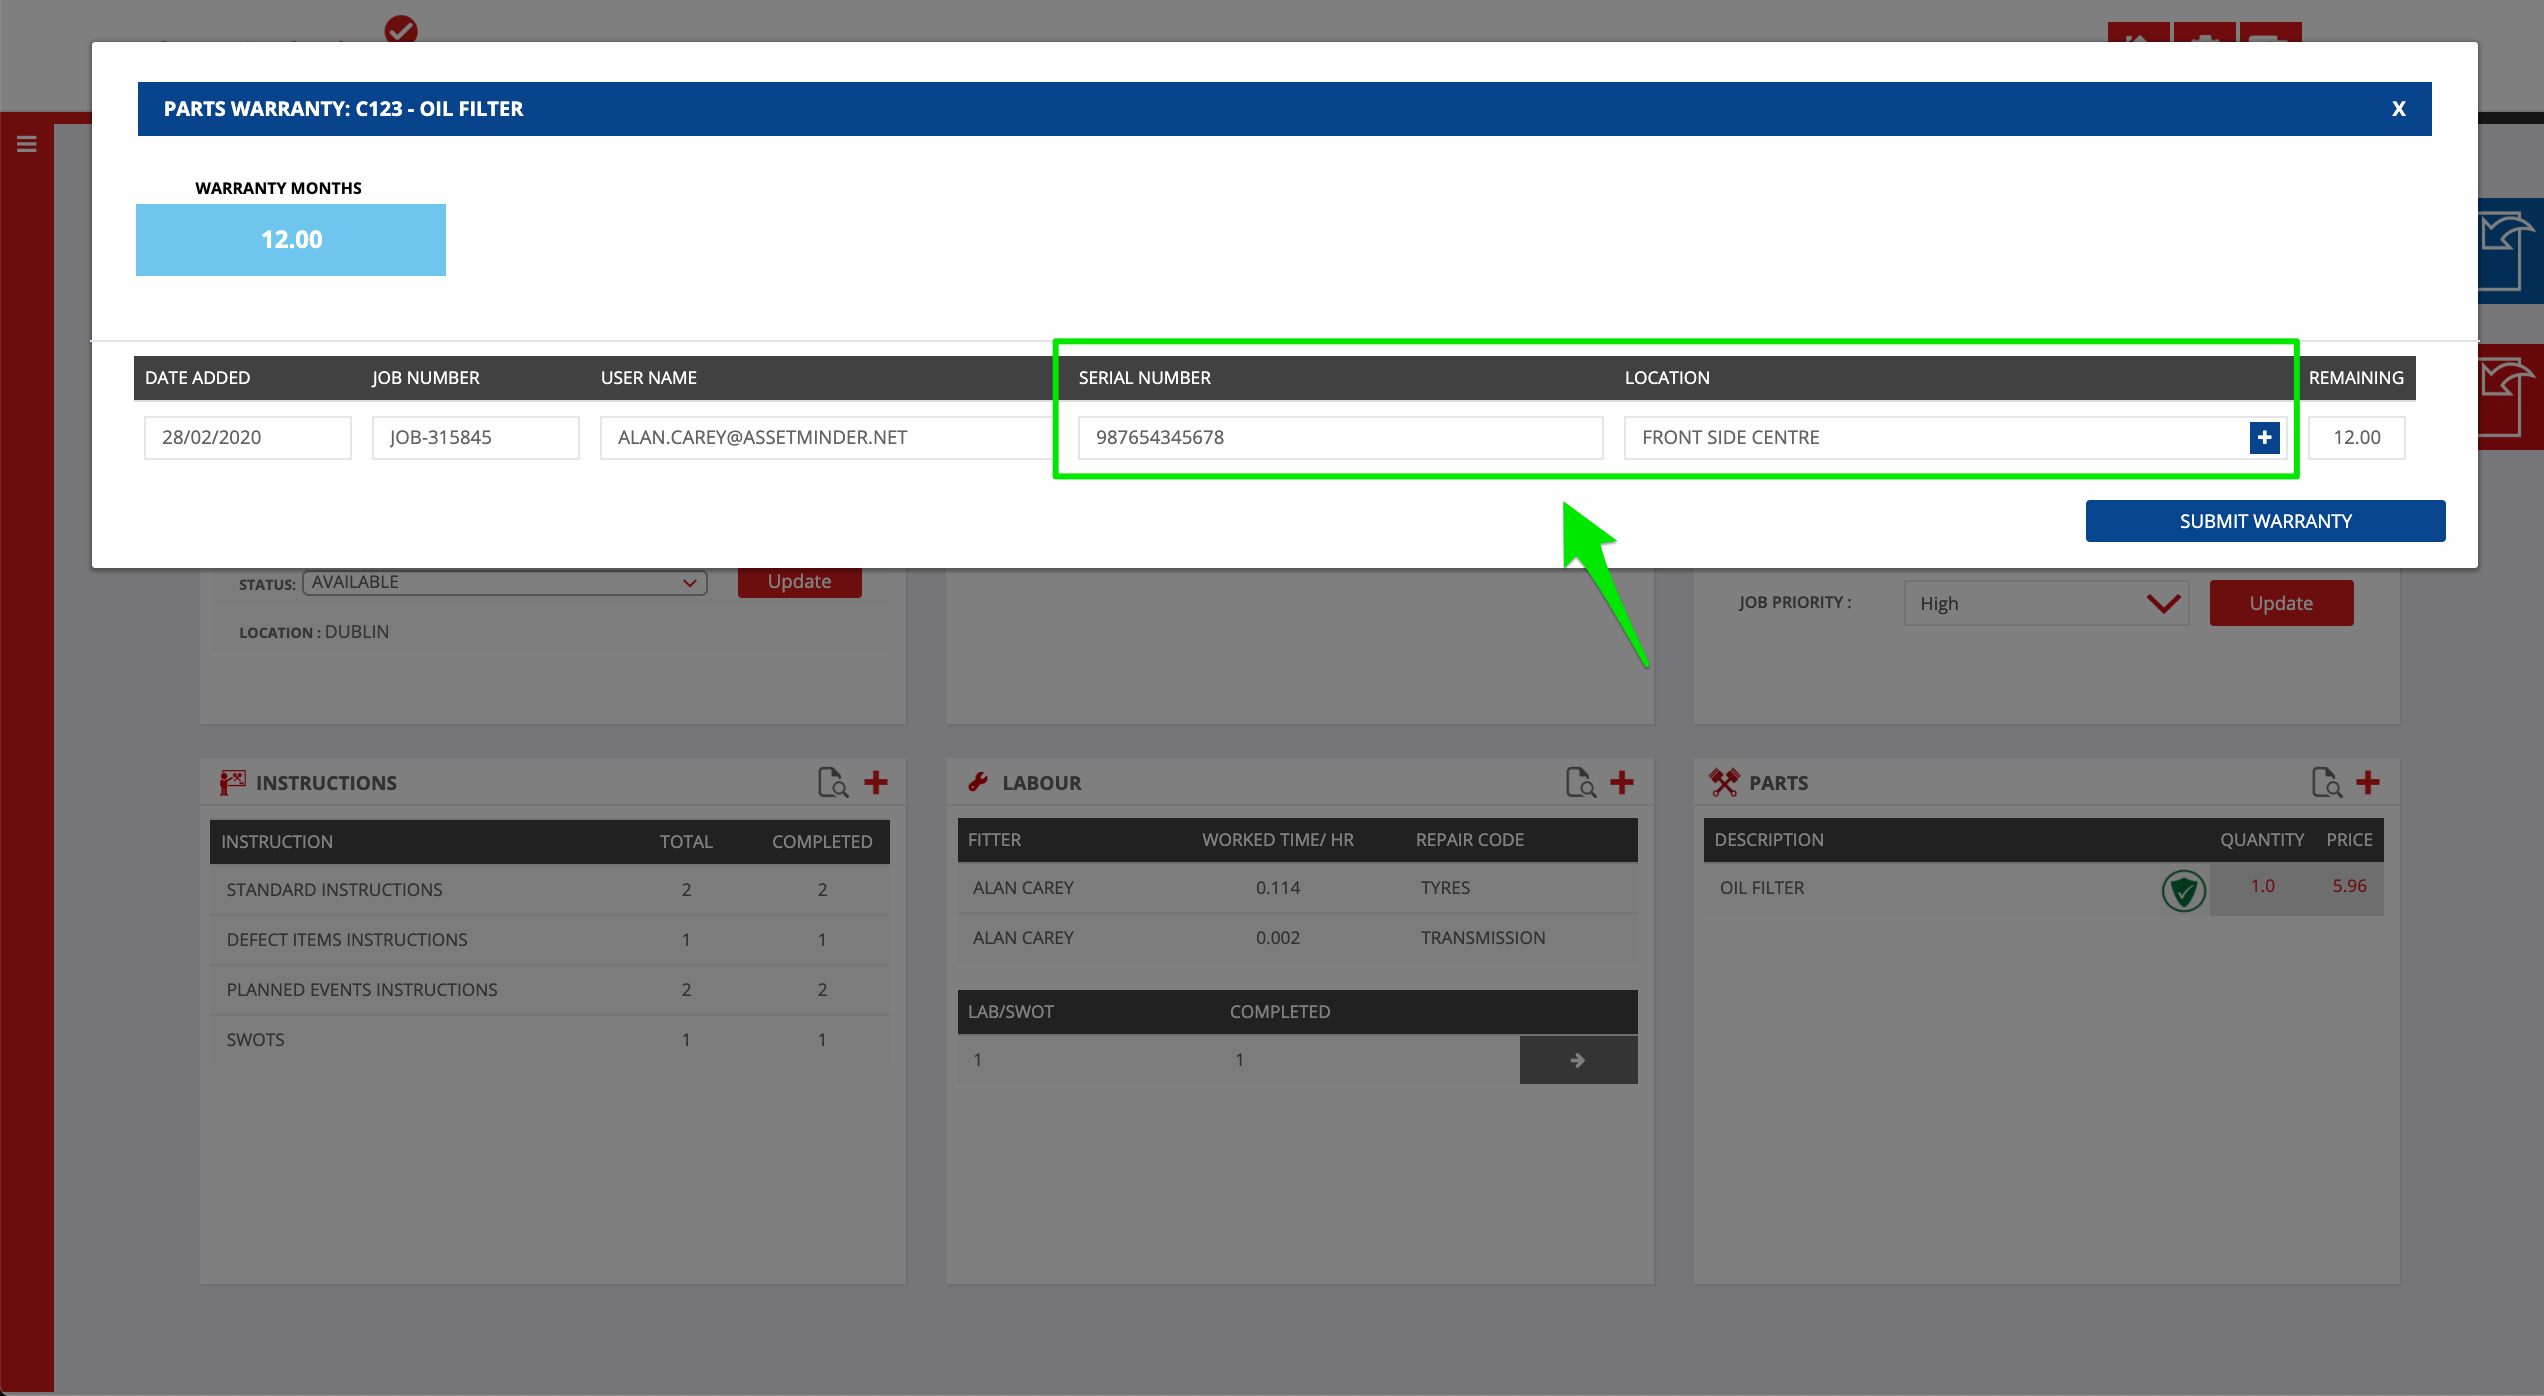
10. In the parts list page, click the warranty icon to verify the details
11. Verify, or fill in the warranty details if needed for each part line item. Click Submit Warranty when done
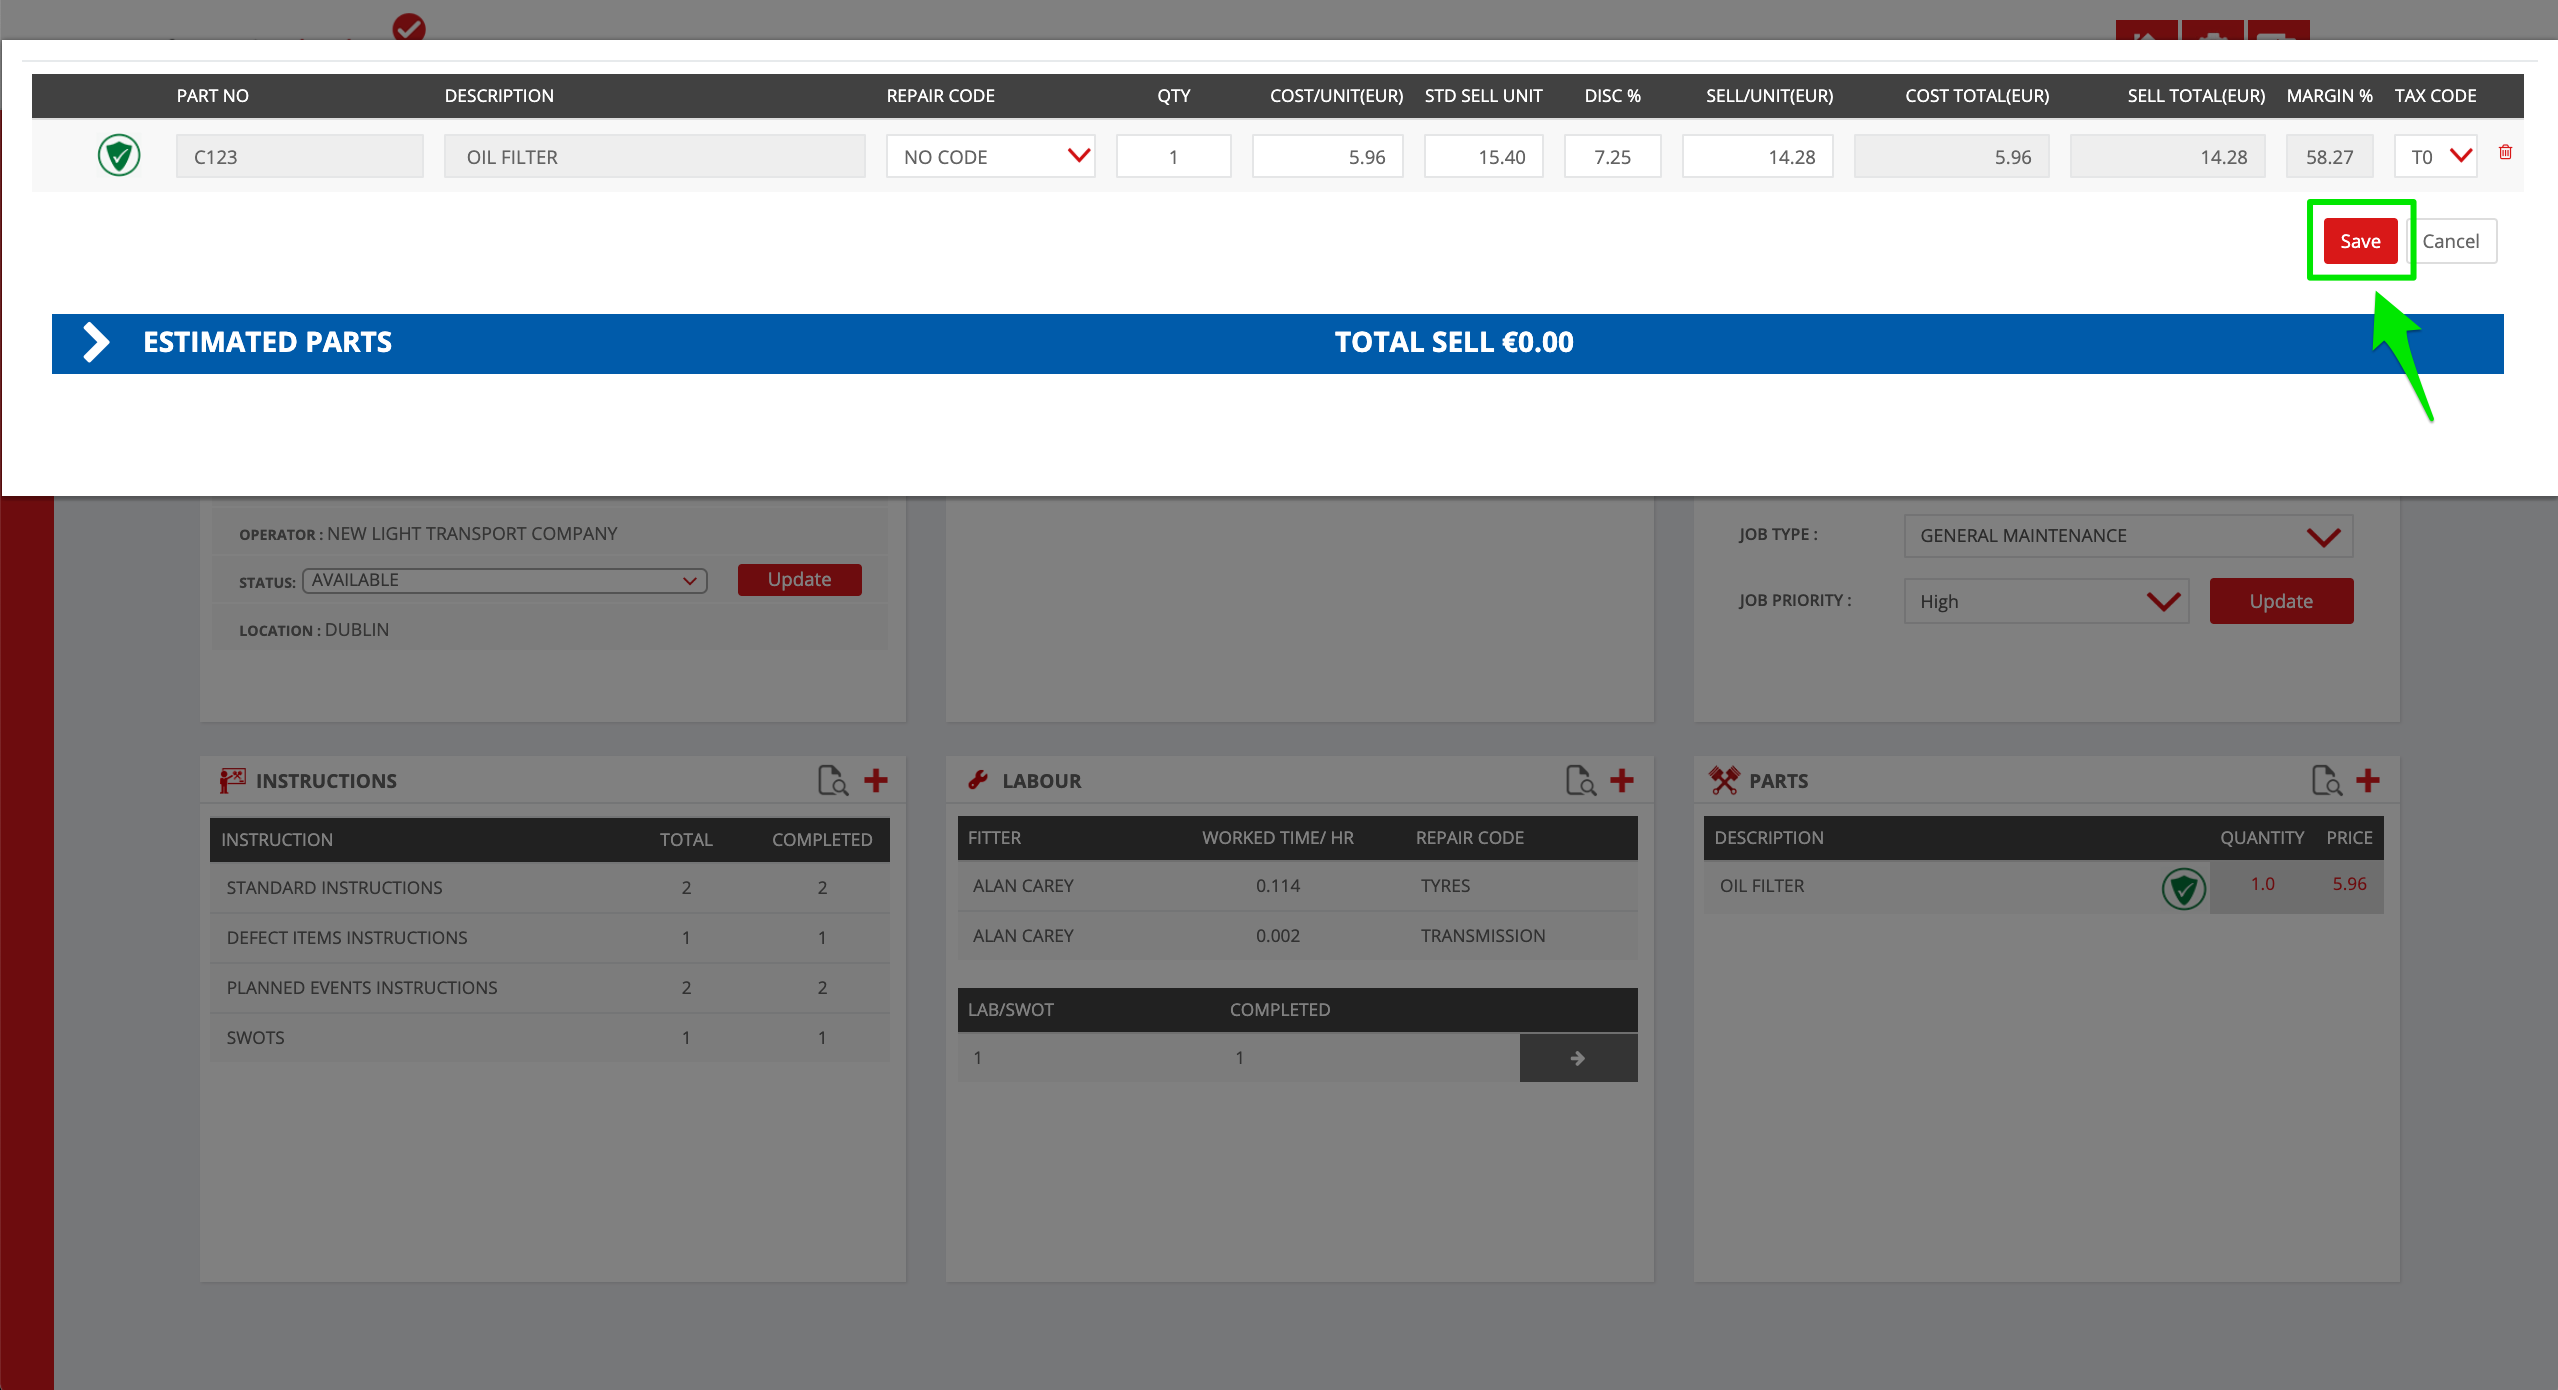
12. Verify part costs, sell price, margins etc. Click Save when done
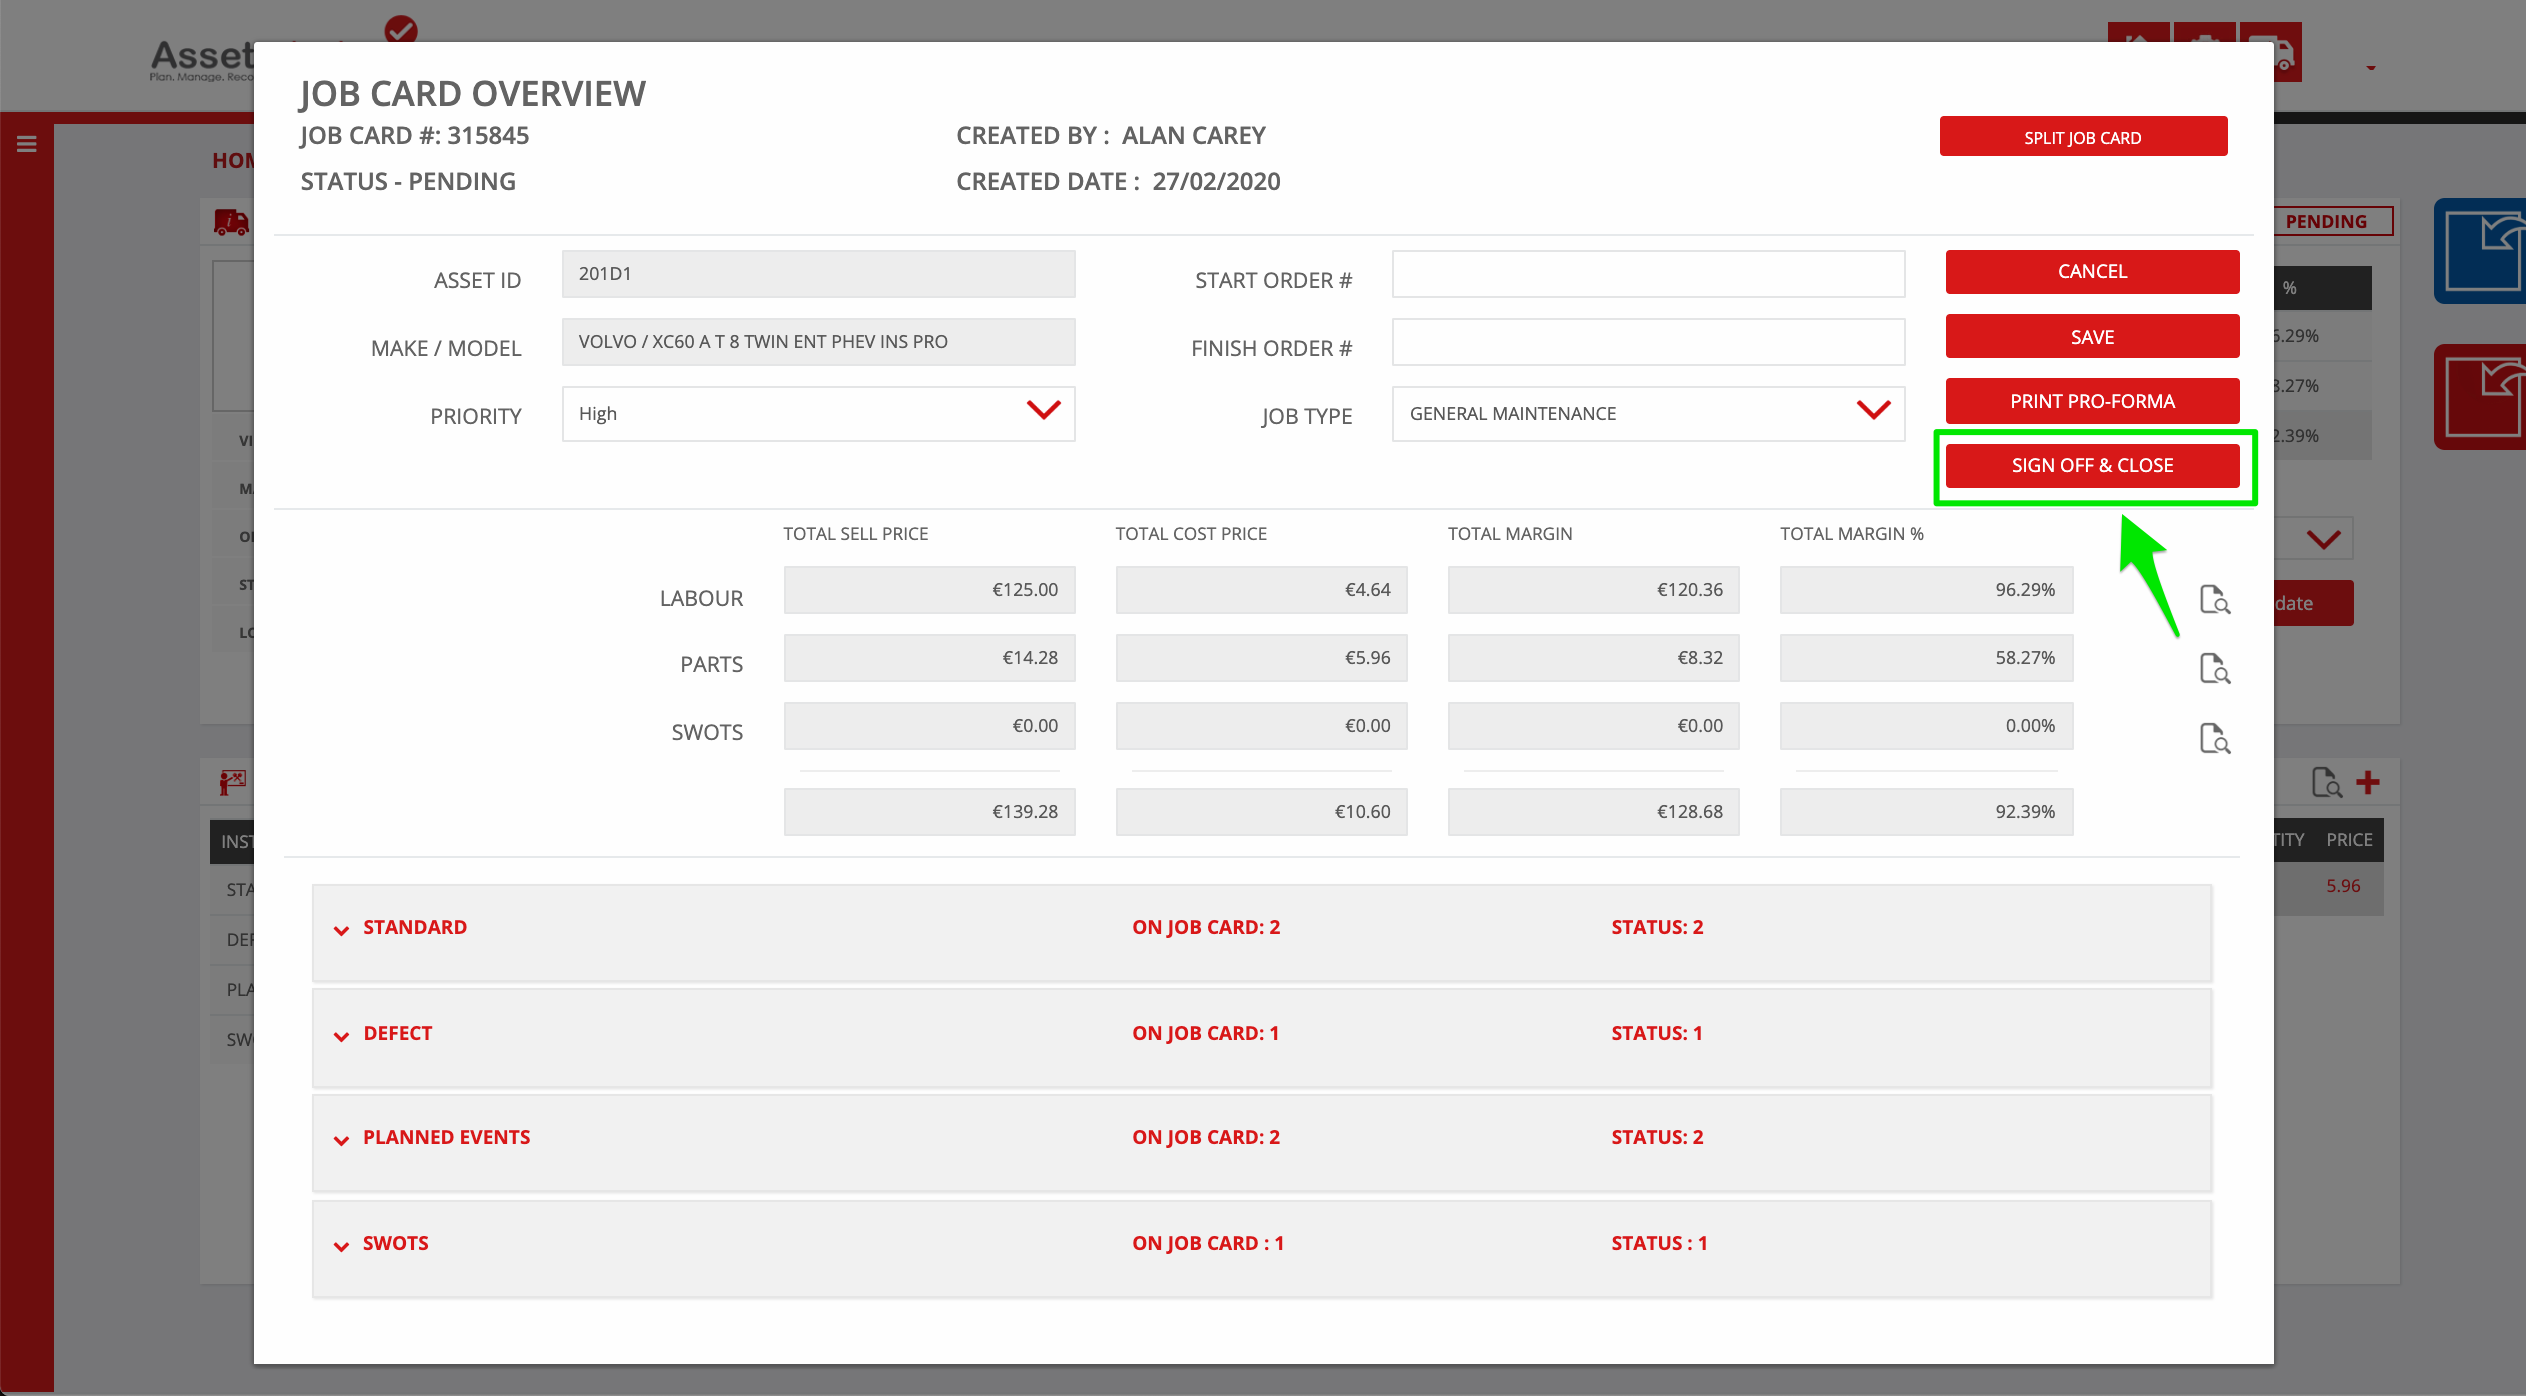
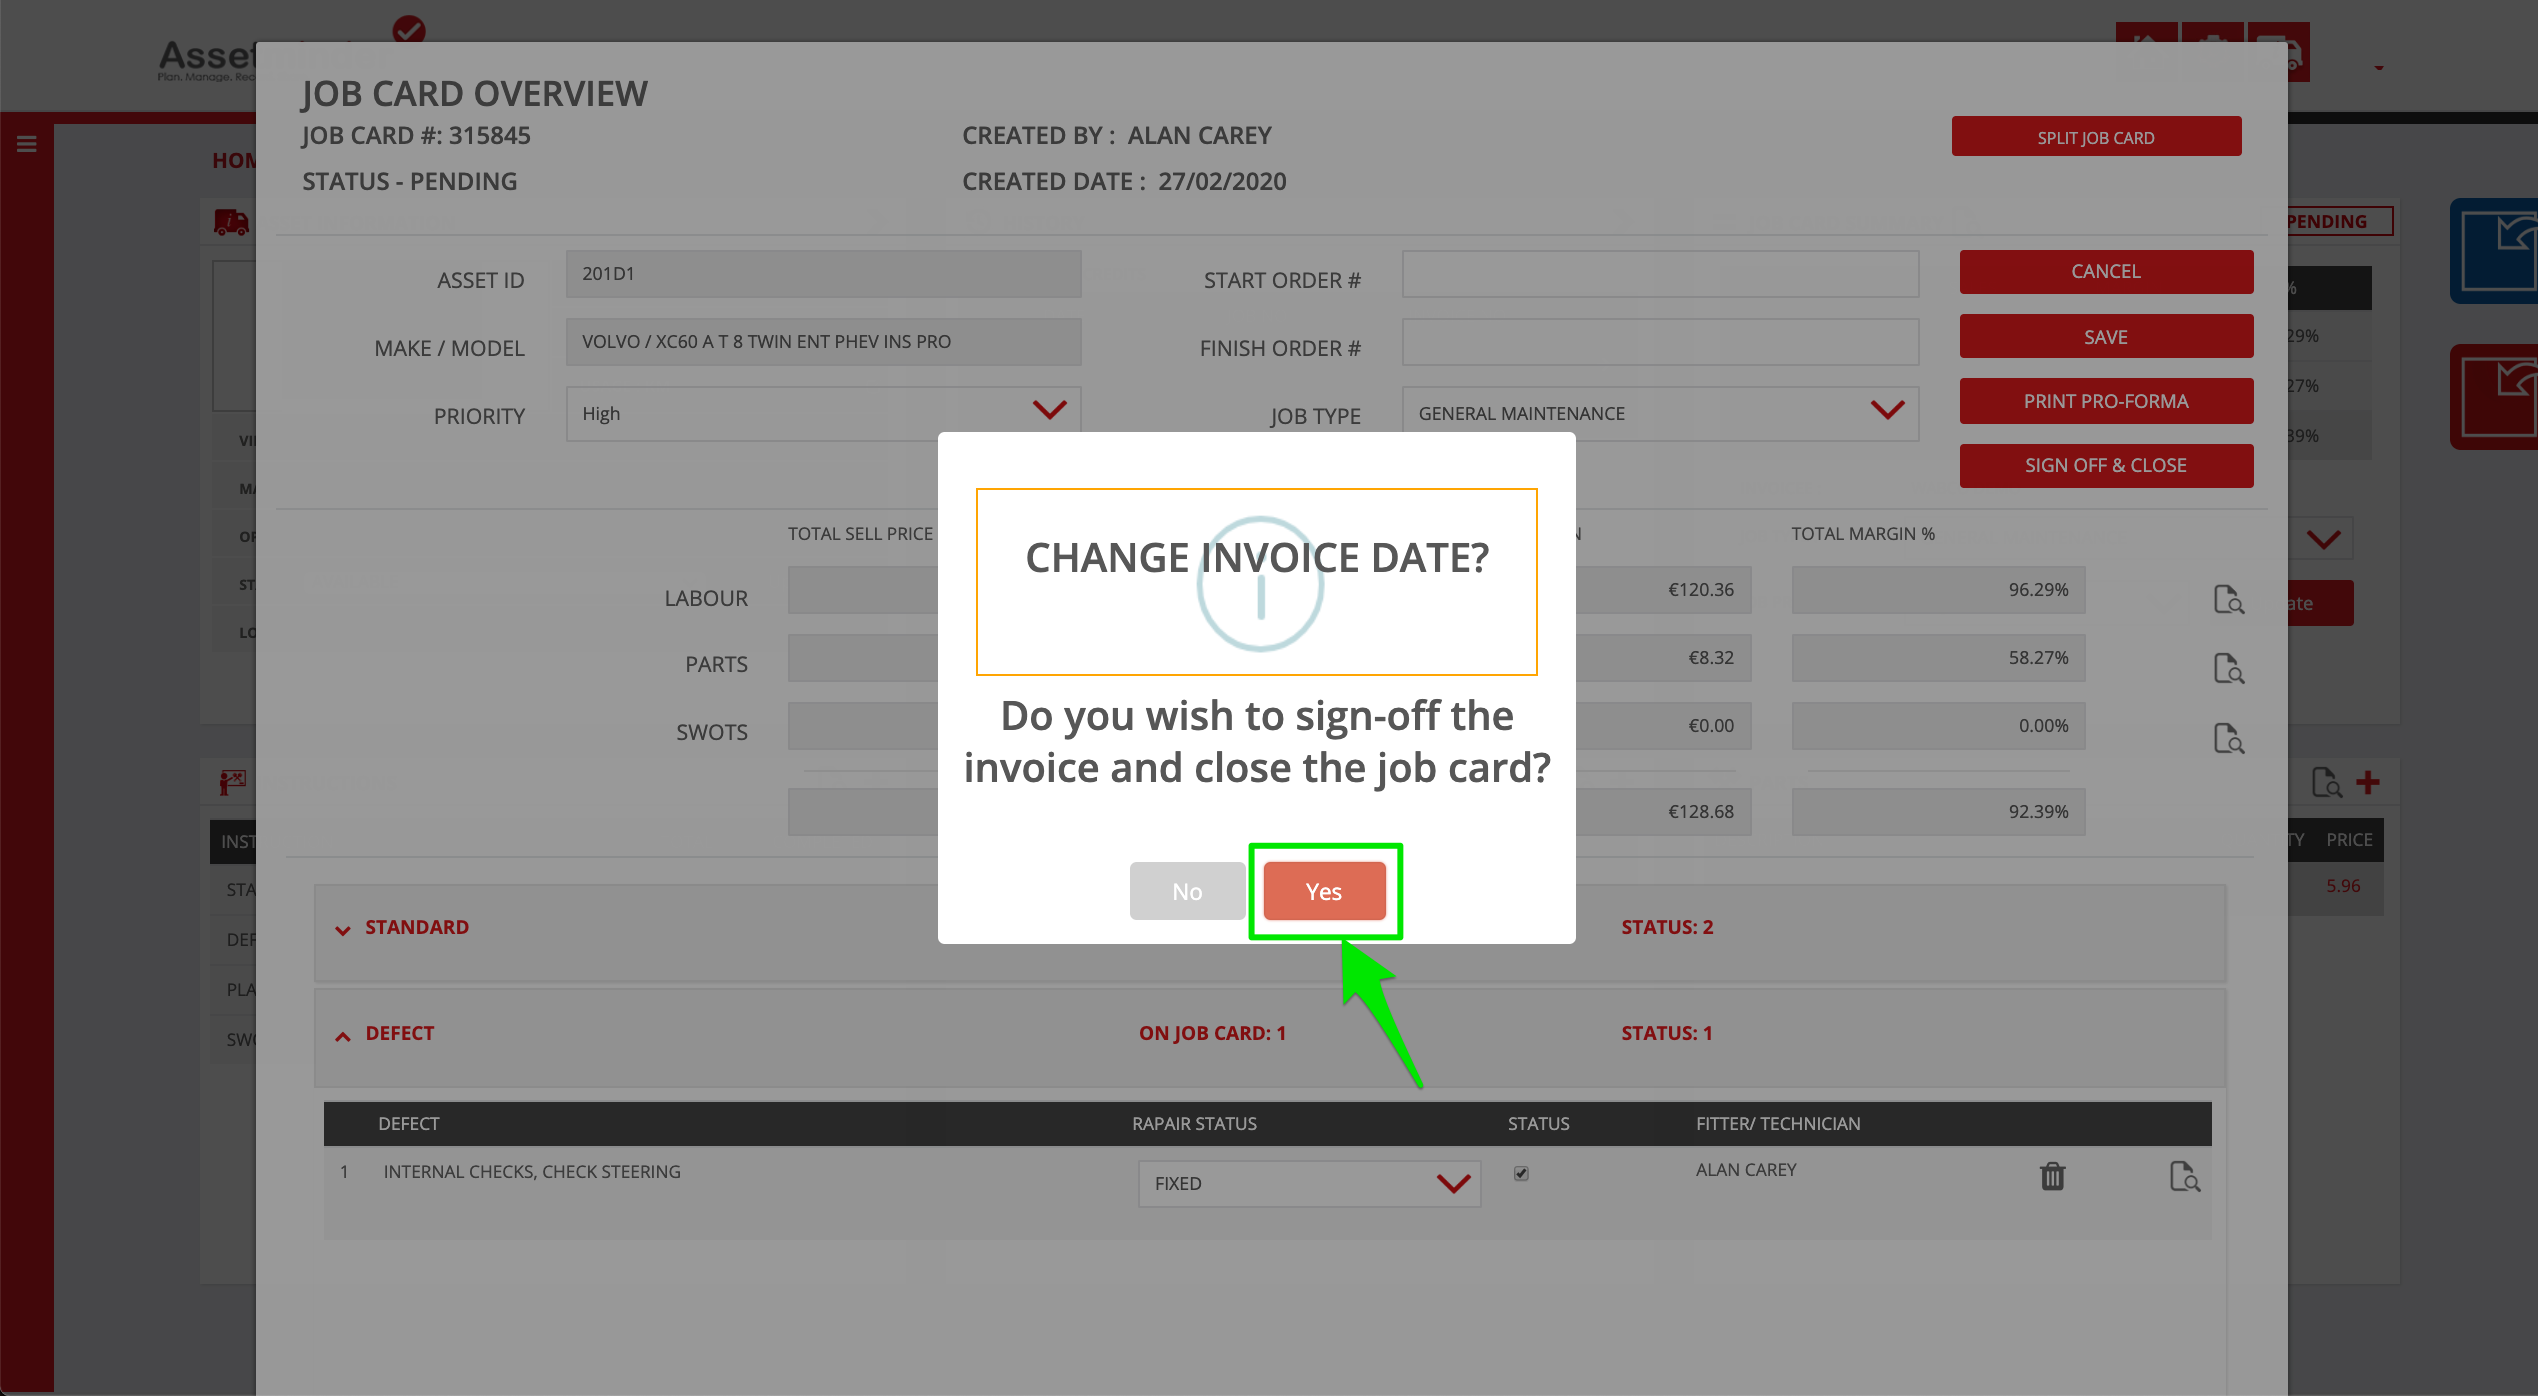
13. When the job card has been verified, click Sign Off & Close
14. Click Yes to close the job card
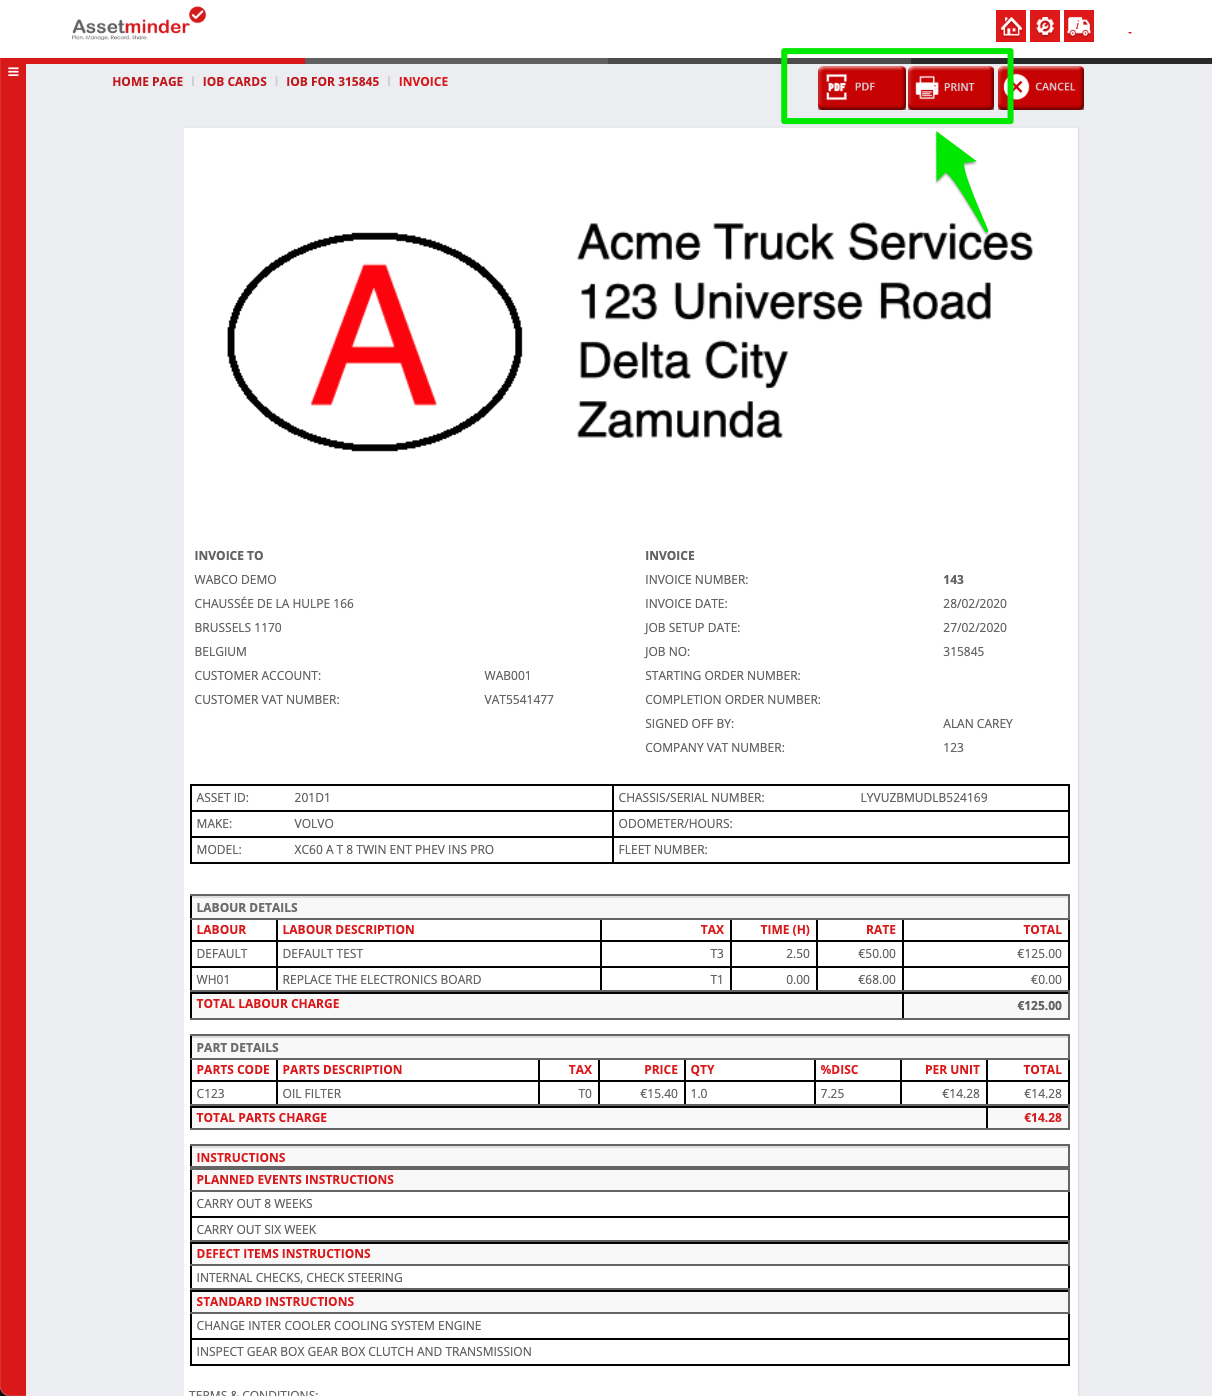
15. On the invoice screen, click PDF to save as PDF and send to the client, or click Print to get a paper copy for the client
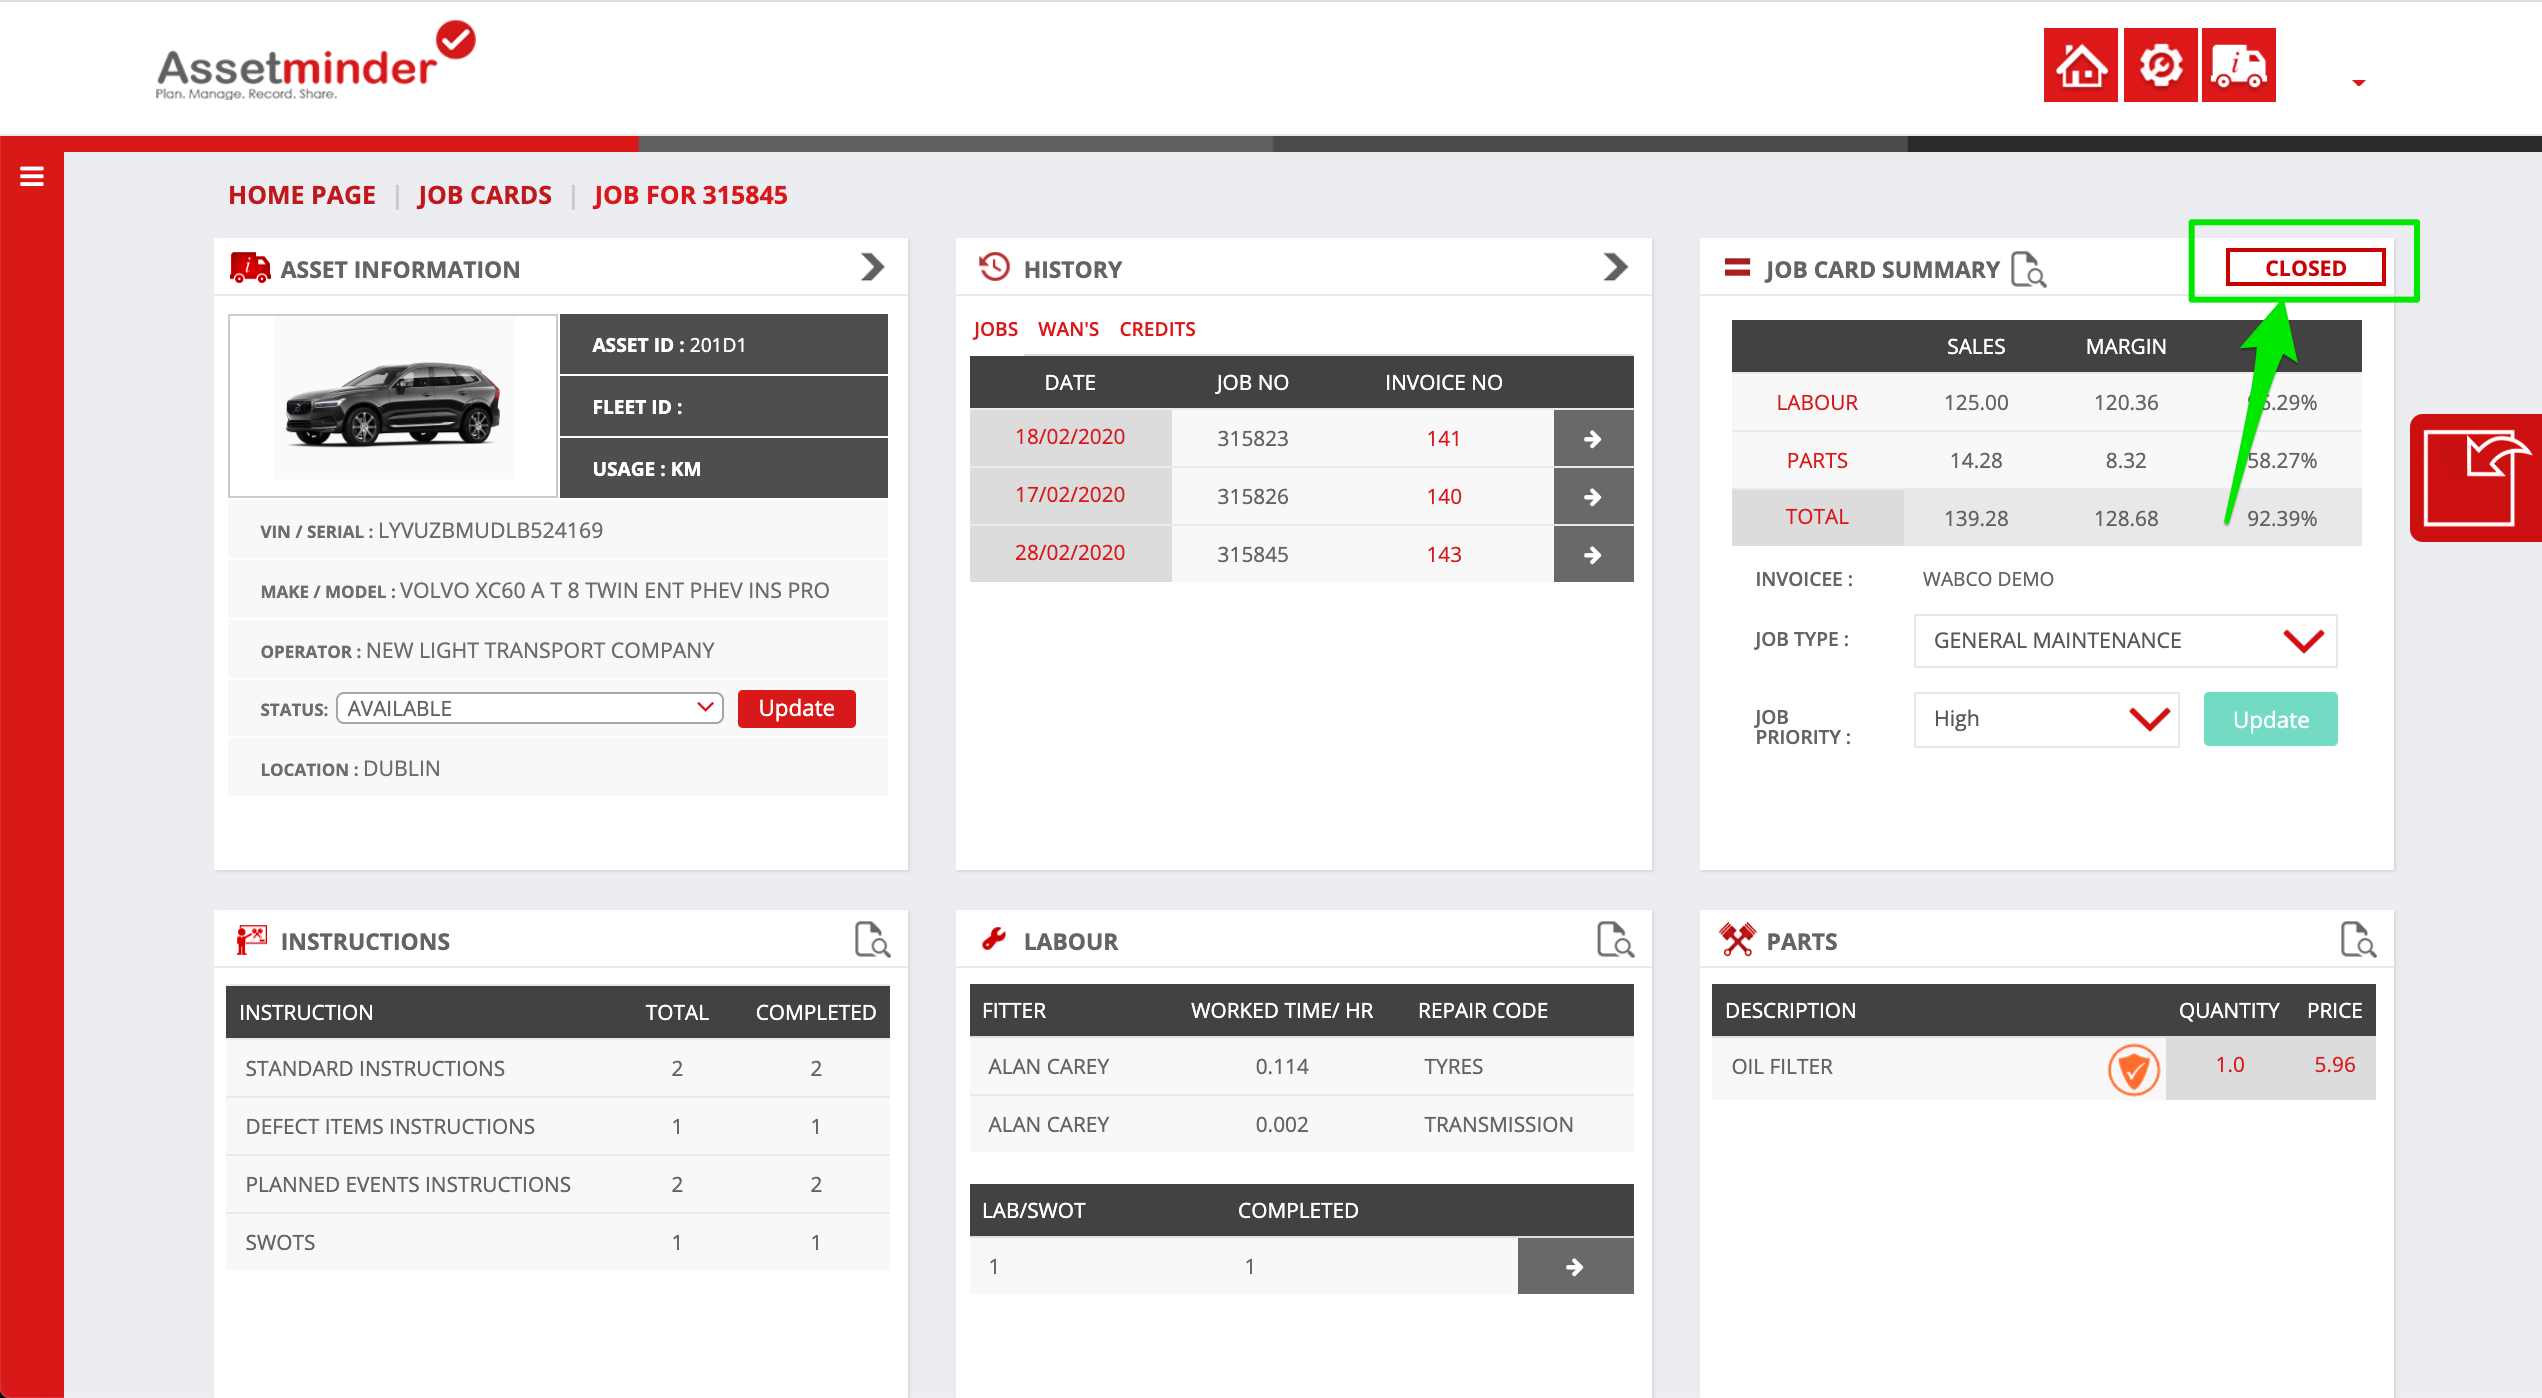
16. The job card is now closed.
Paul Murray
Comments