Prerequisites before completing this procedure:
- A job card must exist
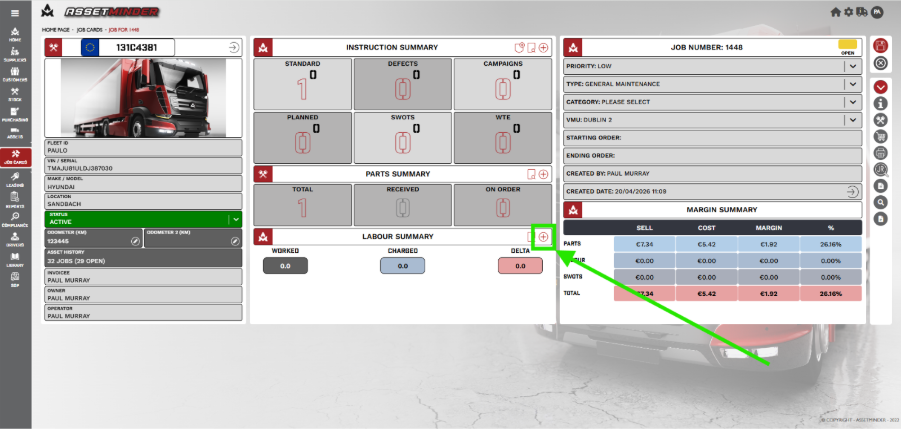
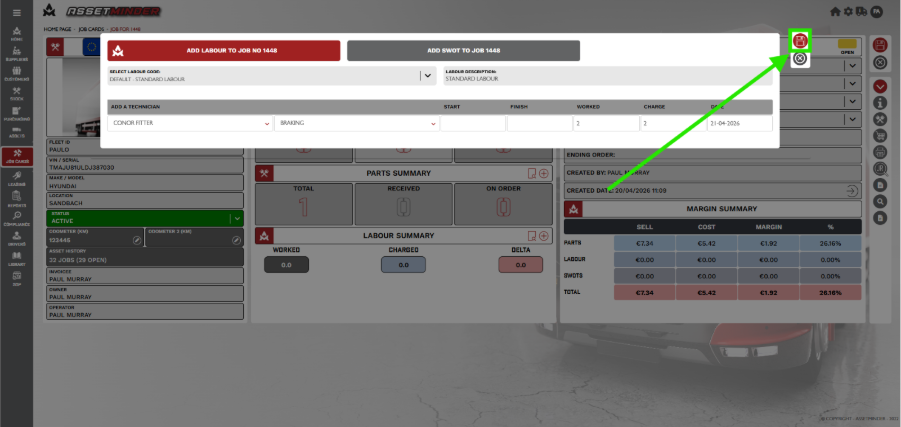
1. Open the job card and click the Add New icon in the Labour tile.
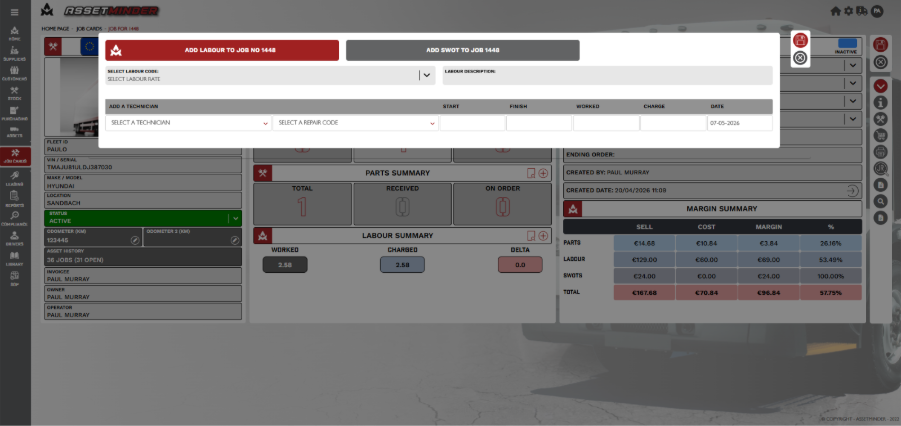
2. A dialogue box will open.
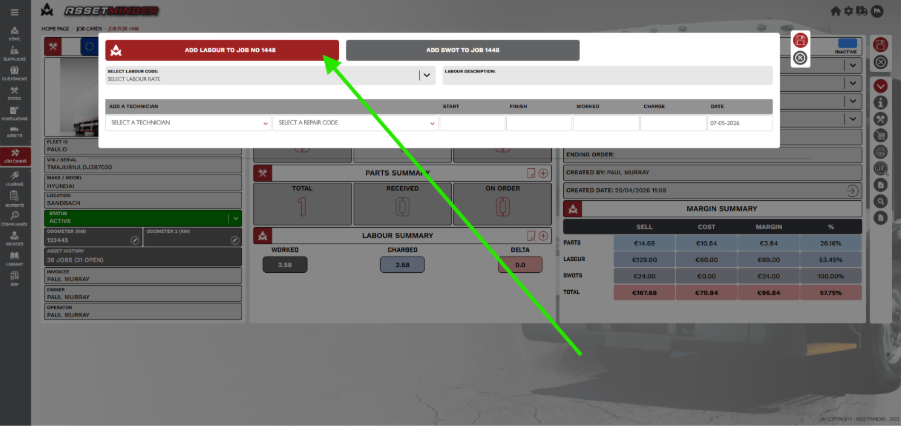
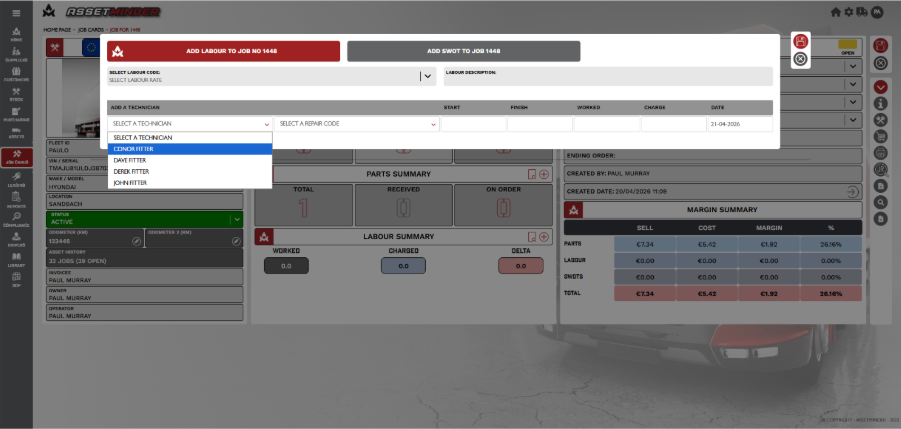
3. Ensure that the ‘ADD LABOUR TO JOB NO xx’ is highlighted (see below).
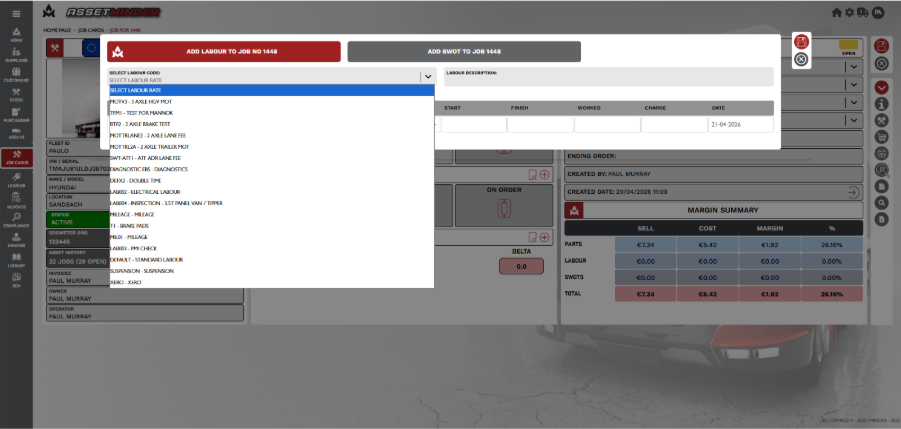
4. Select the LABOUR CODE. Selecting the down arrow to the right of the labour code box will show the available labour codes. The labour code (these are set-up by the organisation).
5. Select TECHNICIAN. Selecting the down arrow to the right of the technician box will show a list of the technicians. Select one.
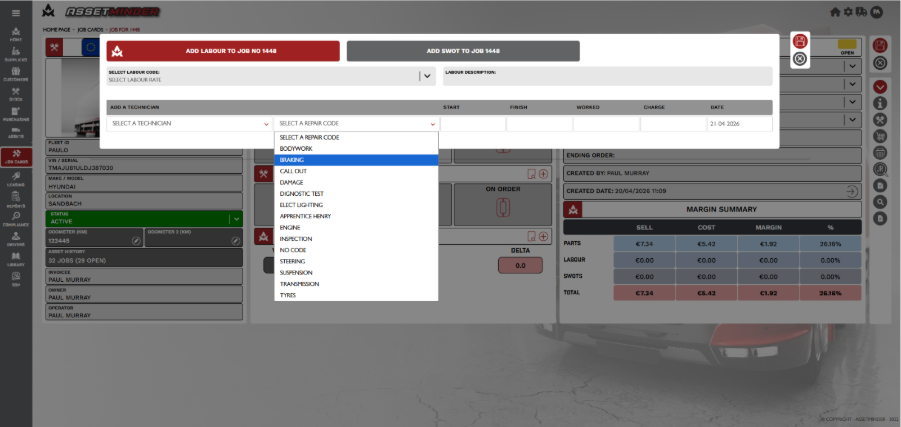
6. Select a REPAIR CODE.
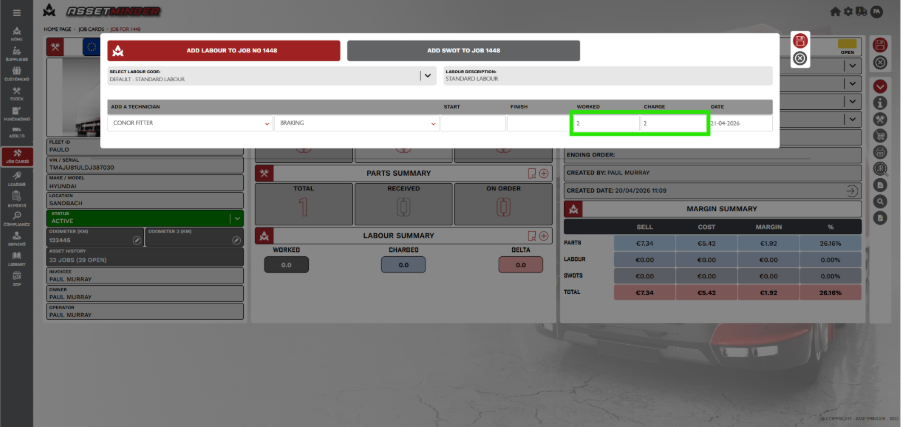
7. Adding labour time
The user now adds the time details. There are two time records, viz. ‘WORKED’ and ‘CHARGED.’
- WORKED shows the overall time committed to the task, and may, or may not, include the amount to be charged to a customer.
- CHARGED is the number of hours (or part) that are to be charged to the customer invoice. These number may be more or less than the hours worked.
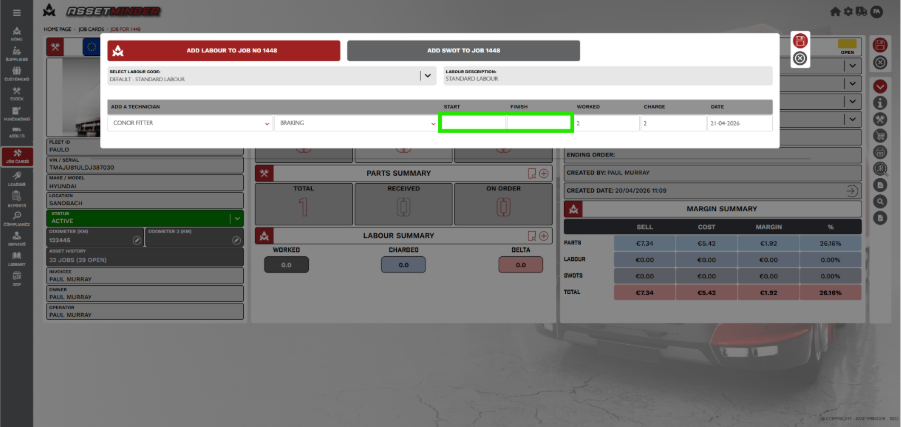
It is not necessary to enter a START and FINISH time. If these are enter, the WORKED and CHARGED will be calculated and shown in the relevant boxes. Note that these will be set to the same value (i.e., FINISH less START time). Where the START and FINISH times are entered, the CHARGED time can be adjusted.
7. Click the SAVE icon to finish.
Paul Murray
Comments