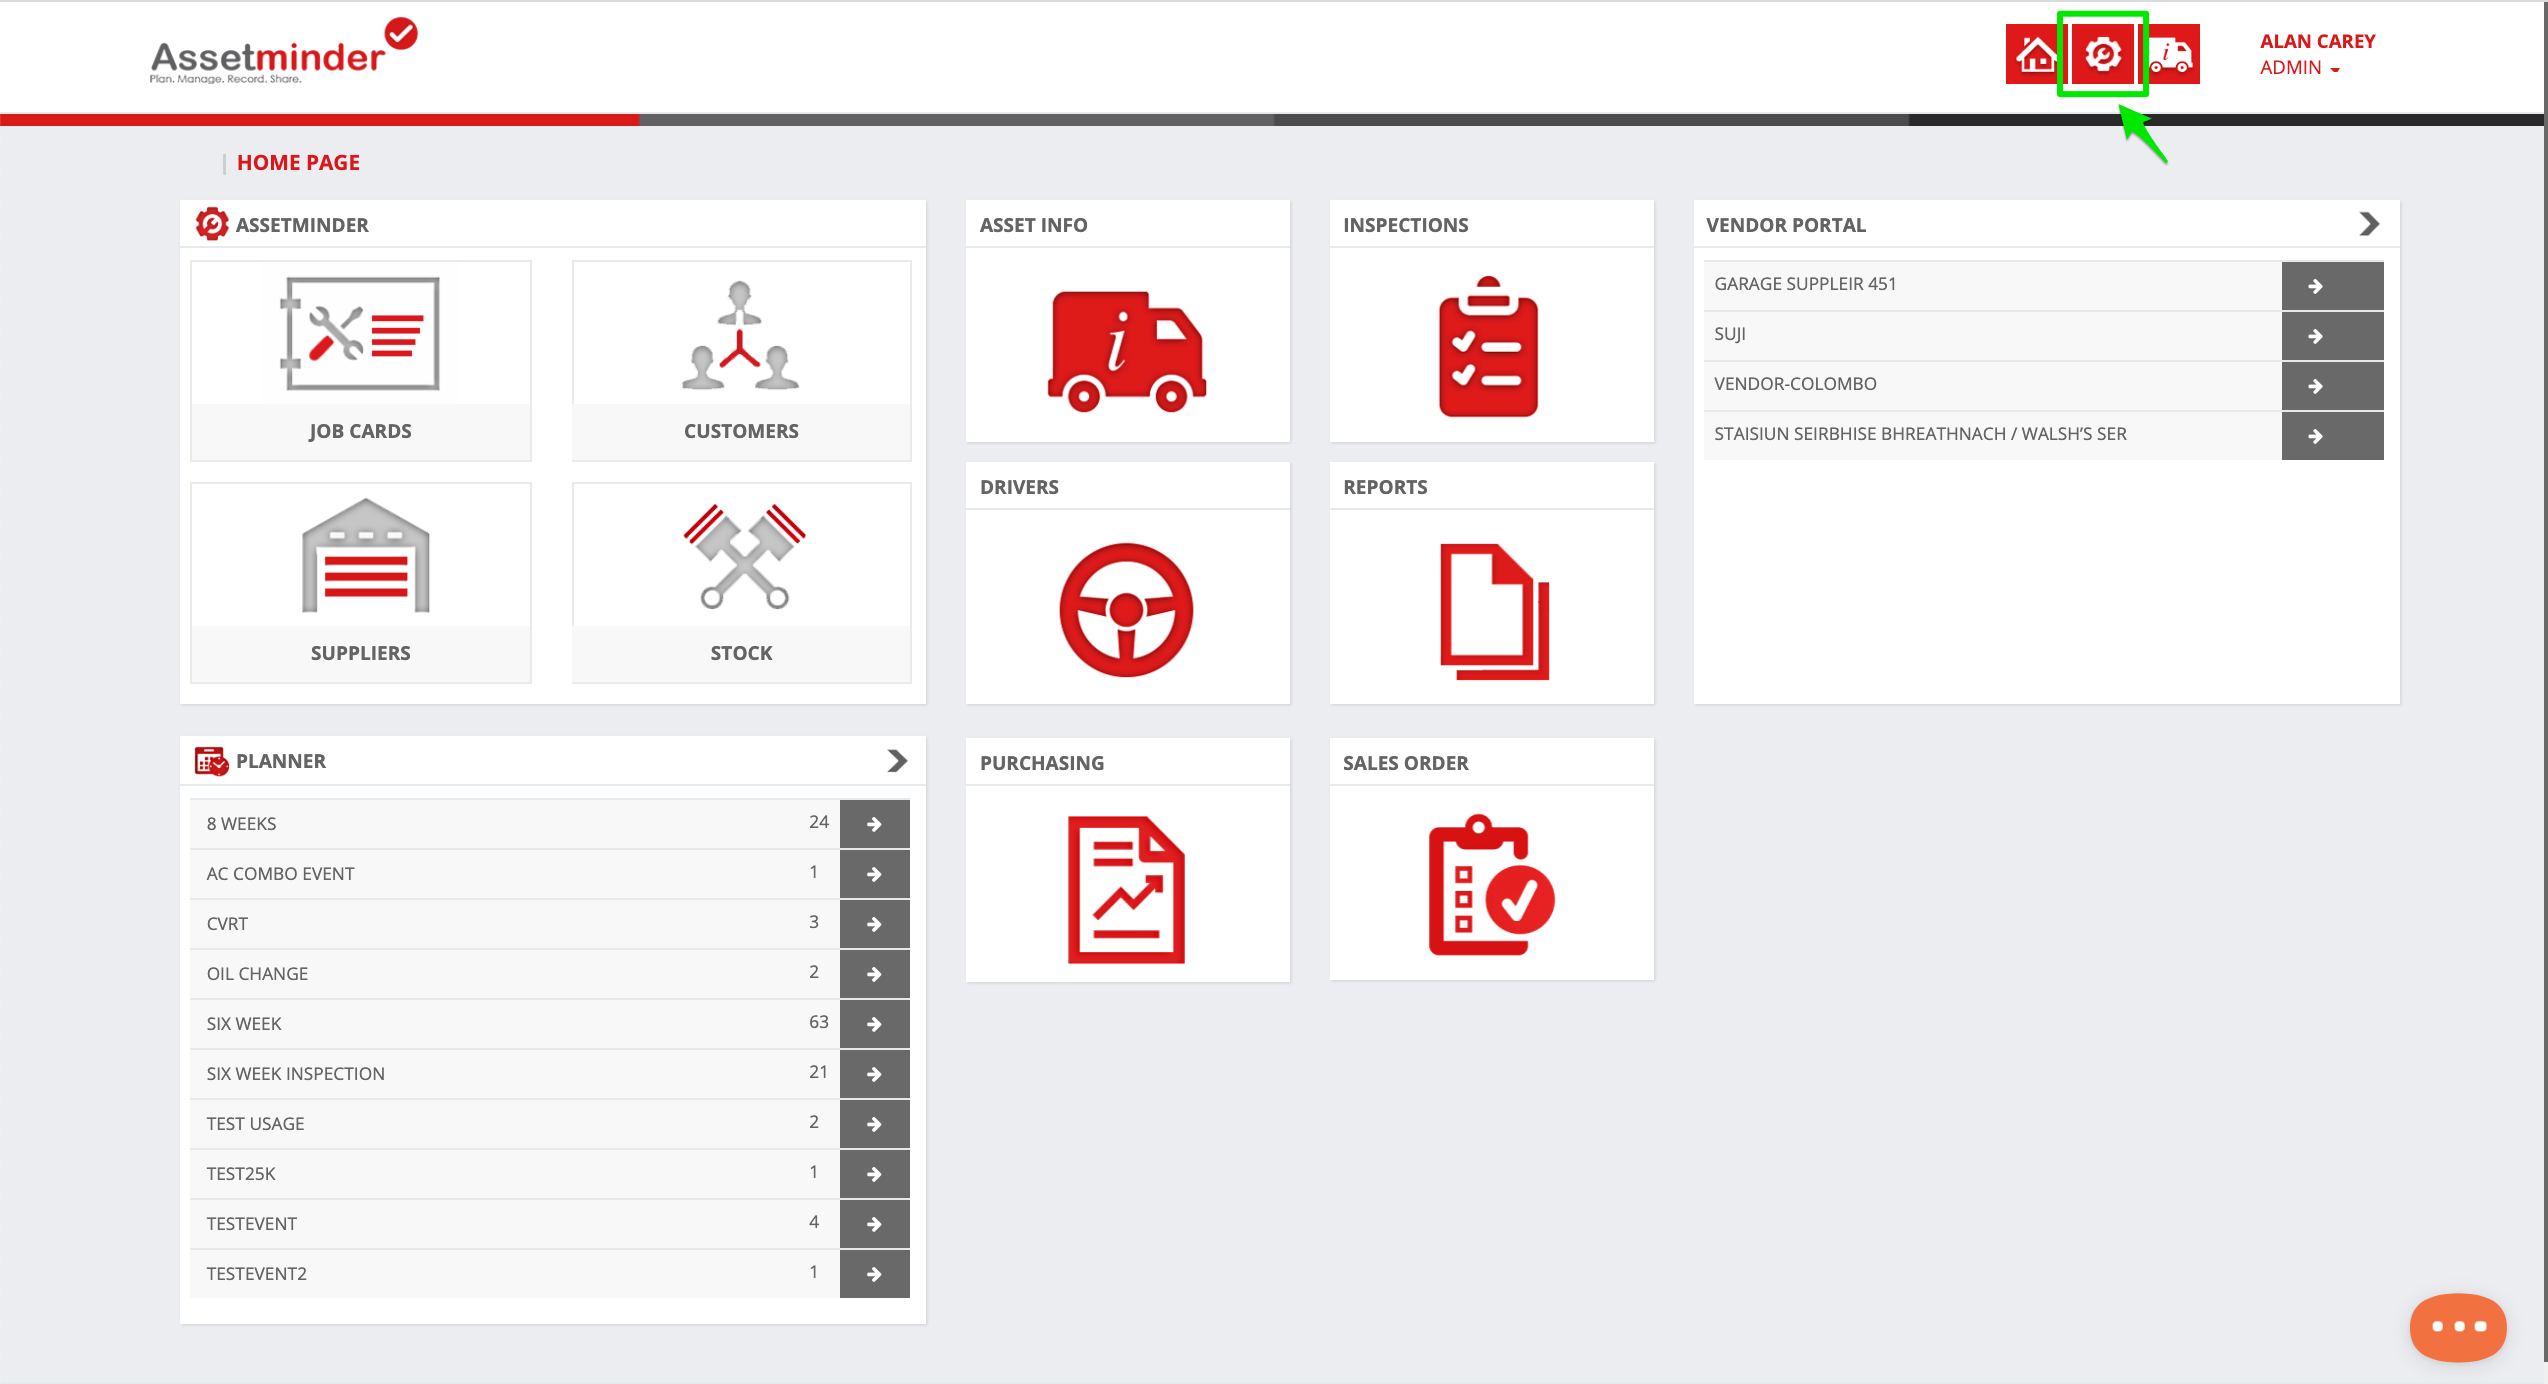
1. Click the Administrator Settings icon on the home screen
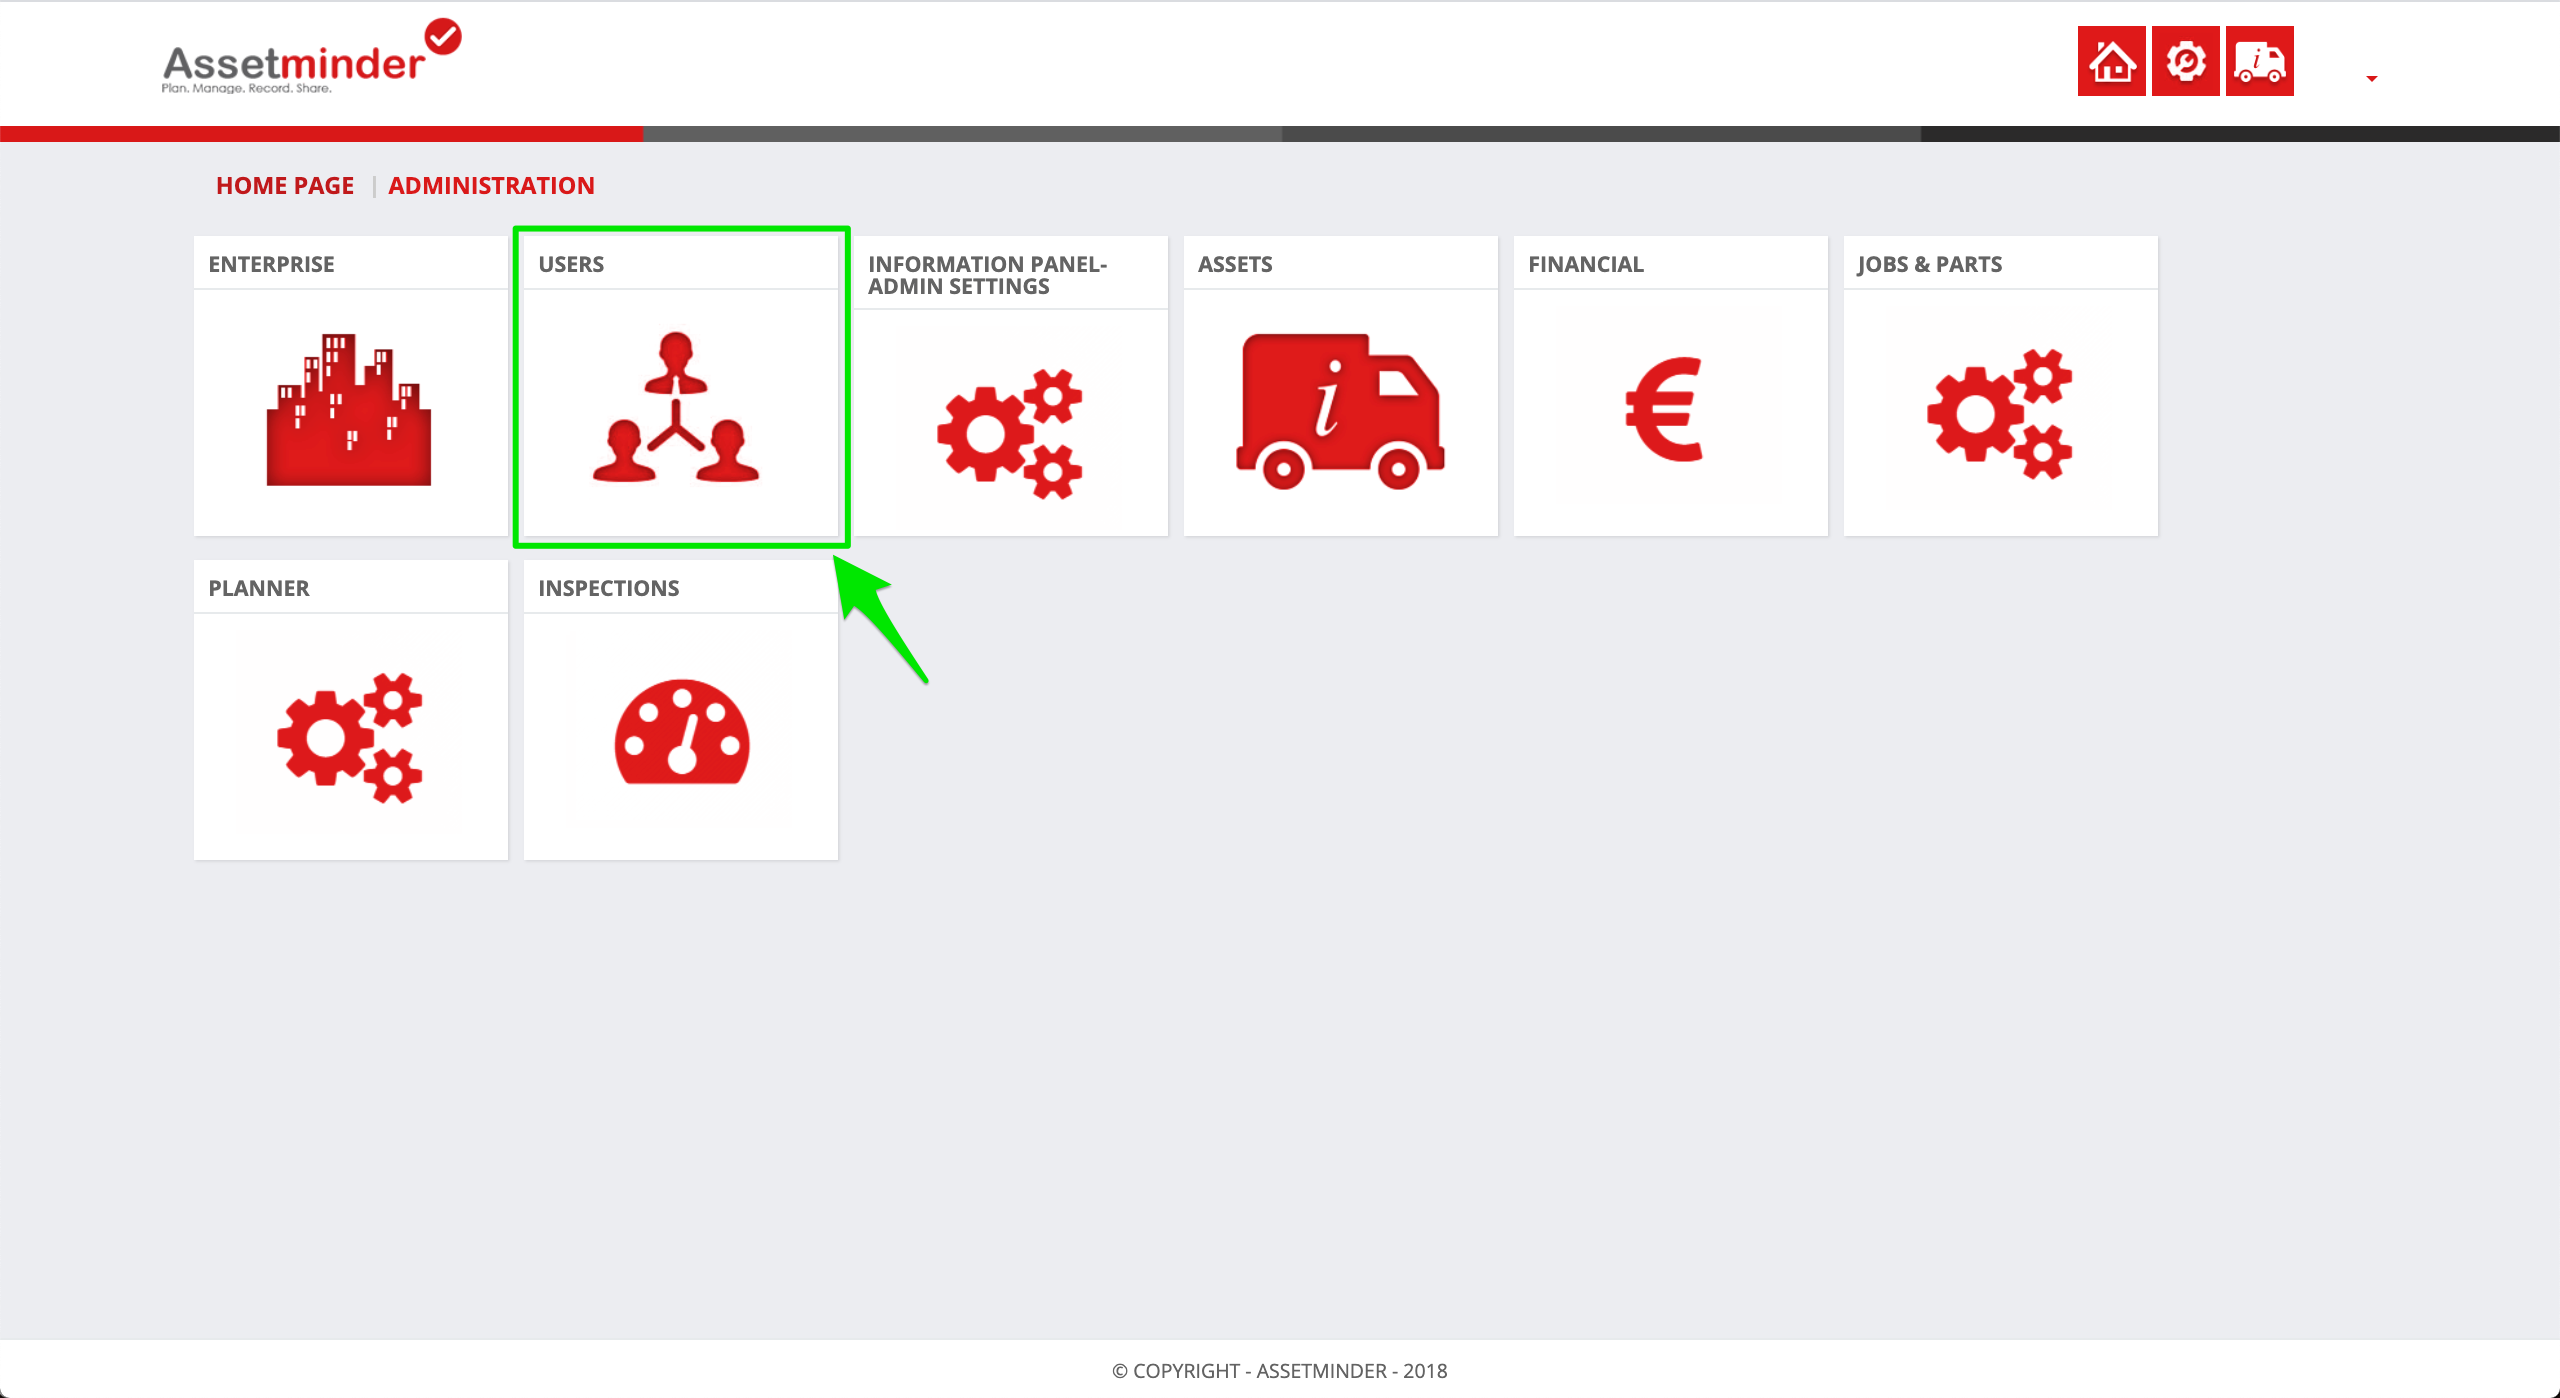
2. Select Users from the admin list
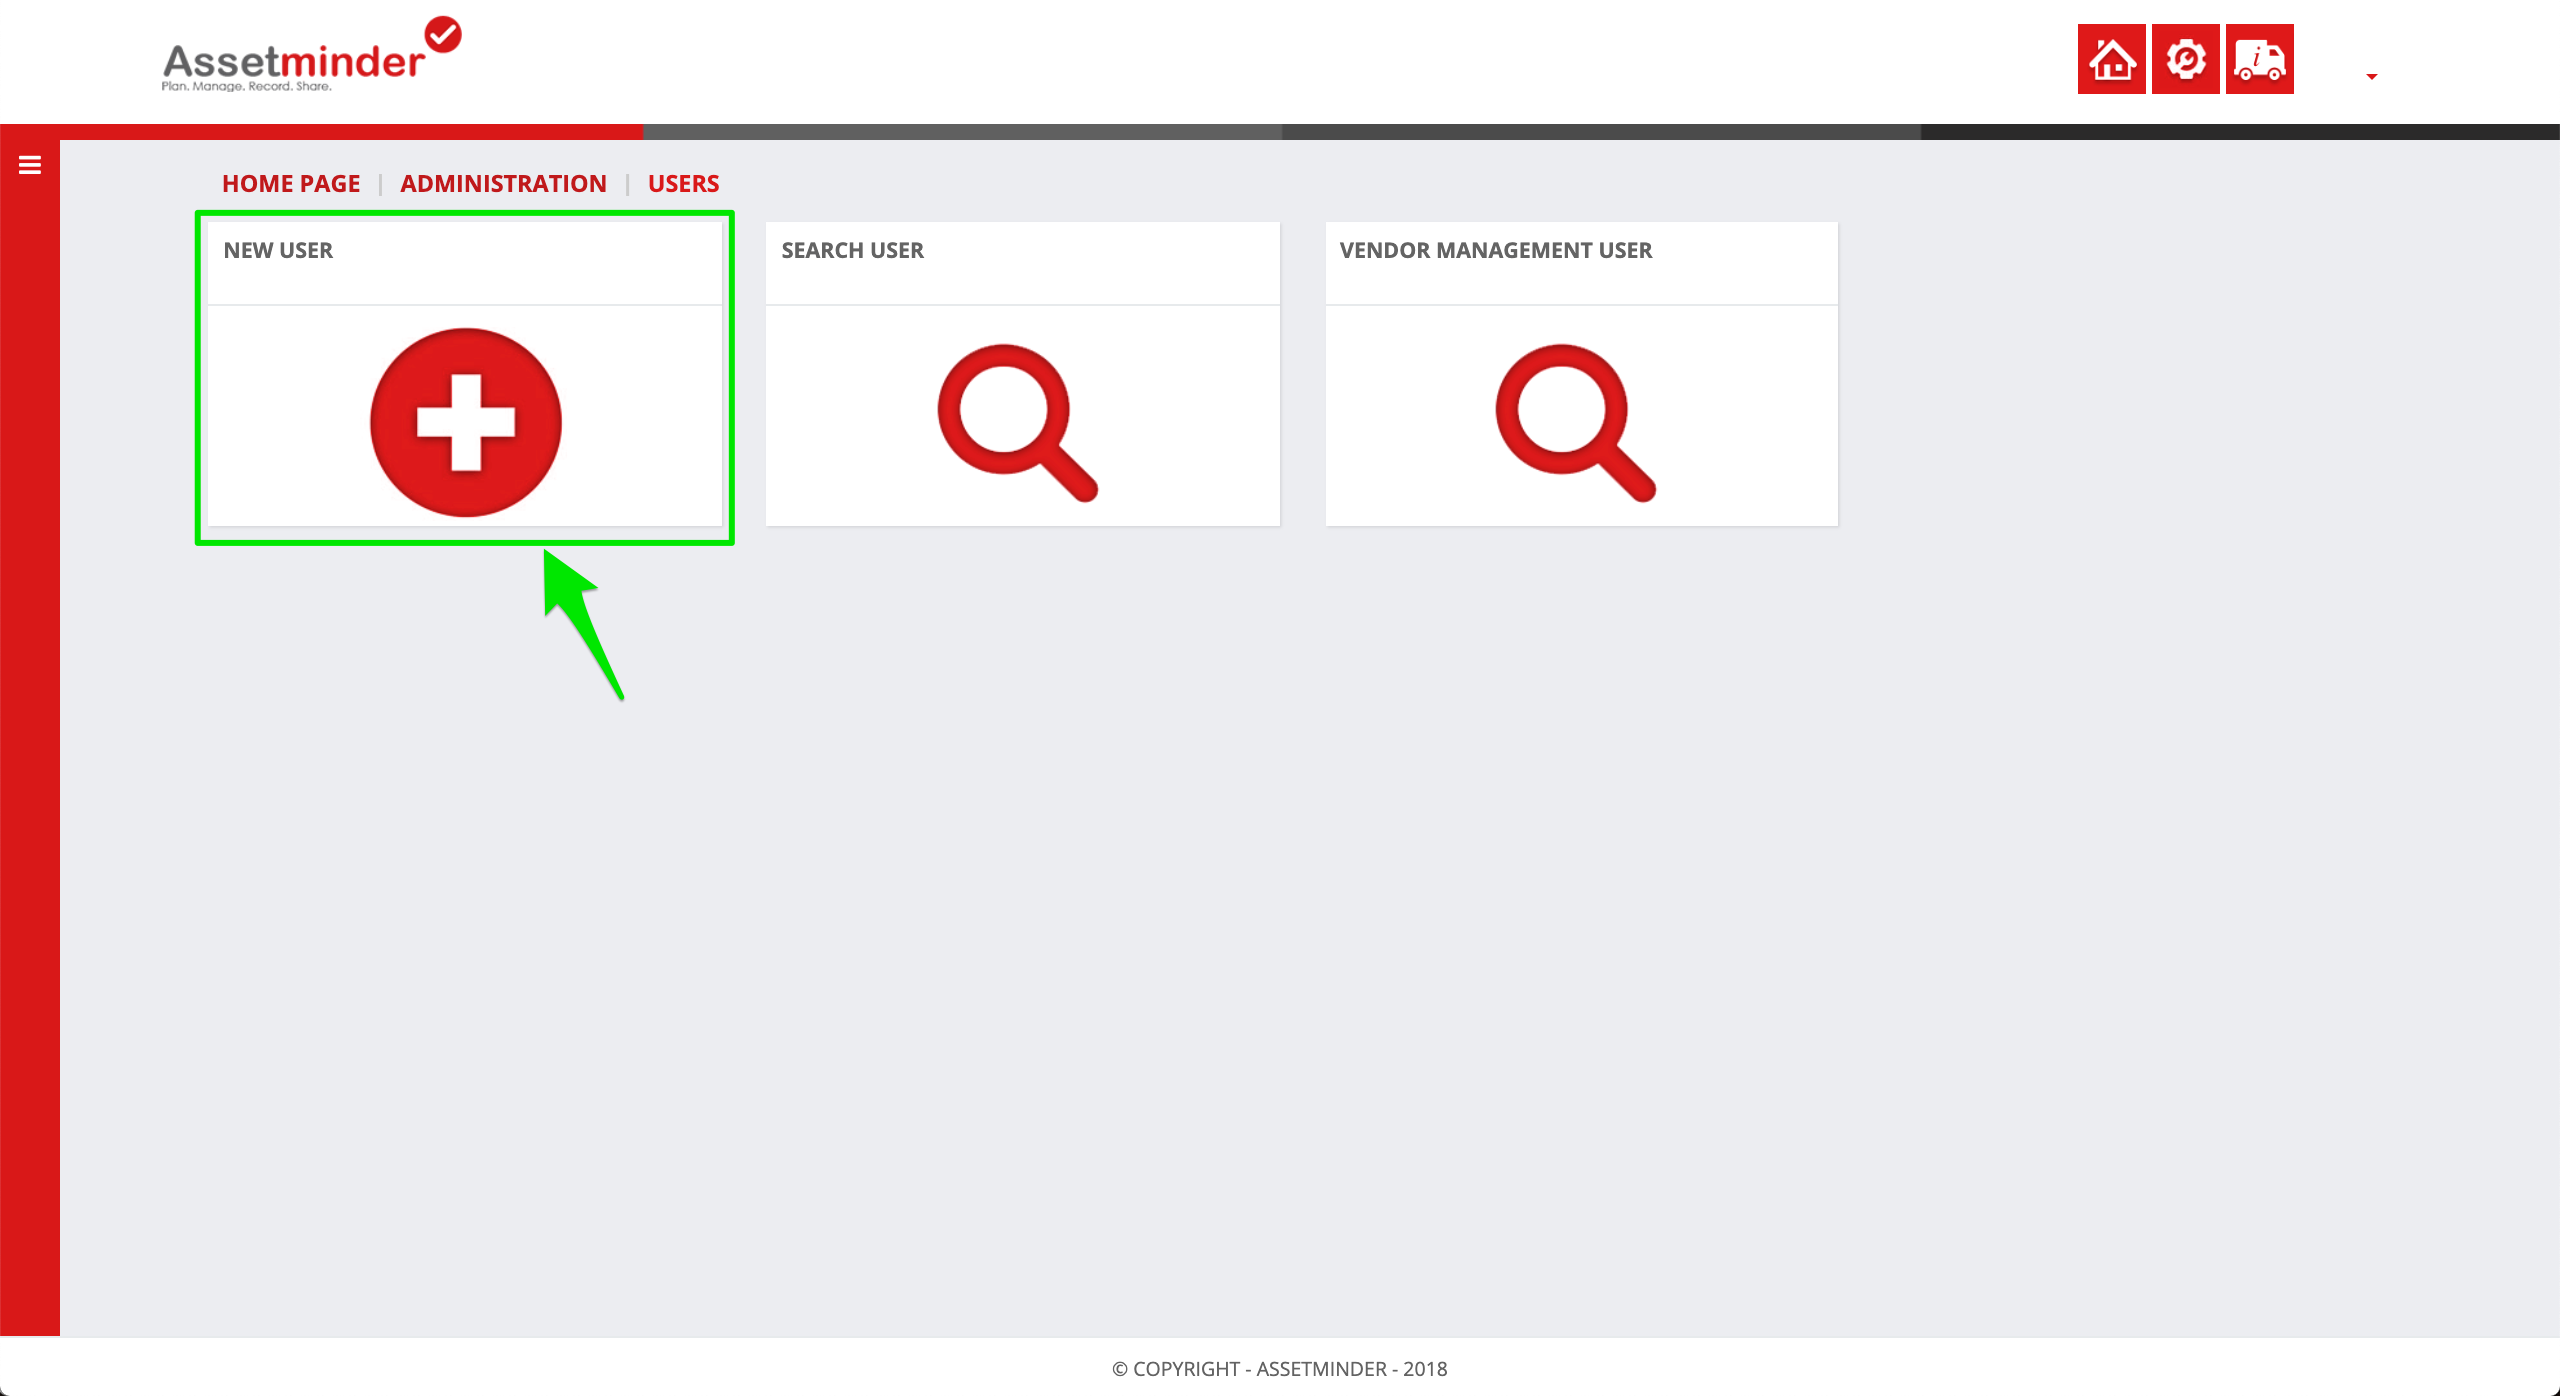
3. Click New User to add the new user
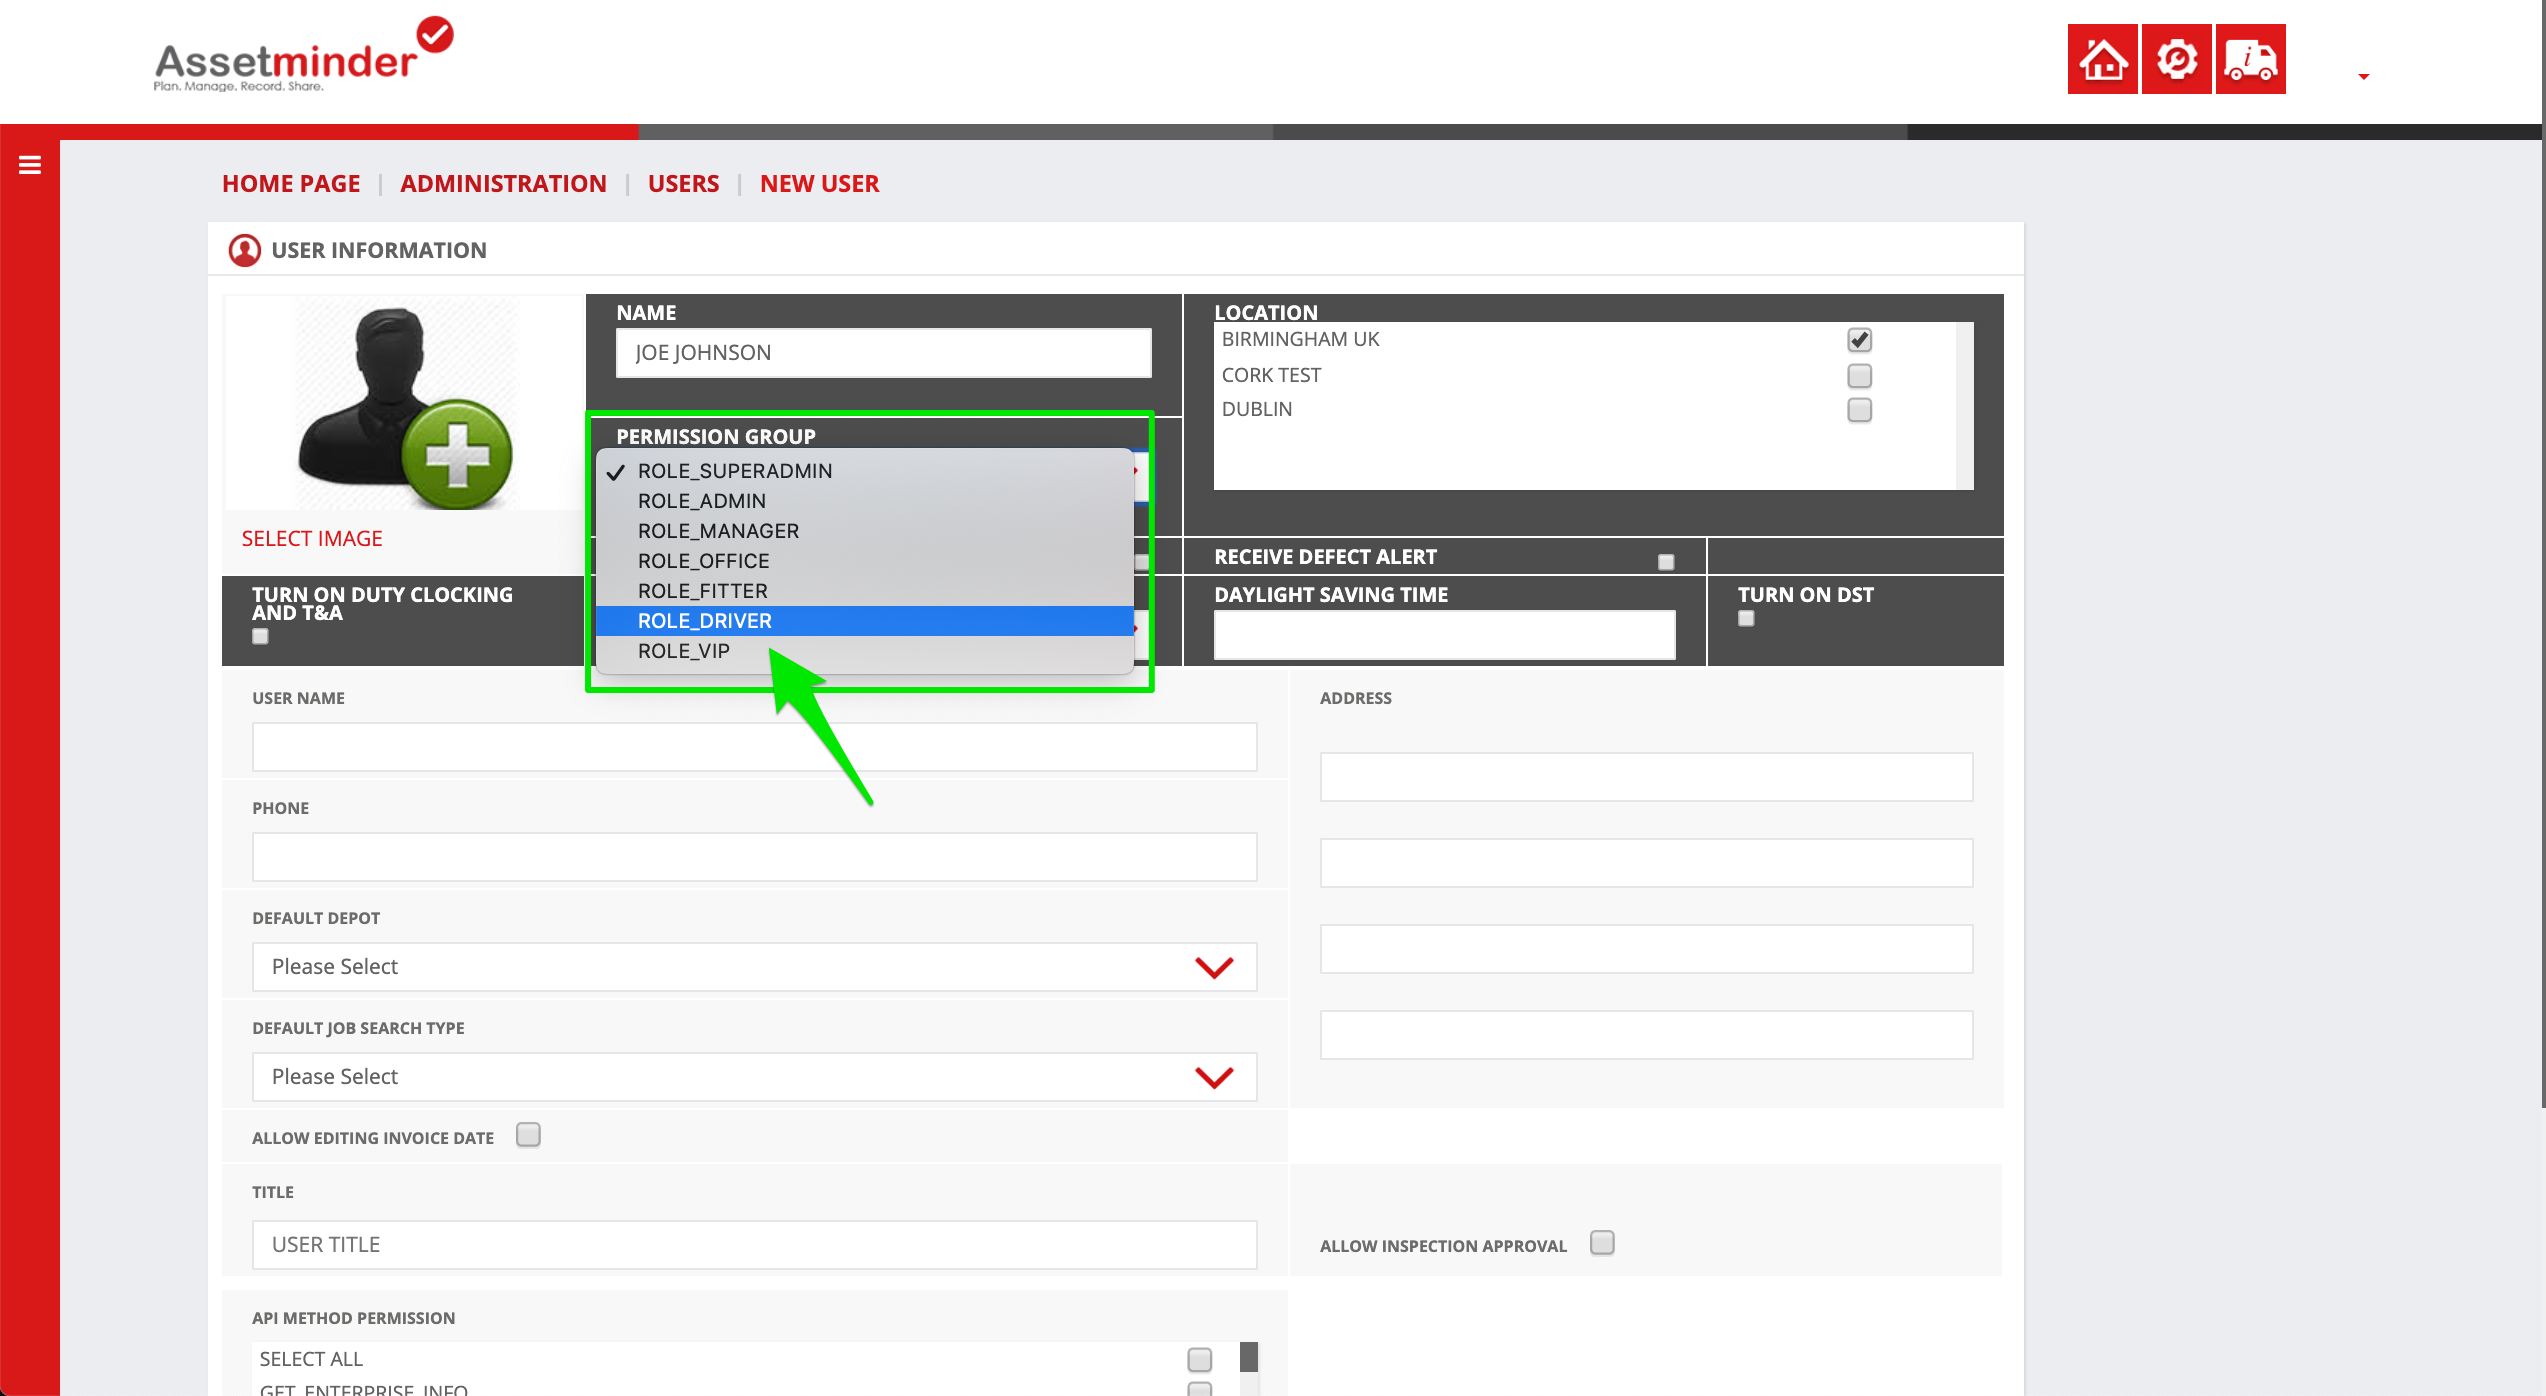
4. Add the driver details to the user record. Key to deciphering between a user and a driver is the permission group. Select Role_Driver from the dropdown list
There are a number of configuration options but a driver will typically only access the system via the mobile app.
- Permissions group - This defines the user role in the organisation and determines how much of the system they have access too. To give more access to more features, grant the user a role with more access. The roles are set by Assetminder.
- Location - That user can access the jobs and assets at that location.
- View all locations checkbox - The user sees the data by location as set in the previous location setting. Check this checkbox so the user can see the data across all sites if needed.
- Receive defect alerts - Check the checkbox so the user can receive defect notifications for their location.
- Turn on duty clocking - Turning this feature on enables duty clocking functionality on the mobile app.
- Timezone & Daylight savings - Inspections will appear in the set timezone.
- Default depot - home storage location for the user on each form.
- Allow editing invoice date - before sending an invoice, the user is prompted to review the date and change if needed.

- Allow inspection approval - gives the user the permissions to sign off inspections in the inspection module
- Default job card type - sets the default job type on the job card. (reactive, breakdown, condition-based maintenance, etc)
- Cost per hour - Cost of that employee to do 1-hour work
- API Method Permission - Determines what API access this user profile has. This needs to be configured if the user needs access to anything connected via the API such as the maintenance planner.
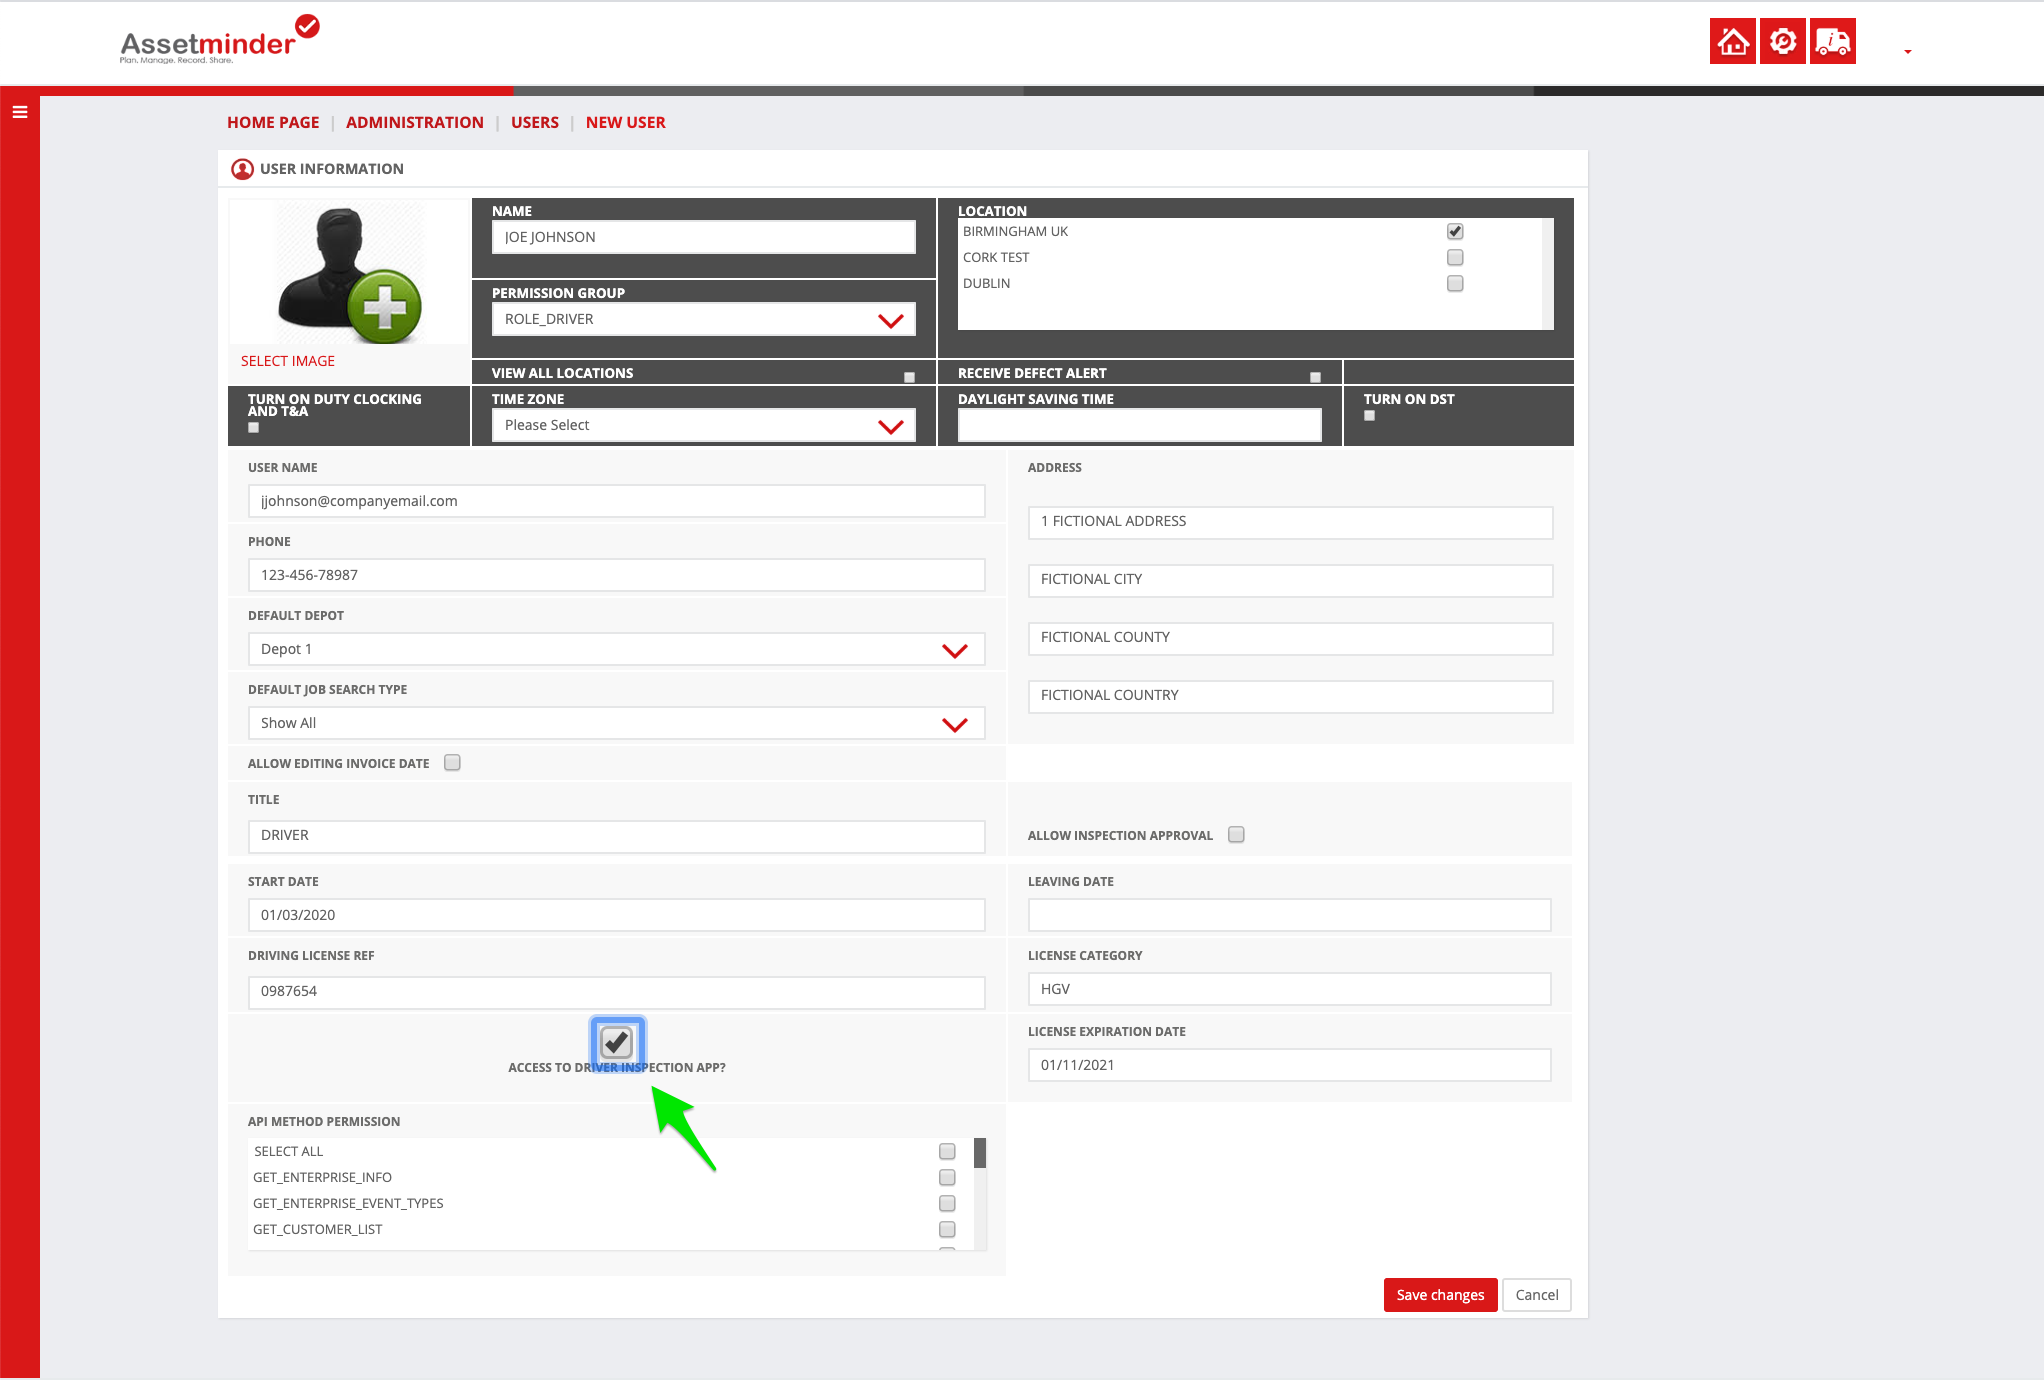
5. Be sure to enable access to the mobile app by enabling the Access to Driver Inspection App check box. When all fields are filled in, the driver record will look like the following:
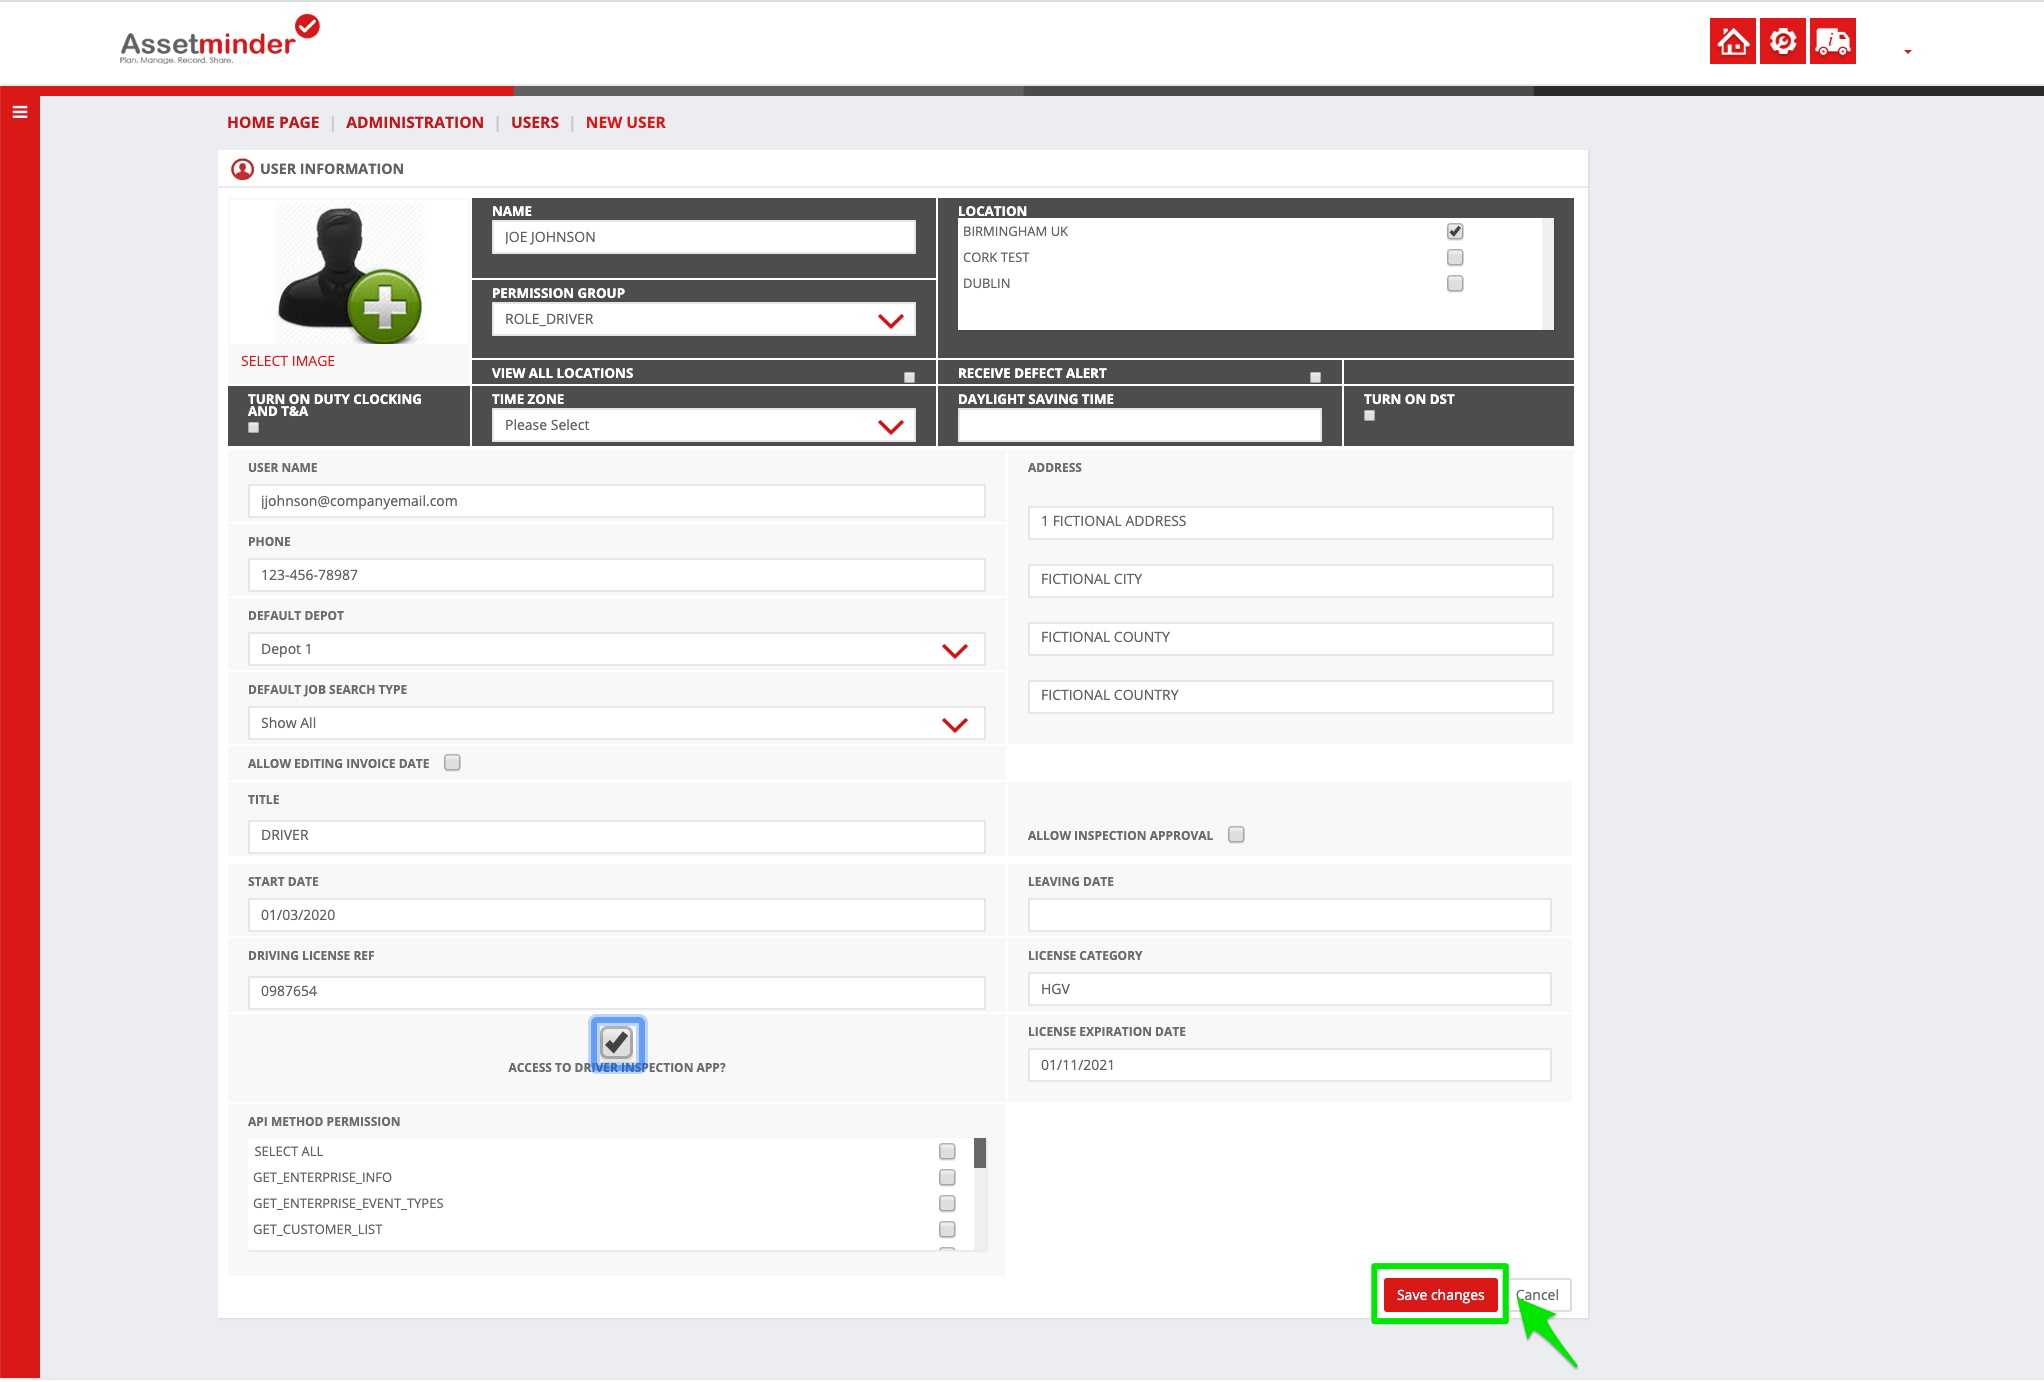
6. Click Save on the bottom right-hand side of the page when done.
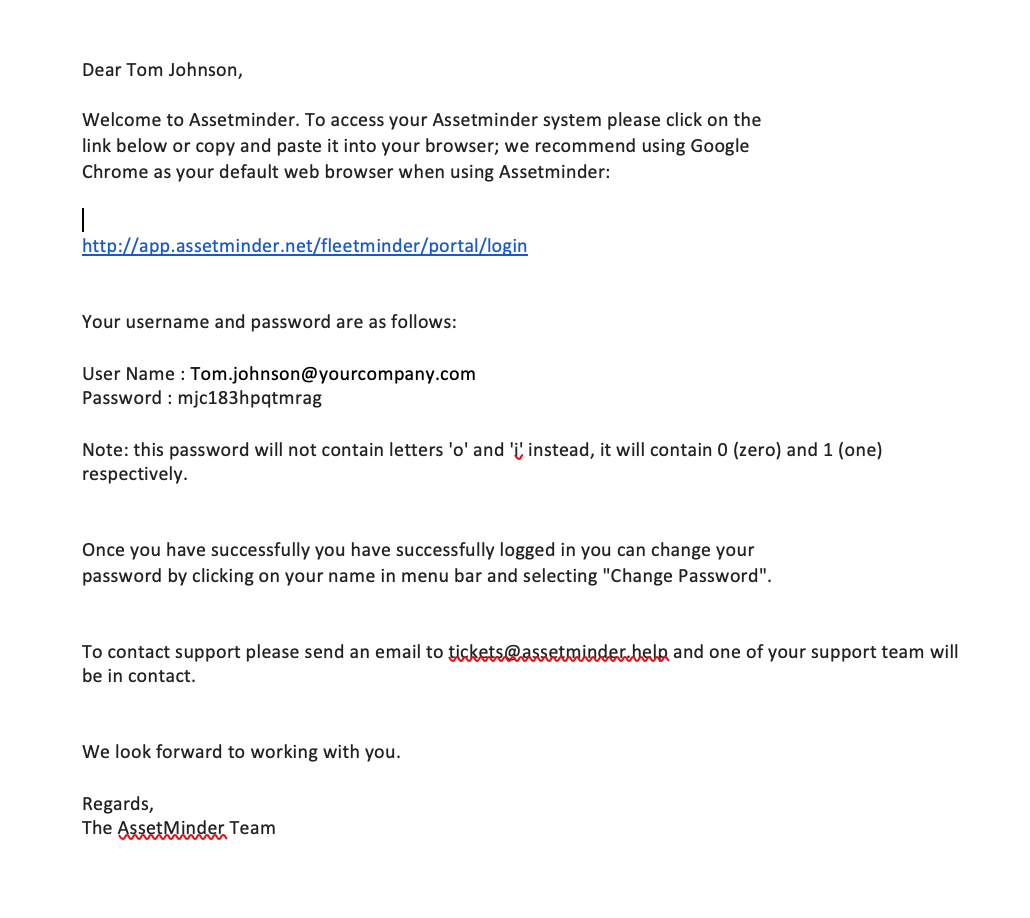
7. The driver will be sent a welcome email with login details.
8. Repeat process for all additional drivers
Conor Gibson
Comments