Background
Job cards and sales orders are very similar. Job cards are issued against a vehicle whereas sales orders are issued against the company. For example, a client may wish to buy some parts from your company, so a sales order is created.
Procedure
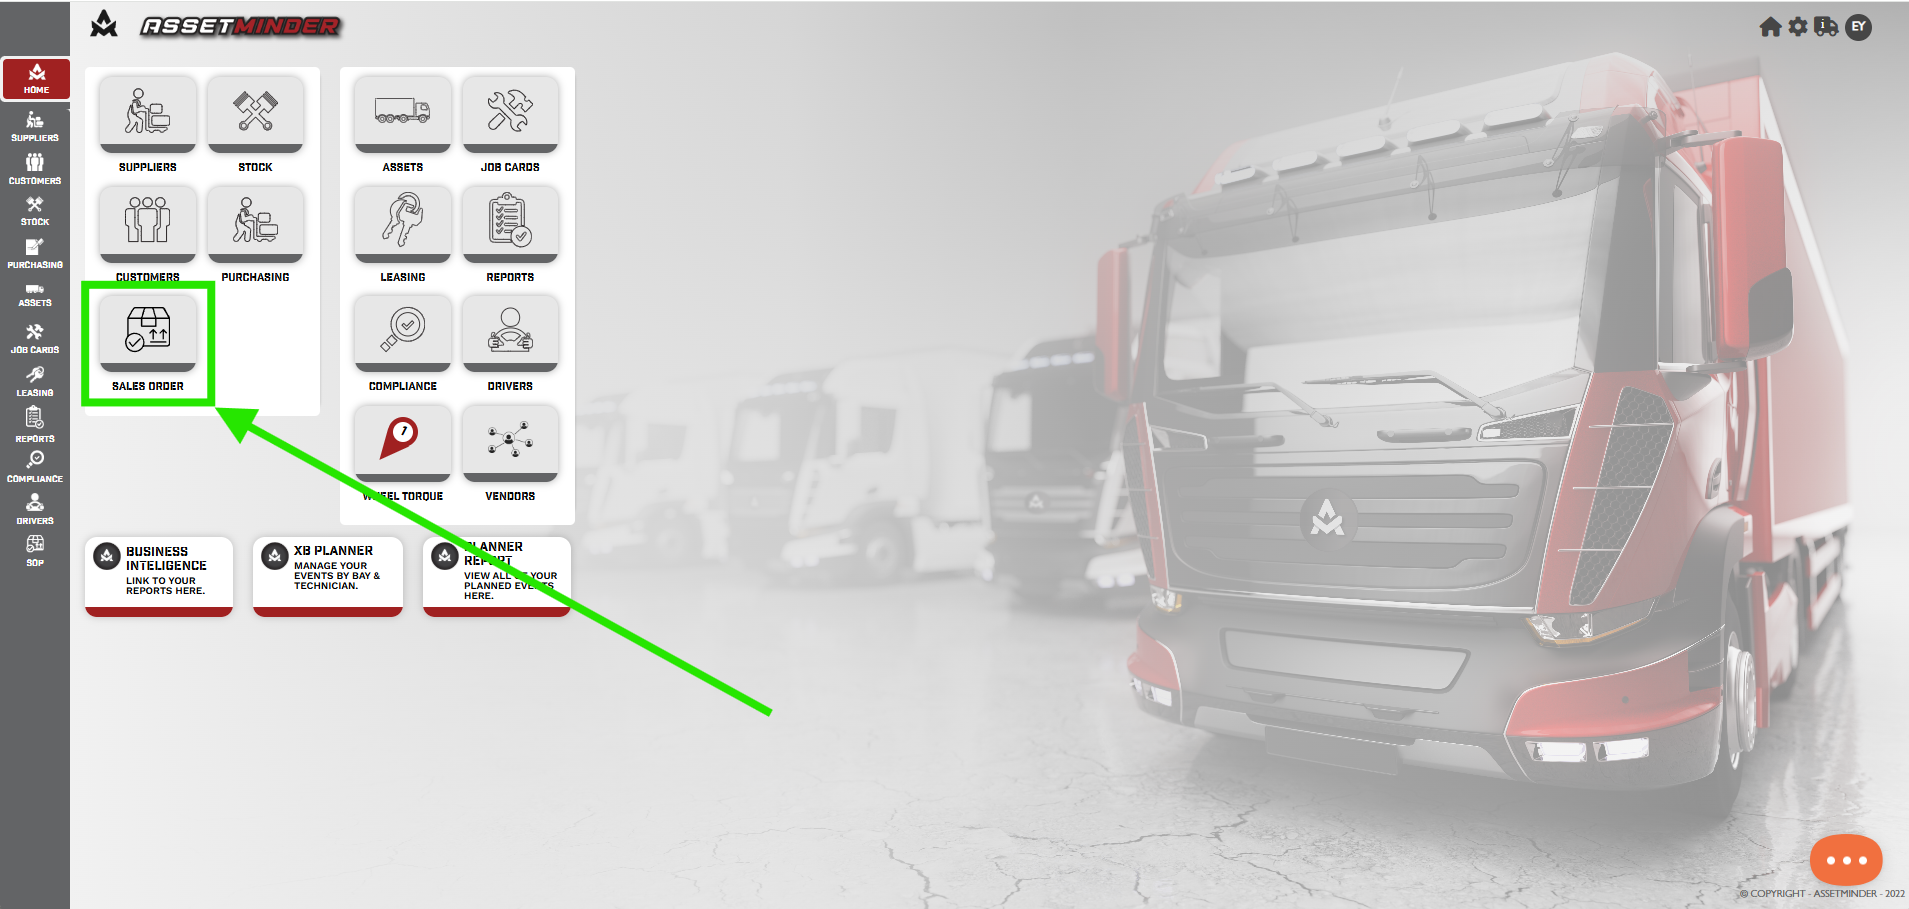
1. Click Sales Order on the home screen.
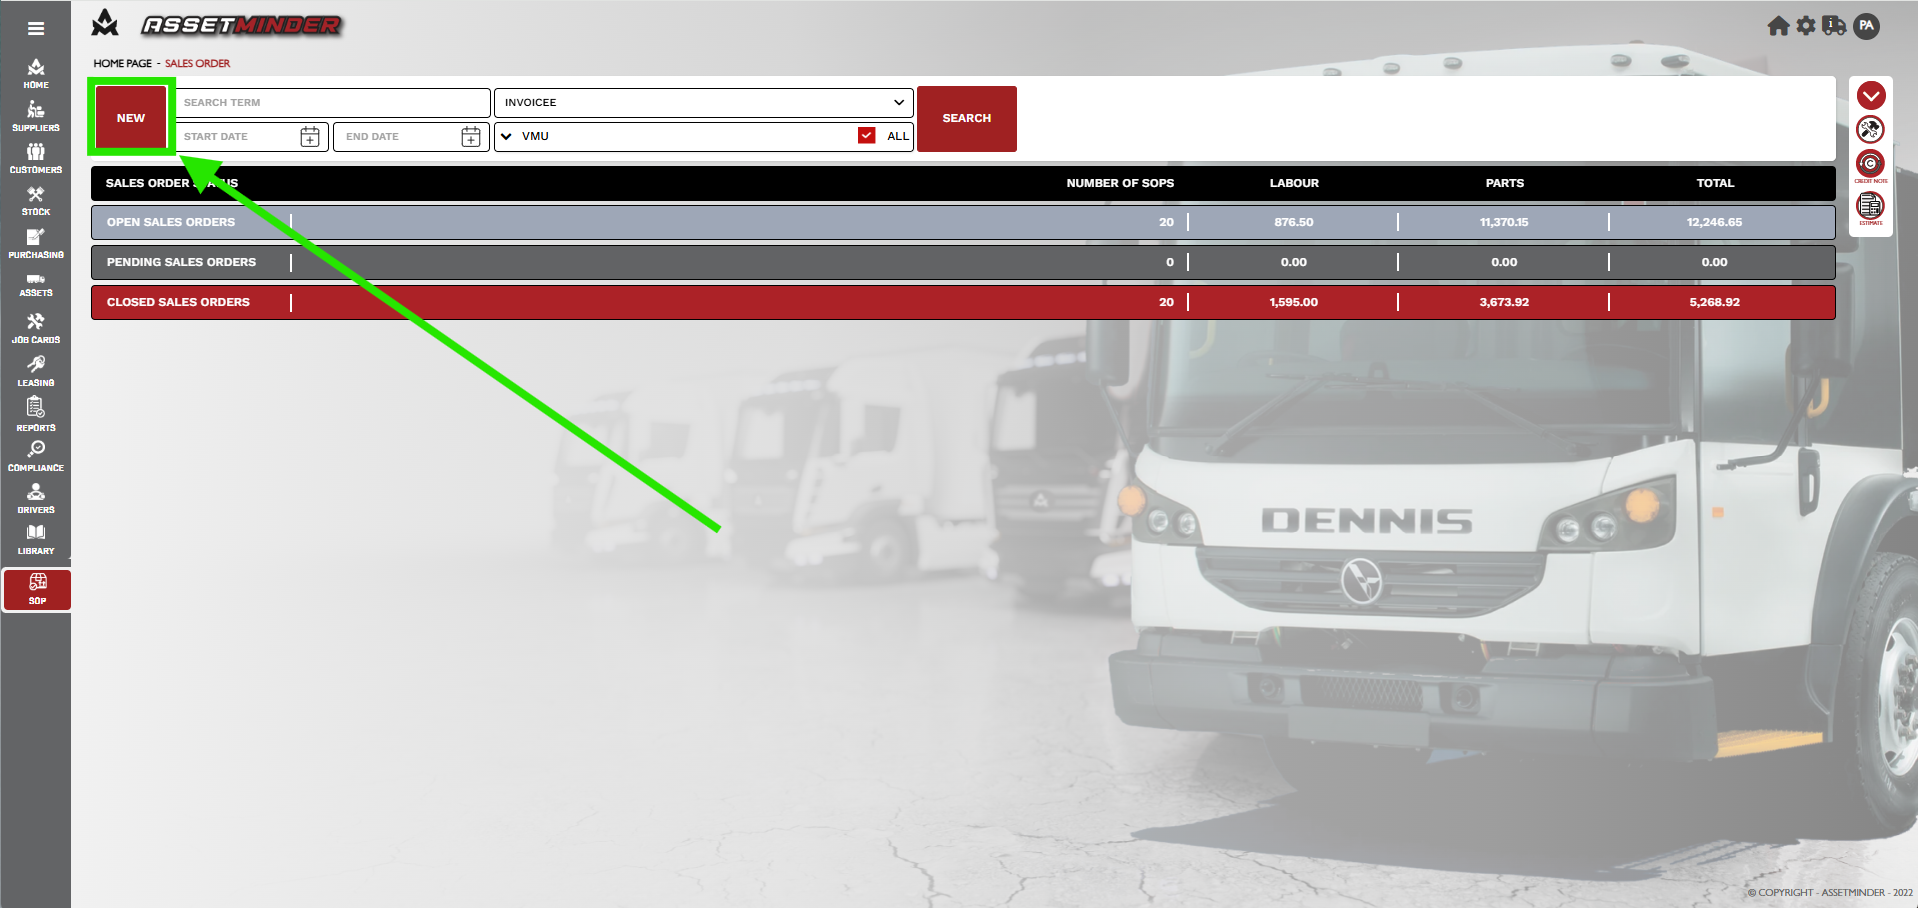
2. Click New.
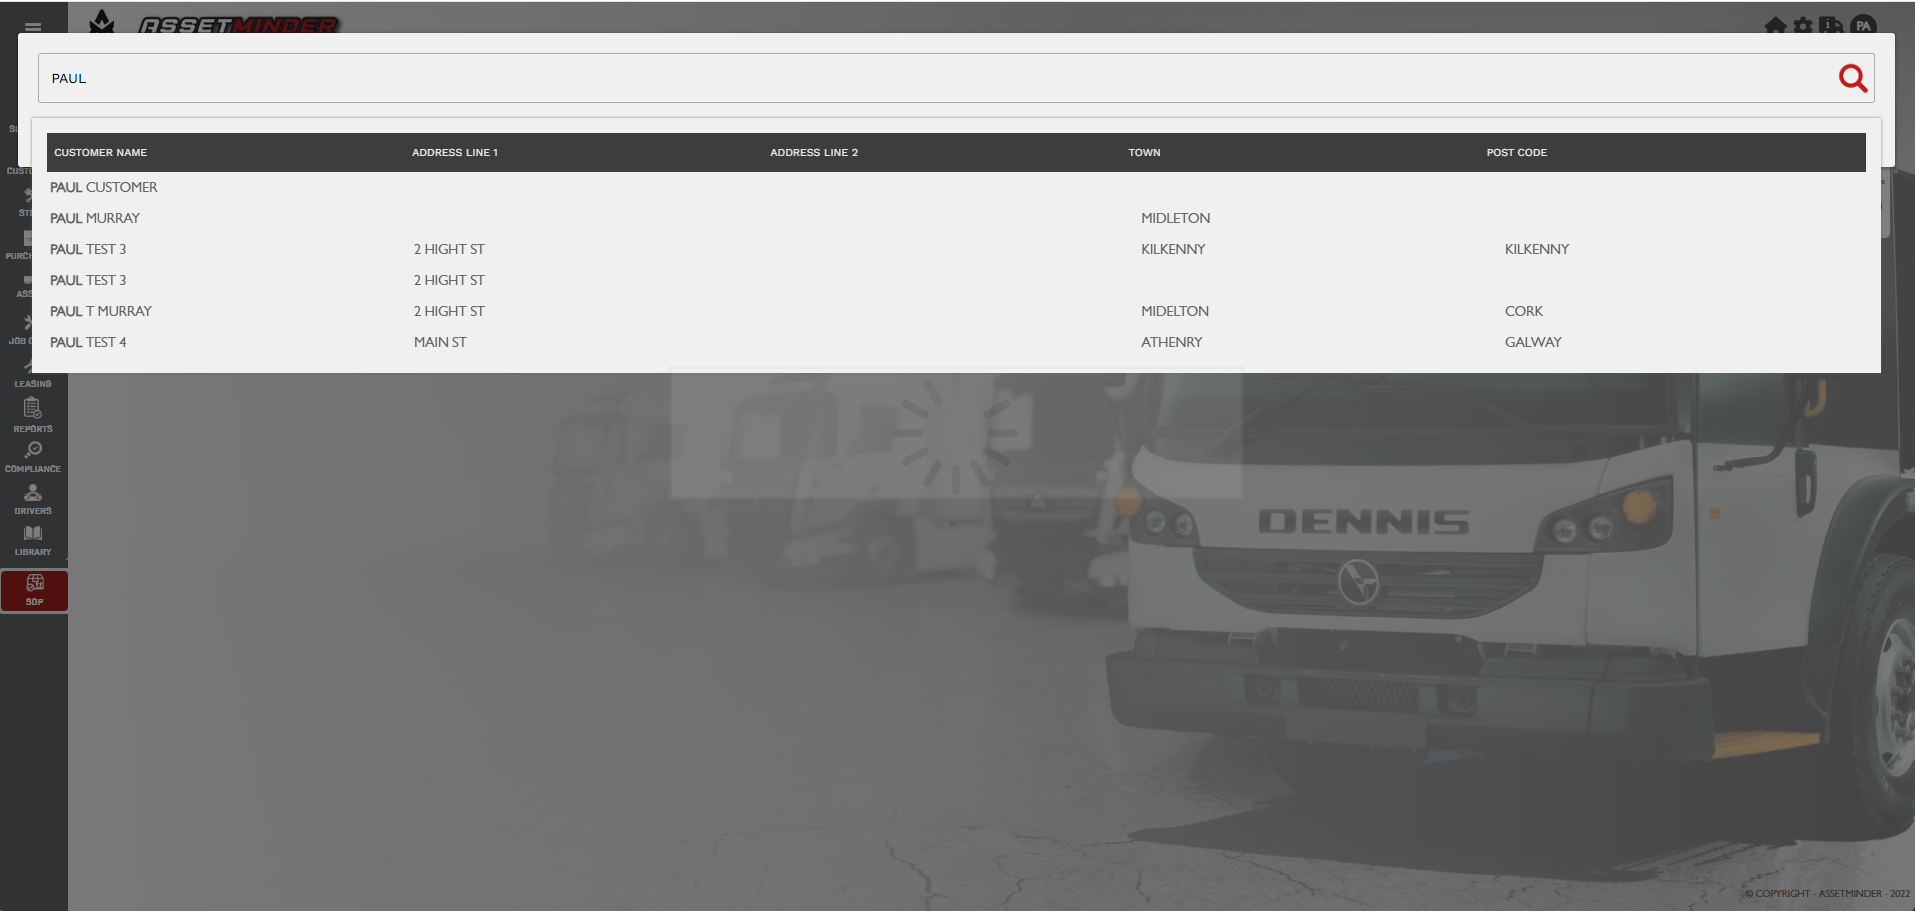
3. Search for the client in the client list.
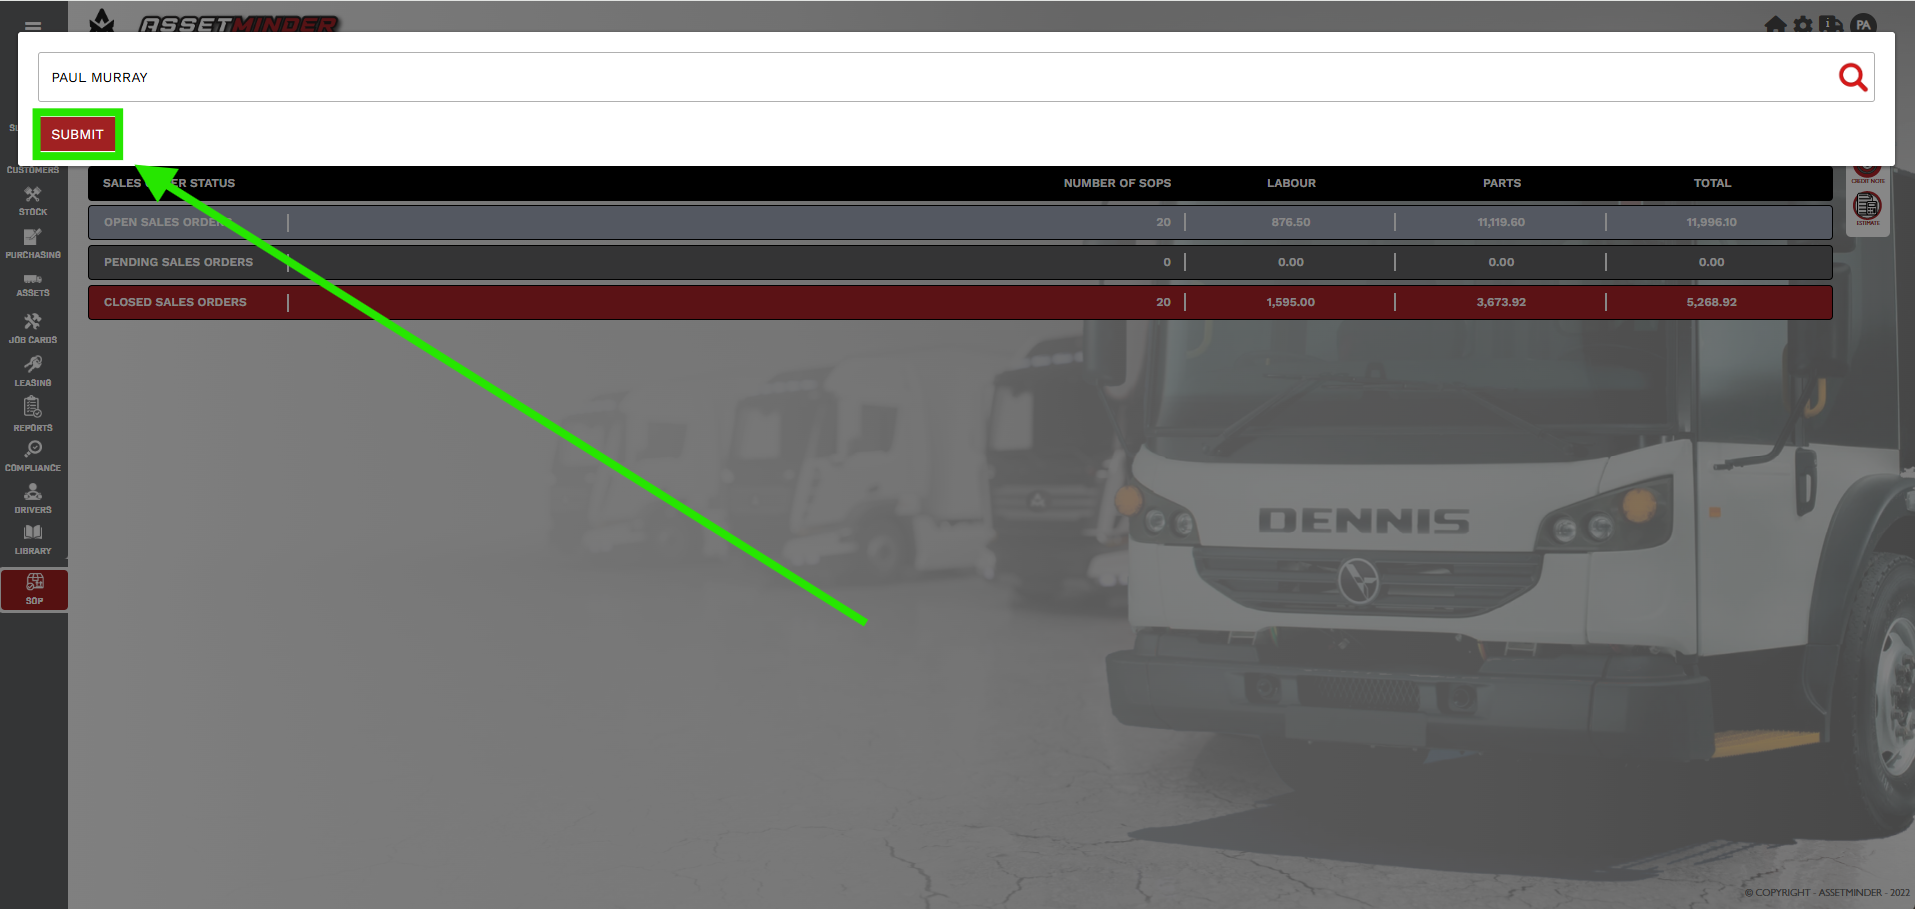
4. After selecting the client, click Submit.
5. To add labour to the order, click the Add icon in the Labour tile.

6. Fill in the labour rate, technician, hours worked, hours to be charged, and repair code. Click Save when done.
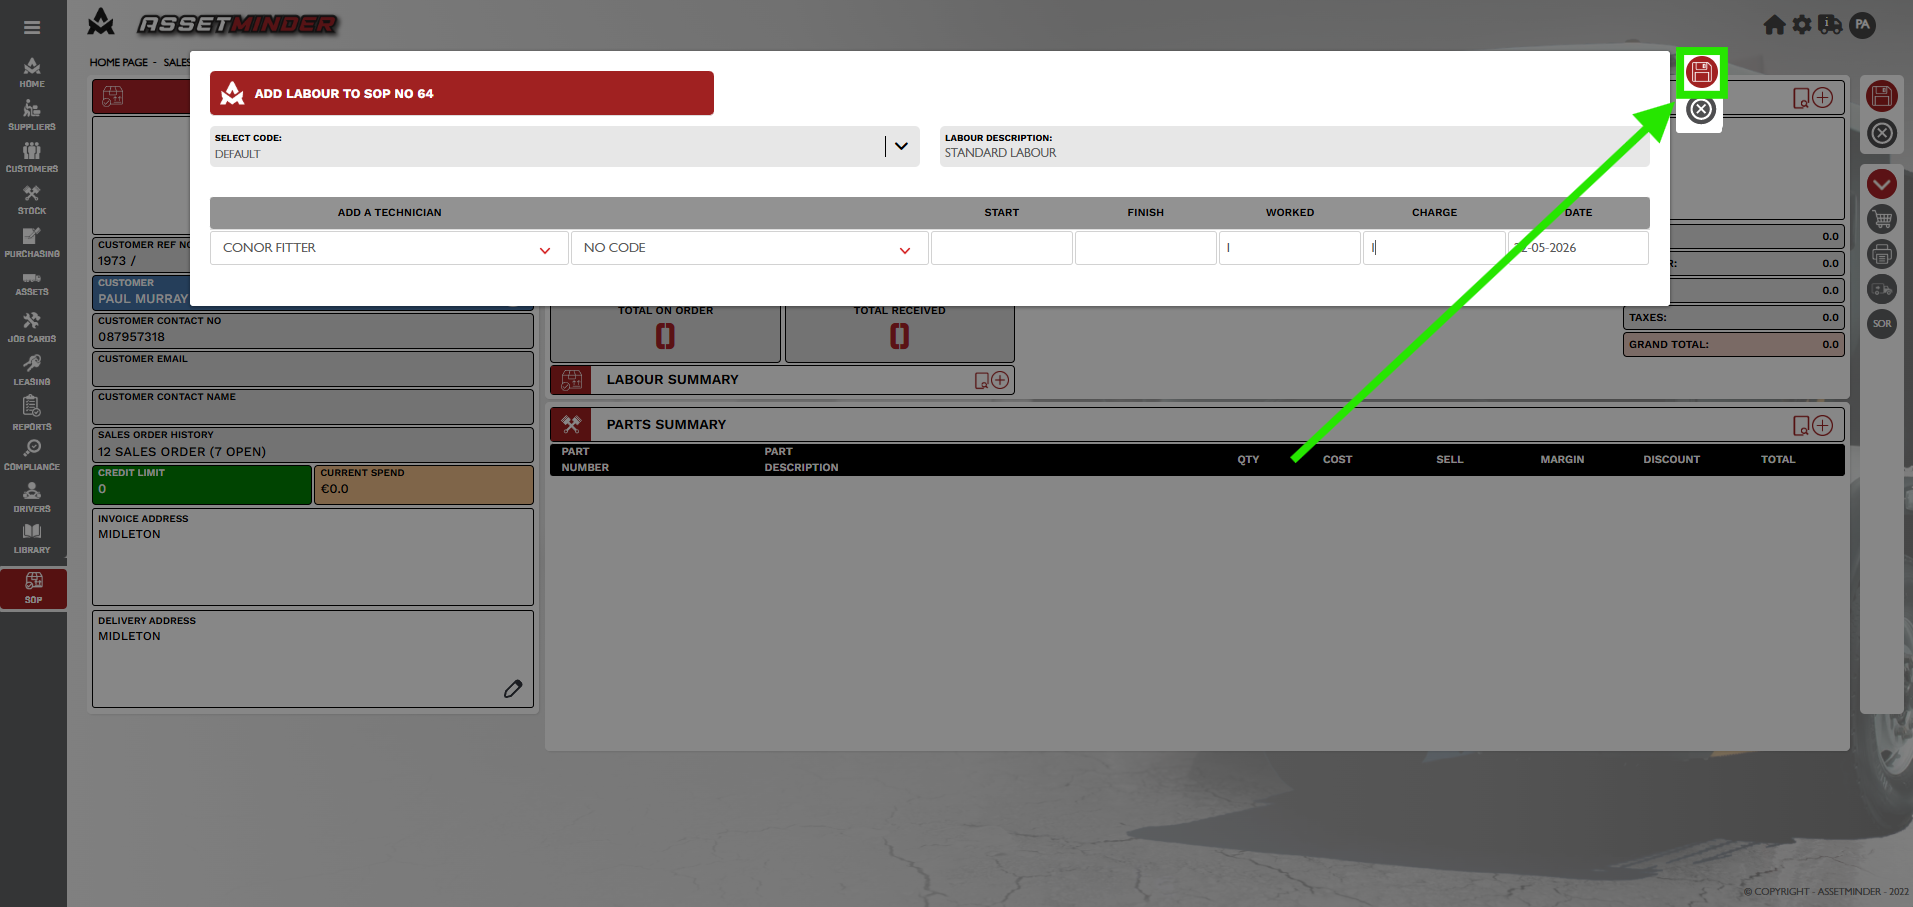
7. Repeat as needed if more labour is required on the sales order
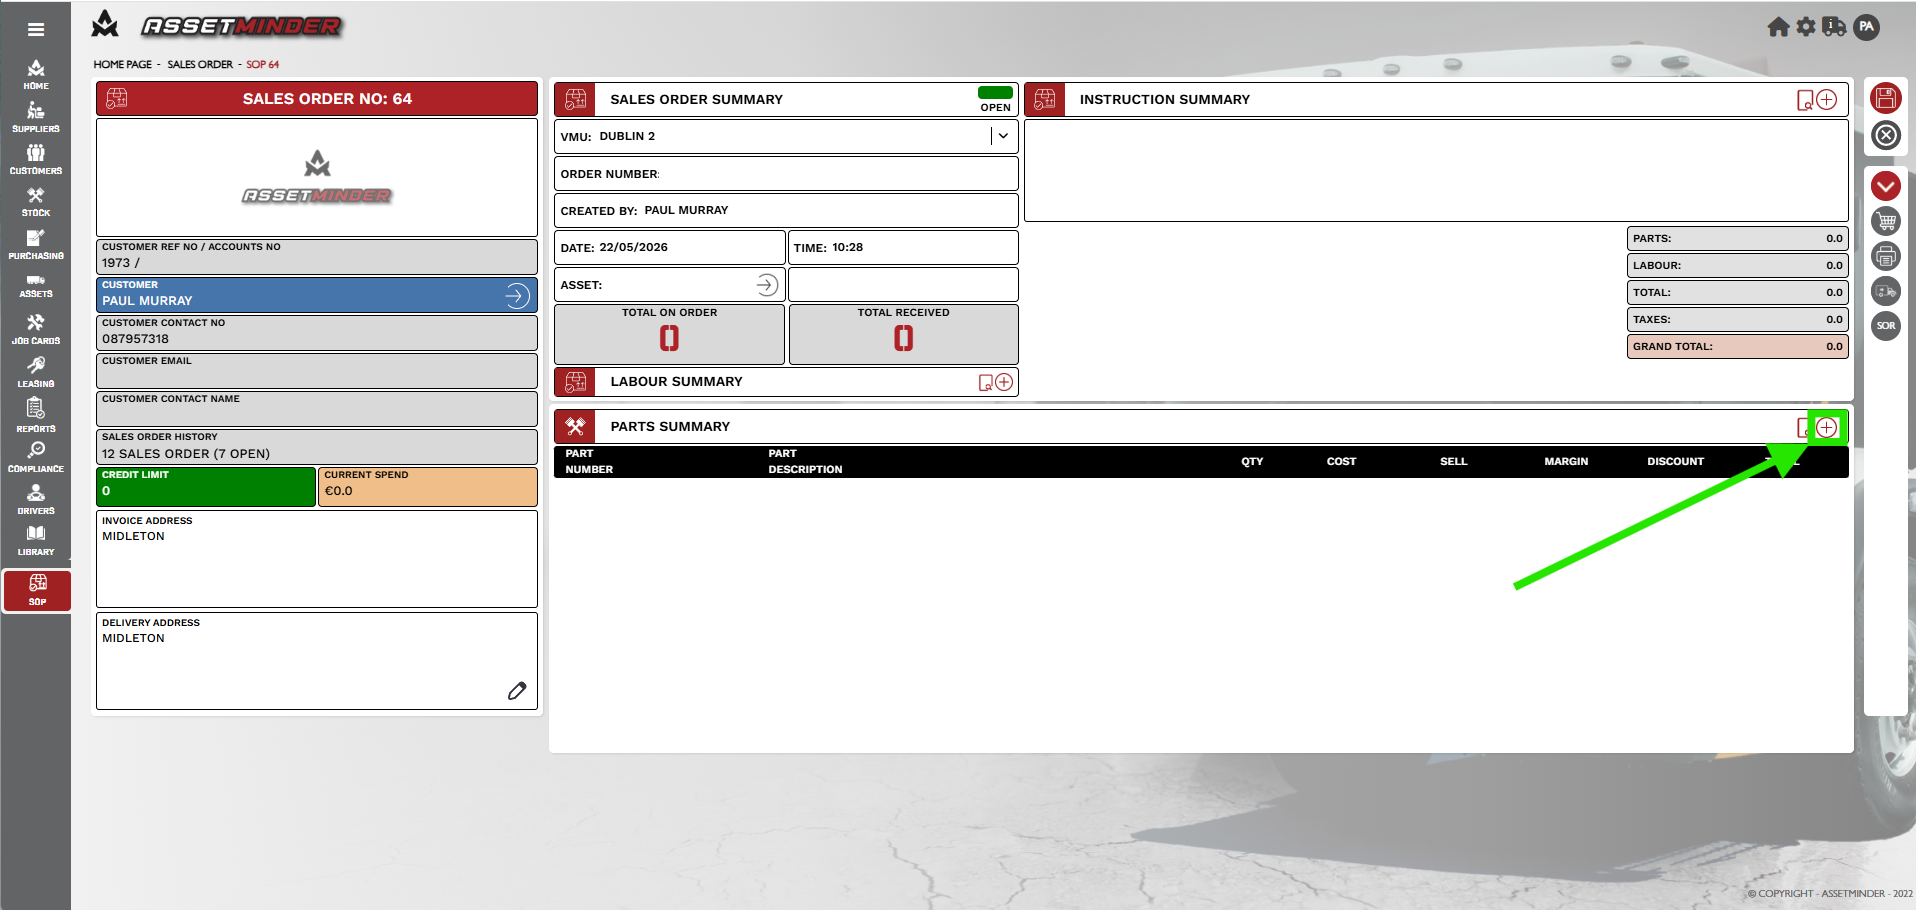
8. To add parts to the sales order, click the Add icon in the Parts tile.
10. Search for the part code or description in the pop-up window. Click the part to add it to the order

11. Verify the information in the window such as tax codes, repair code etc. Add the Quantity needed to the sales order.
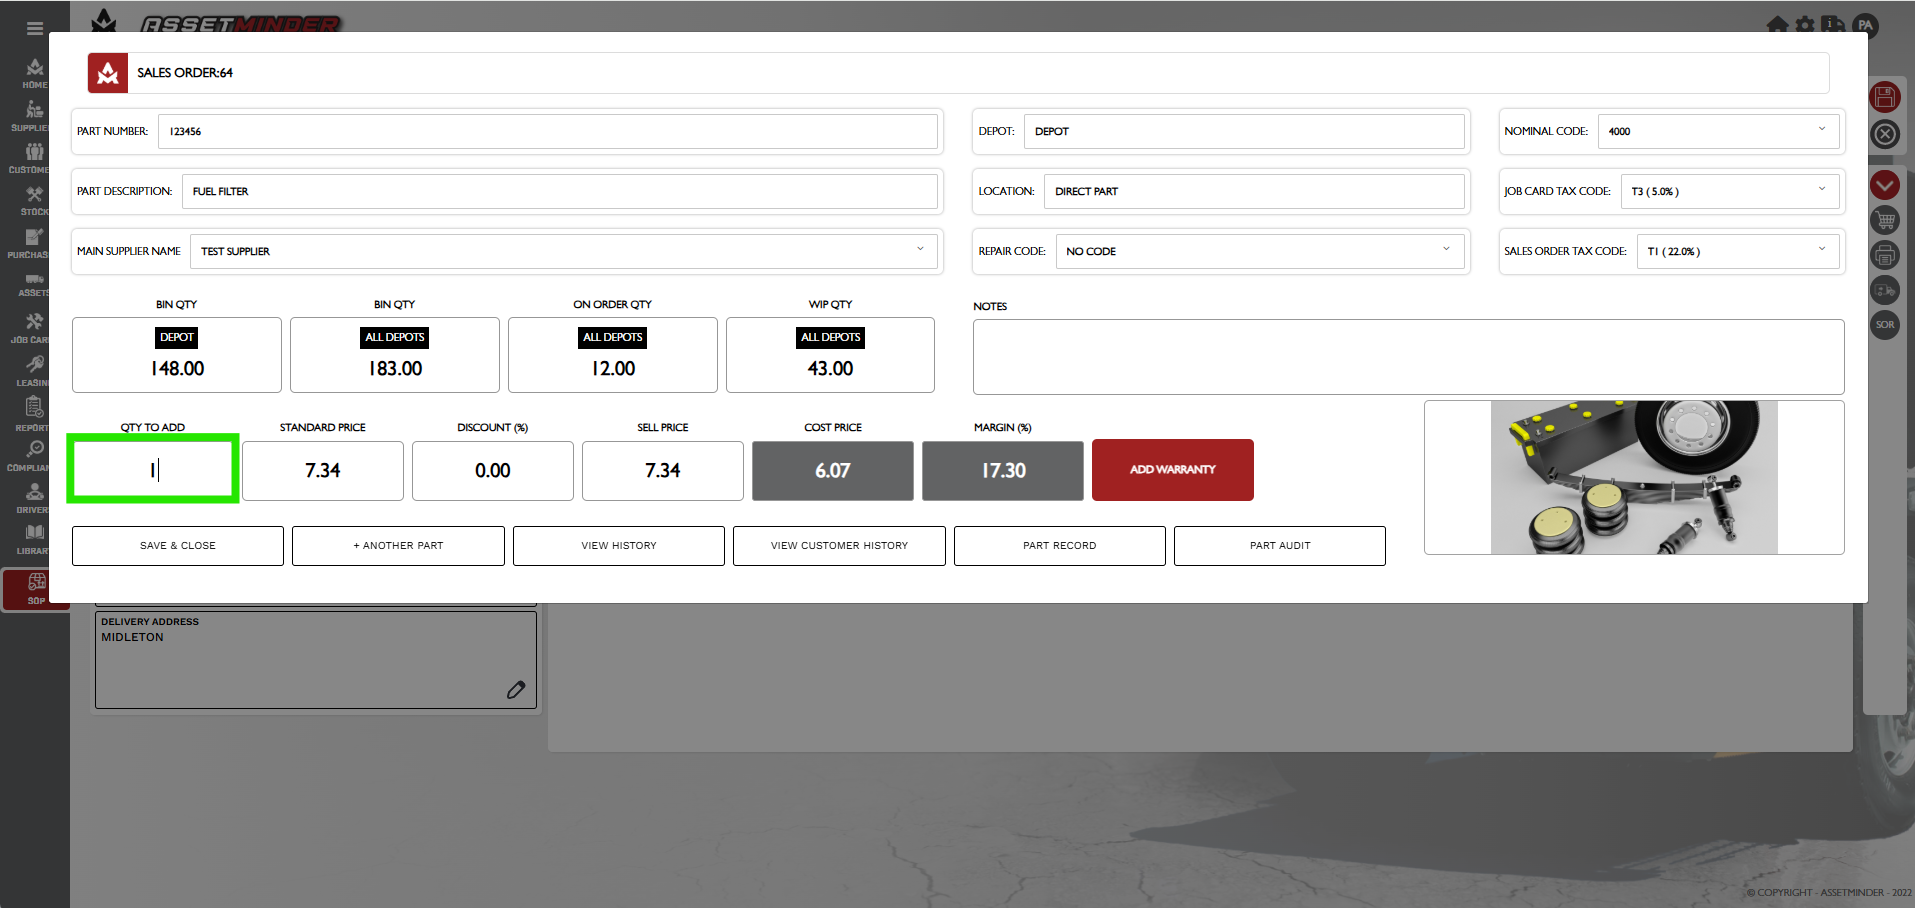
14. Click +Another Part to add more parts to the order. Click Save & Close when all parts have been added.

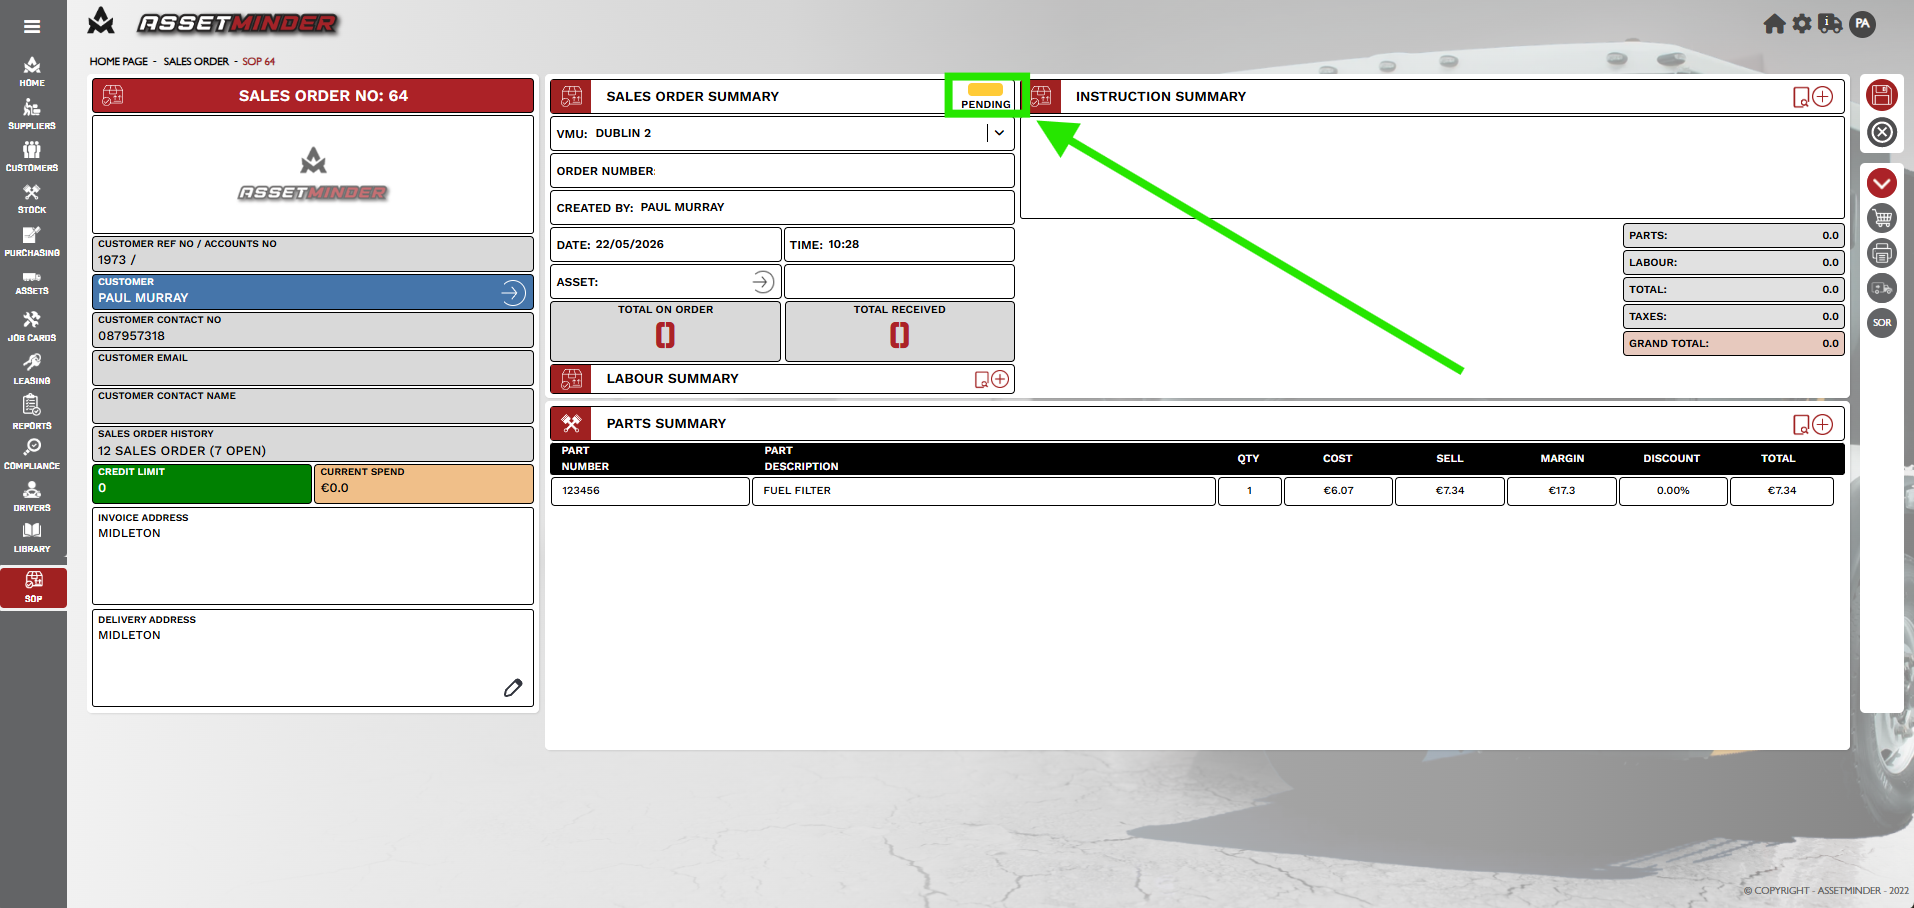
15. When all the details have been added to the order, click to convert the order from open to pending.
16. Click the SOP Summary tile.

17. The sales order cannot be processed until the parts are delivered to or handed over to the customer. In the Sales Order Review screen, click the View Page icon on the parts line item.
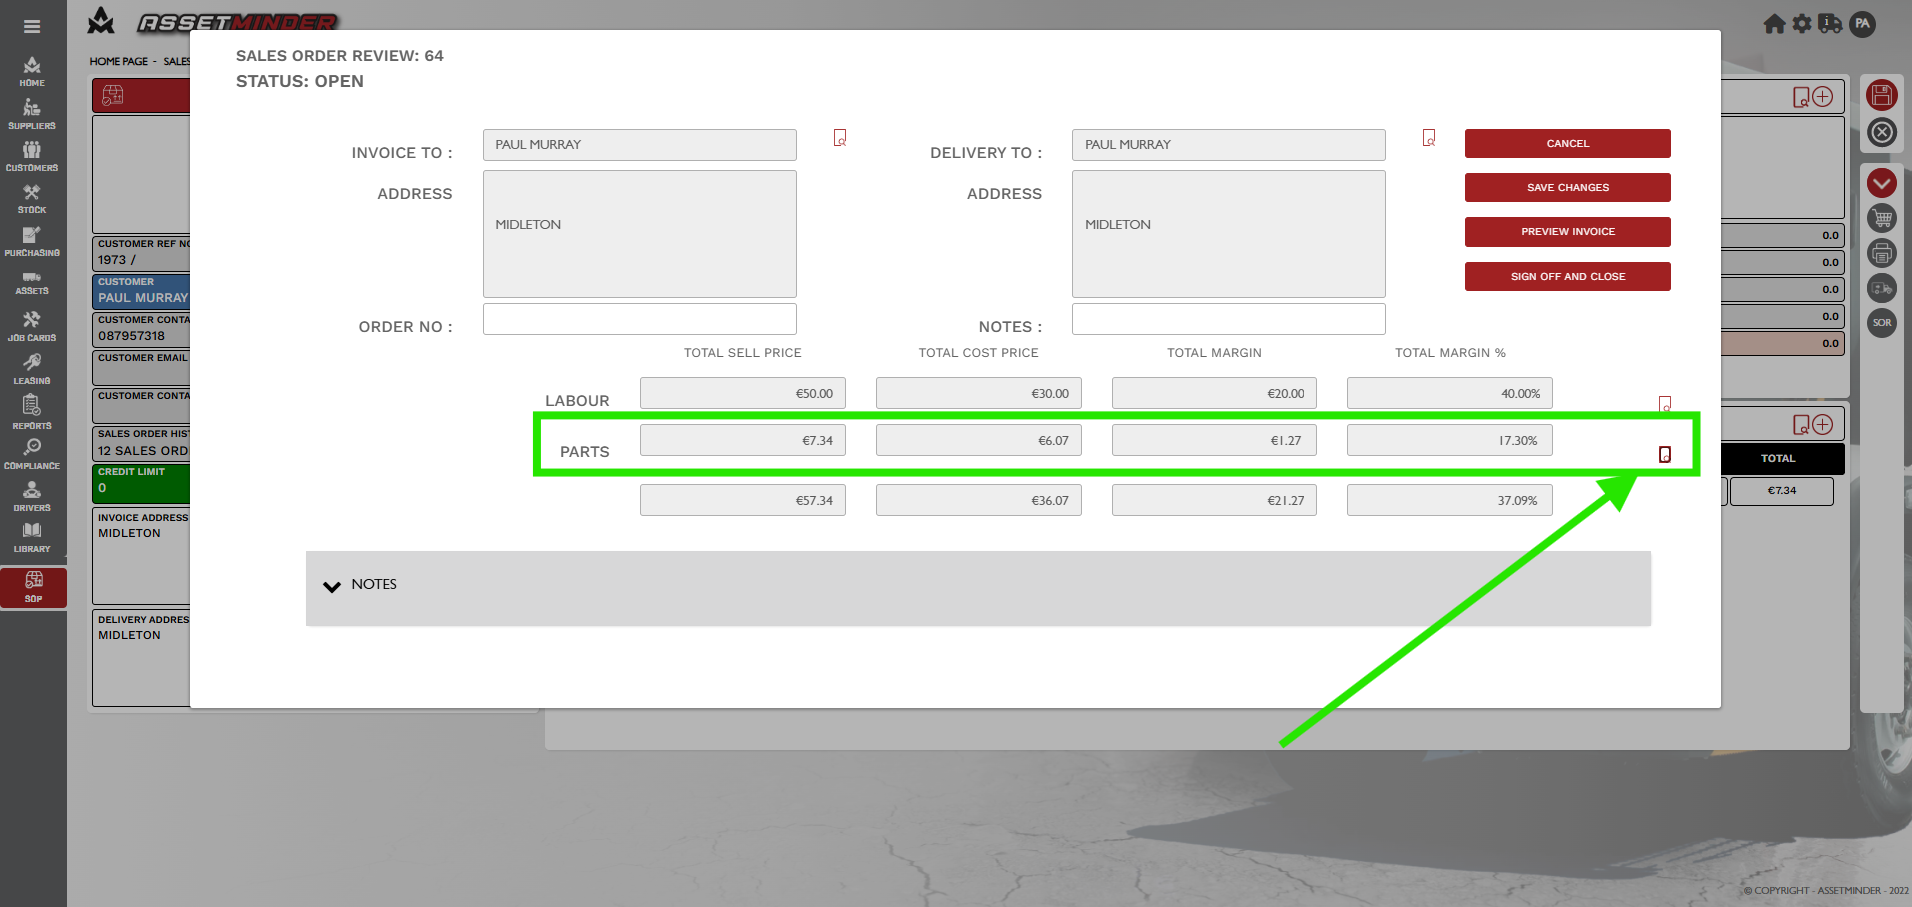
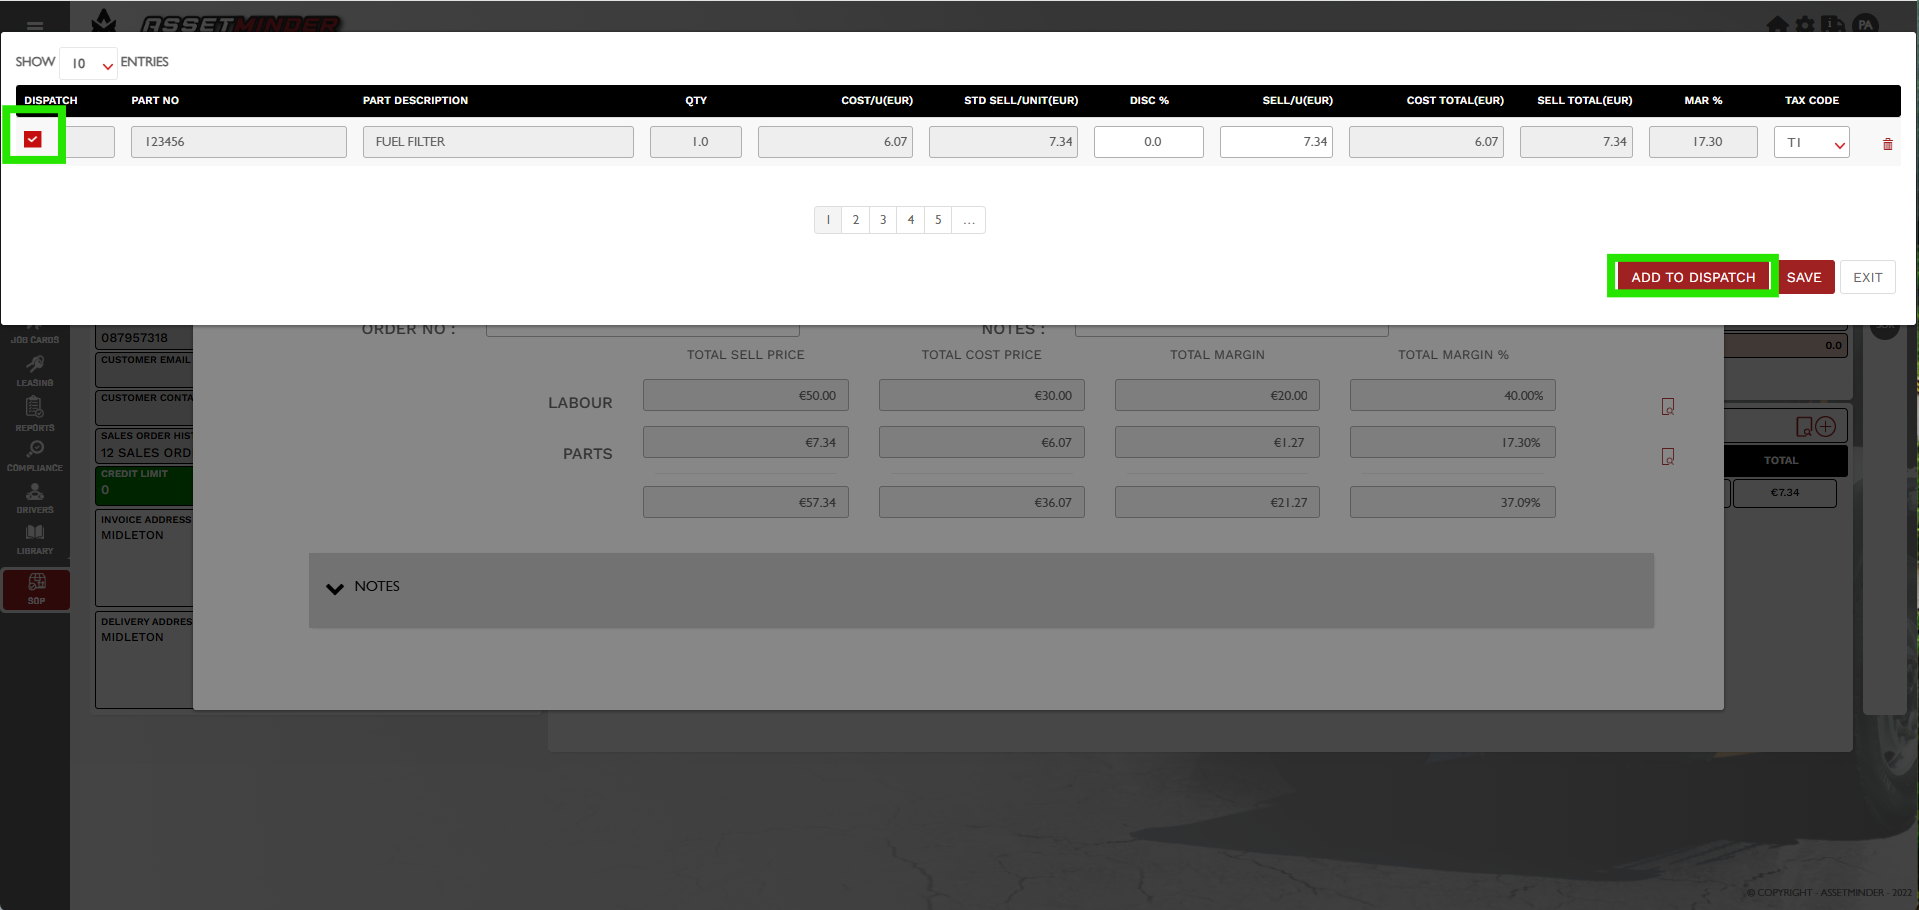
18. It is possible to dispatch some or all of the items. Check the checkbox on the line item to be dispatched, select the dispatch items, and click Add to Dispatch.
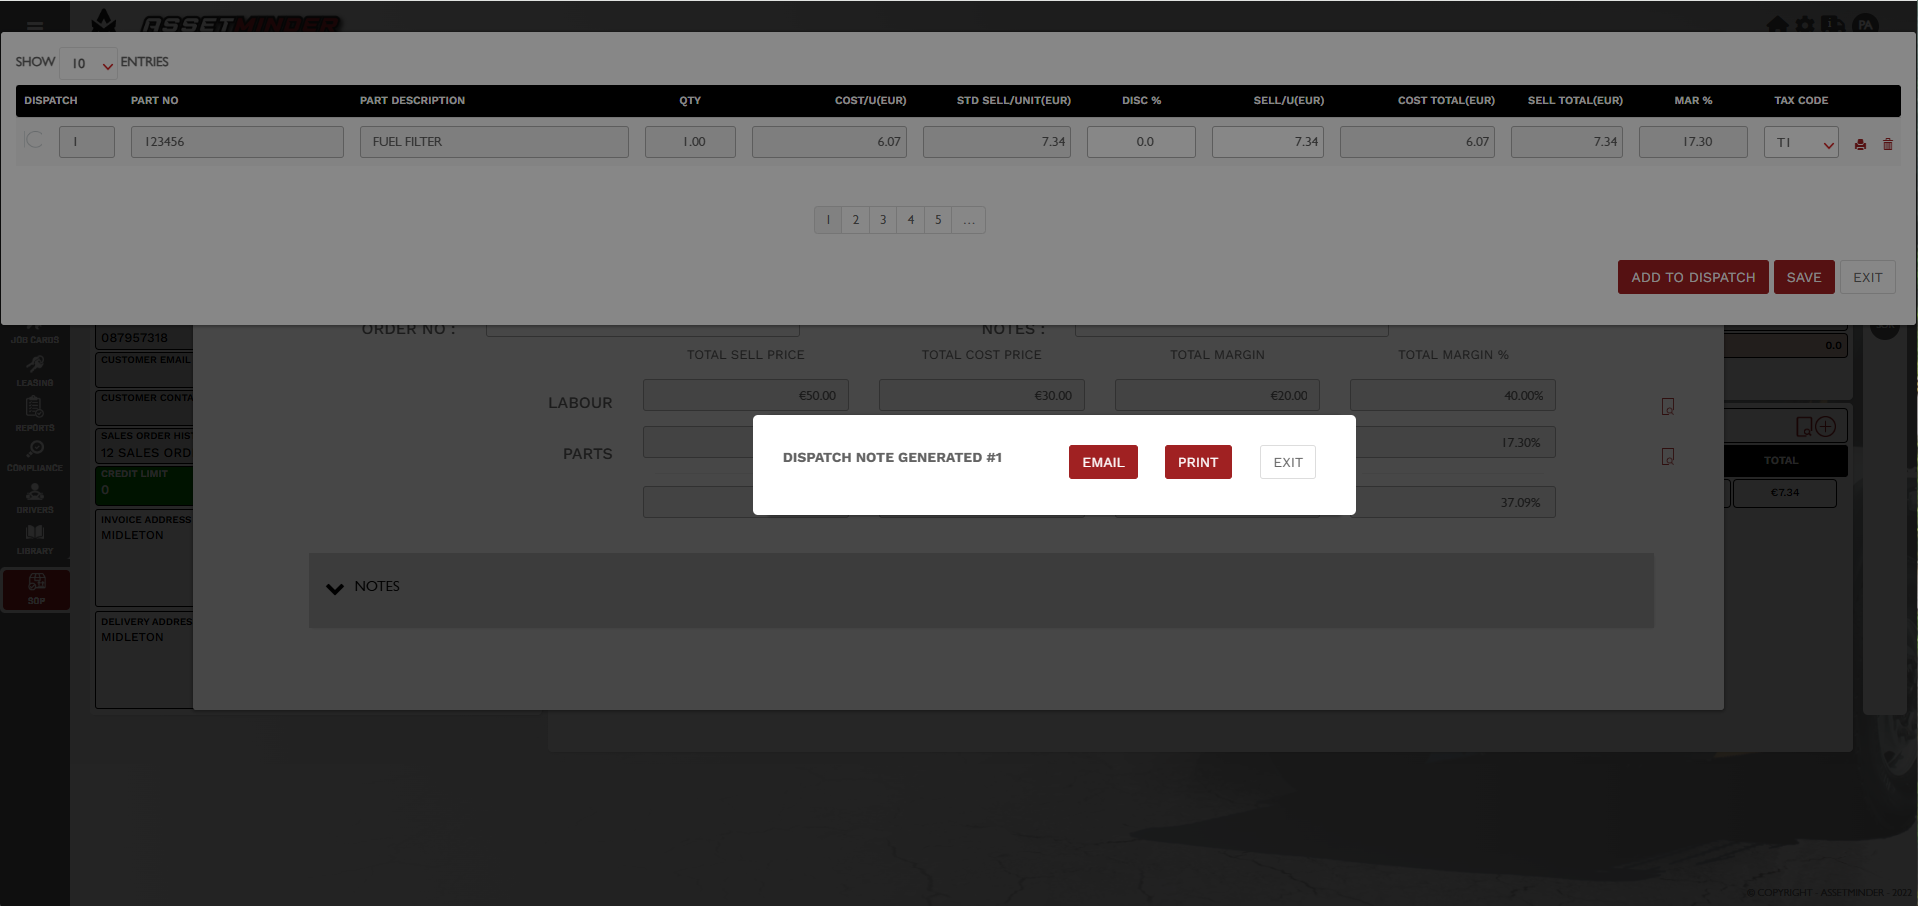
19. The dispatch docket can be either emailed and sent to the client or printed and attached to the parts. Click Exit when done.
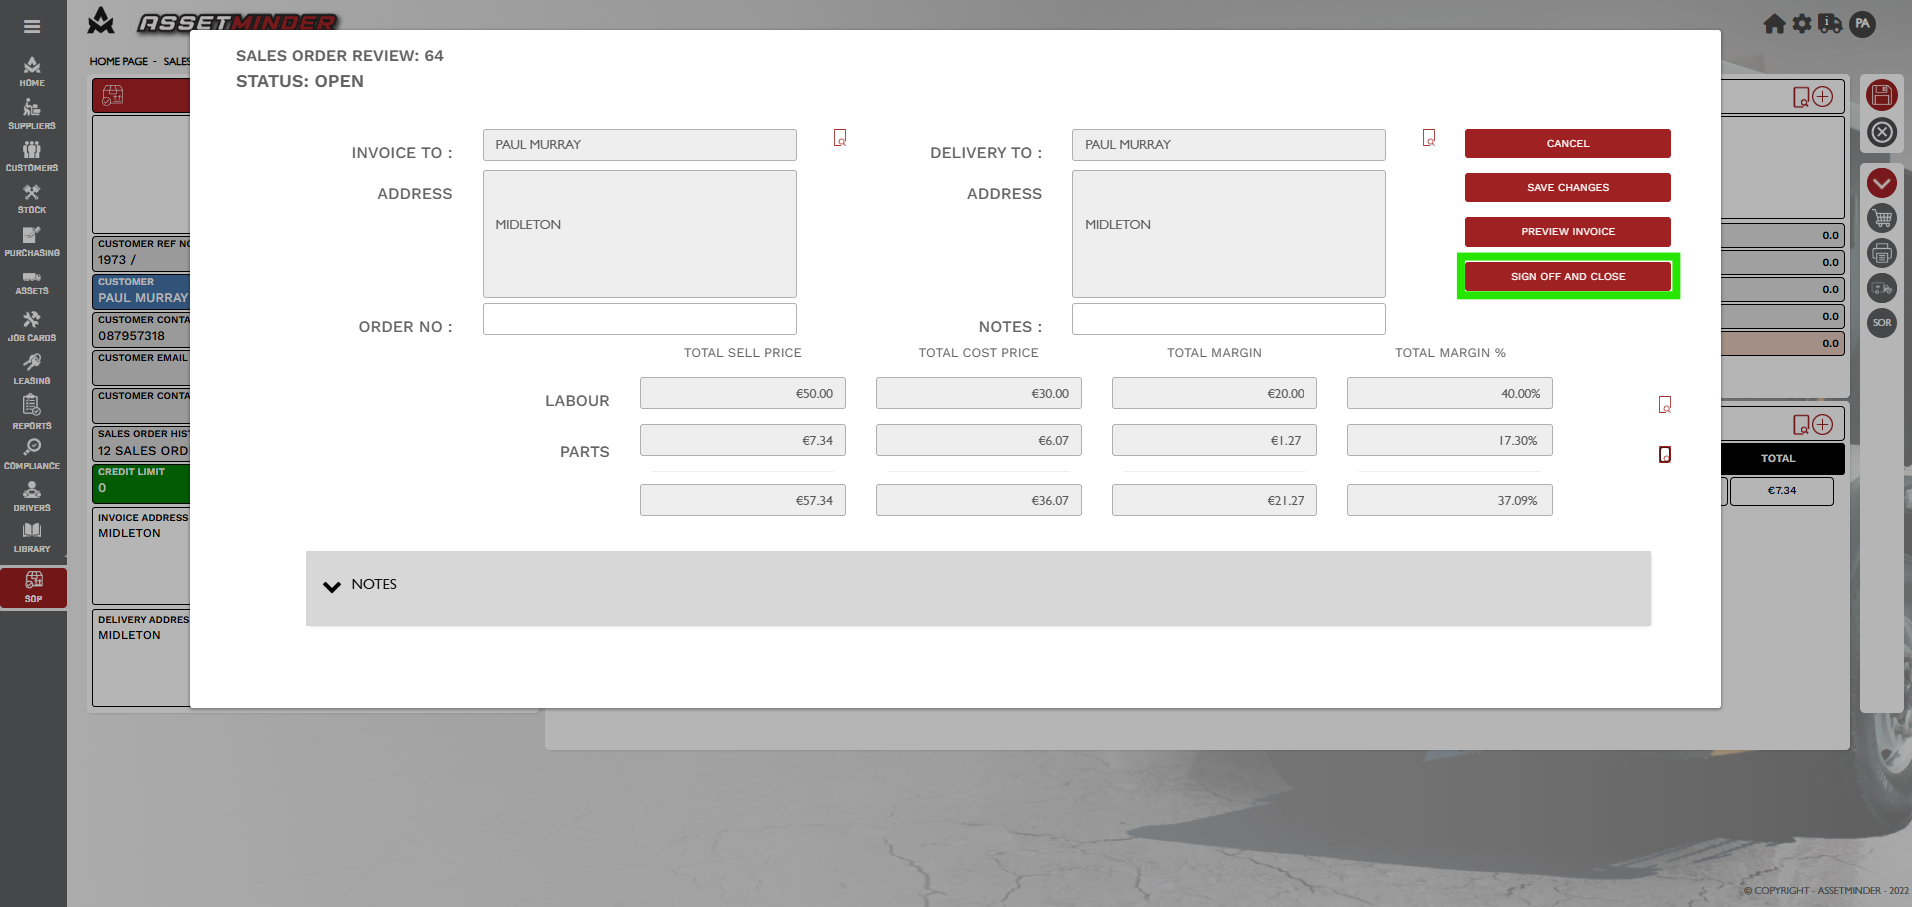
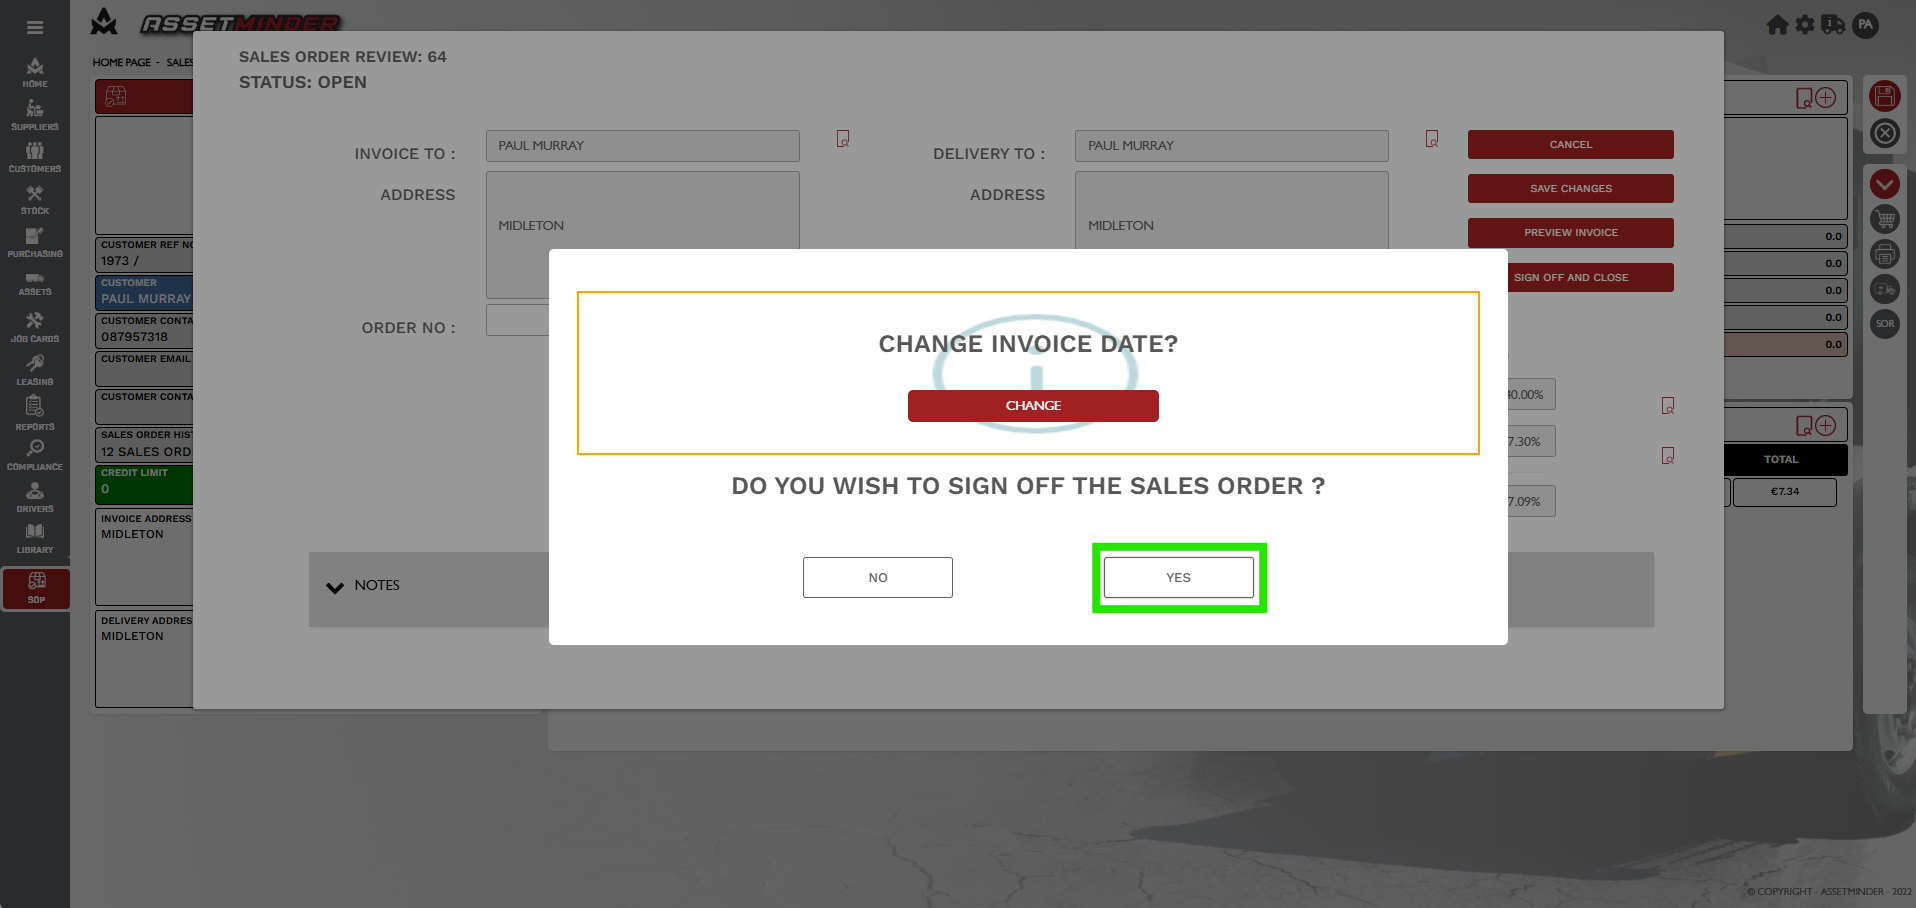
20. Back on the Sales Order Review screen, click Sign Off and Close.
21. Read the warning notice, and click YES.
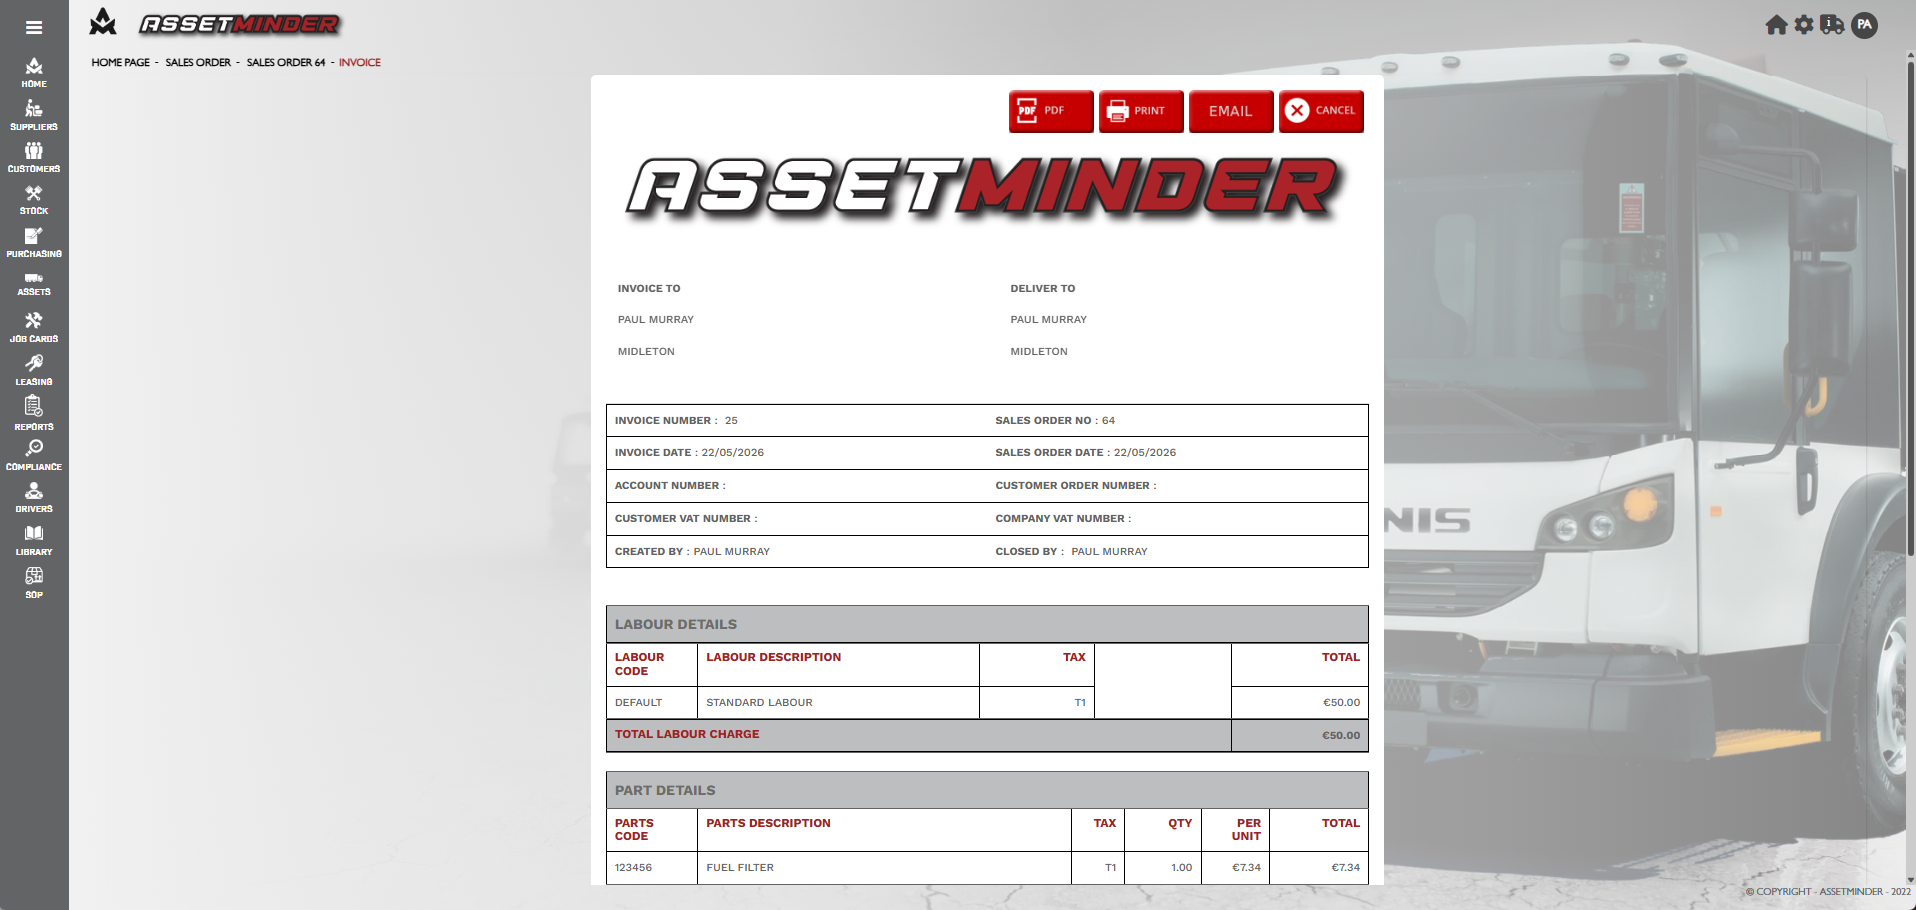
22. The invoice can then be printed or emailed to the customer.
Paul Murray
Comments