PROCEDURE
1.Click on Job Cards
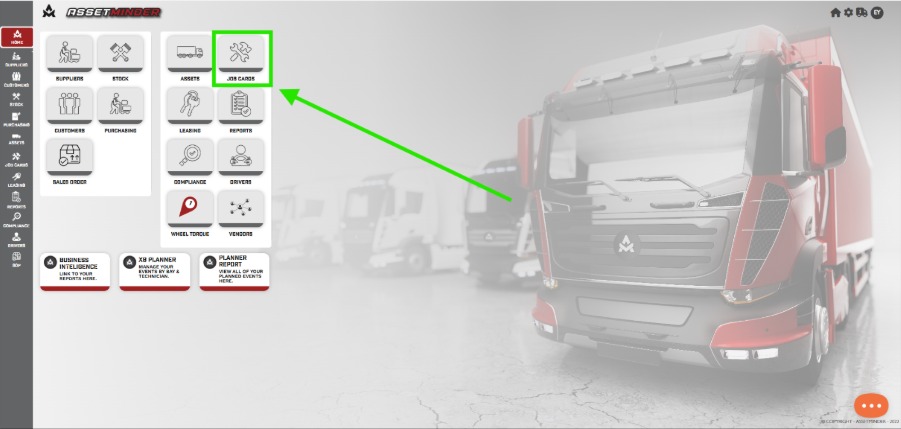
2. Create a New Job Card.
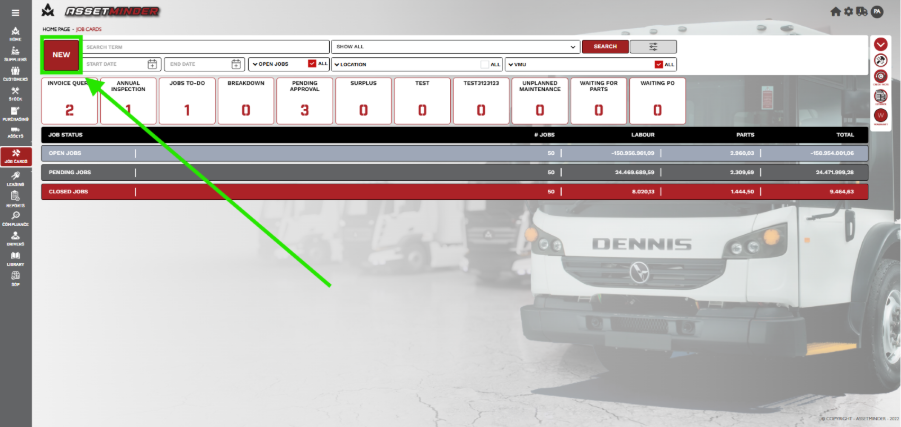
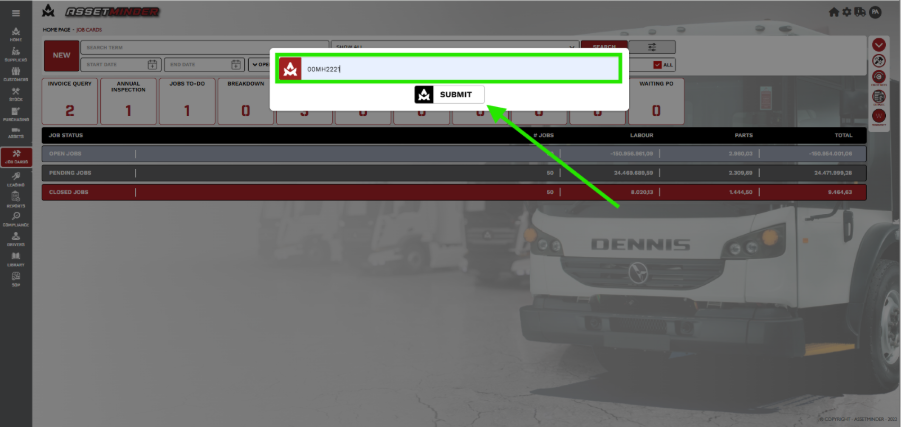
3.Enter the Registration Number and SUBMIT.
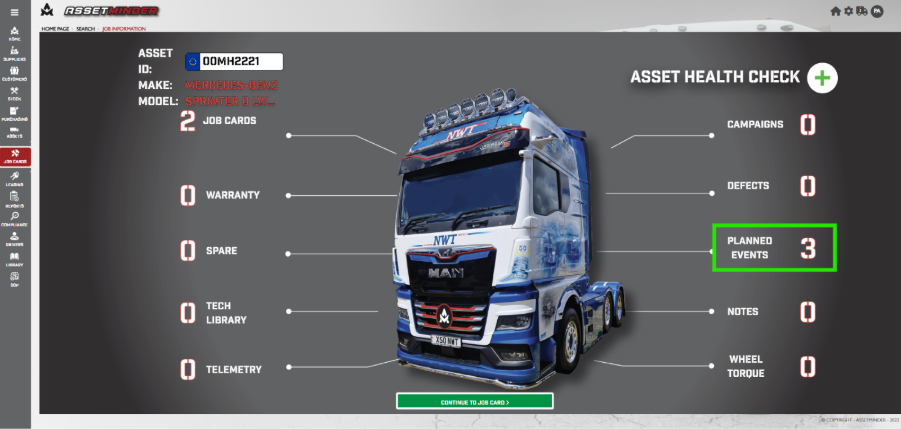
4. The Asset Health Check screen will appear. Click on the PLANNED EVENTS.
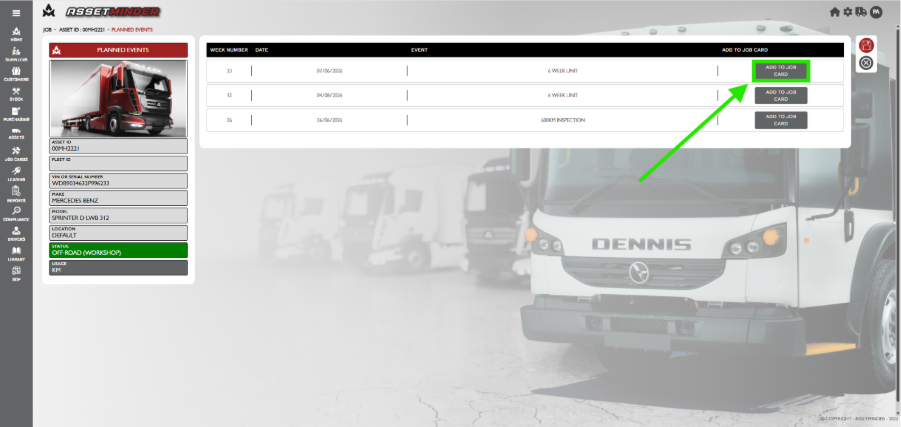
5. The screen will display the planned events. Select the ADD TO JOB CARD.
6. The Job card number will appear in the green box. Click SAVE.
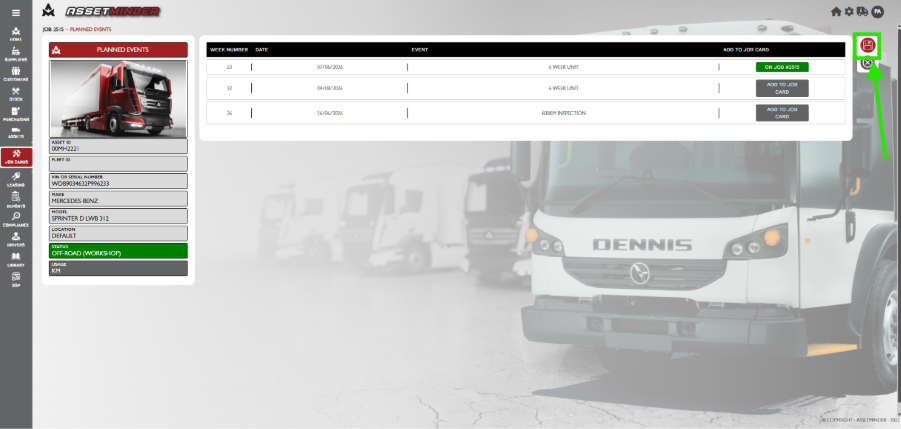
7. The planned event will be added to the Job Card.
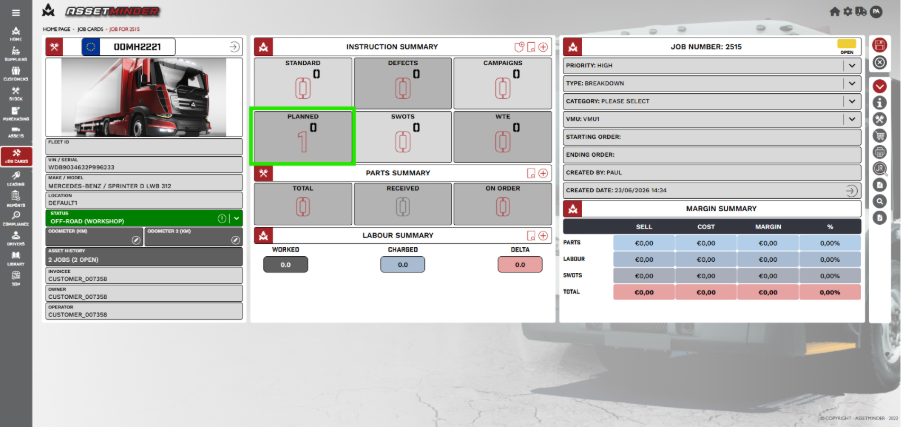
8. To Review Planned events click on the Instruction Summary review icon.
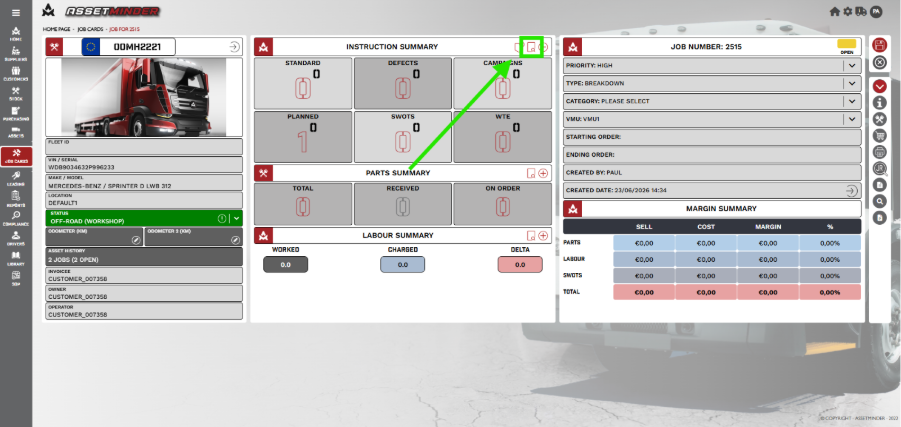
9. Expand the to review the planned instruction.
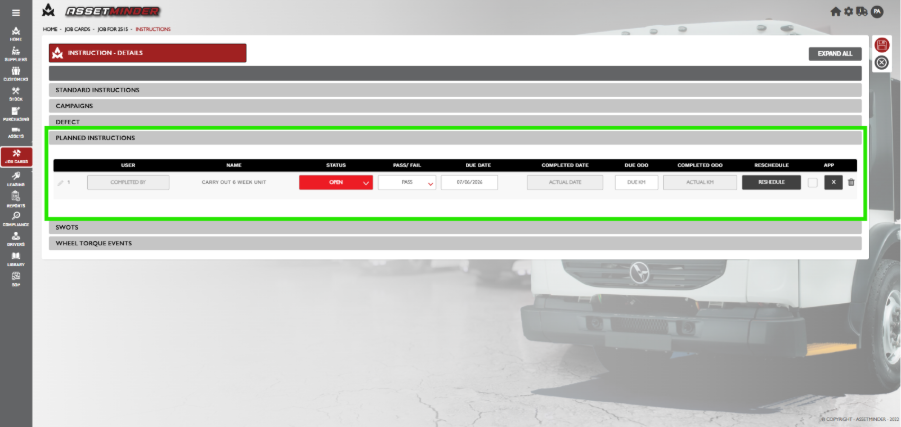
10. Open the job Card on the App. The Planner Event will show (1)(0). This is indicated that there is one planned event and is not completed.
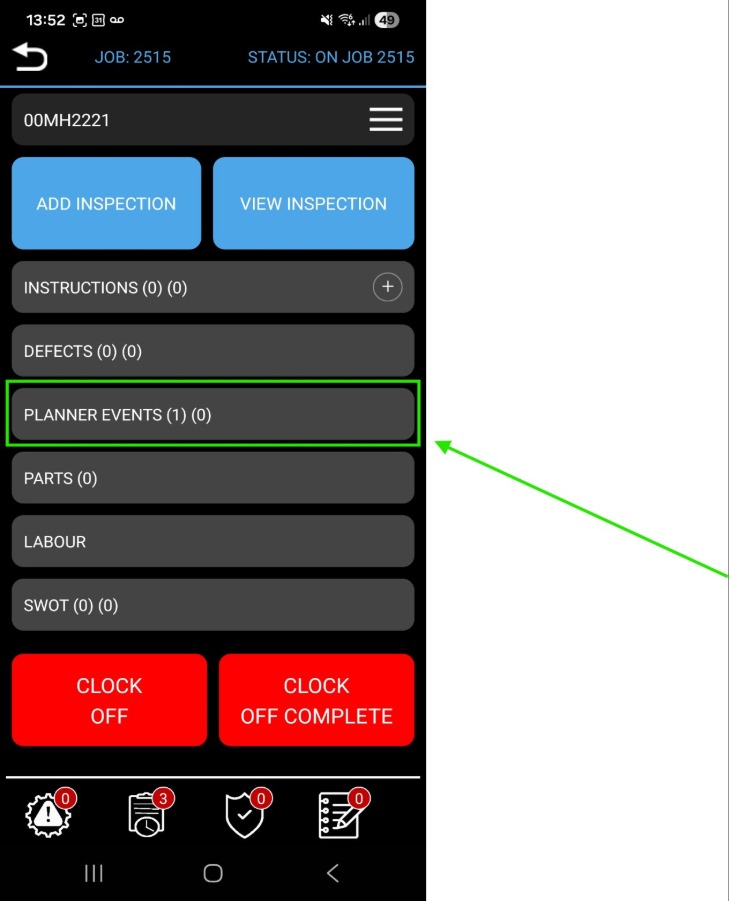
11. Click on the Planner Events.
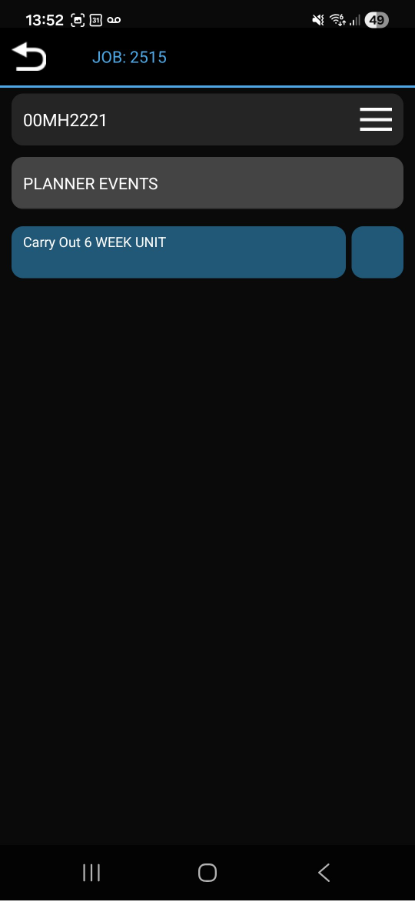
12. When the Event is complete Check the Box.
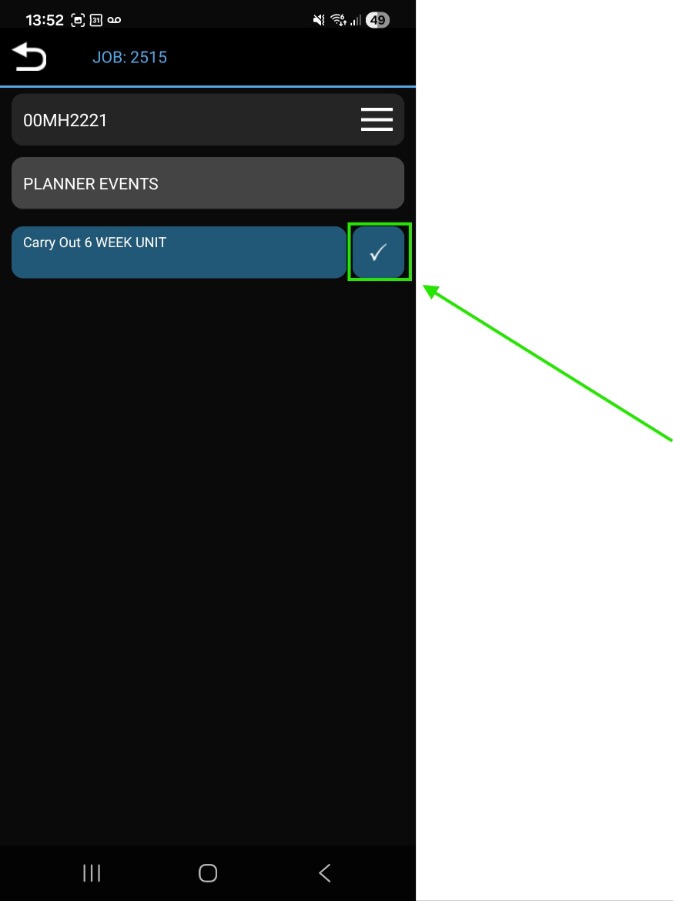
13. Return to Job Screen. The planner events will now show (1)(1). This indicates the Planned event is complete.
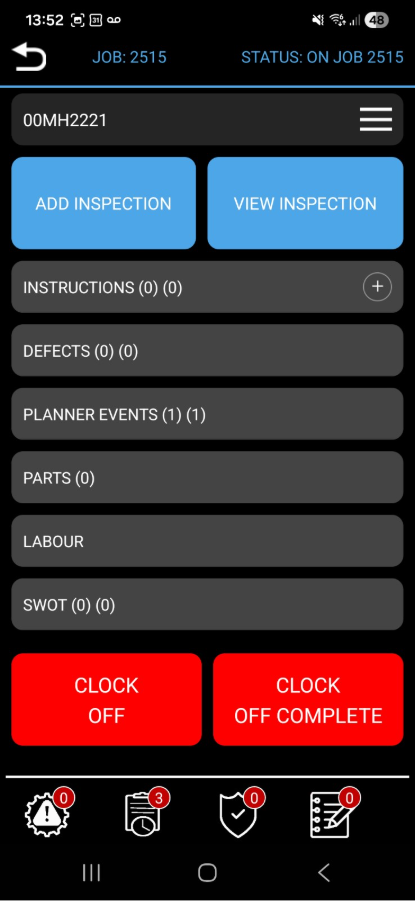
14. On the web, the job shows the planned event as completed (the small 1 denotes one completed).
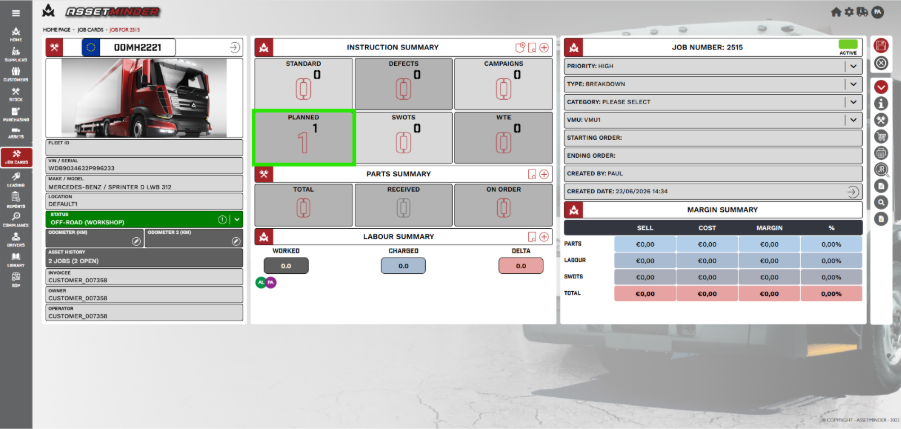
15. To close the Planned events click on the Instruction Summary review icon.
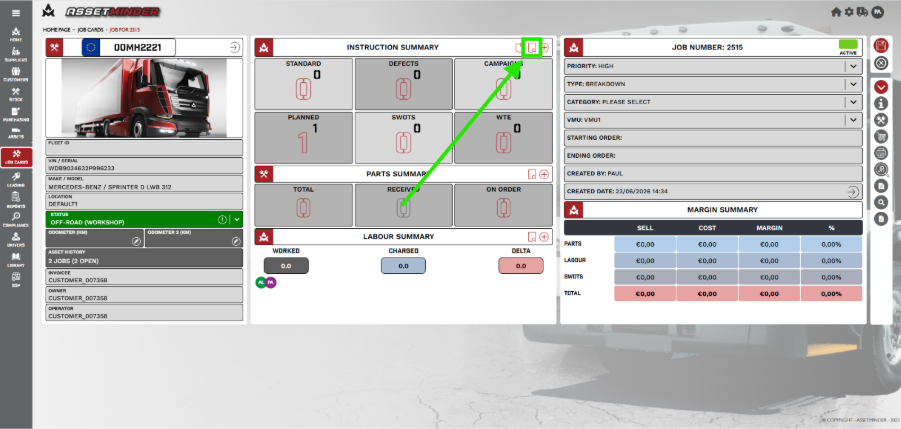
16. Expand the to review the planned instruction.
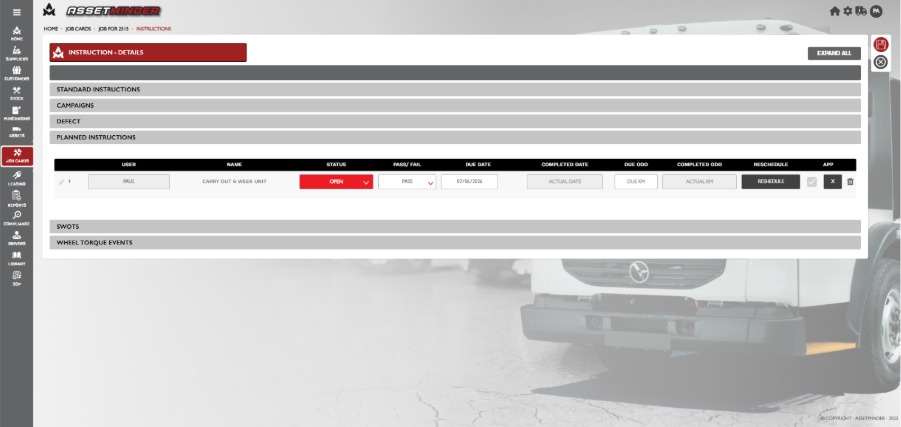
17. Changes status to Closed.
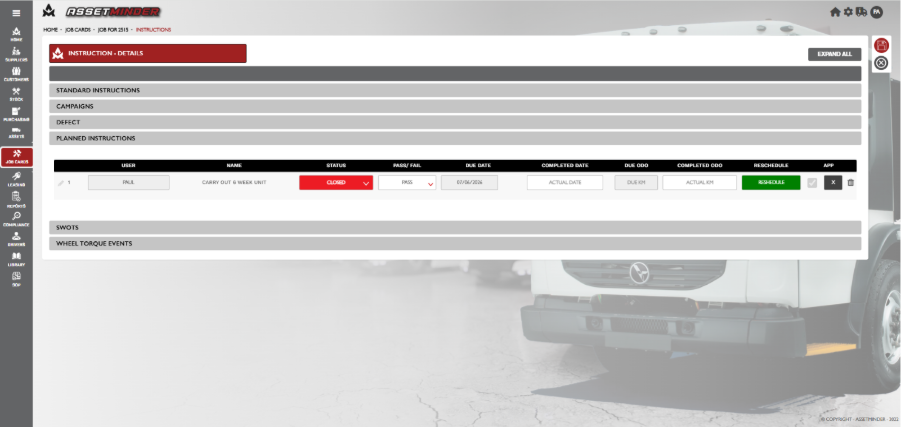
18. Enter the Actual date the planned event was carried out on.
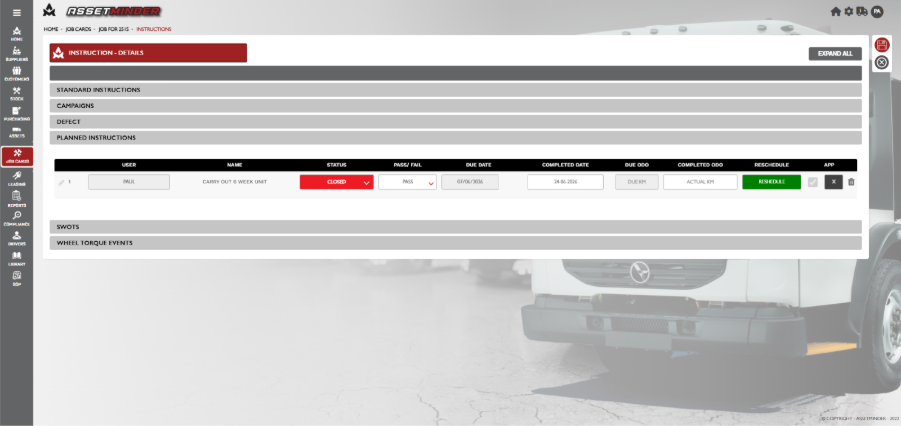
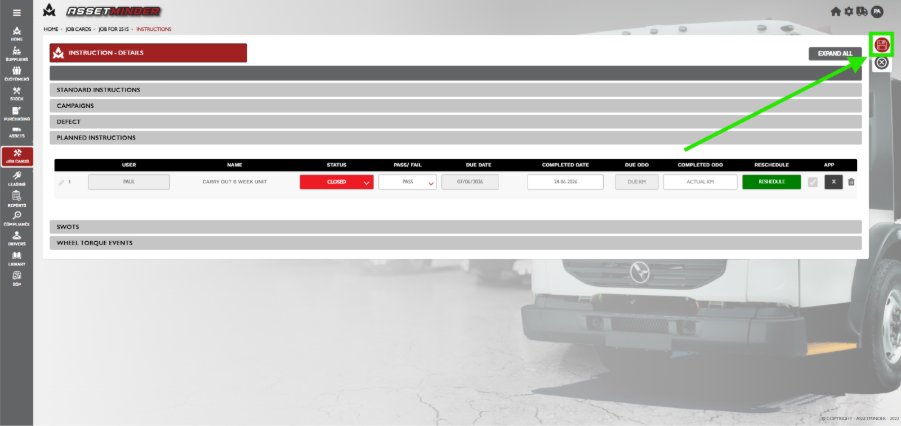
19. Click save to complete.
Paul Murray
Comments