Background
Scheduled reports are automatically emailed to a user's email inbox, at intervals defined by the report schedule.
Procedure
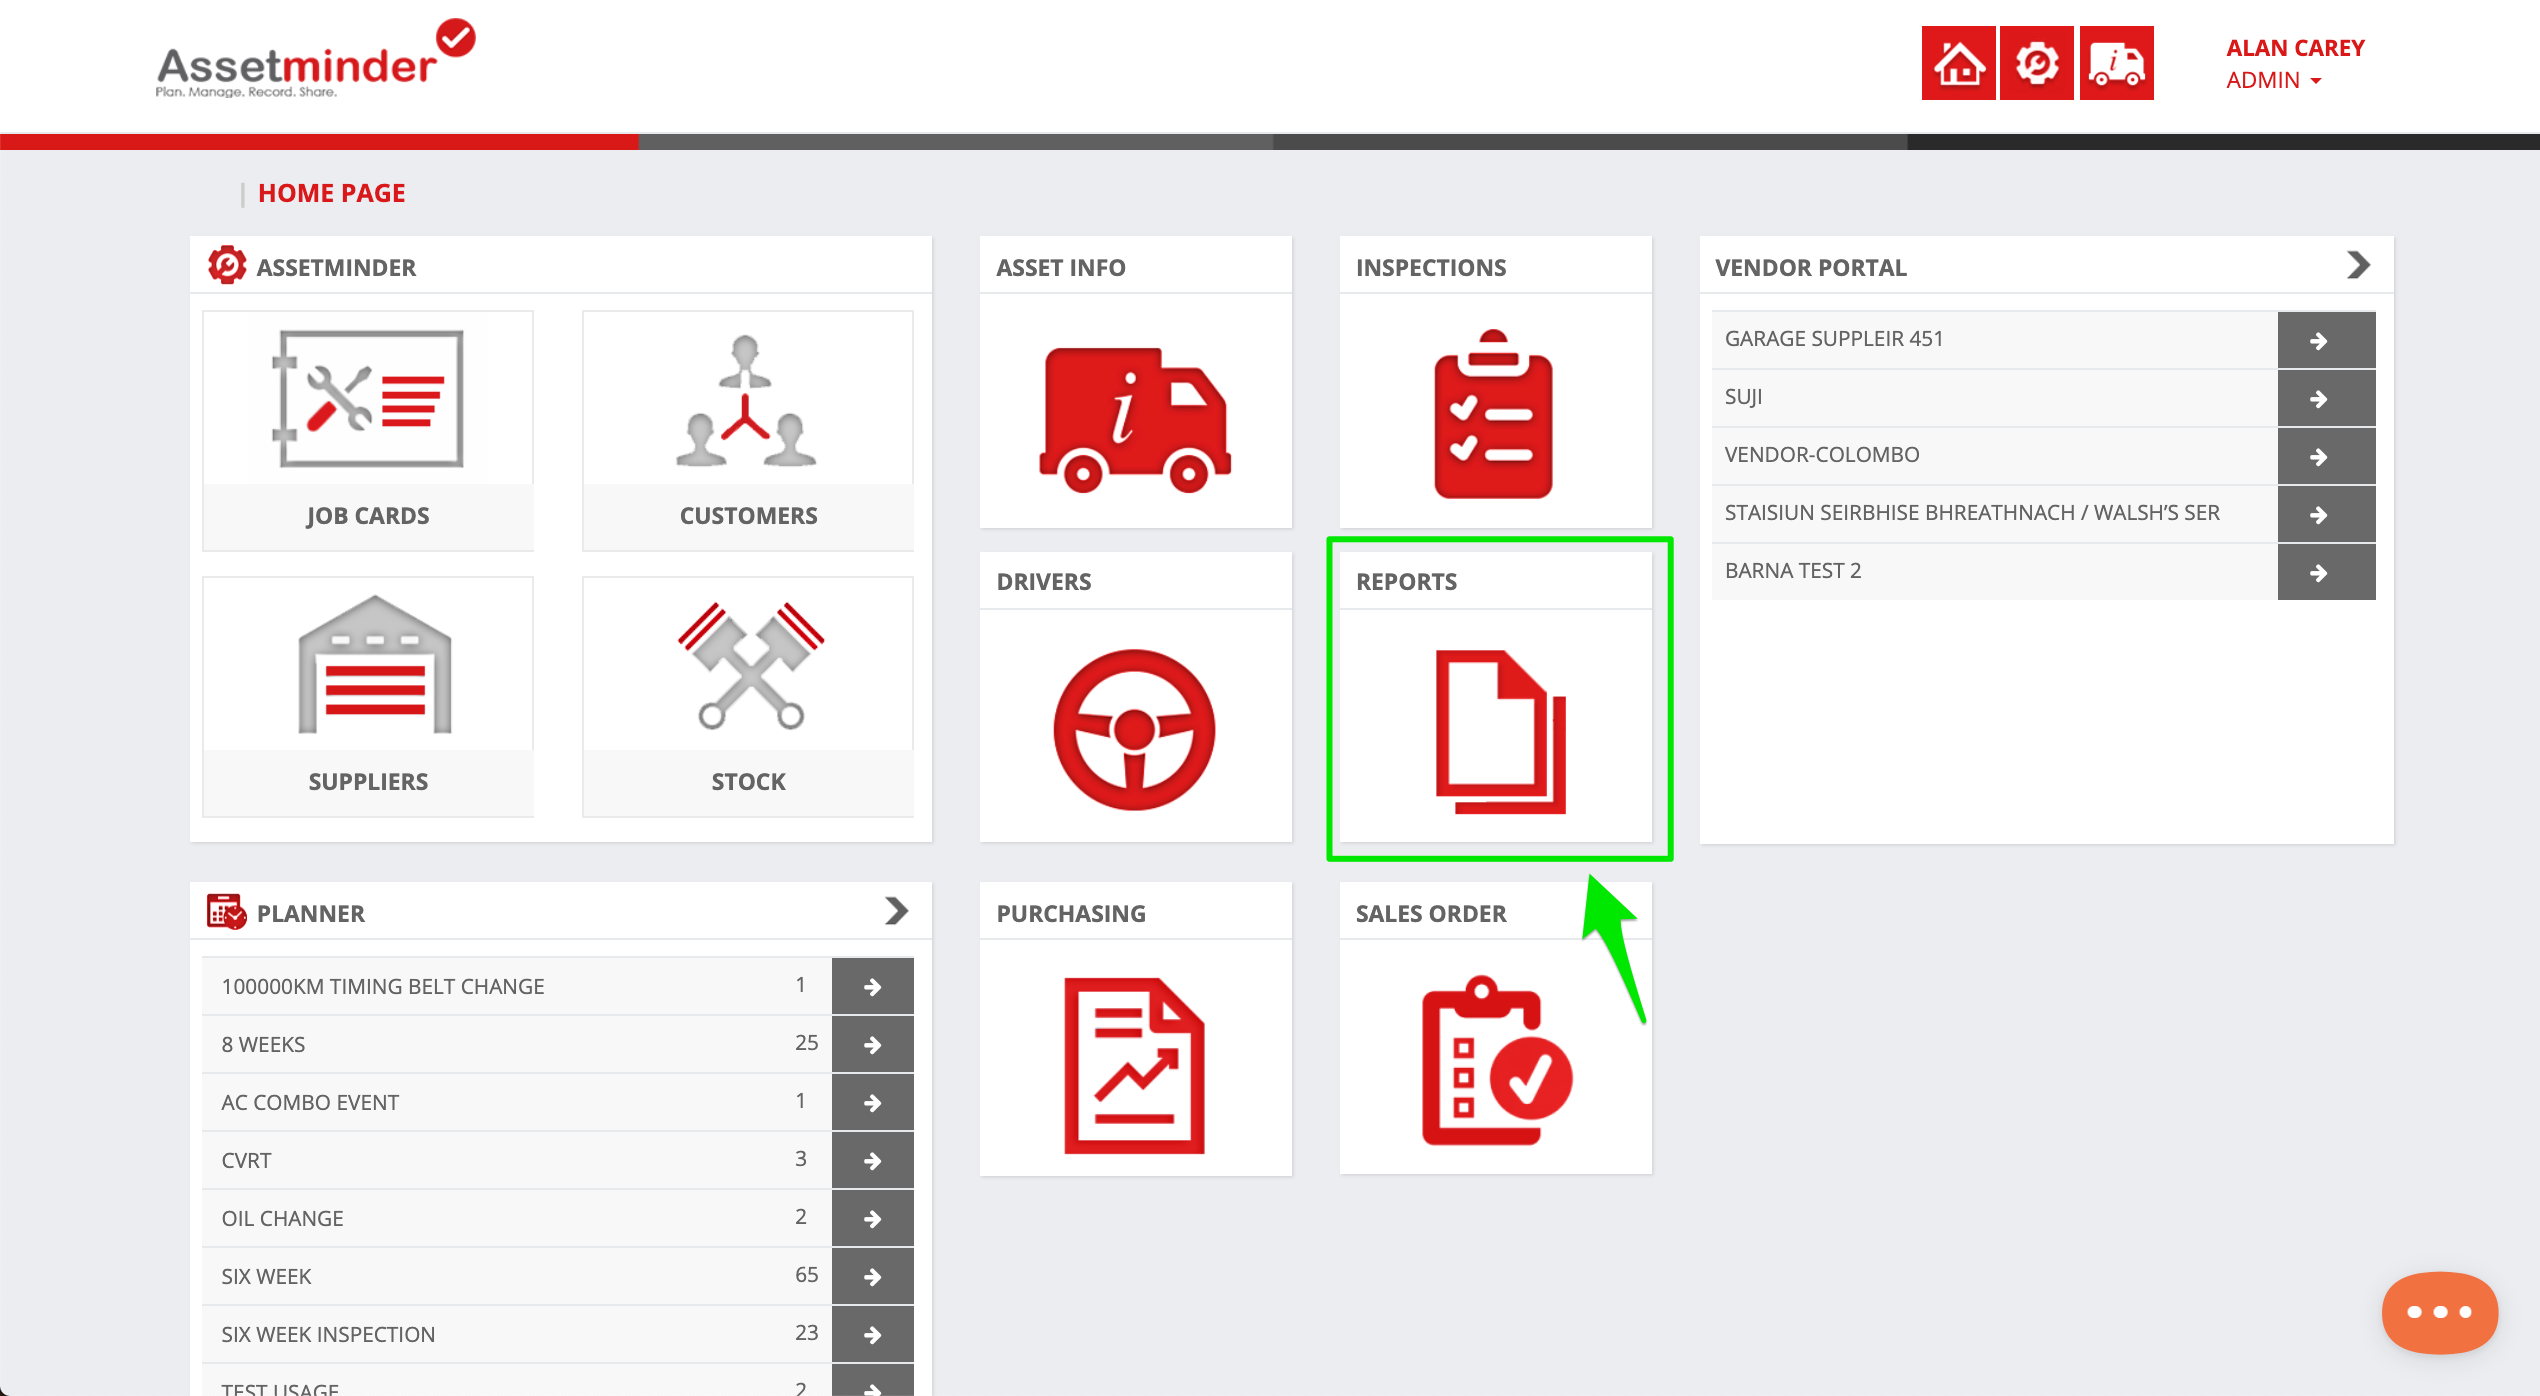
1. To create a scheduled report, click Reports on the home screen
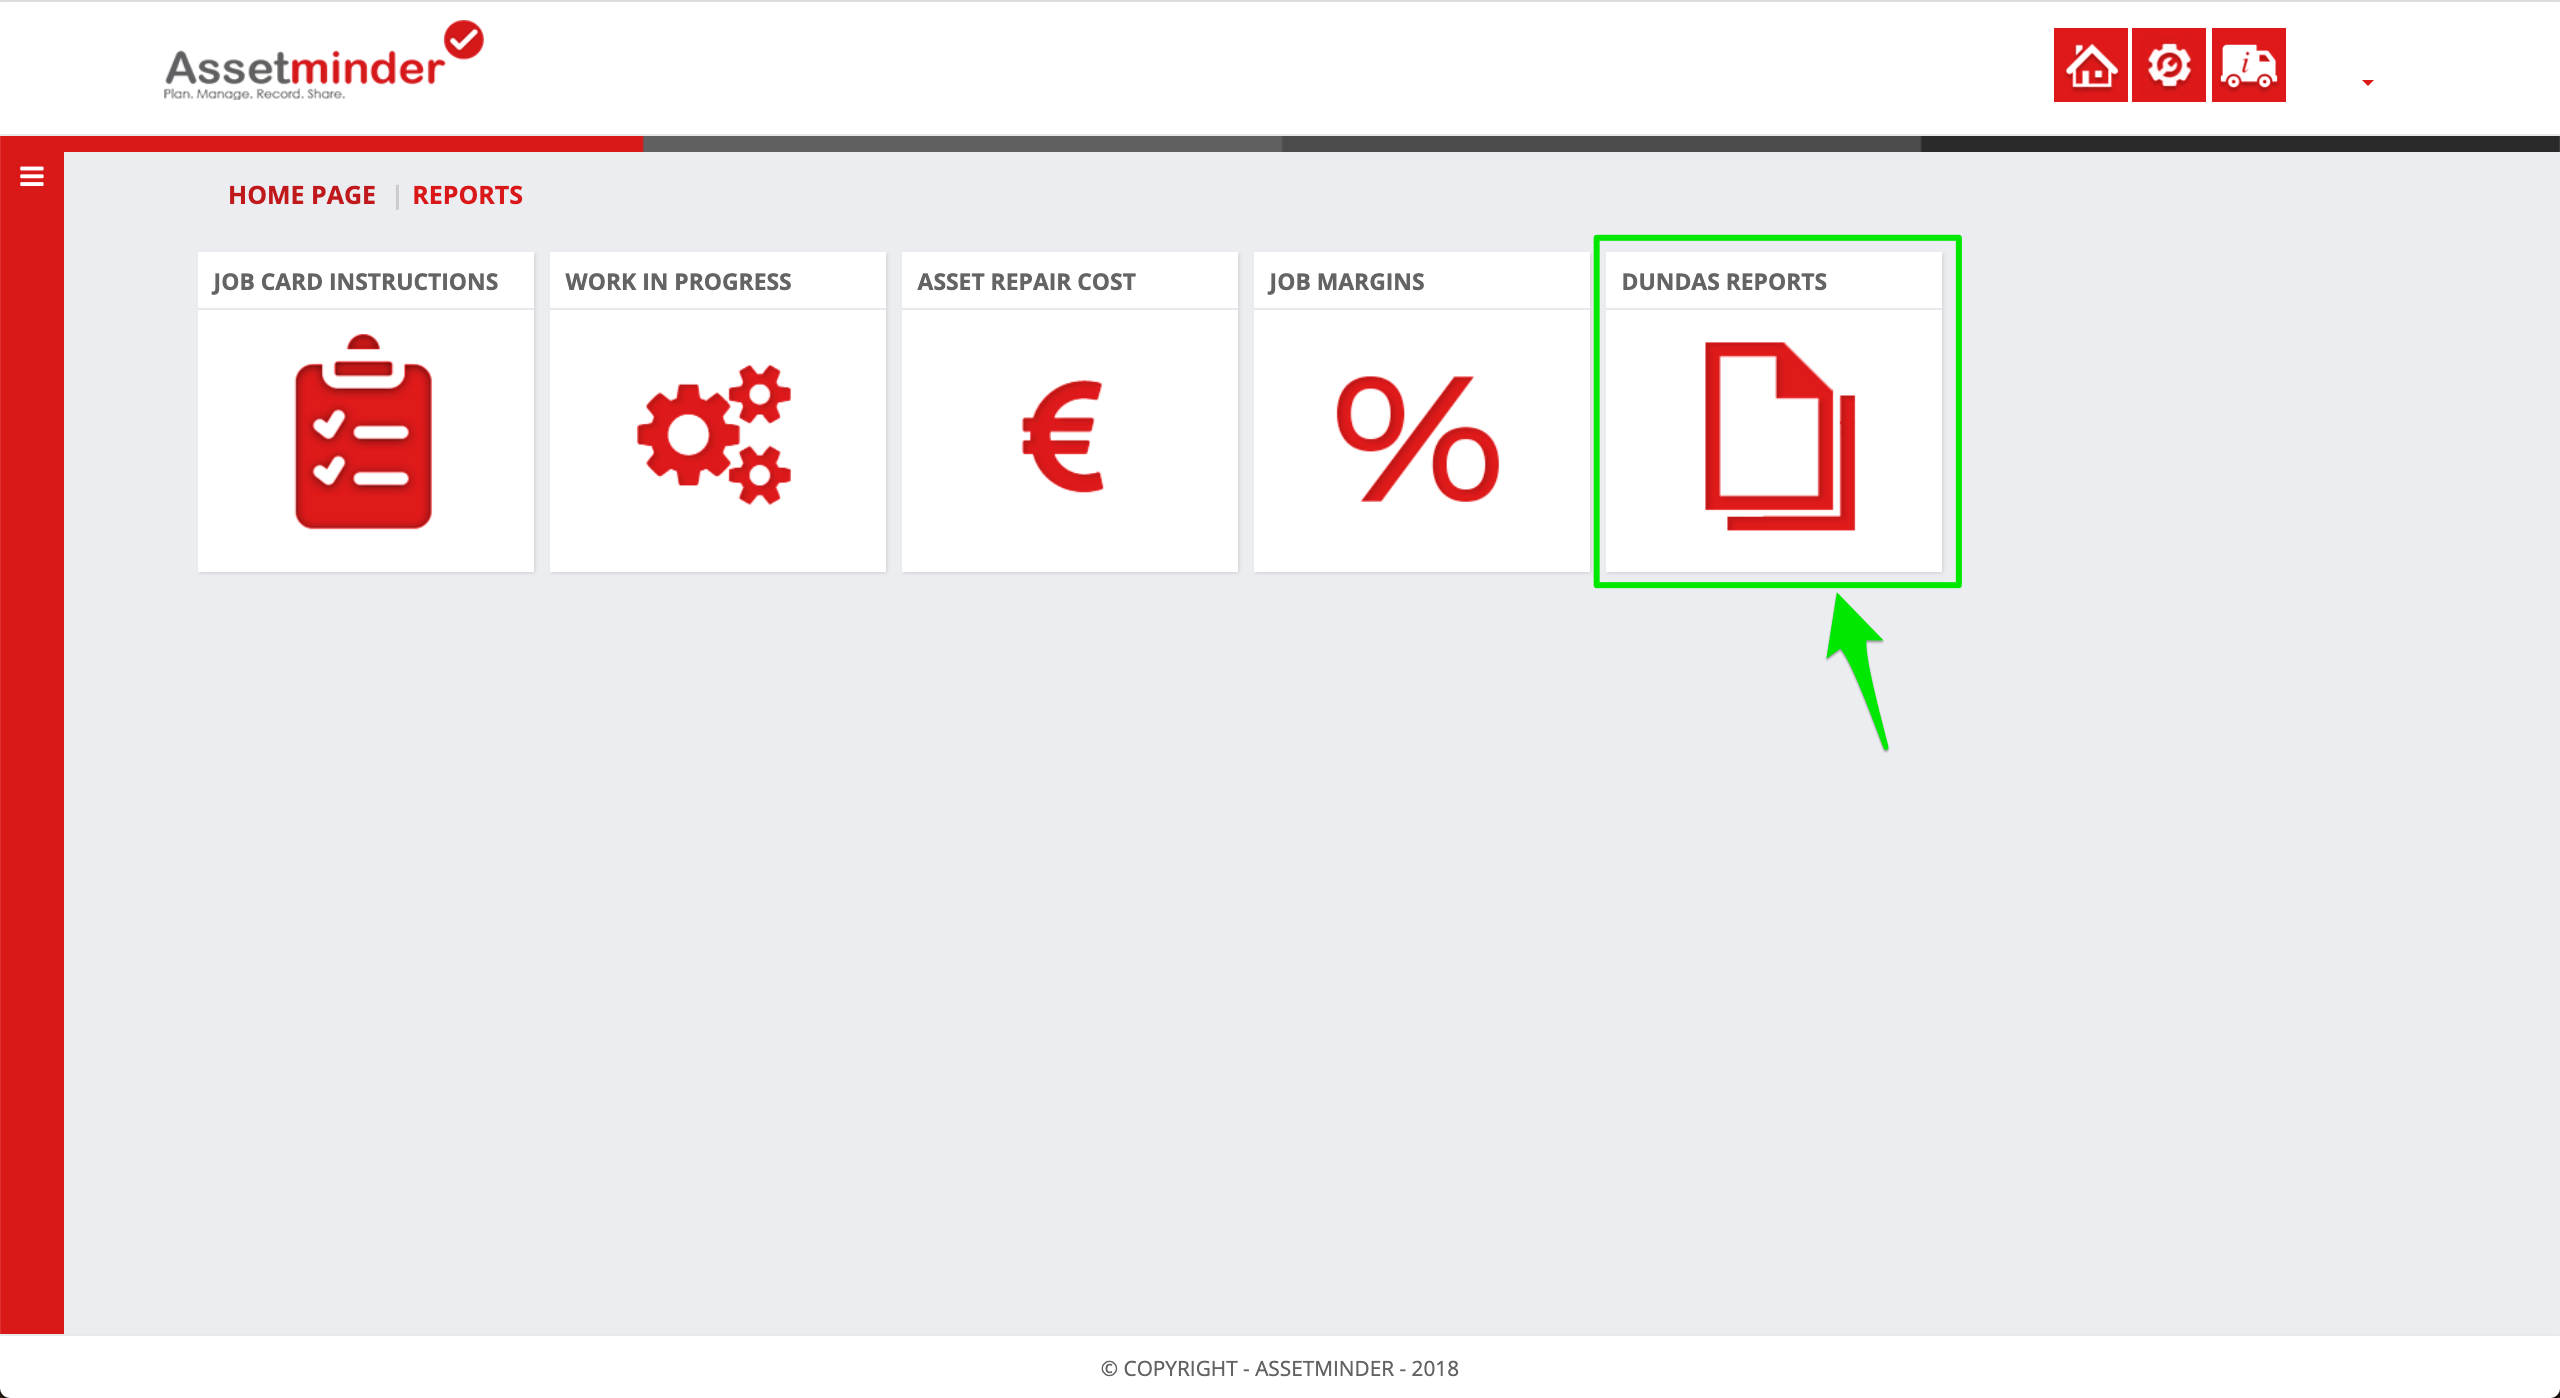
2. Click Dundas Reports
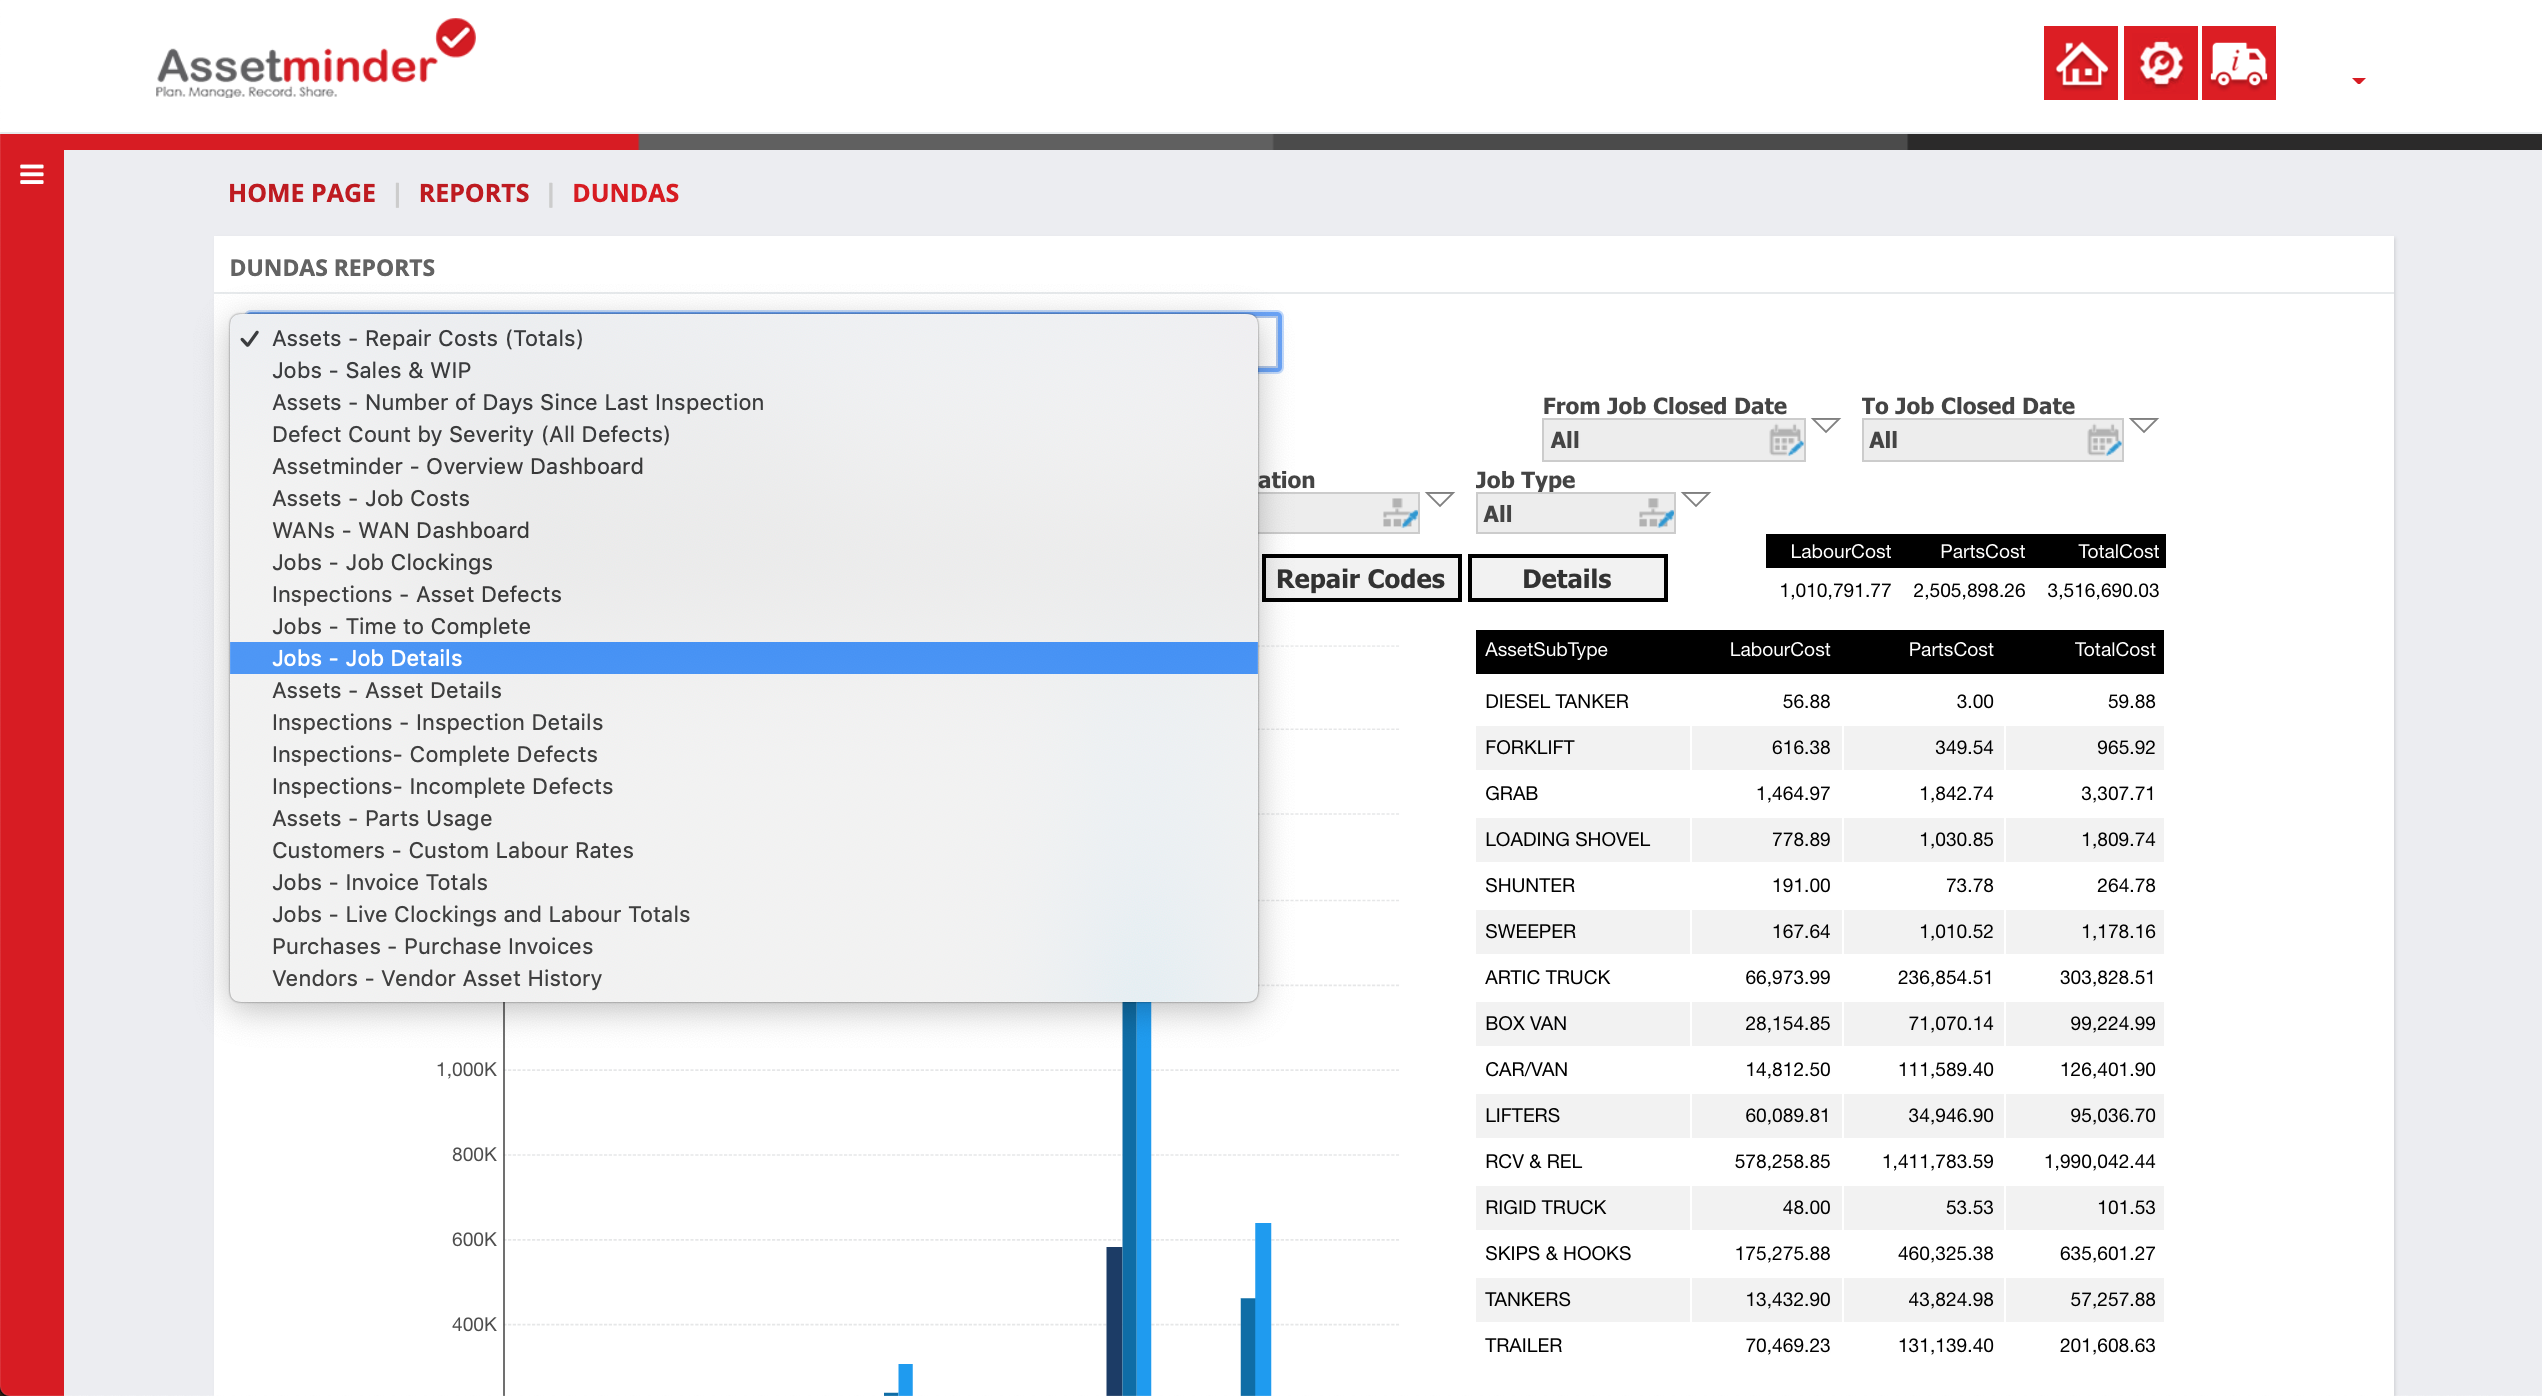
3. Select the report from the available list
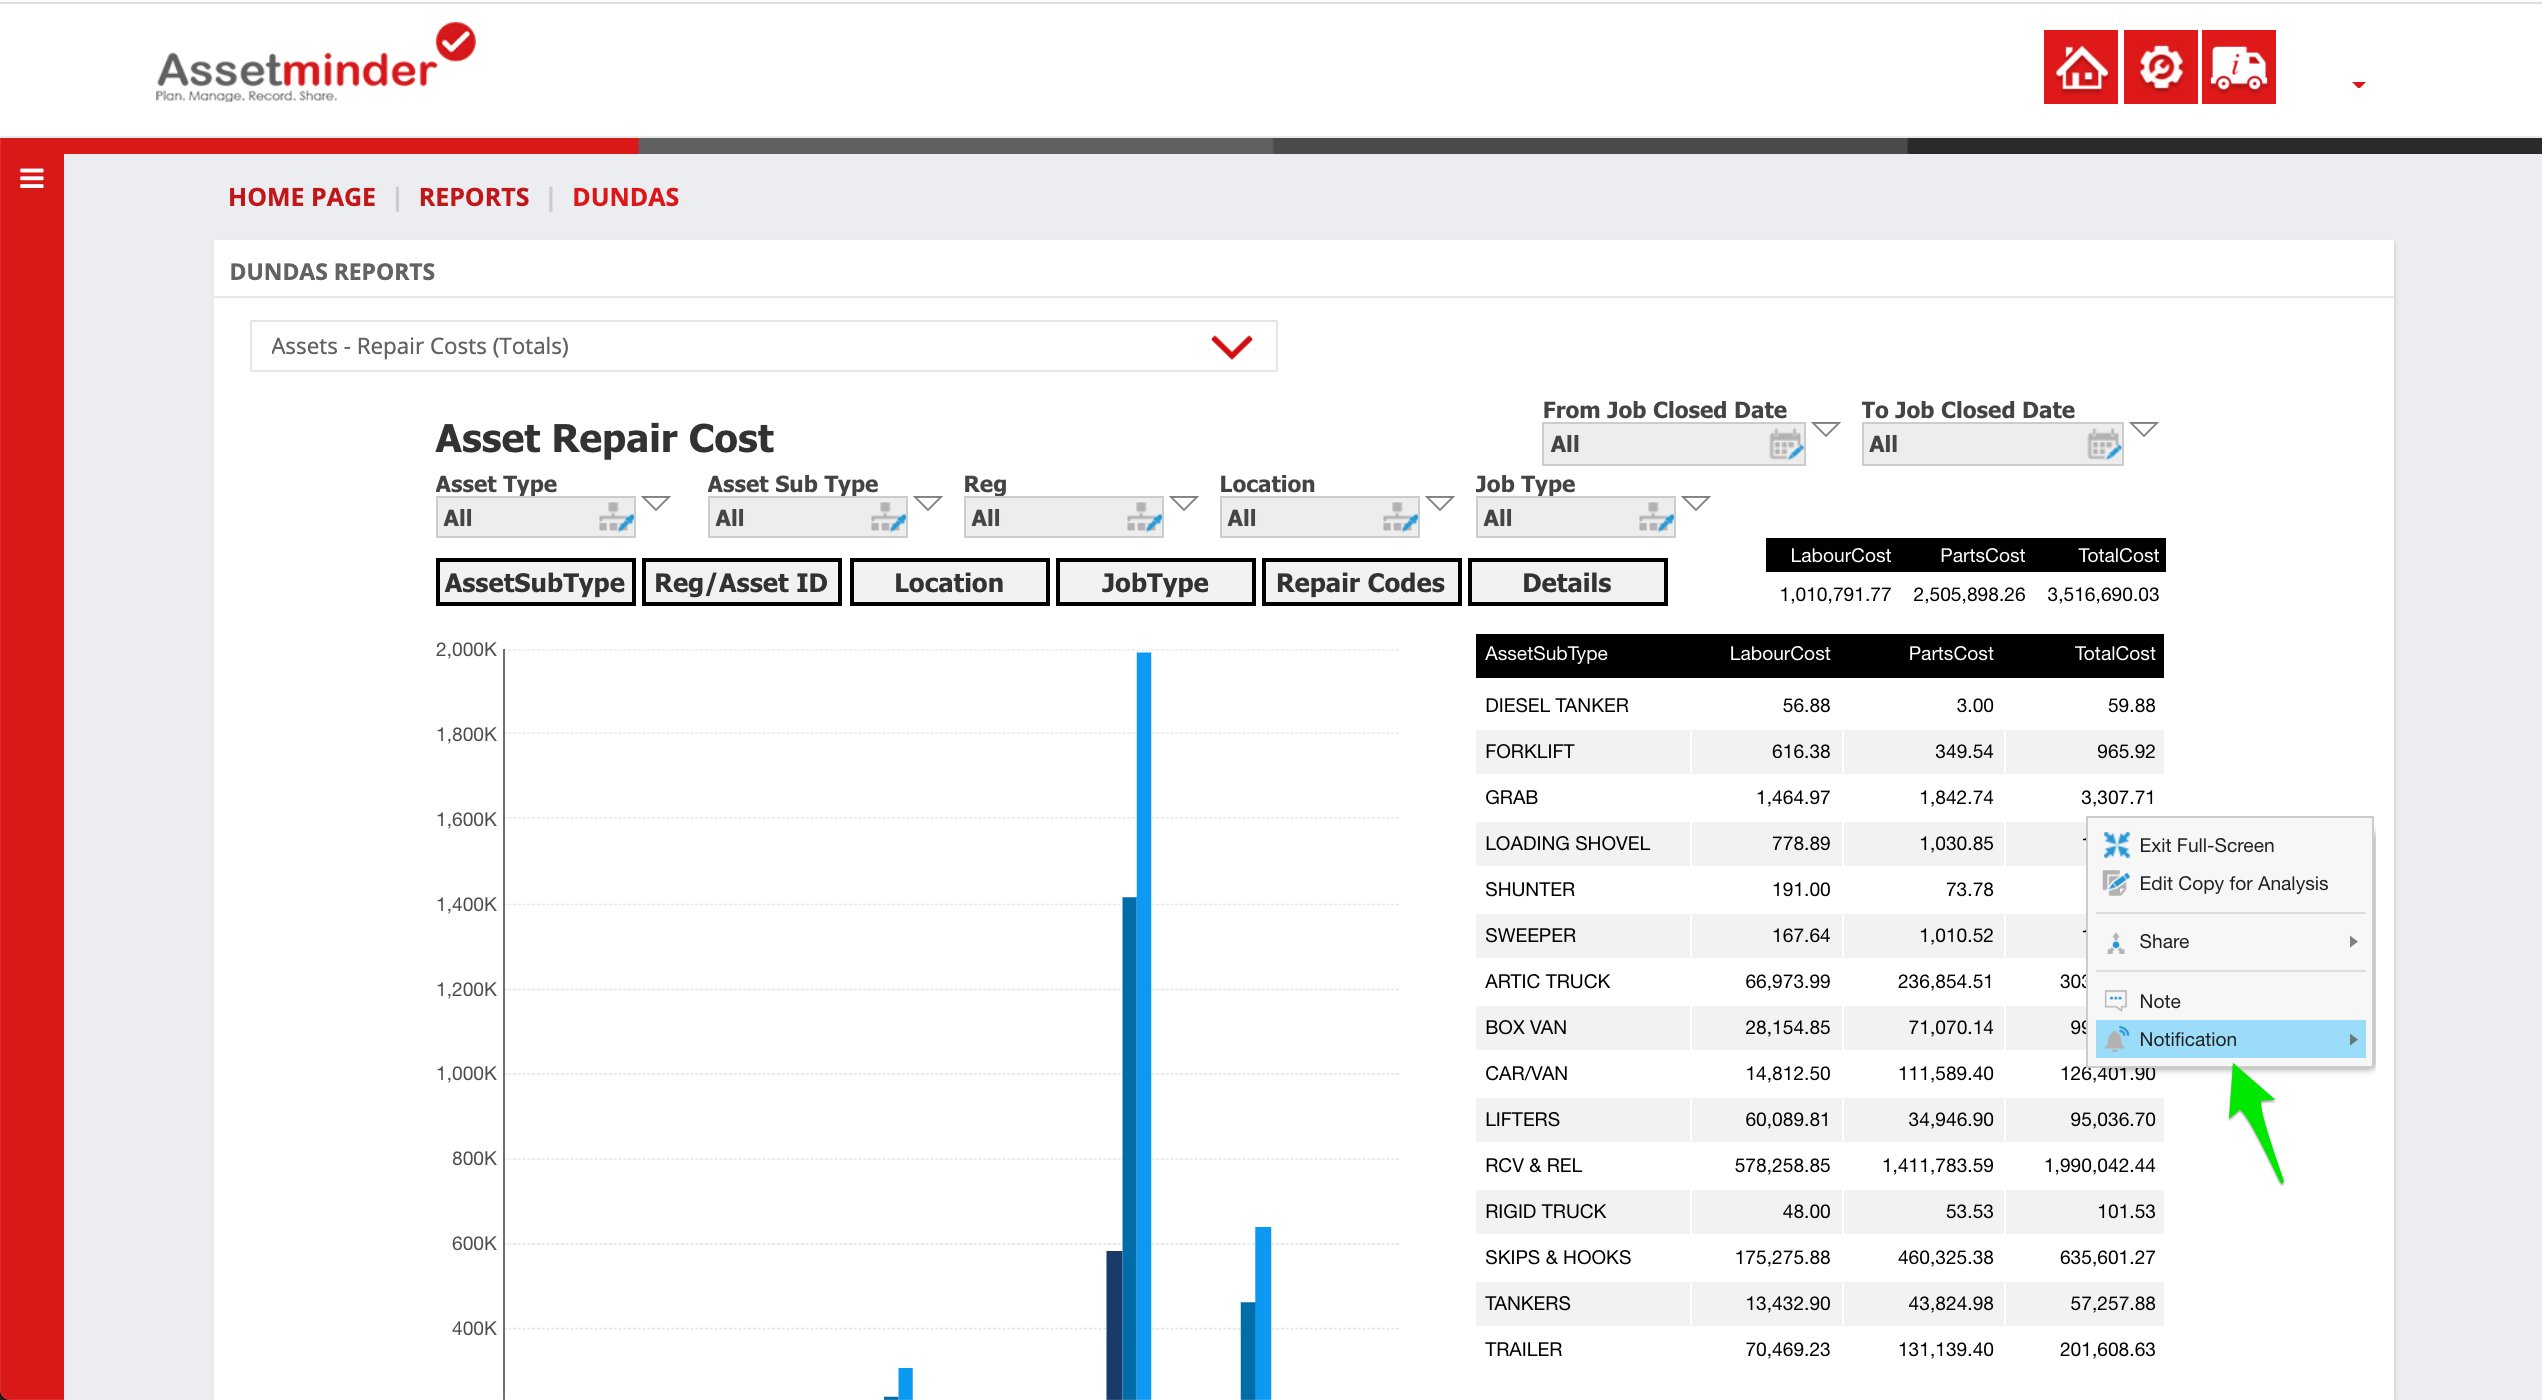
4. Right-click on the side of the report to get the pop-up window. Click Notification. (If you do not see the Notification option, move the mouse outside the report area and try right-click again)
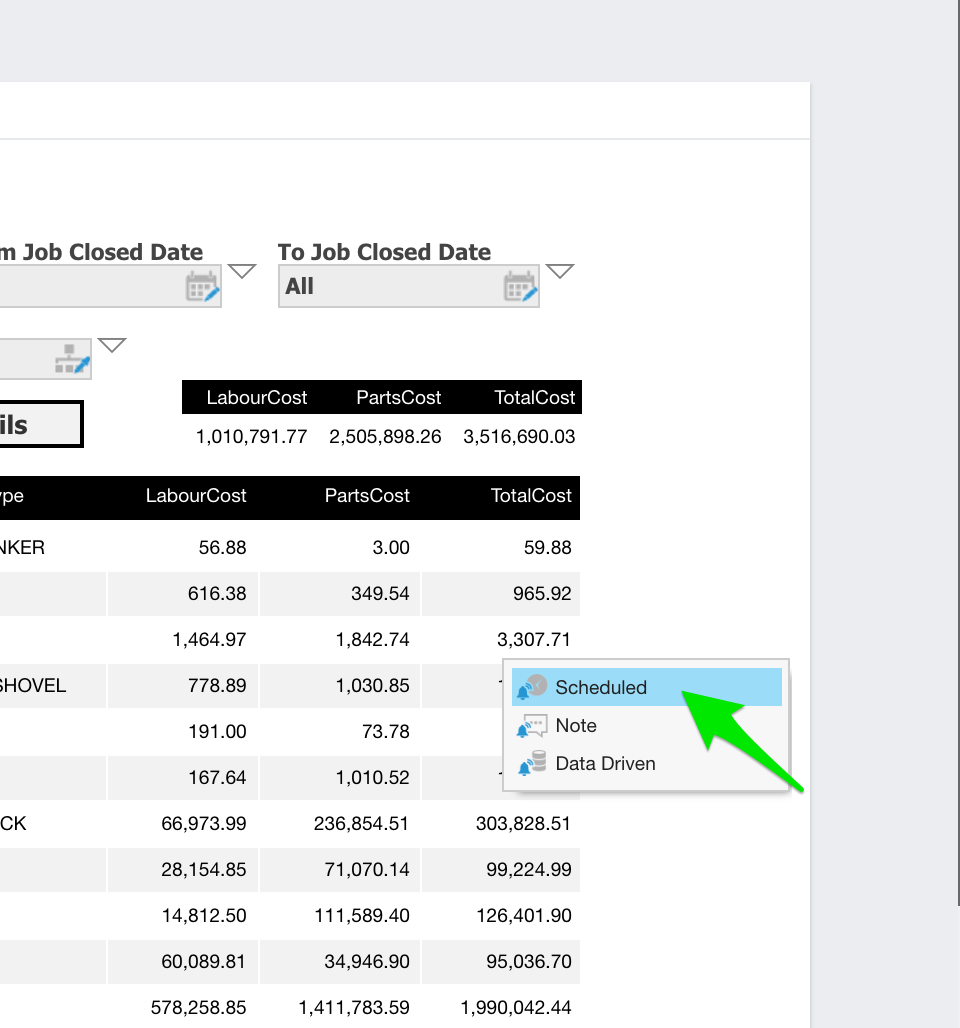
5. Click Scheduled
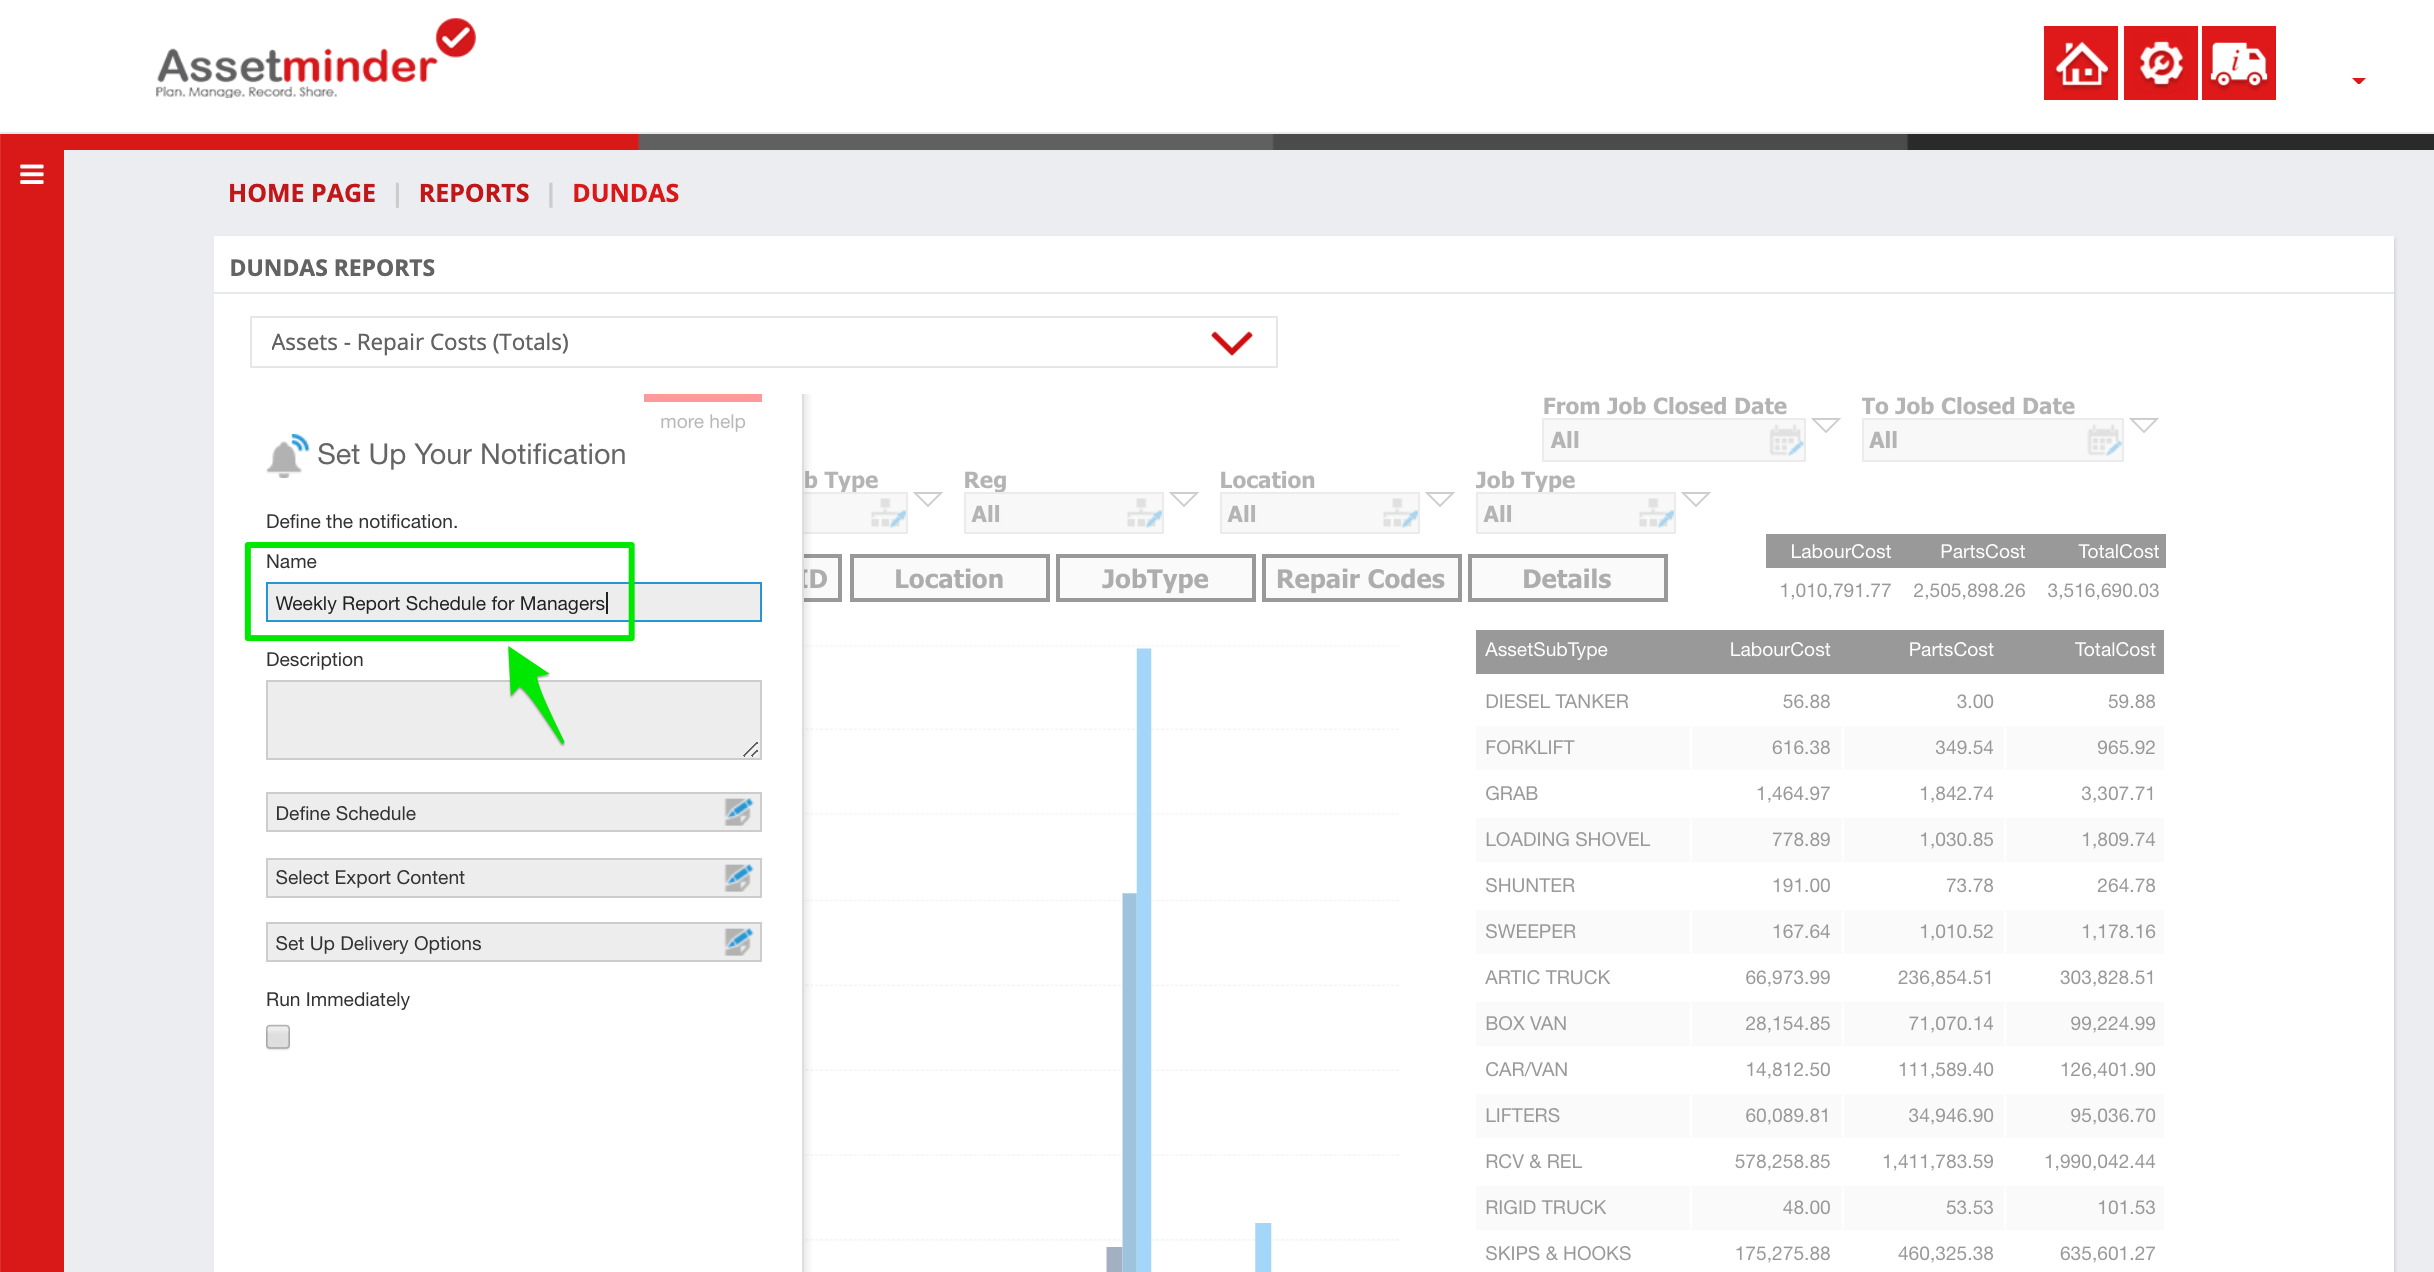
6. Assign a Name to the schedule
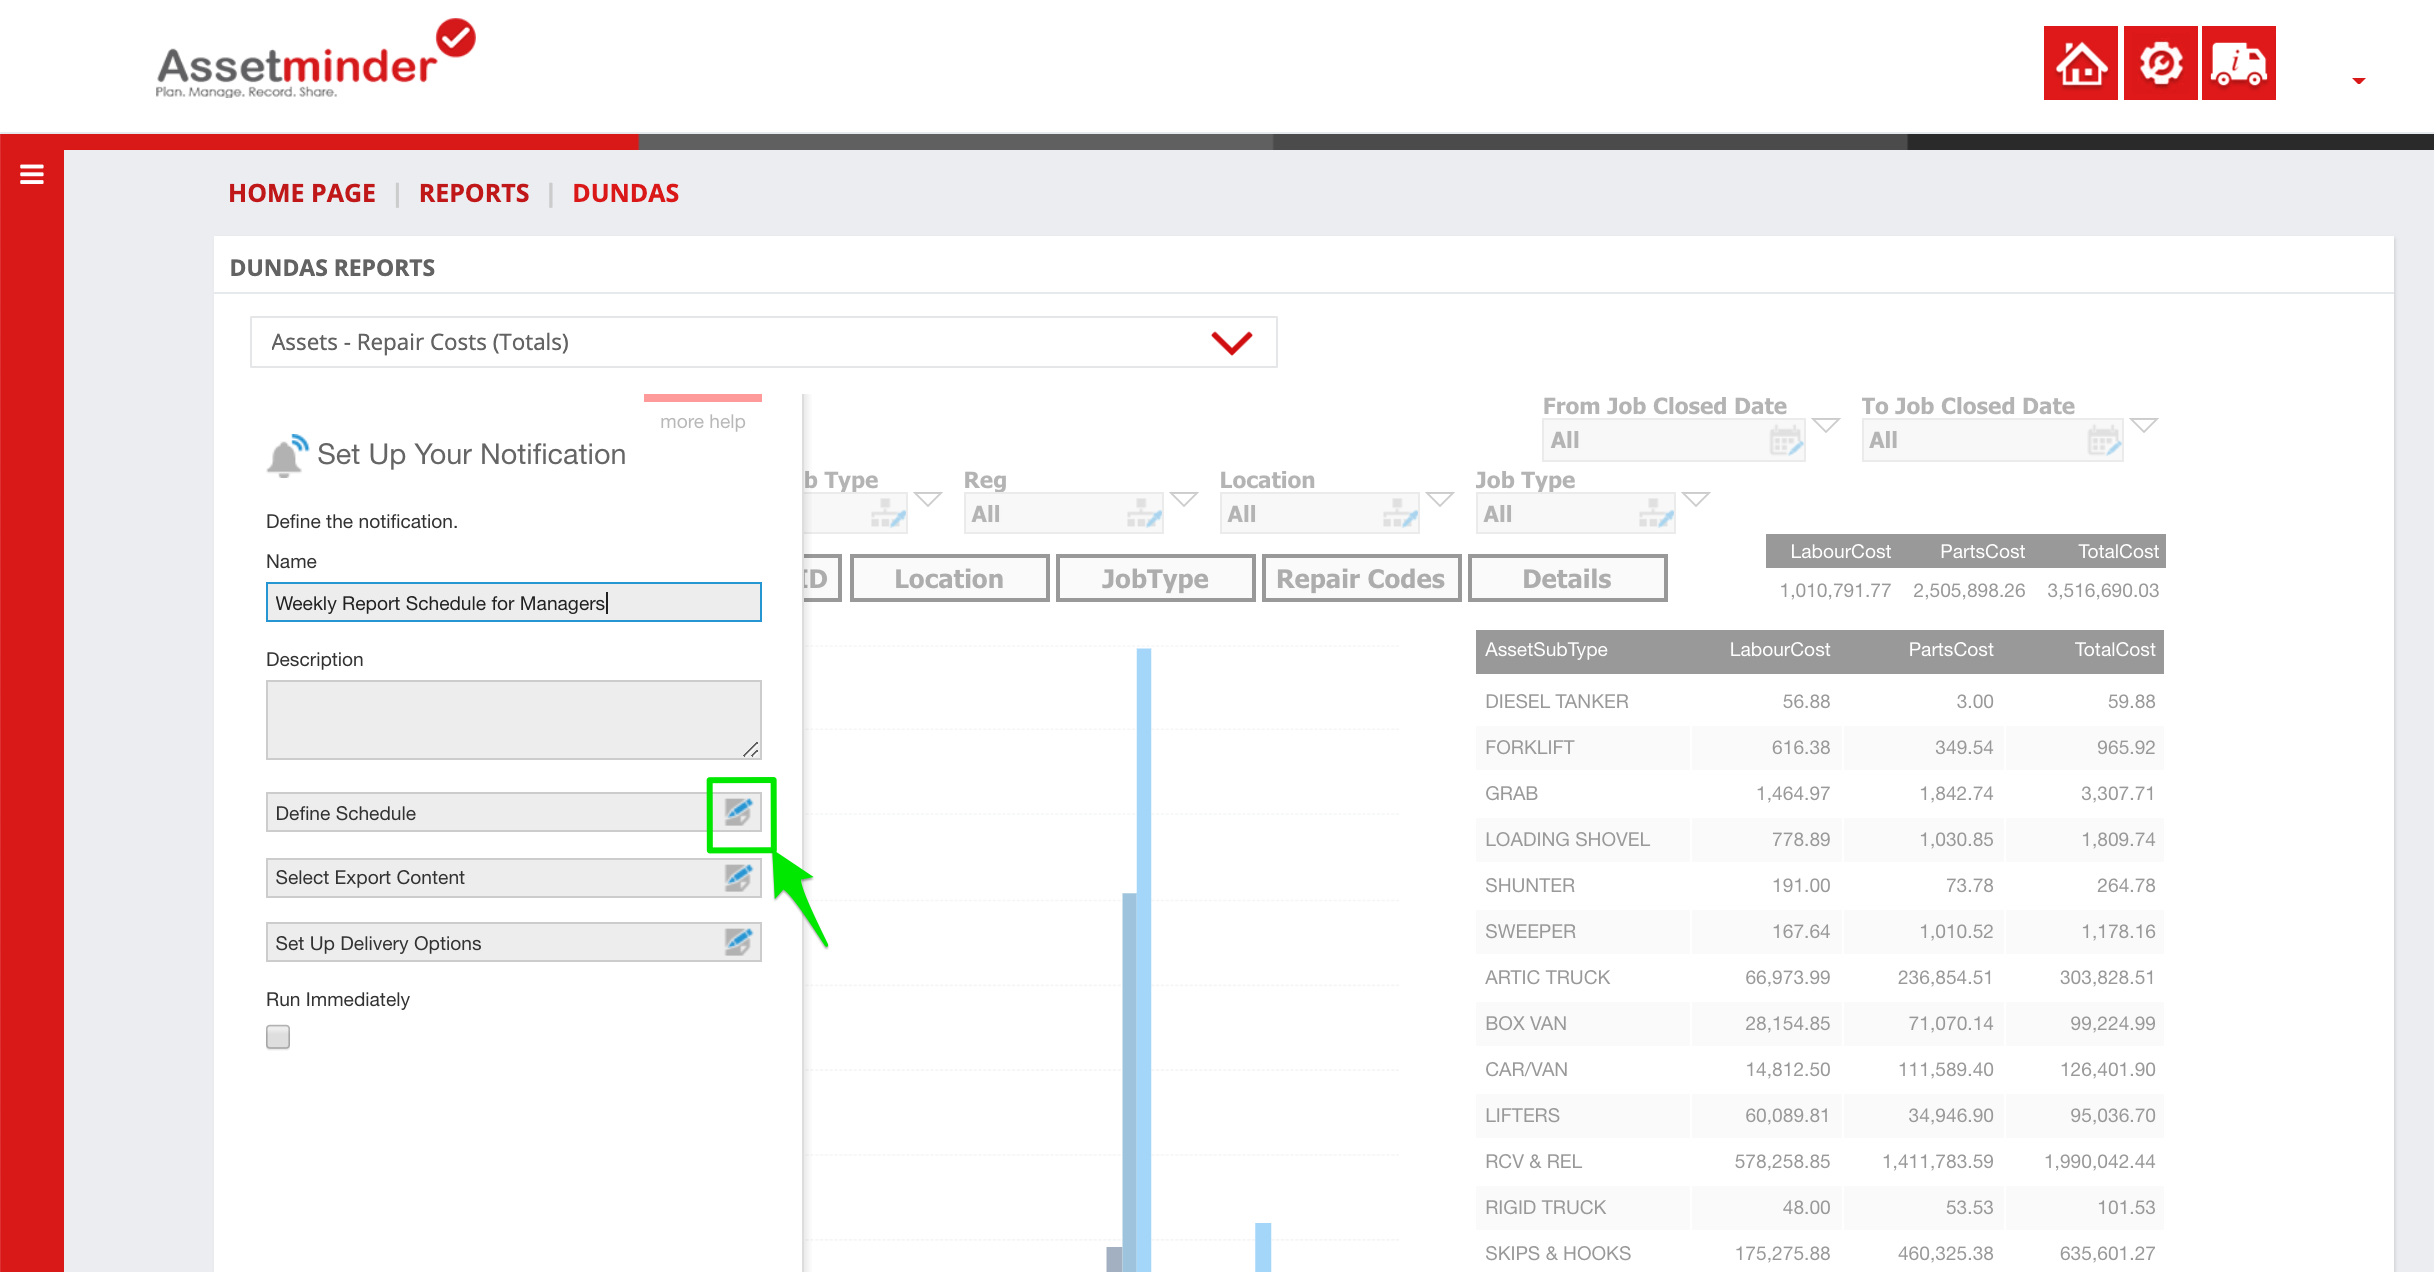
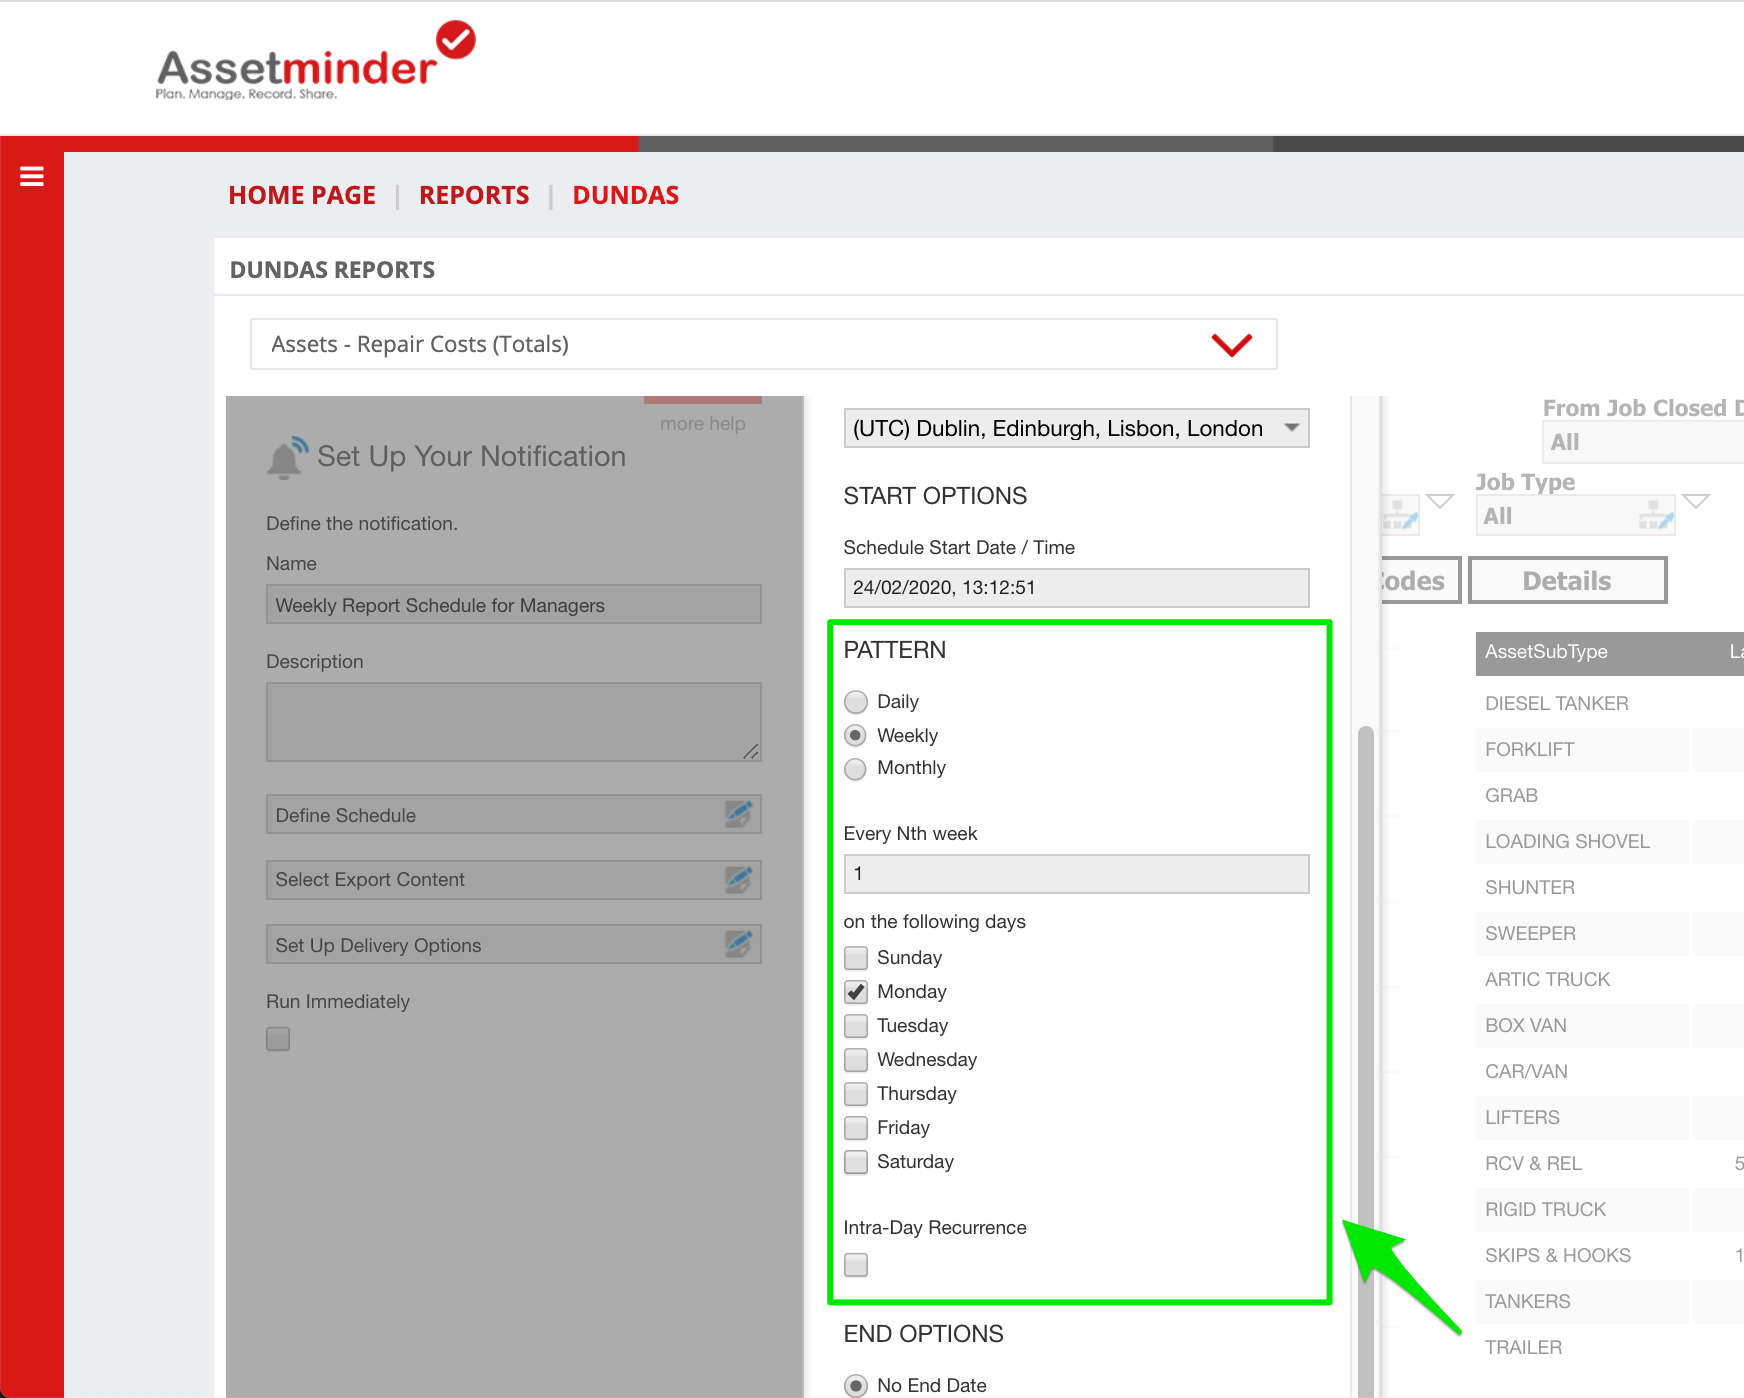
7. Click Define Schedule to create a schedule rule
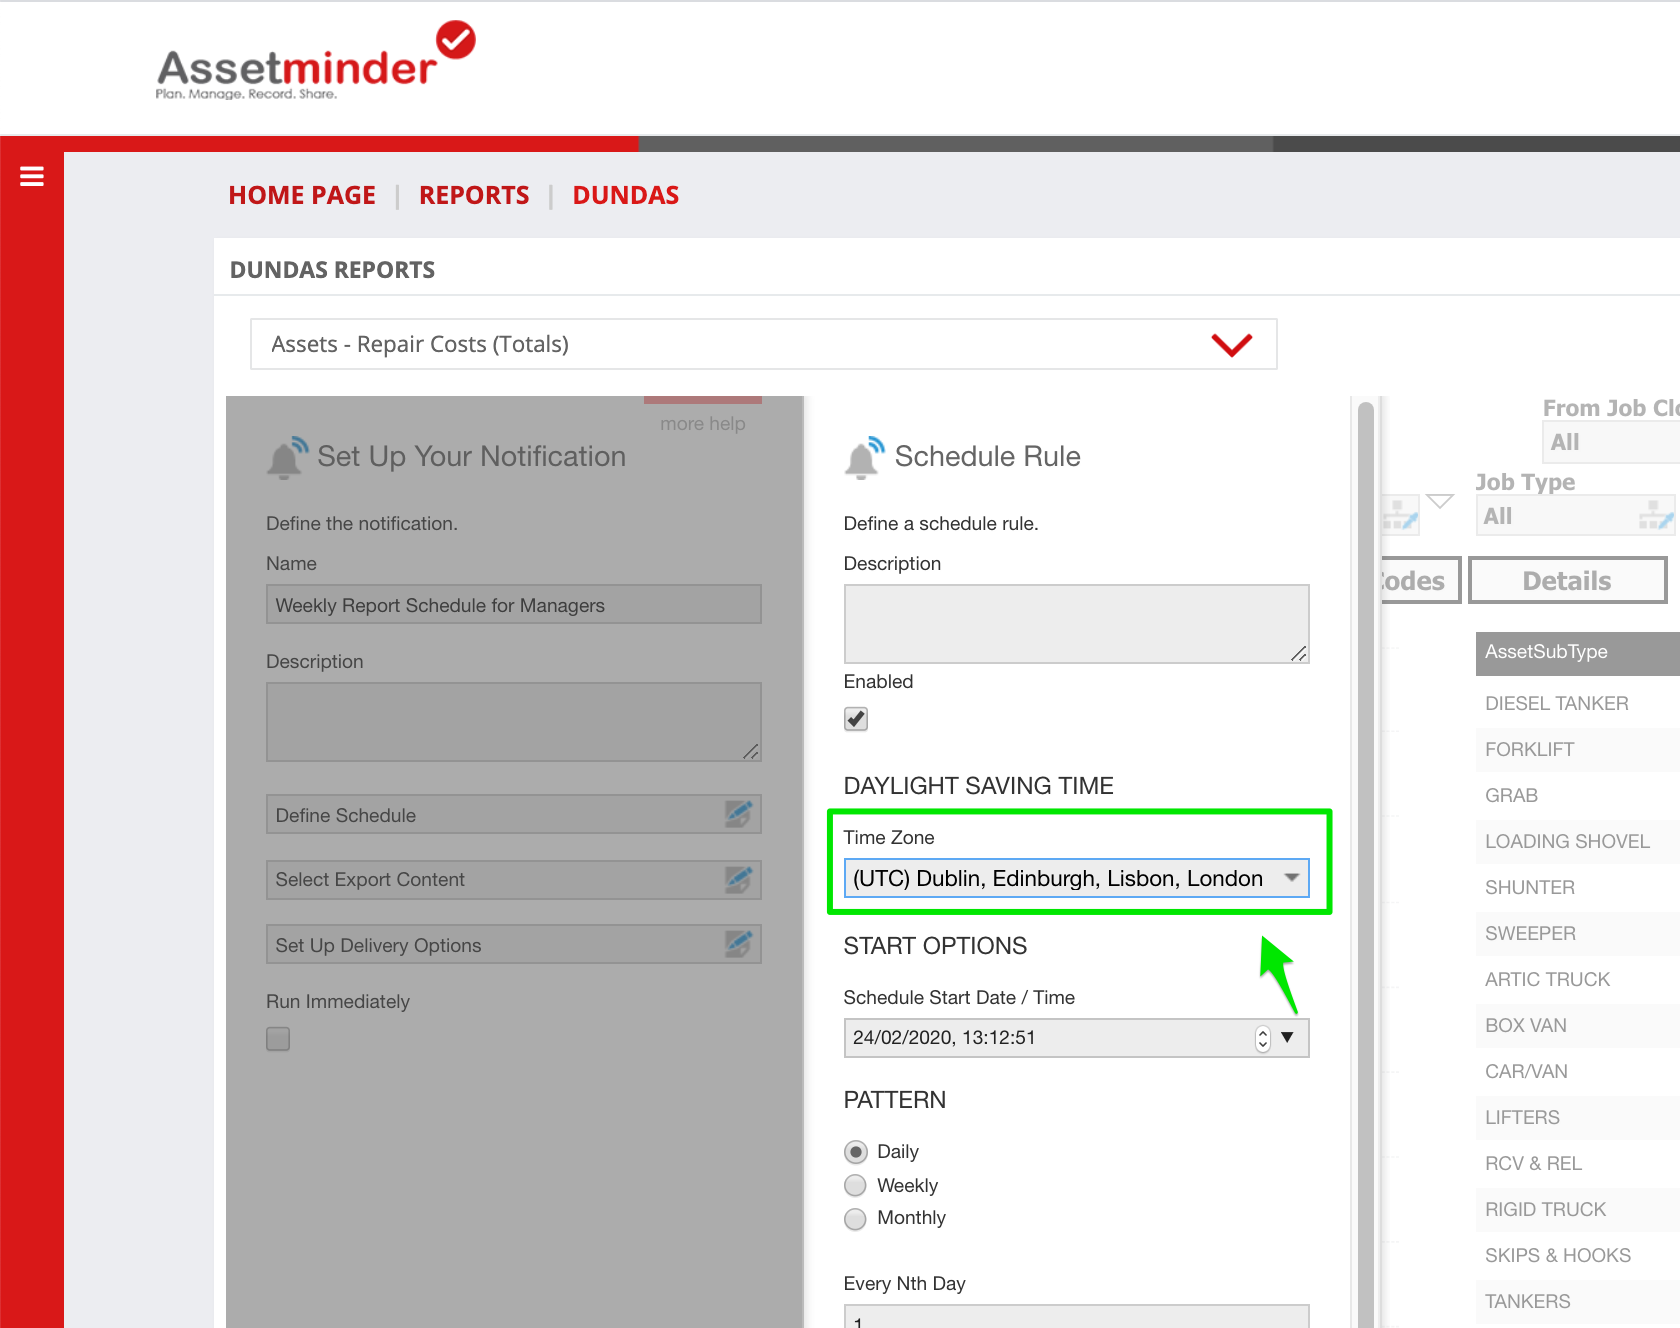
8. Set the correct timezone for the rule
9. Define the pattern or schedule. In this case, the report is set to run every week on Monday
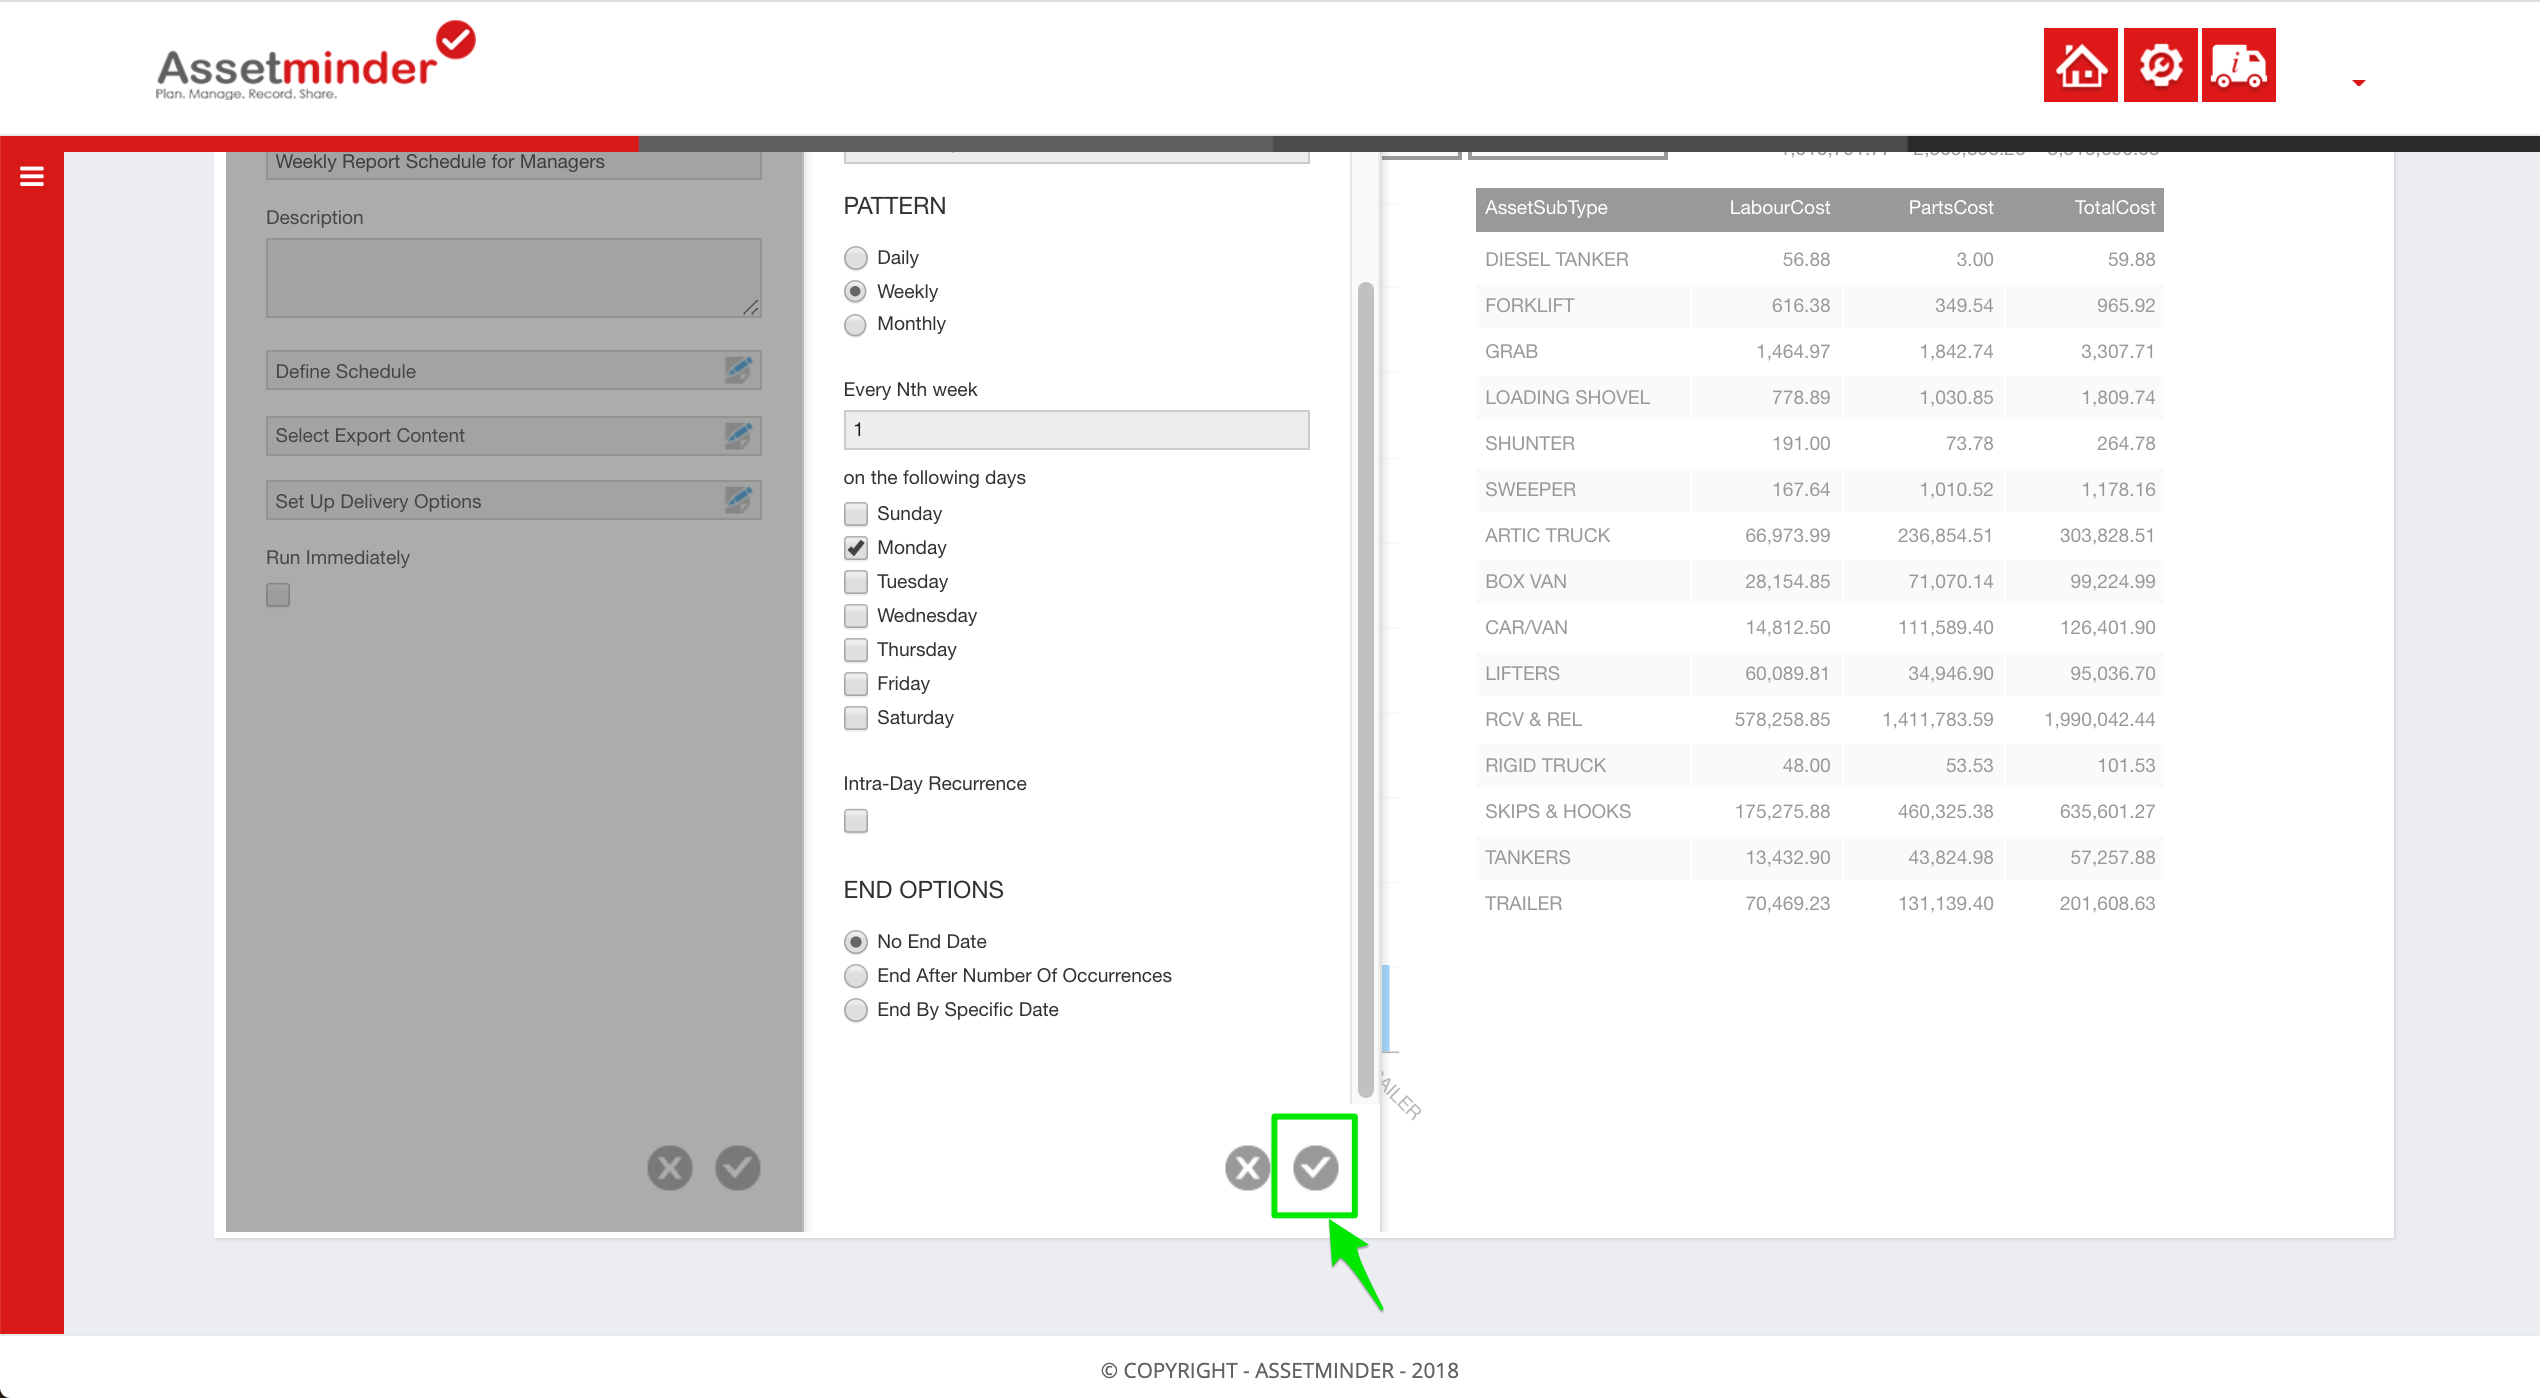
10. Click the Tick icon to Save
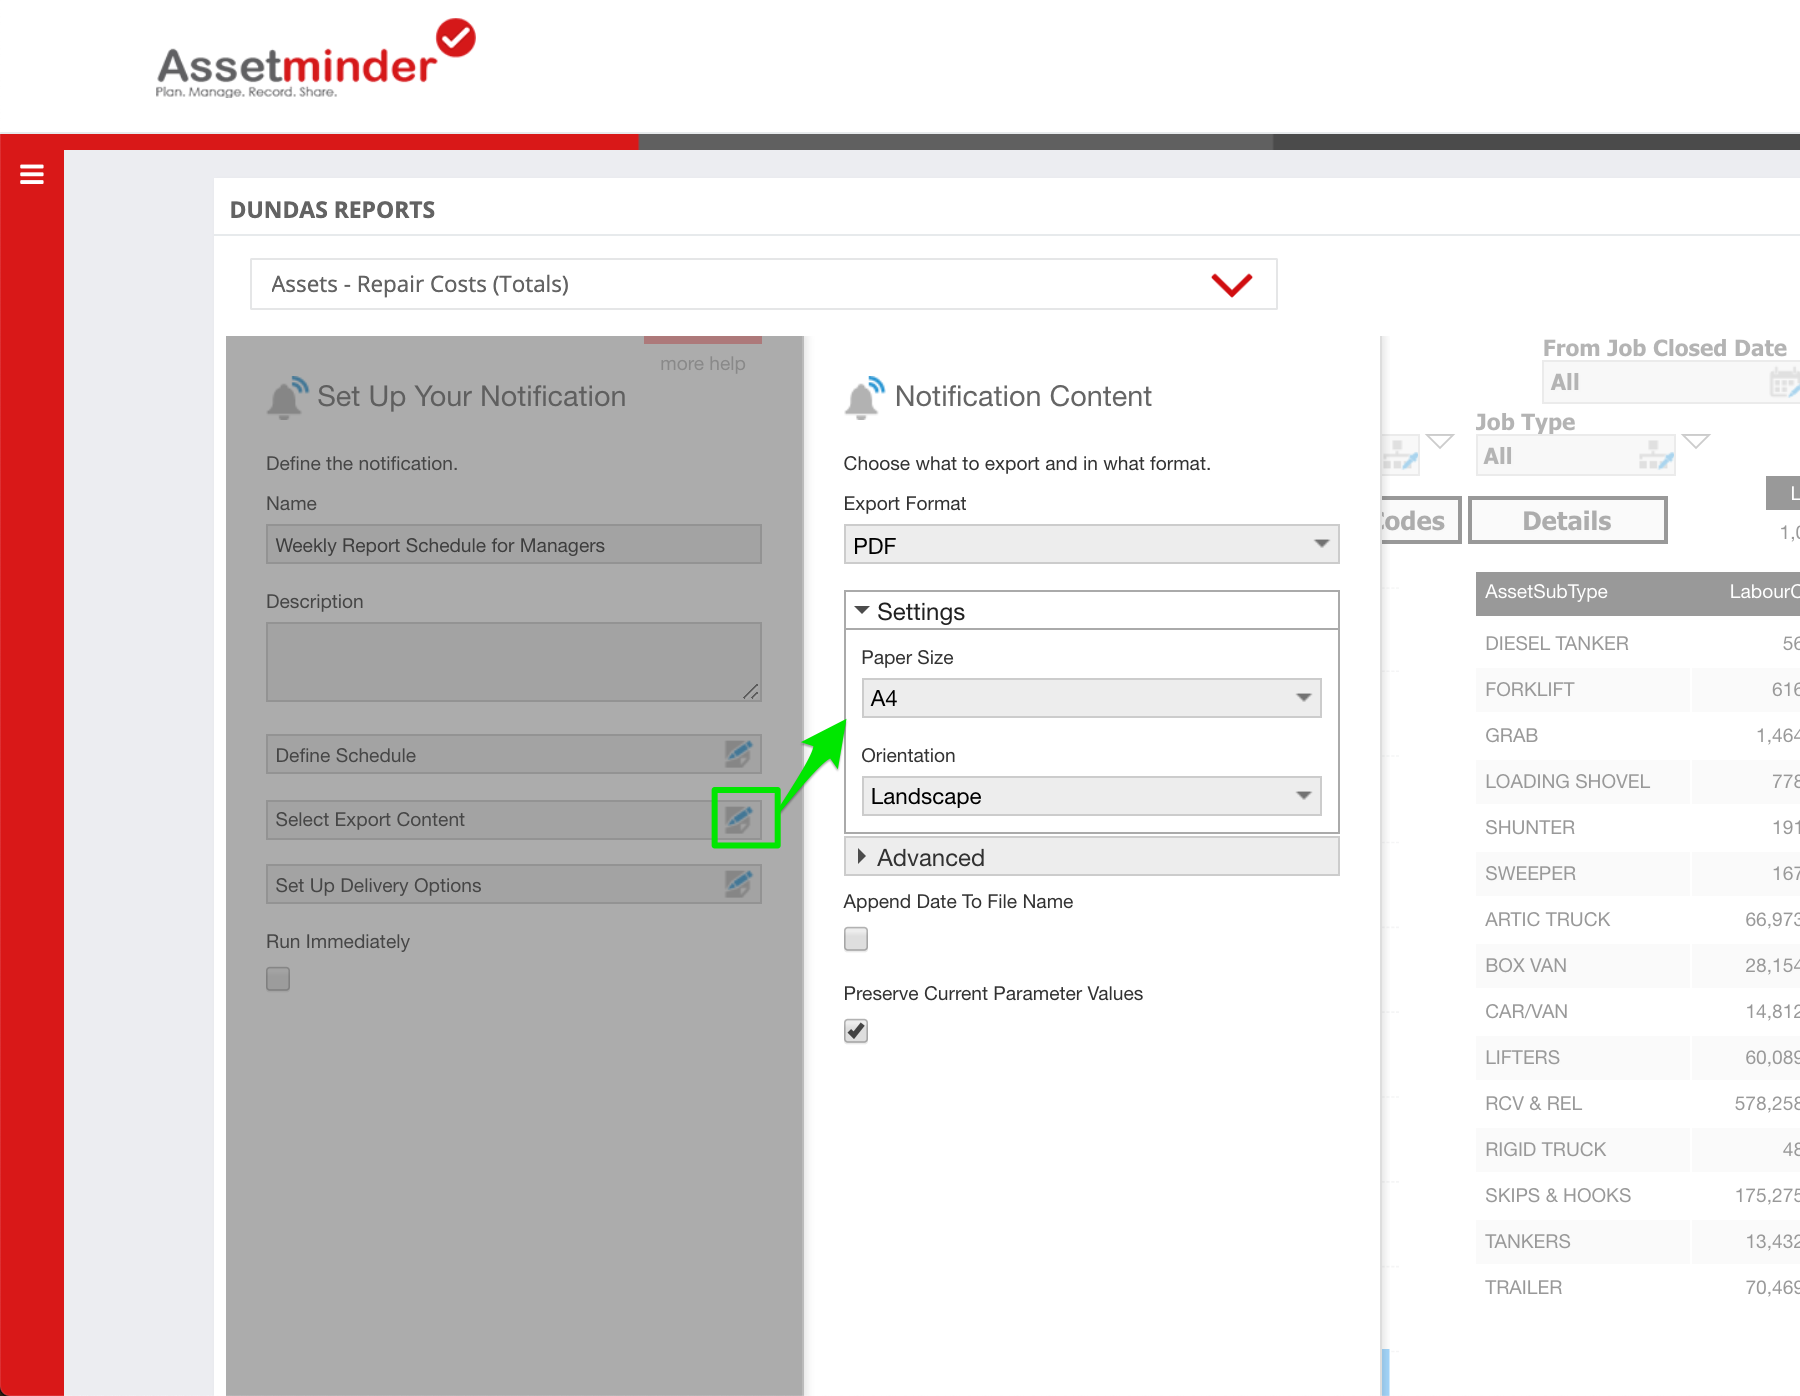
11. Next, Click Select Export Content to define the page format, size, and orientation. Click the Tick icon at the bottom of the page to Save
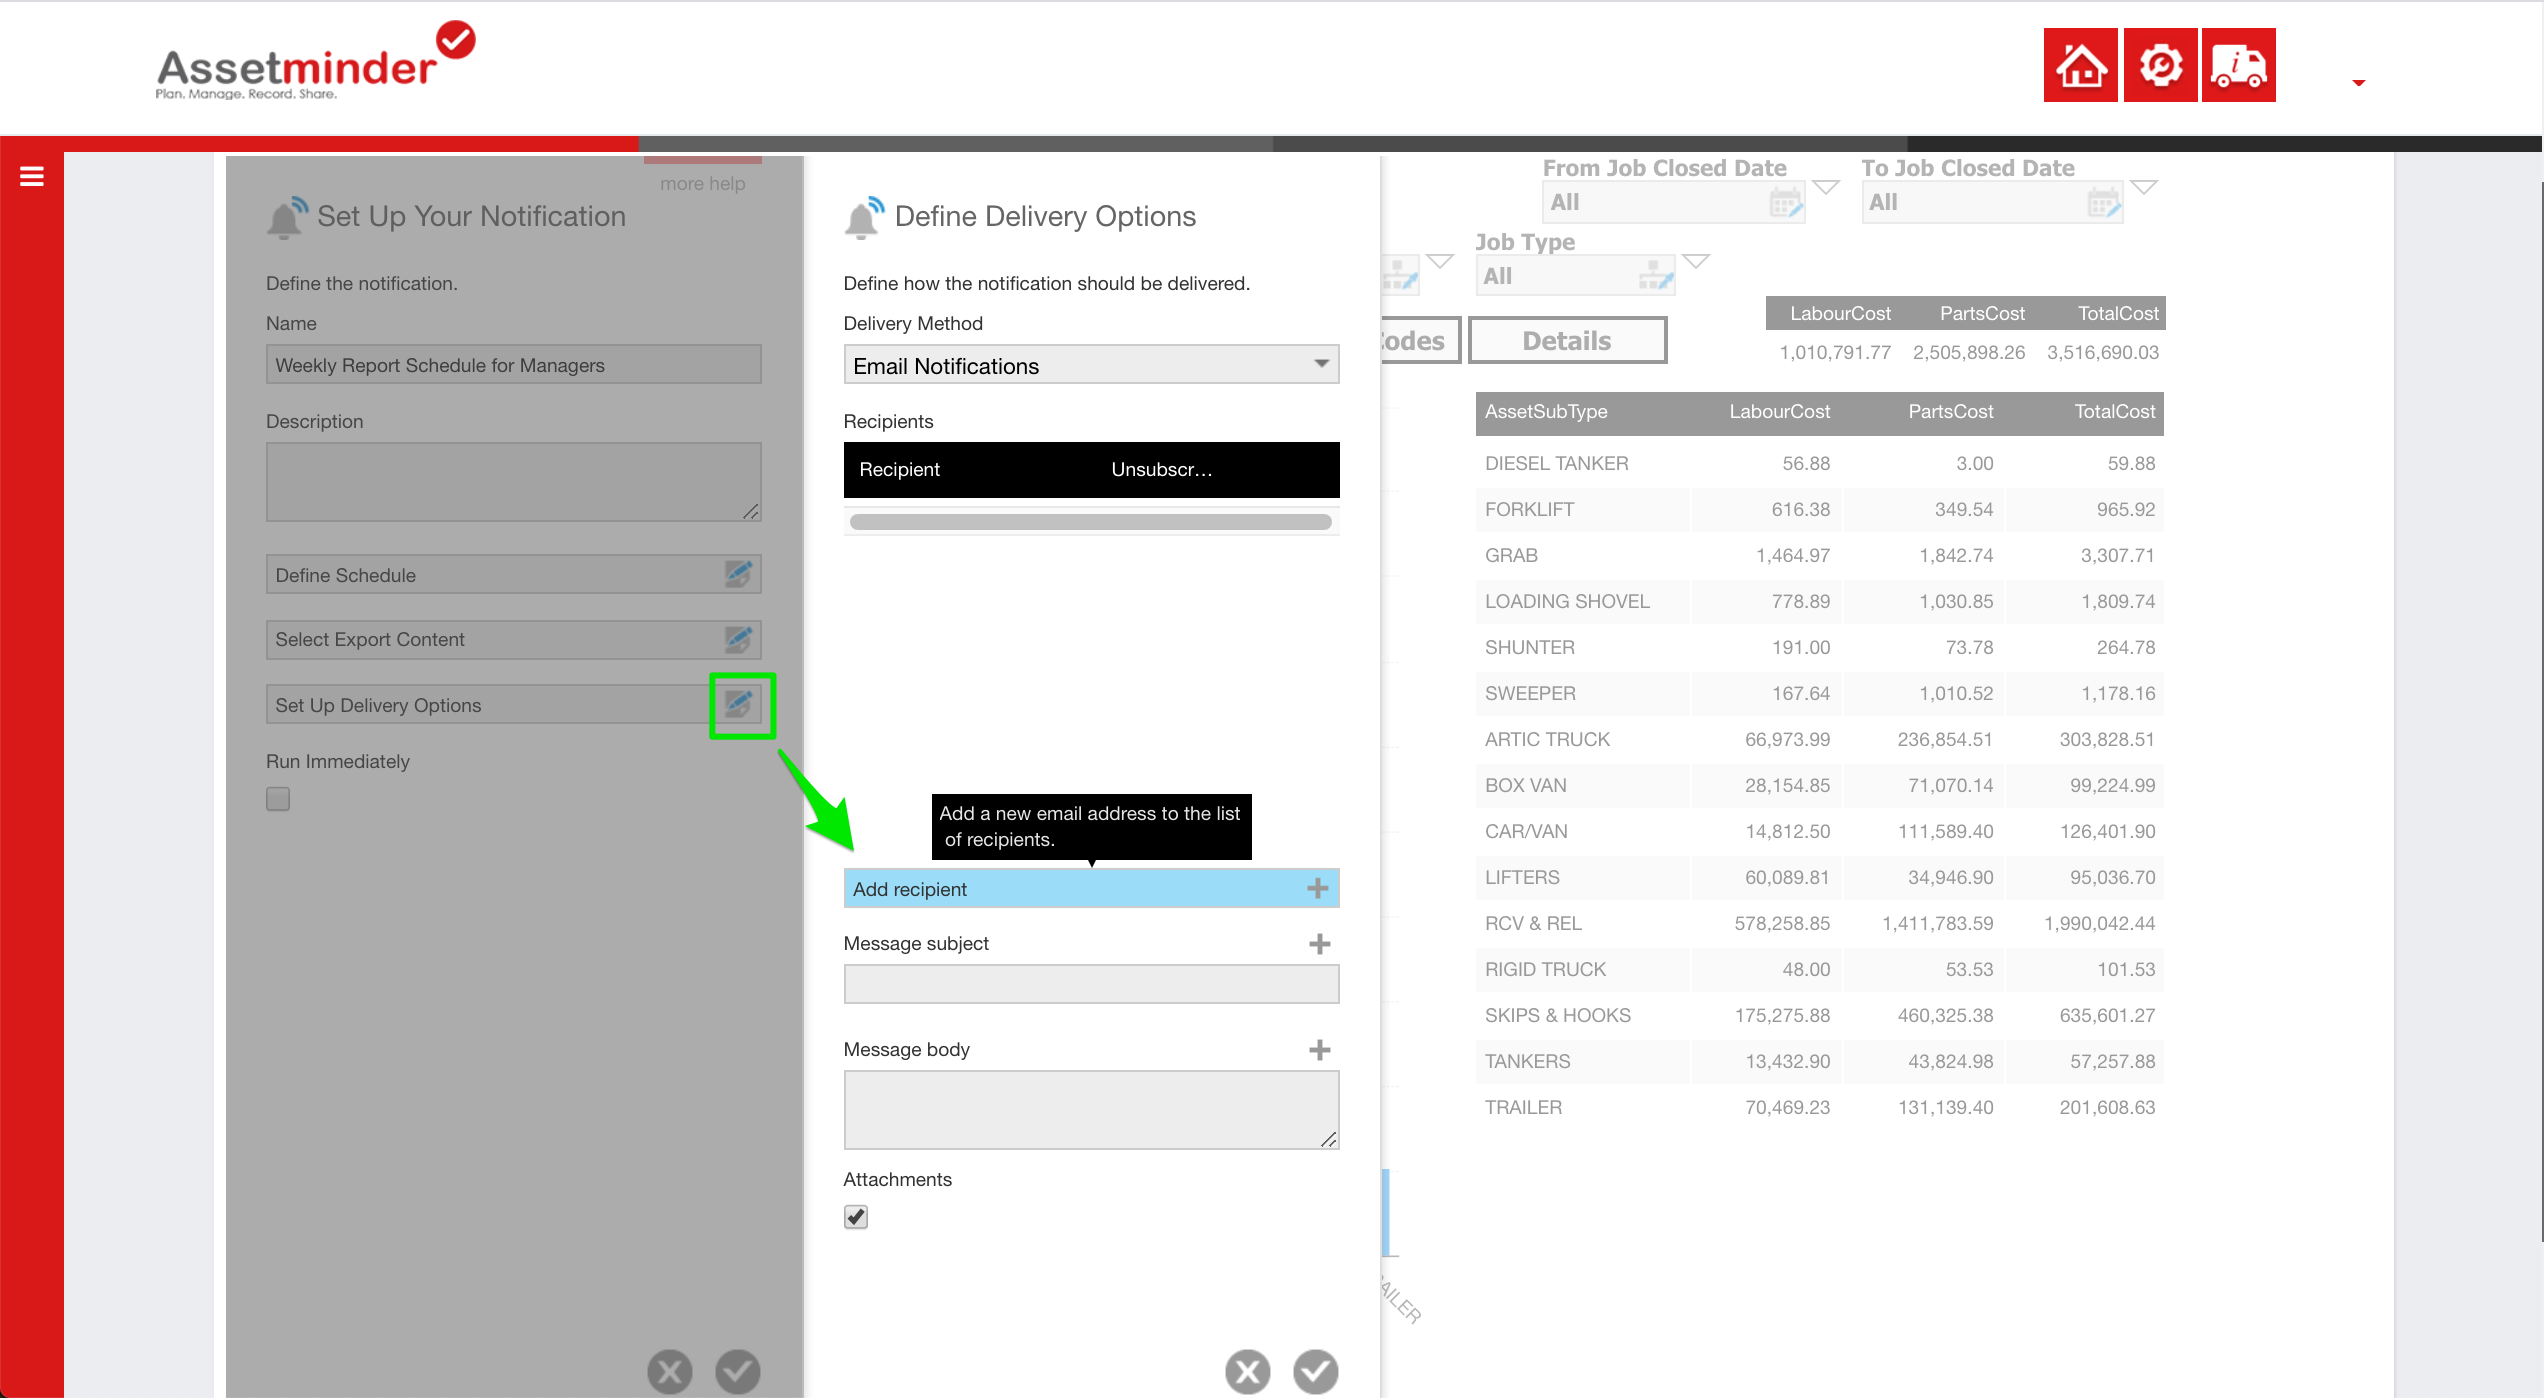
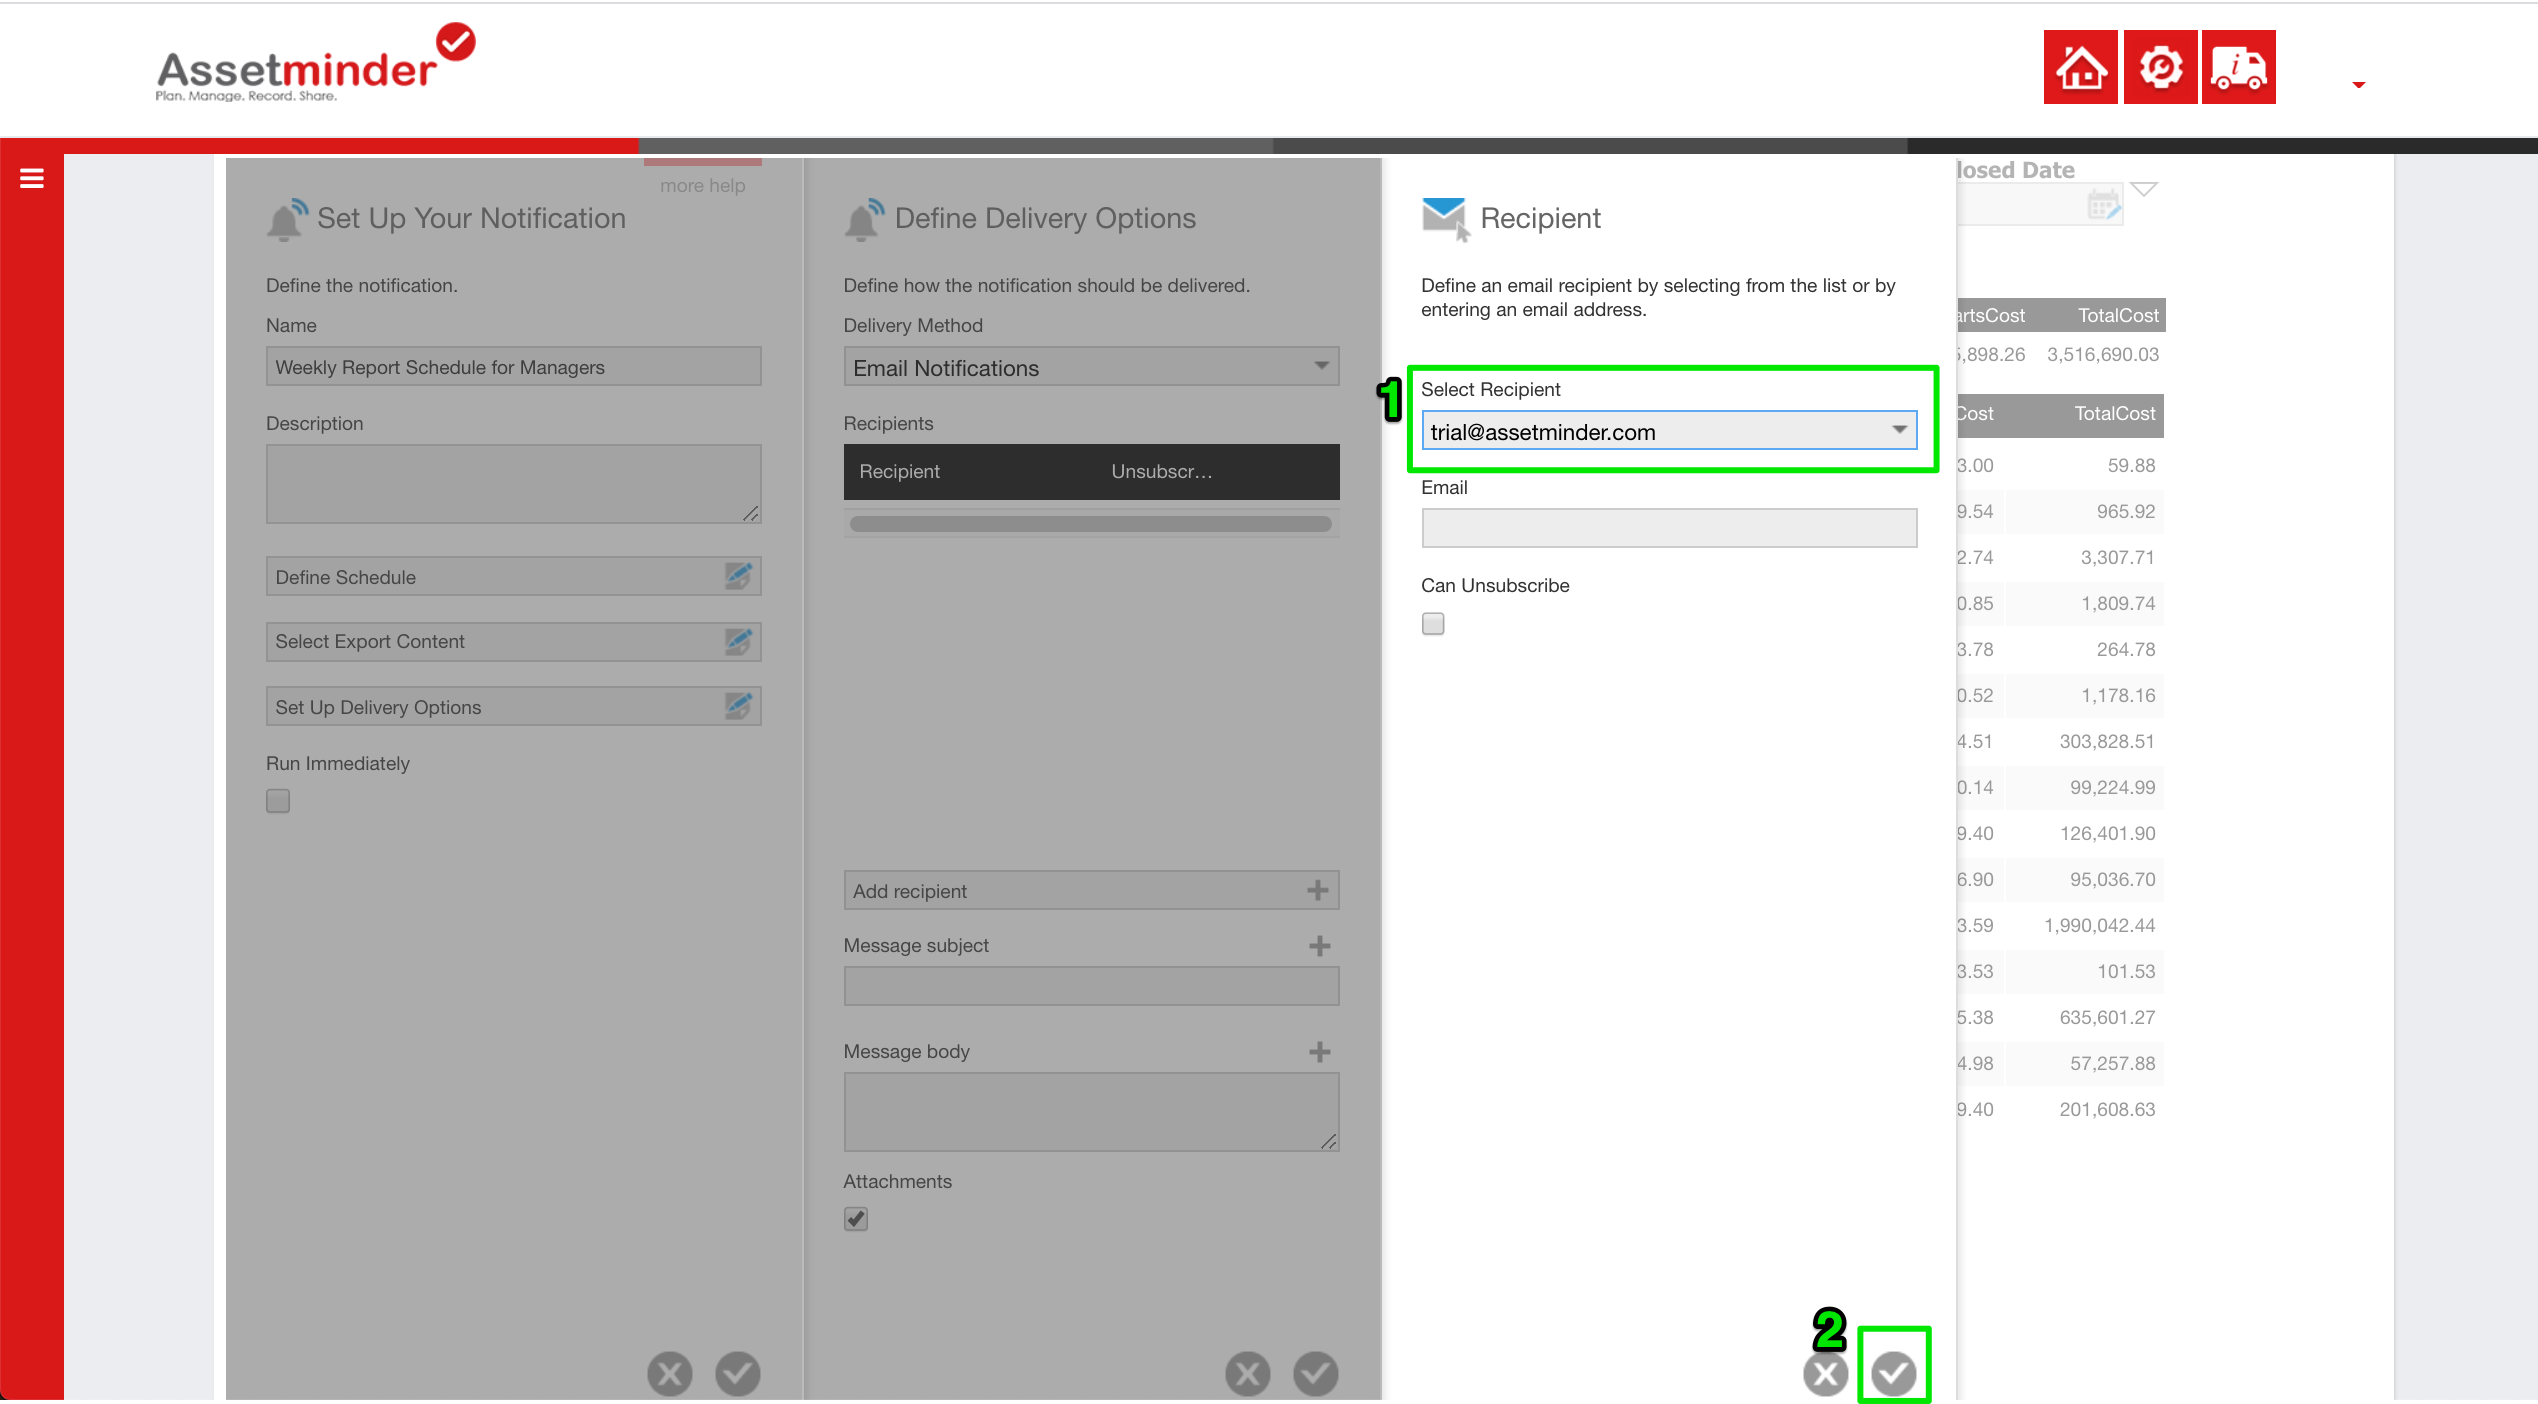
12. Next step is to configure the recipients. Click the Add icon in Add Recipient area
13. Select a recipient from the list, or add in the email address manually. Click the Tick icon at the bottom of the page to Save
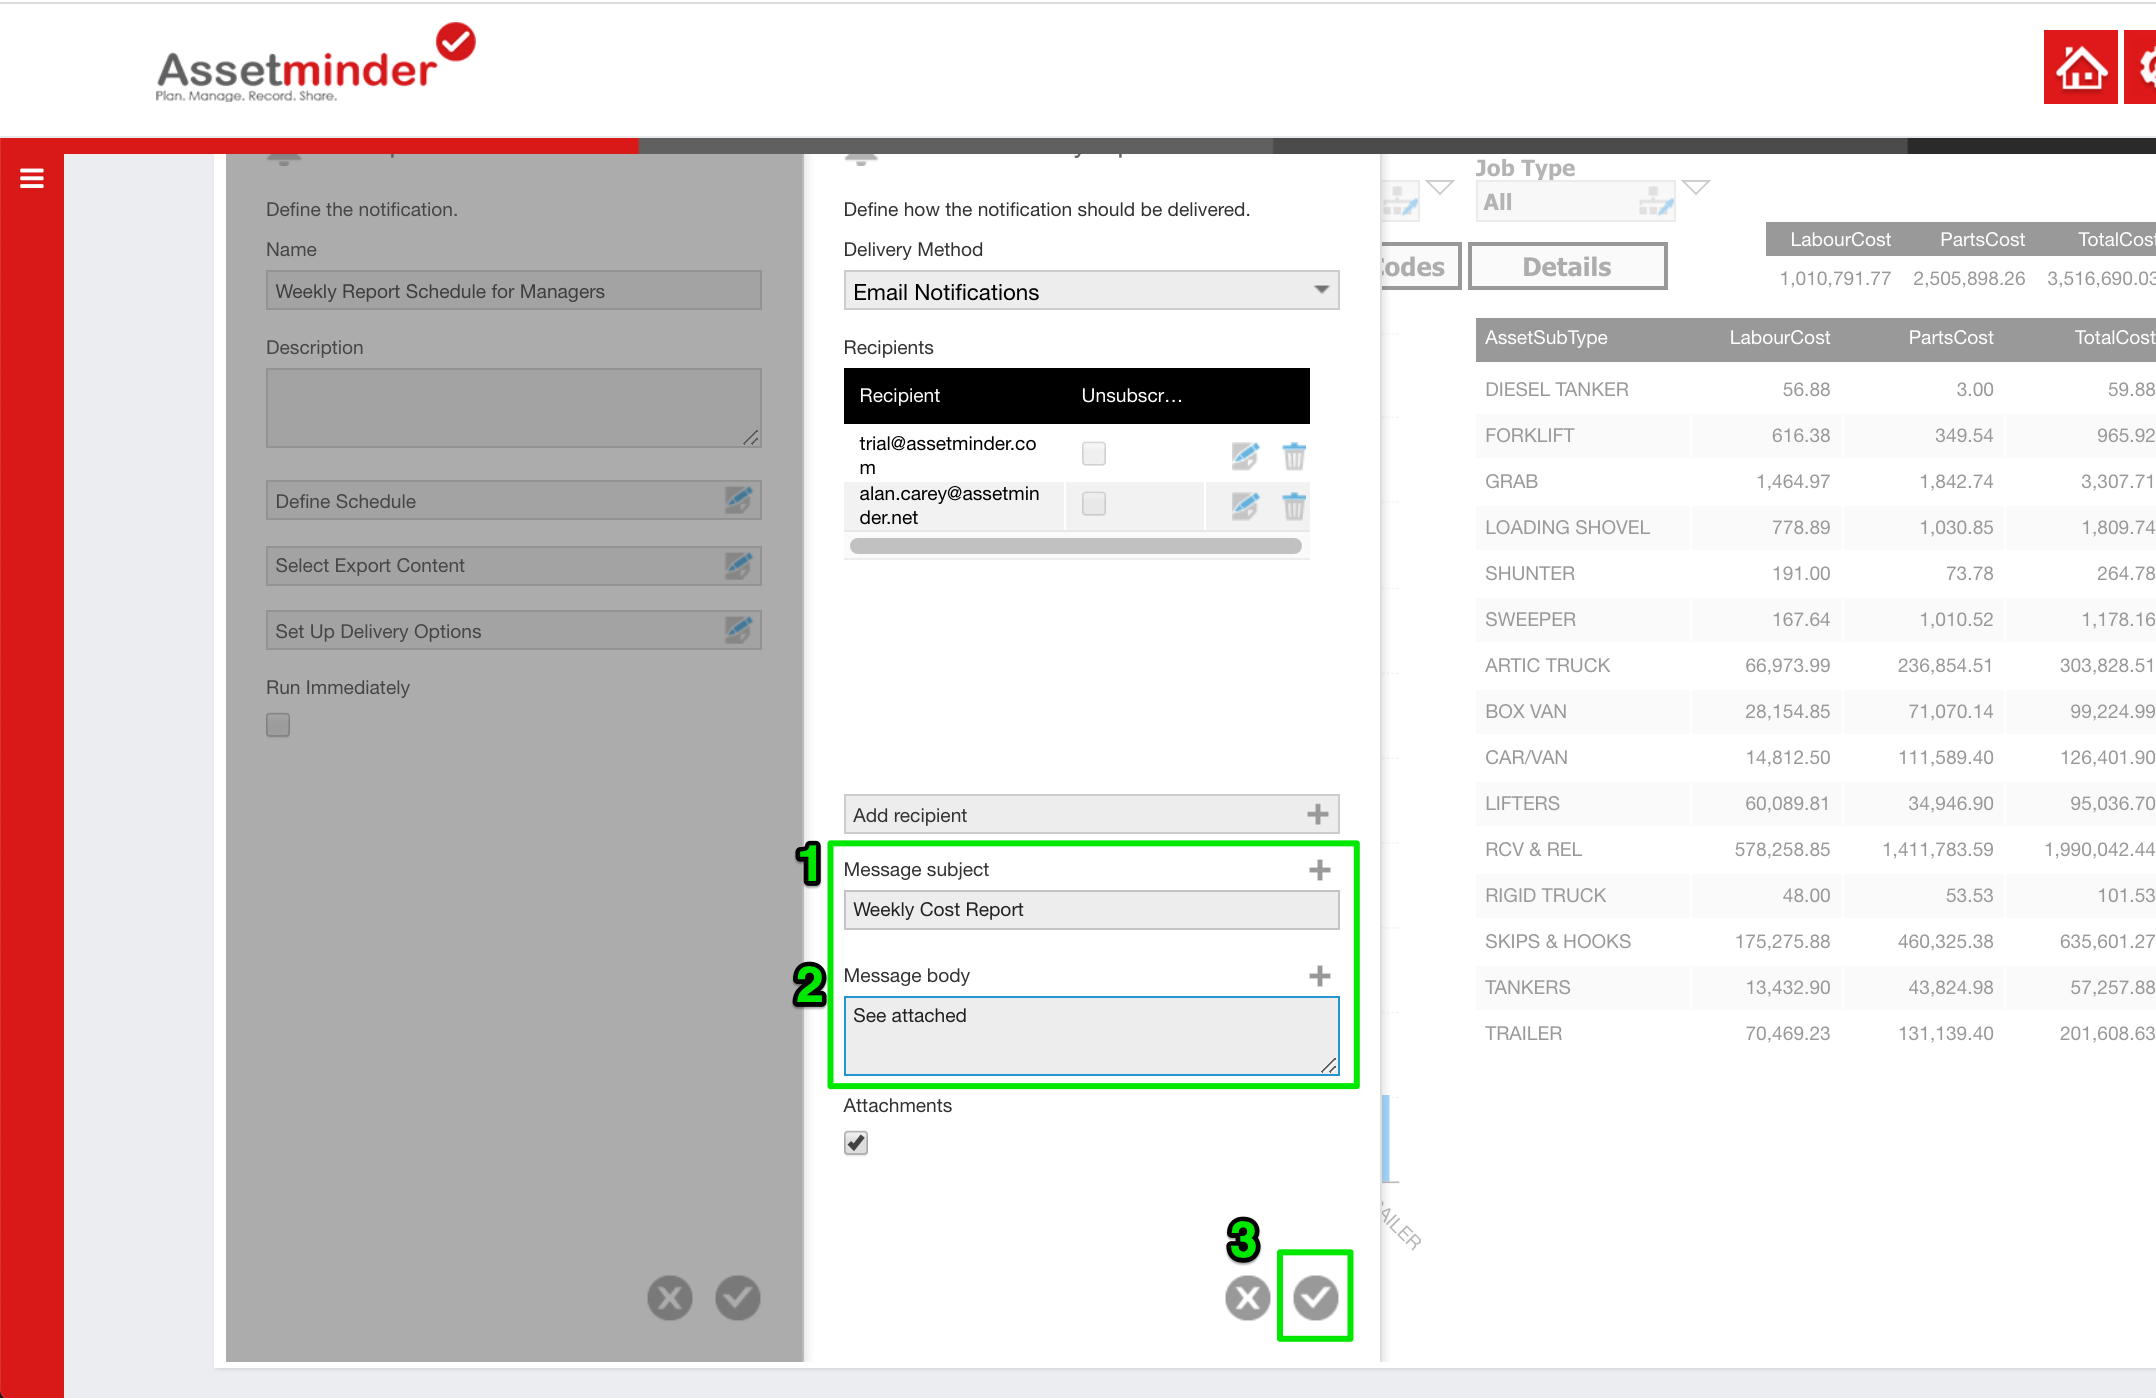
14. Add a subject and description for the automated email. Click the Tick icon at the bottom of the page to Save
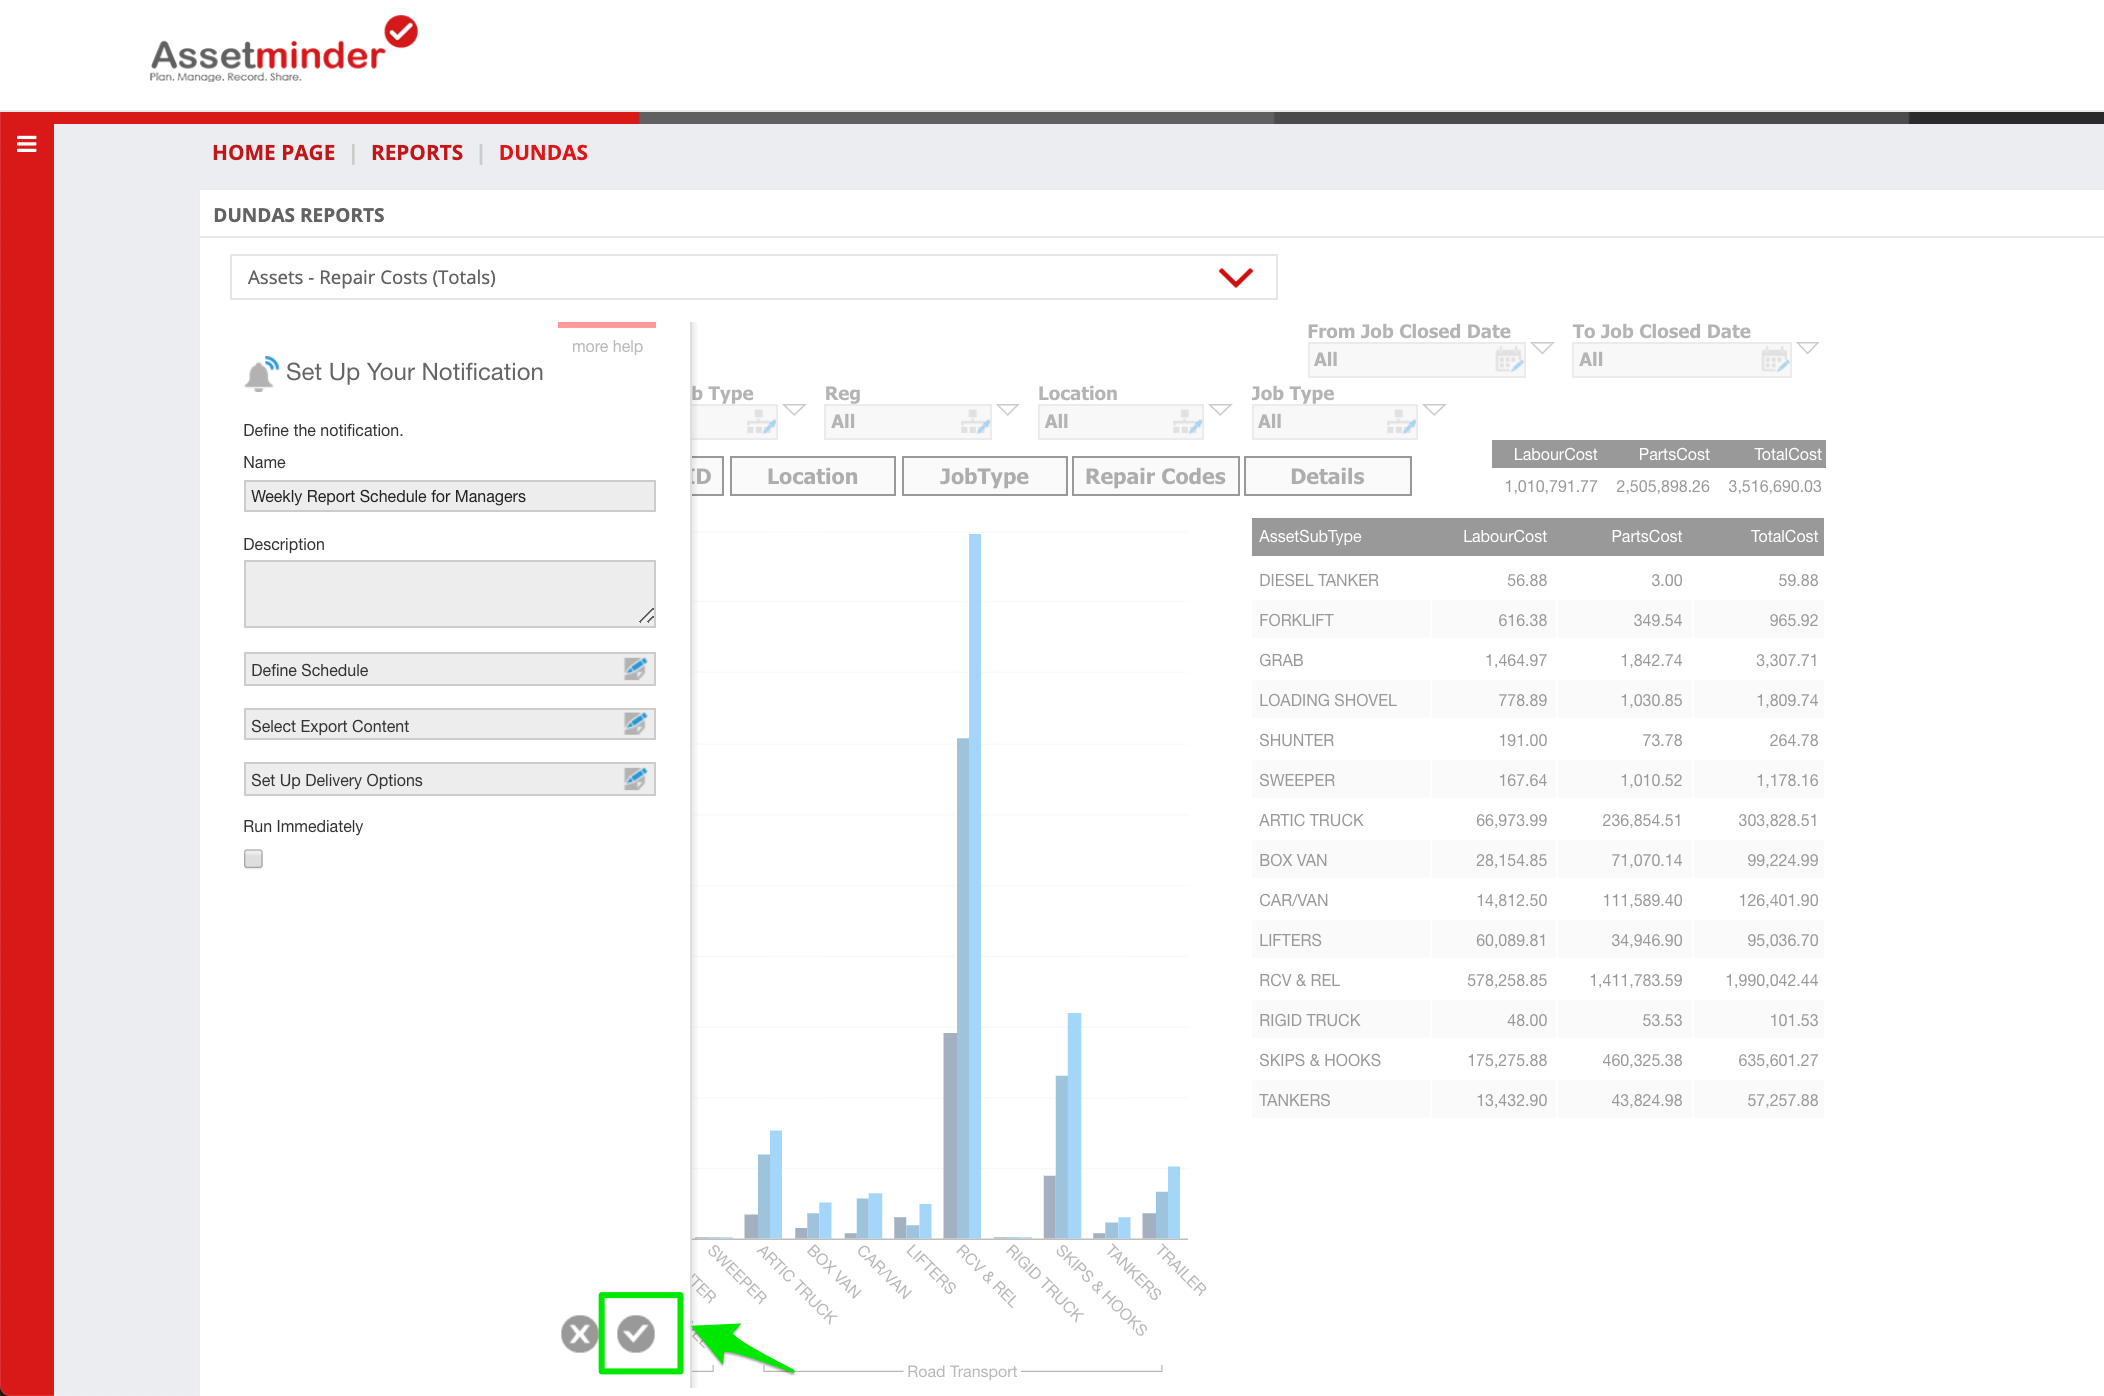
15. Click the Tick icon at the bottom of the page to Save
16. Repeat as needed for all report schedules.
Conor Gibson
Comments