About Sales Orders
A Sales Order is created for a Parts Sales transaction that is not associated with a job card. A Sales Order can also be created for labour. One Sales Order can have many parts and / or a combination of parts and labour.
PROCEDURE
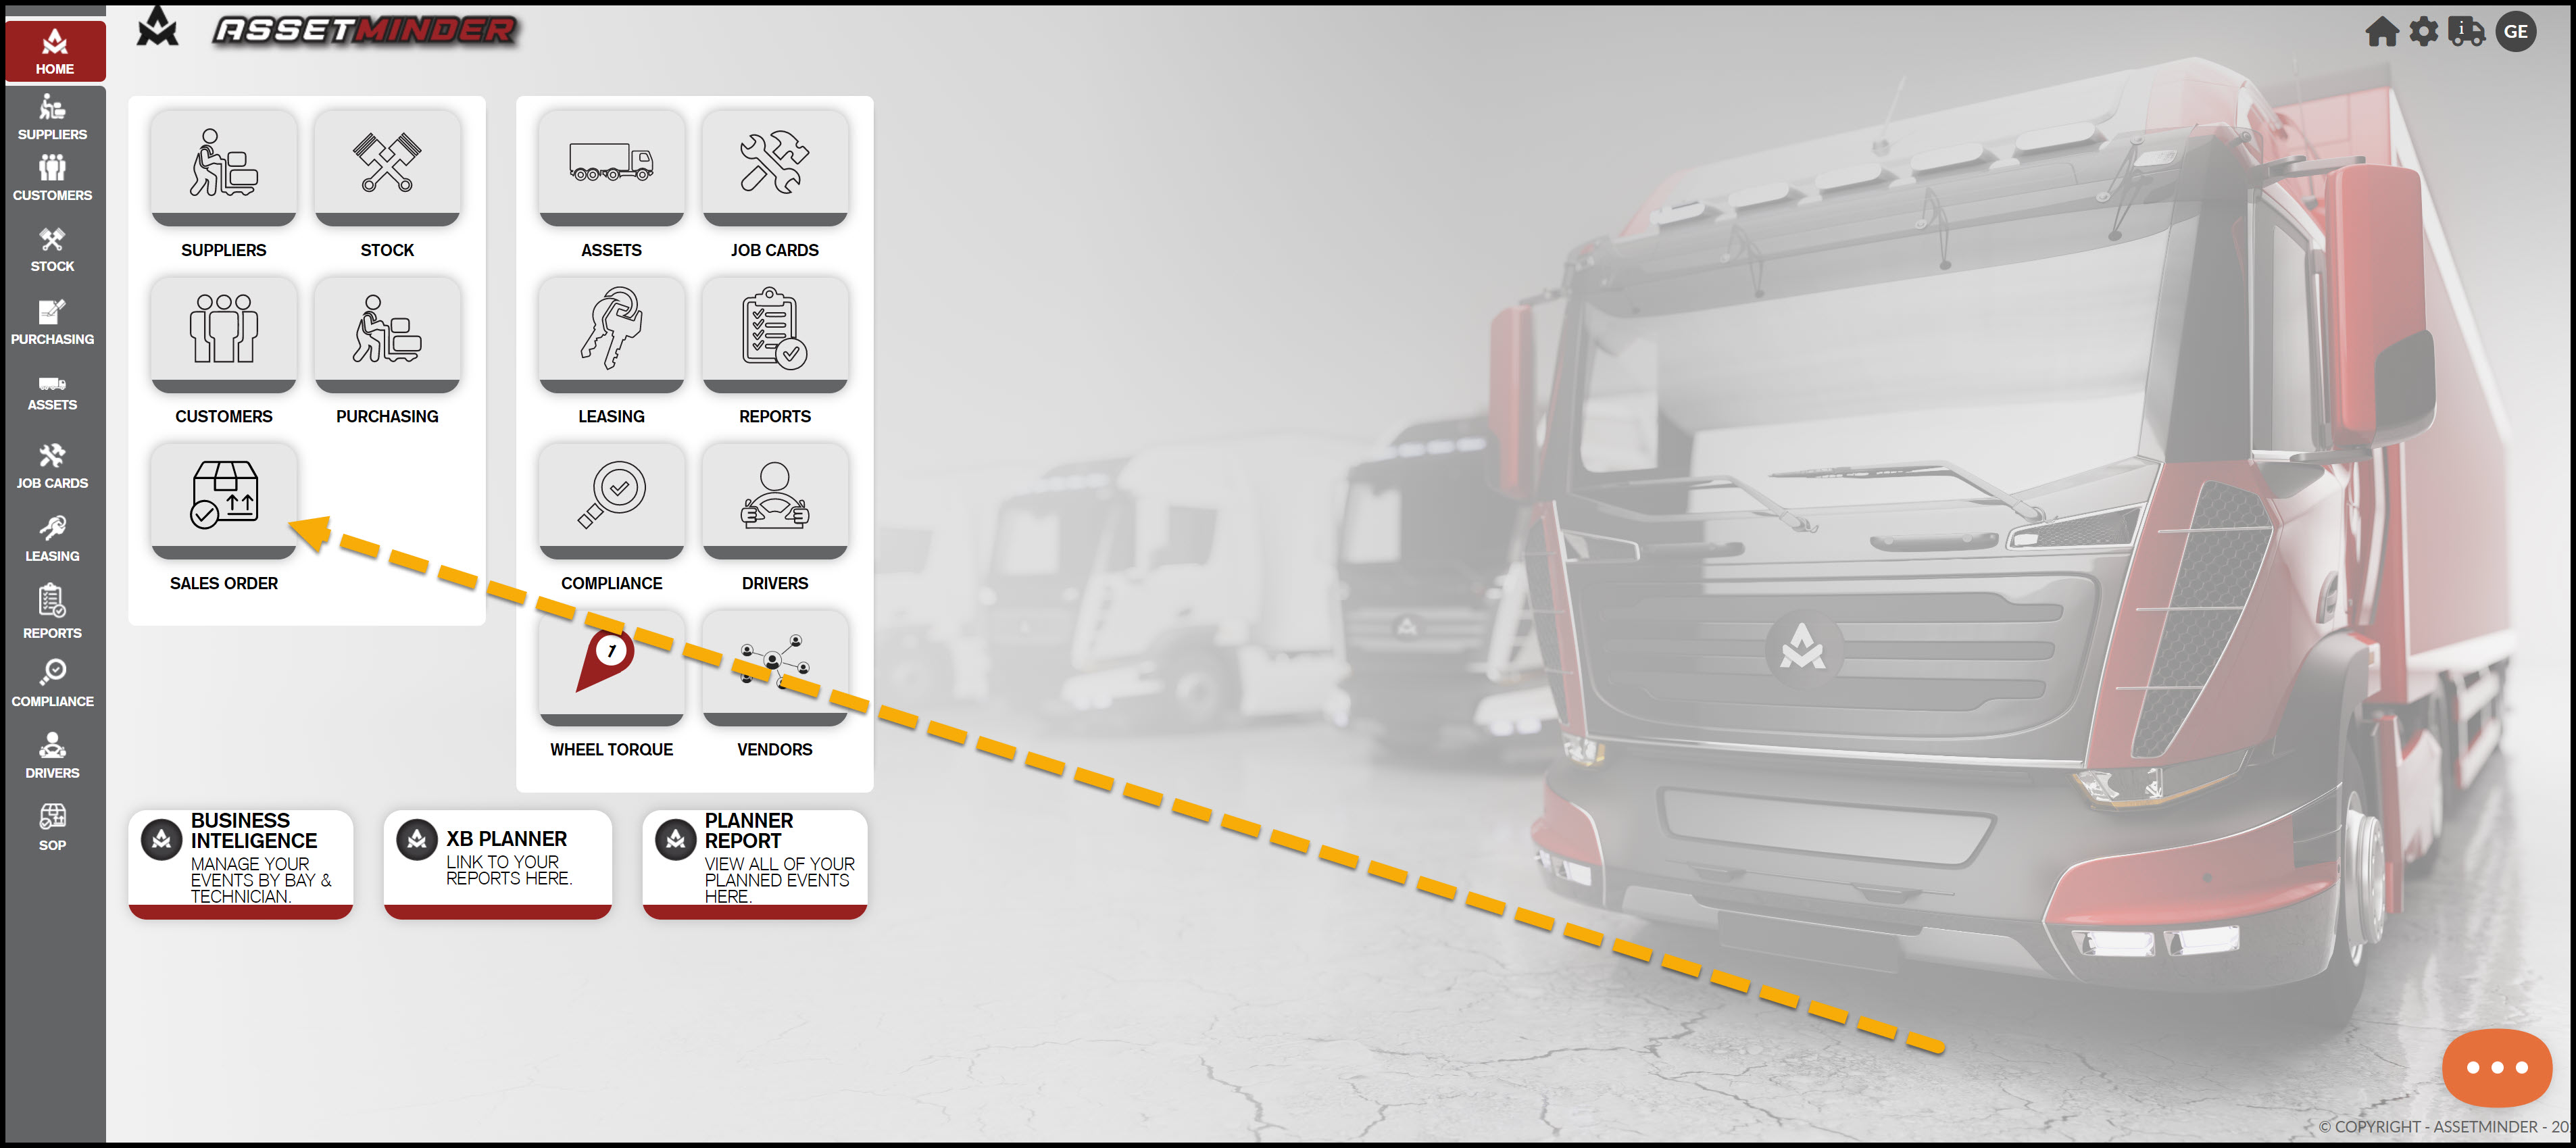
To begin the process, click on the SALES ORDER icon on the home screen, as indicated below.
This will open the SALES ORDER page as shown.
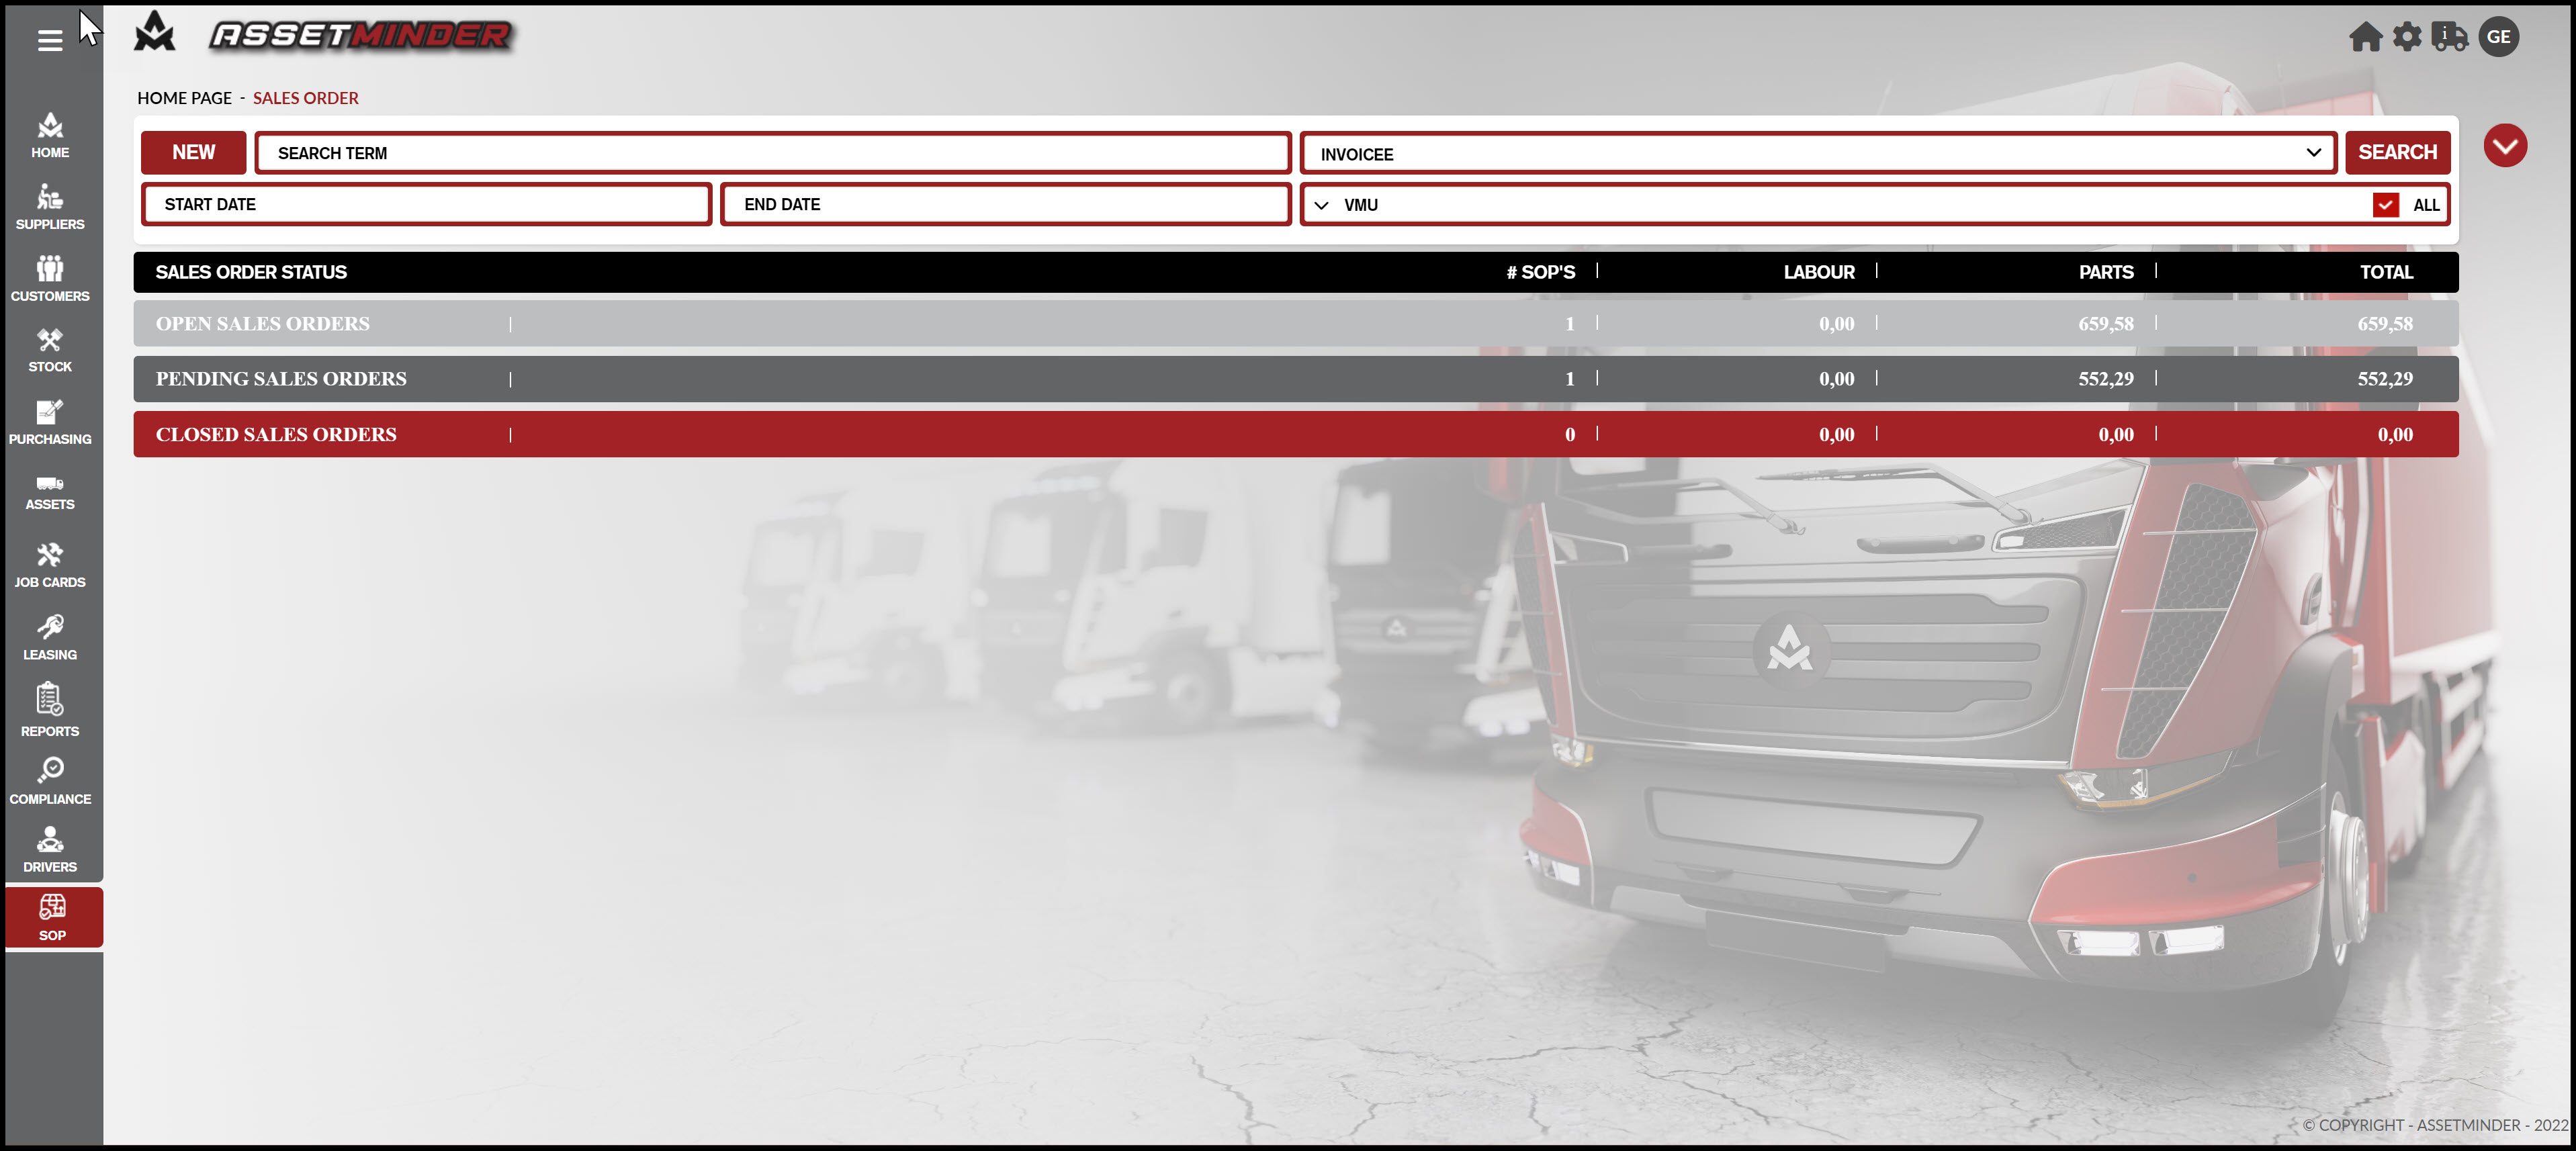
Sales Order are grouped into three categories, viz.
- OPEN - these are sales orders yet to be fulfilled or fulfilled but their status has not yet been changed to the next one.
- PENDING - these are sales orders that have been fulfilled and whose status indicates that they are awaiting sign-off
- CLOSED - these are sales orders that have been fulfilled, and signed off.
To create a NEW SALES ORDER, click on NEW on the top line. The user will then be prompted for the name of the invoicee for the Sales Order, as shown below.

If the name of the Invoicee is known, begin typing the name on the INVOICEE line. Once the first three characters have been entered, Assetminder will begin searching the database to locate a customer with a name matching the characters entered. If more than one name is shown, the user can either select the required one from the list shown or continue to enter more characters. As the number of matching names decreases, the list will shorten until only a very small number are shown or just one, which will be the intended invoicee.
Once the required customer name is shown, select it by clicking on the line with the name and then click SUBMIT.
The Sales Order will be created and shown.
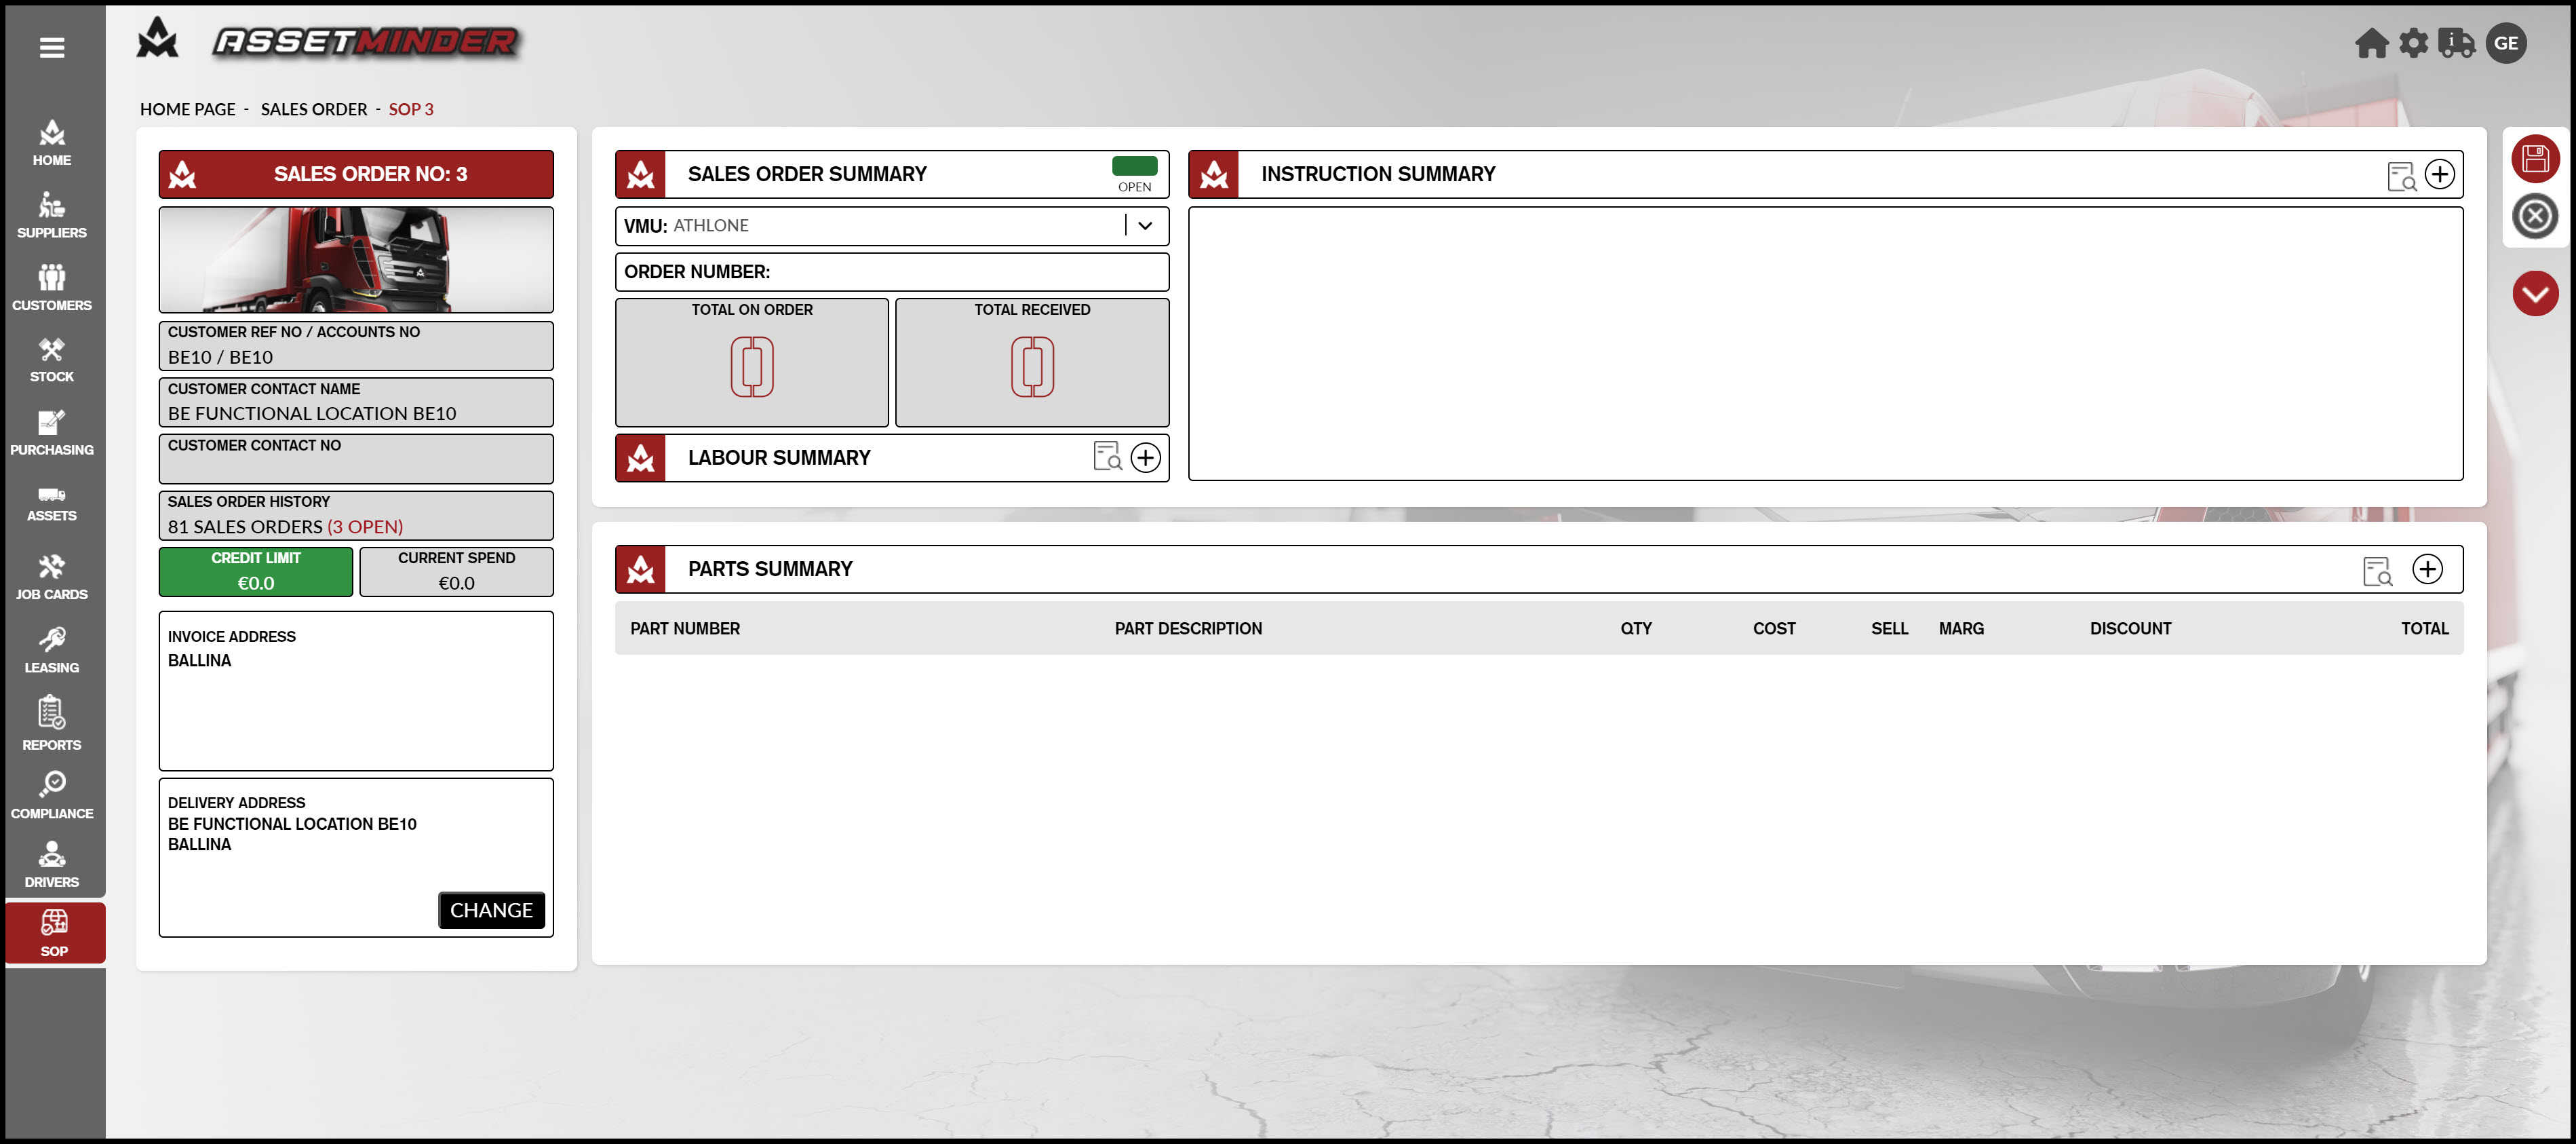
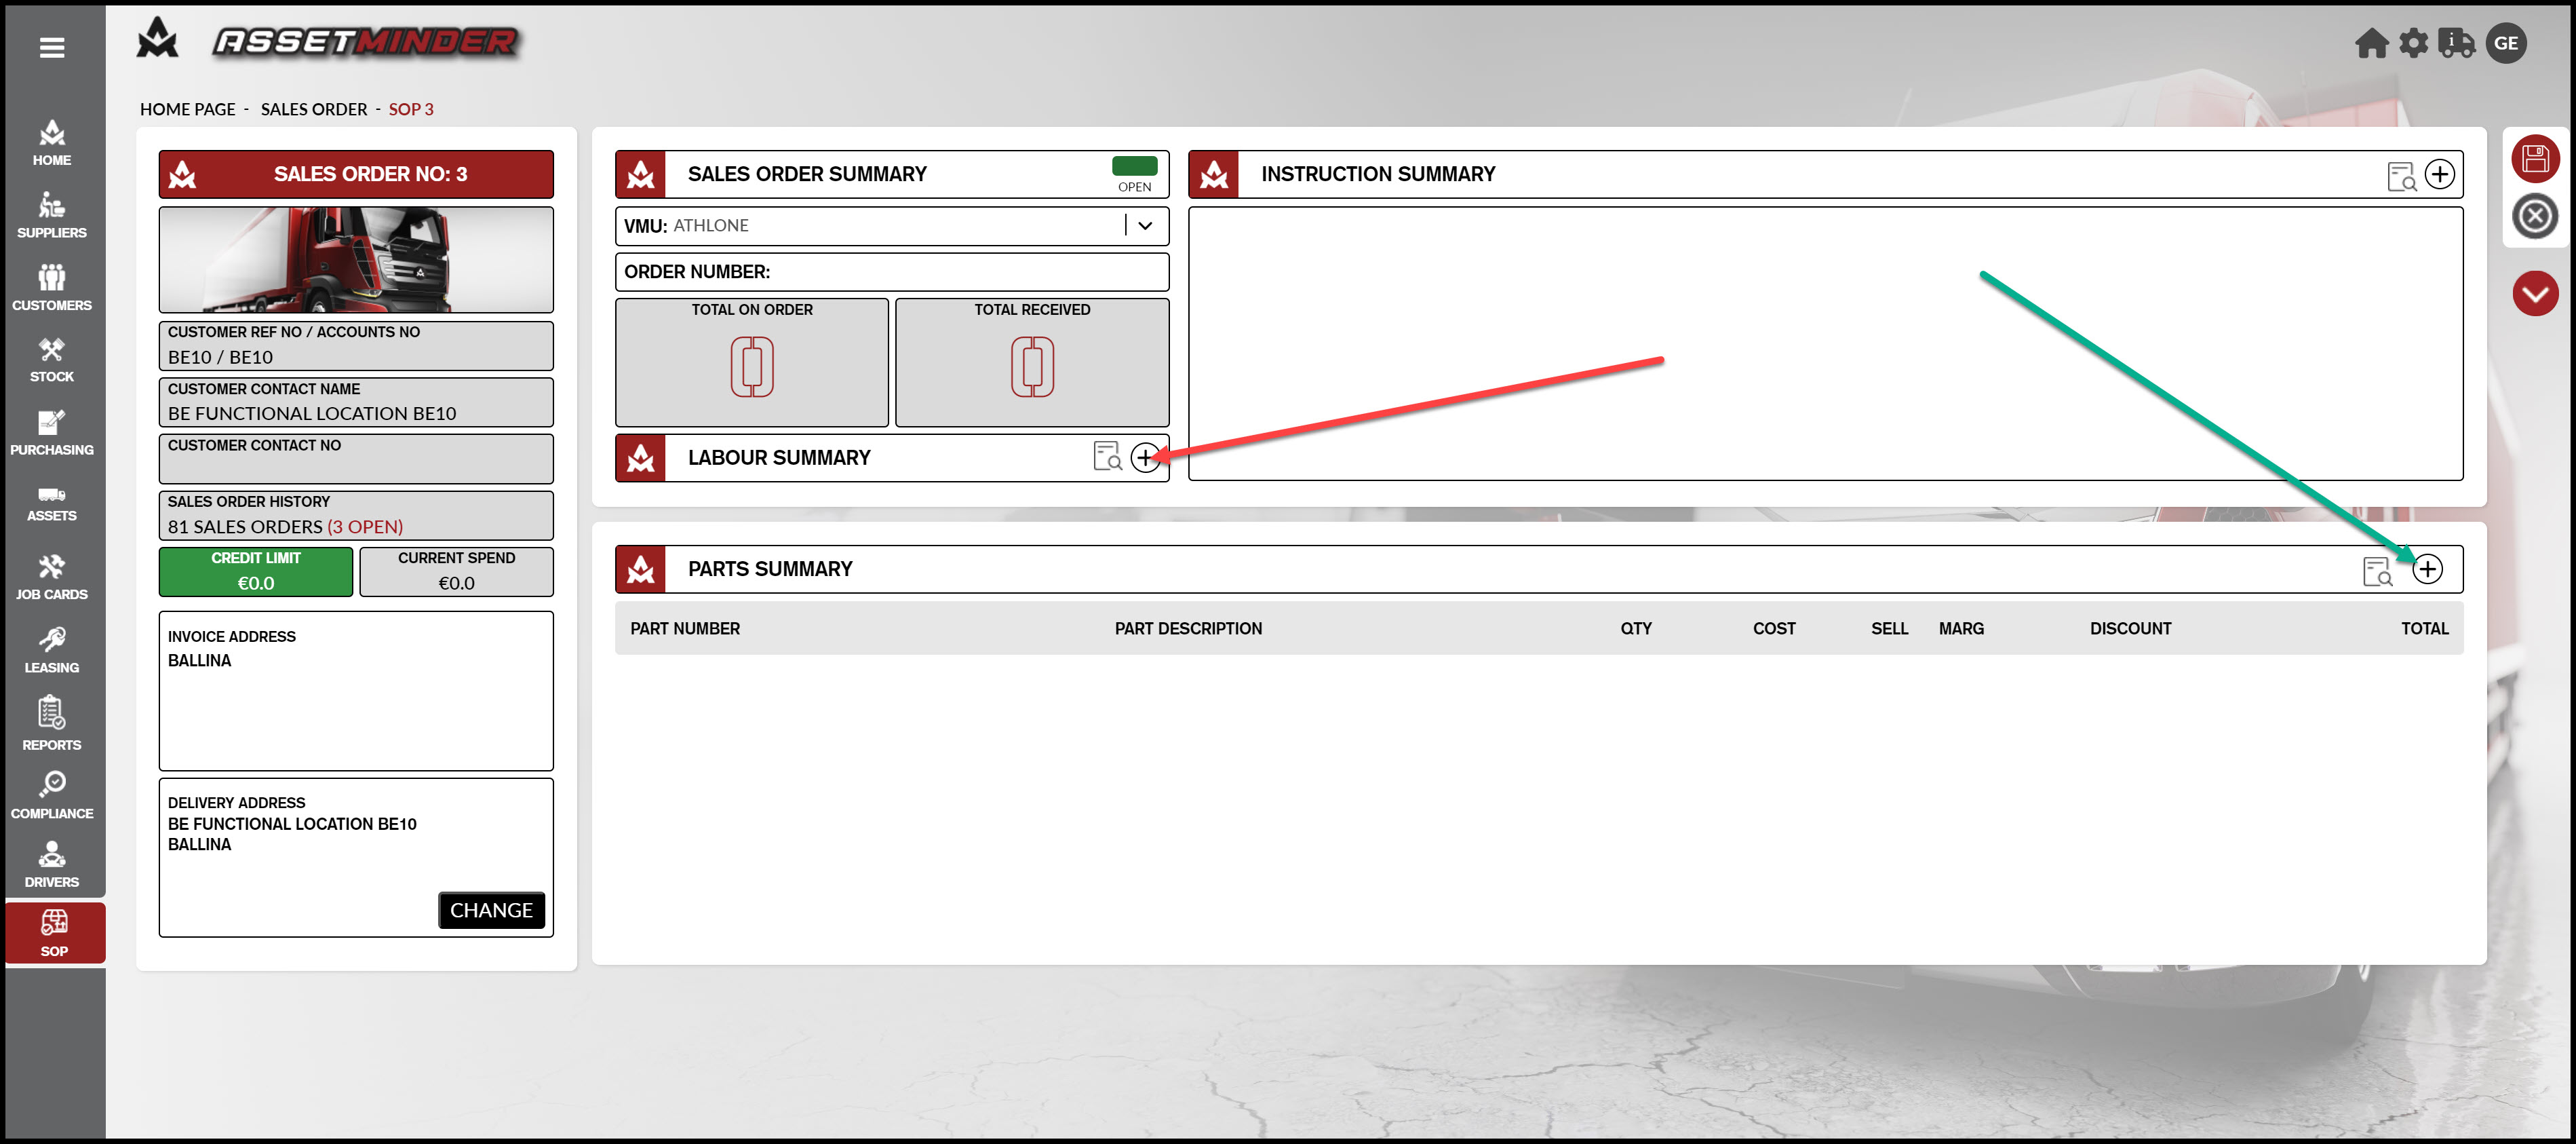
Here, the user can add parts and / or labour to the SALES ORDER. To add PARTS, then click the '+' button indicated by the GREEN LINE below. To add LABOUR, click the '+' button indicated by the RED LINE below.
ADDING PARTS
After clicking the '+' button to ADD PARTS, the following will be shown.
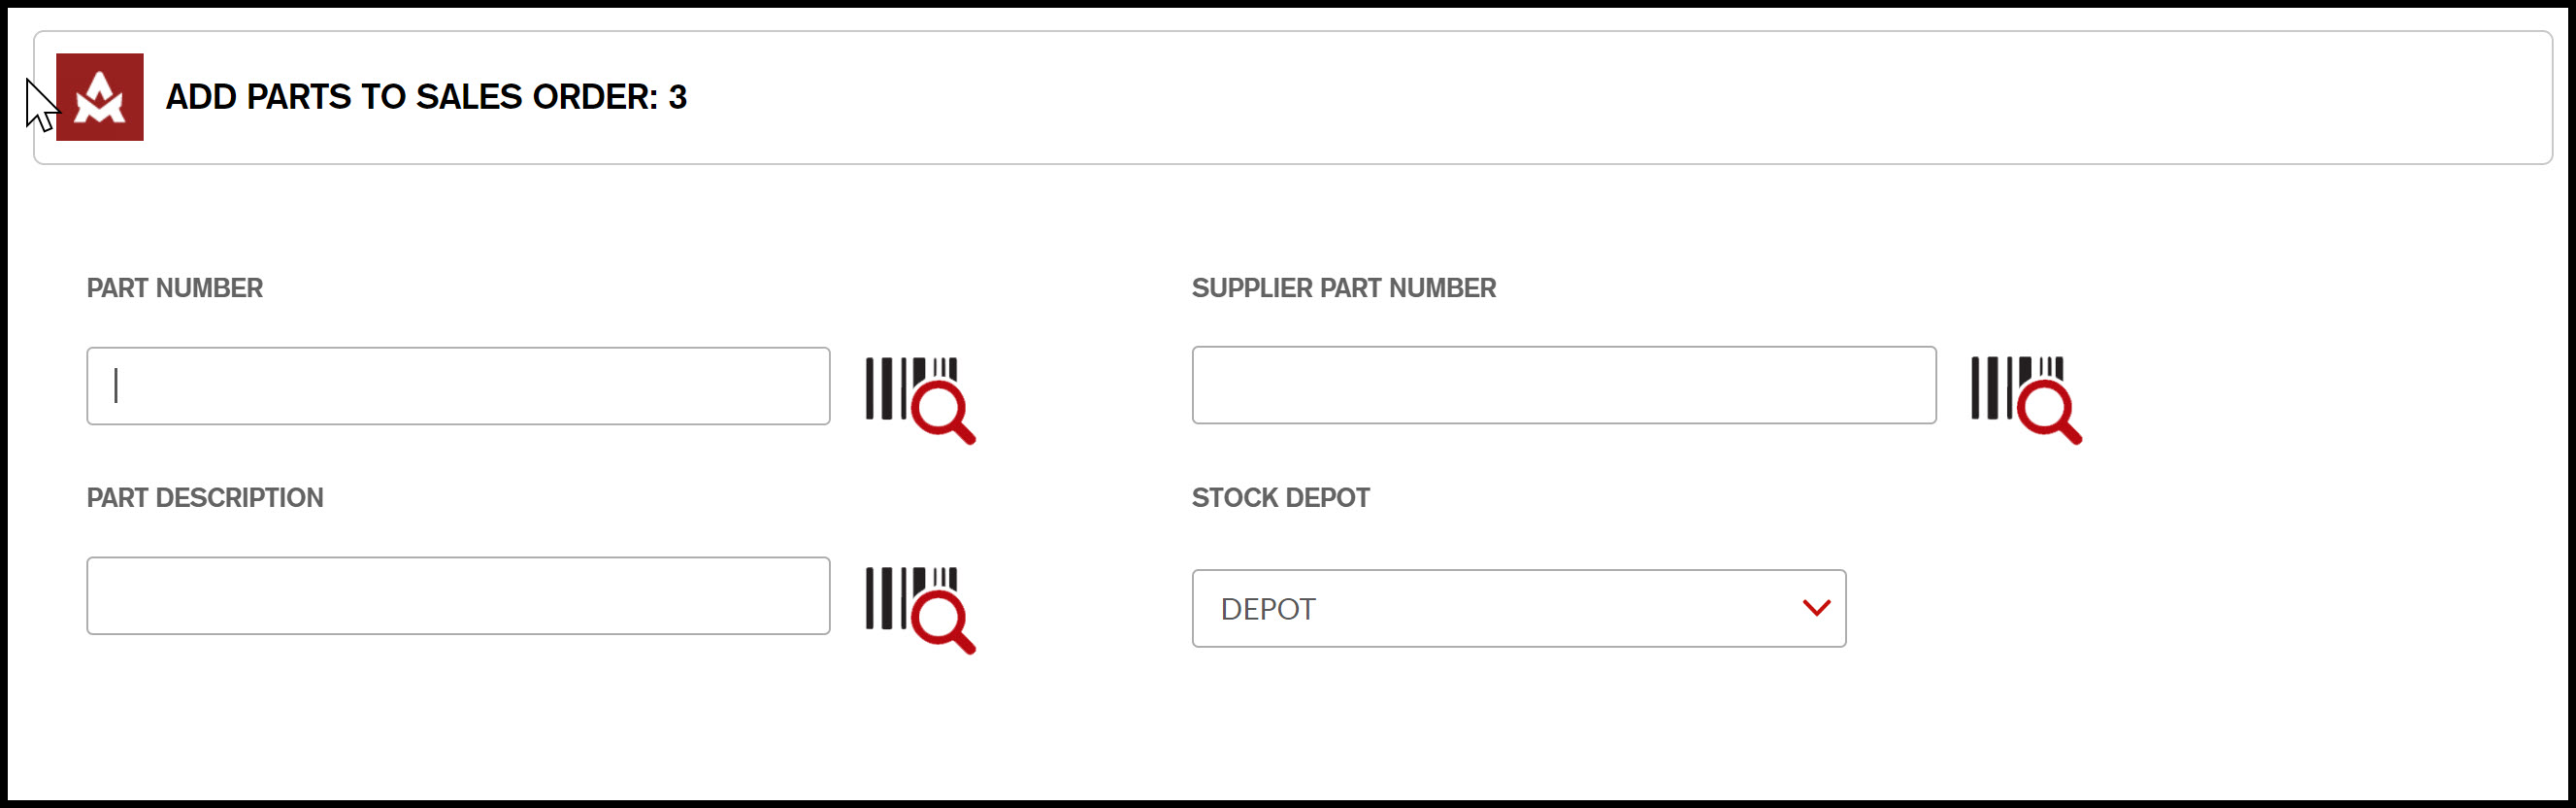
First, the user chooses the part to be added to the Sales Order. This can be located by PART NUMBER, SUPPLIER PART NUMBER, or PART DESCRIPTION.
When the part has been selected, the following is then shown to the user. Here, the user will enter the QUANTITY to be added to the SALES ORDER. This is done by entering a value in the box titled QUANTITY TO ADD (highlighted in green below).
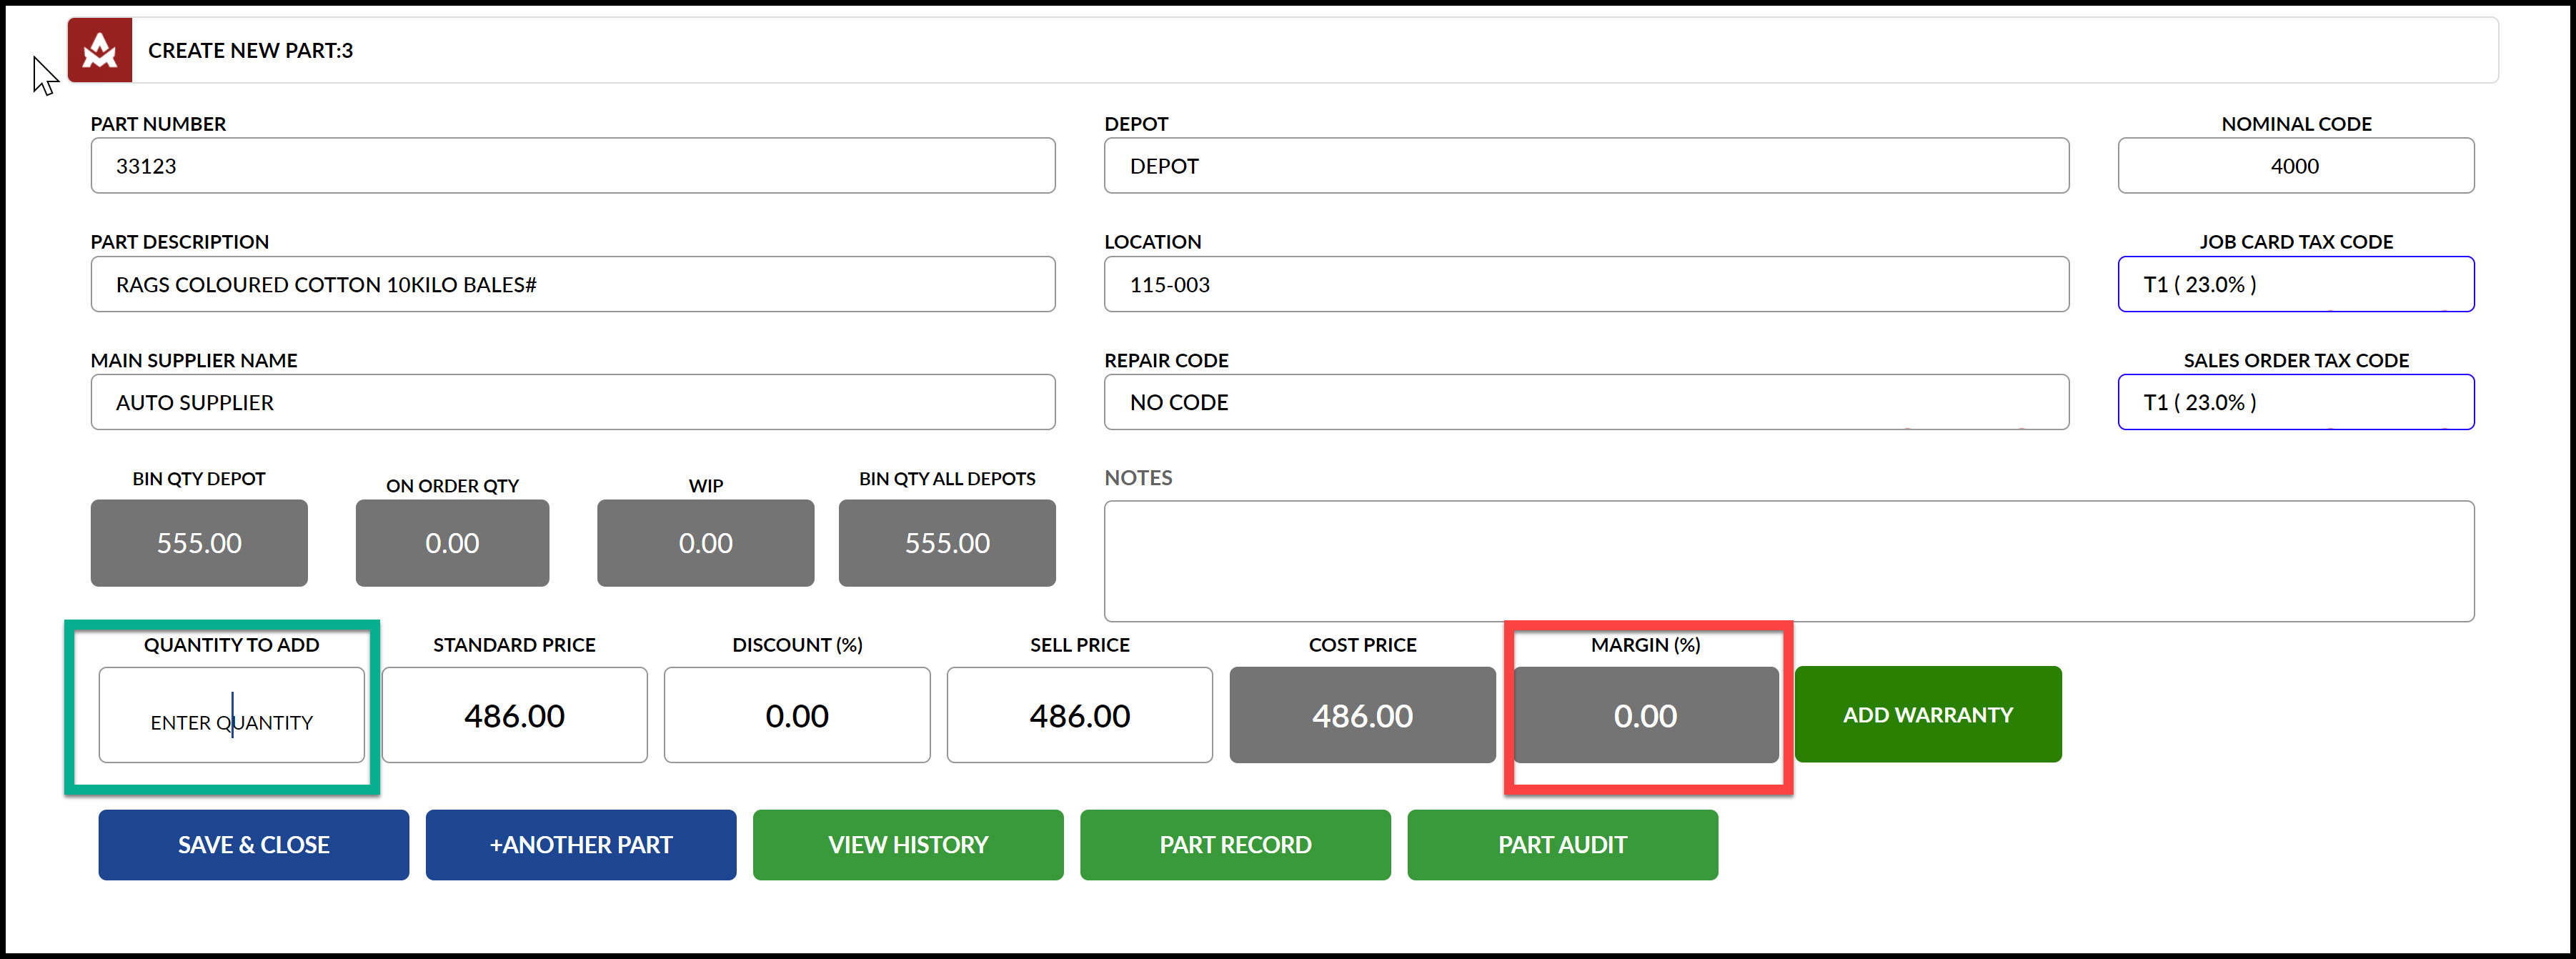
At this point, the user can also change:
- STANDARD PRICE
- DISCOUNT (in percentage)
- SELL PRICE
Changing any of these will automatically change the margin percentage, highlighted in RED on the above image.
If another part or parts is to be added to the SALES ORDER, click on + ANOTHER PART button and repeat the procedure.
If there are no more parts to be added, click on SAVE & CLOSE.
ADDING LABOUR
If the user wishes to add LABOUR to a SALES ORDER and has clicked on the ADD LABOUR plus icon as shown above, the ADD LABOUR panel will be shown.
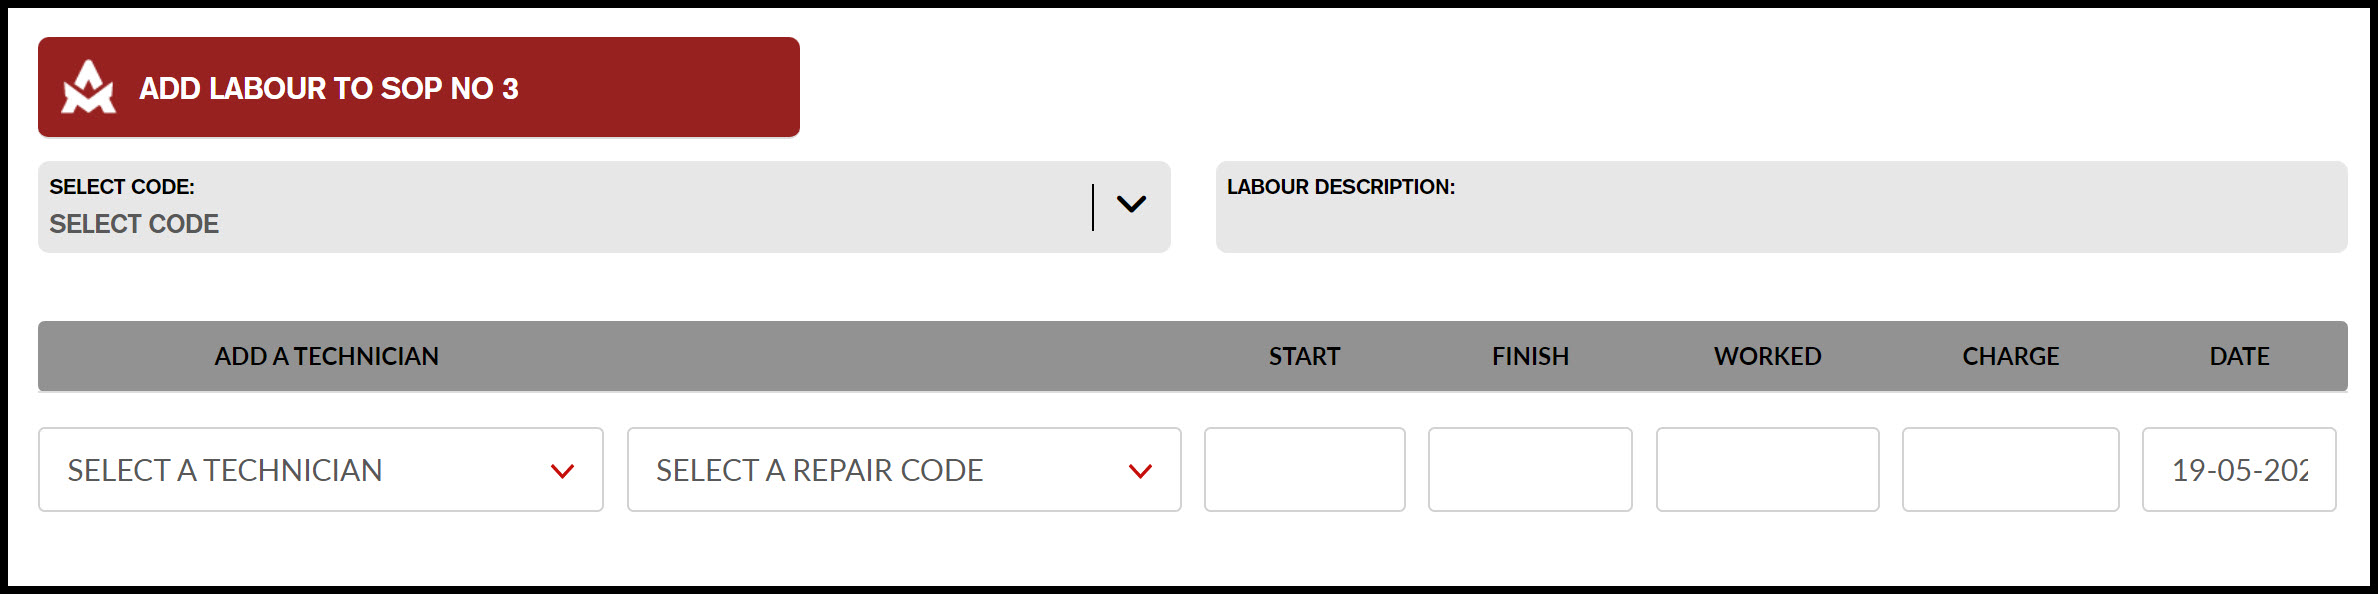
The options for the user here are:
- Select a LABOUR CODE from the dropdown box SELECT CODE. Selecting a LABOUR CODE will then show a description of this code in the LABOUR DESCRIPTION box.
- Select a technician using the SELECT A TECHNICIAN dropdown
- Select a repair code using the SELECT A REPAIR CODE dropdown
- Select a START TIME and a FINISH TIME. The WORKED will be automatically calculated.
- If the charged hours is different to the calculated WORKED hours (for example, a fixed price quoted was given to the customer and while the work took longer than anticipated, the customer cannot be charged more than the quoted hours), then the user can enter the hours to be charged in the CHARGE box.
- Finally, the date is automatically shown to be today's date. This can be changed if the work was done on a different day.
When all required details have been entered, click on the SAVE icon (shown below)
COMPLETING THE SALES ORDER
After PARTS and / or LABOUR have been added to the SALES ORDER, the SALES ORDER panel will be shown, with all added items included, as in the example below.
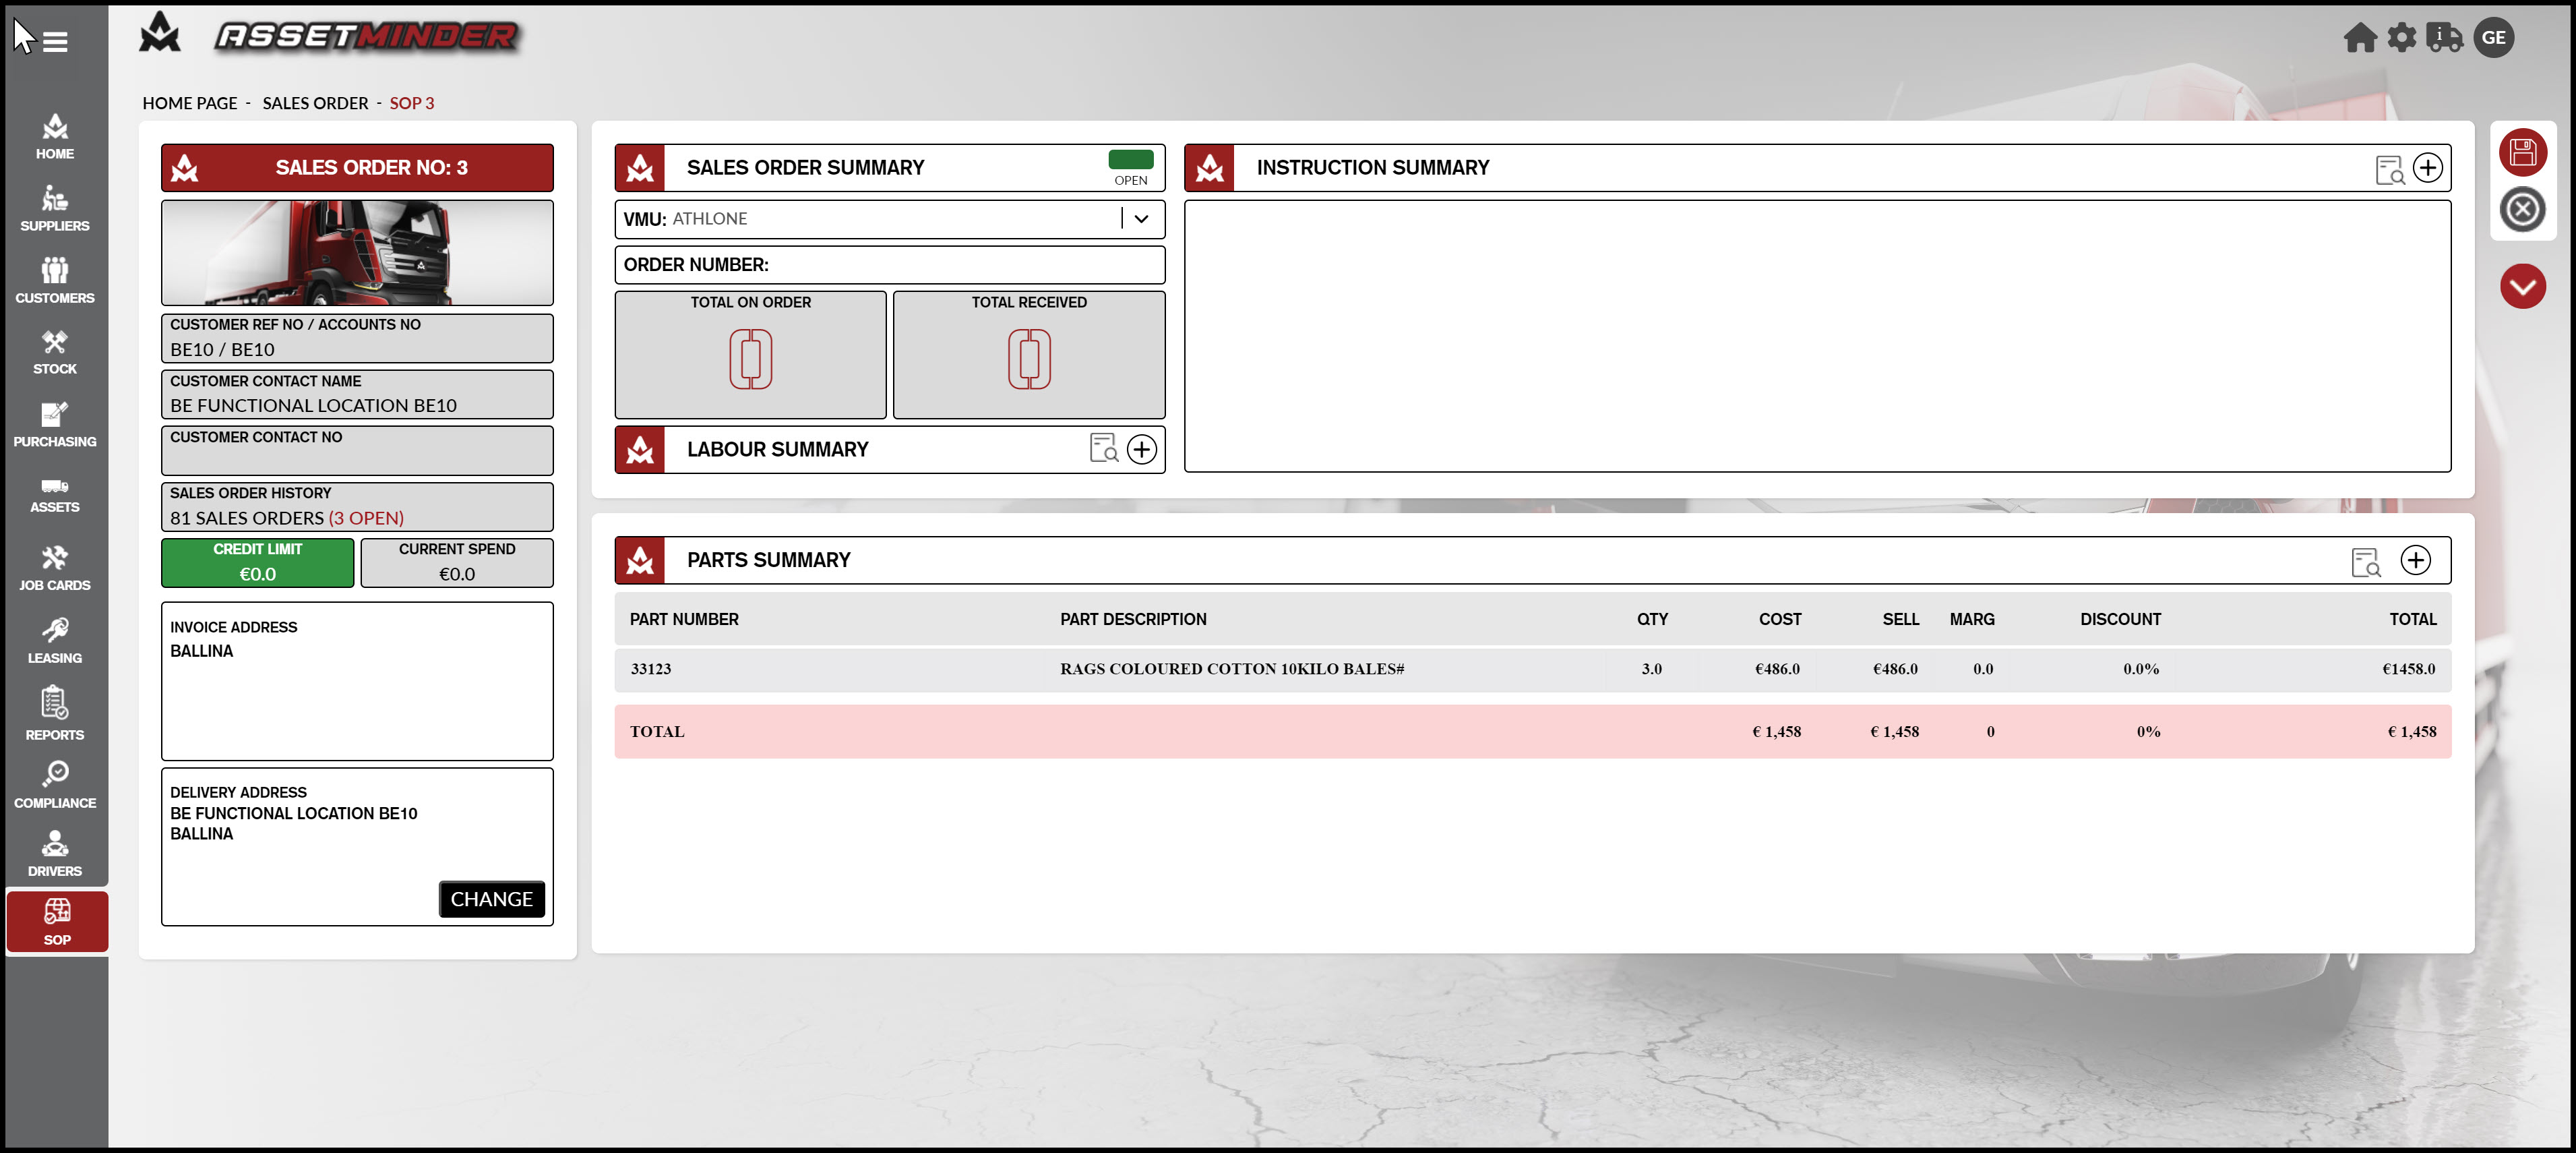
If desired, details can be added under INSTRUCTION SUMMARY. Clicking on the '+' symbol to the right of the INSTRUCTION SUMMARY line will open up a box, allow free-text entry.
Additional actions are available, for example, to print the Sales Order, by selecting the down-arrow on the right side of the page.
When the user is ready to save the purchase order, click the SAVE icon on the right-side of the page.
The SALES ORDER is now created and will show with a status of OPEN when SALES ORDERS are selected from the HOME PAGE
Conor Gibson
Comments